
This article mainly introduces the use of externals in webpack in a simple and easy-to-understand way. The editor thinks it is quite good. Now I will share it with you and give you a reference. Let’s follow the editor to take a look, I hope it can help everyone.
We usually package third-party libraries into bundles when working on projects, such as the picture below
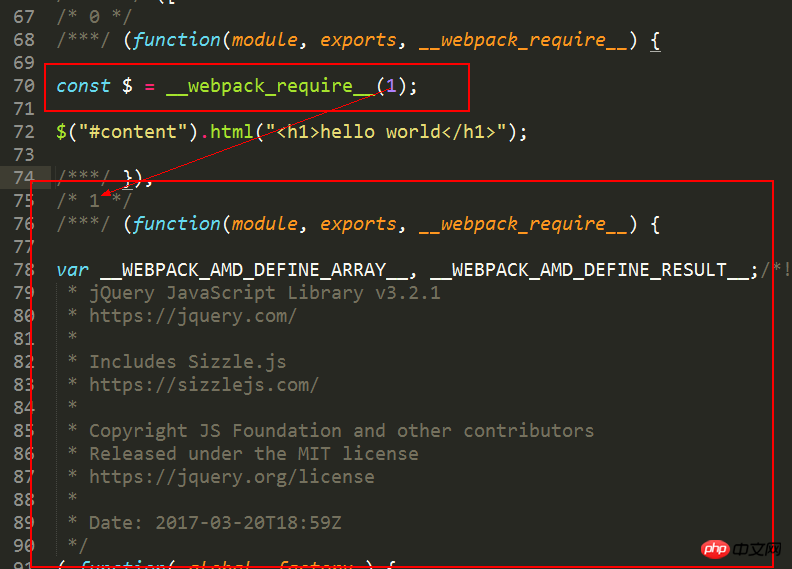
If you don’t want to package third-party libraries In the bundle, there are externals. The official use of externals is relatively simple
externals
The official website document explains very clearly that webpack can not process some dependent libraries of the application. After using externals configuration, it will still It can be accessed through CMD, AMD or window/global globally in the code.
Just three steps——
1.Introduce the cdn of the third-party library in HTML
2.Configure externals in webpack
externals: {
 jquery: "jQuery",
}3. Quote in js
const $ = require("jquery");
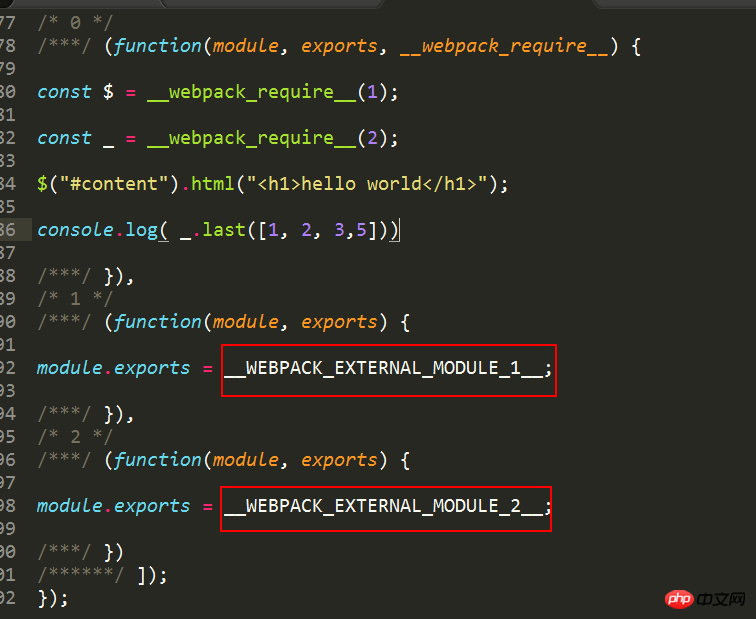
$("#content").html("<h1>hello world</h1>");Okay, now we can use the jquery plug-in as we like and ensure that it will not be packaged into the bundle. How does external do it? Let's analyze the principle through the source code of the bundle.
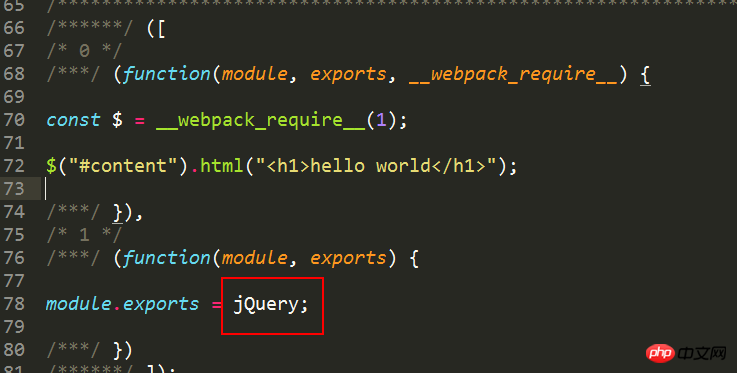
/* 0 */ and __webpack_require__ here respectively refer to the module functions corresponding to js before packaging, which will not be explained in detail here. Here you can see module.exports = jQuery, which means that the key in our externals refers to the require thing, and the value refers to it, which means "when the parameter of require is jquery, use the jQuery global variable to reference it." . The simplest externals configuration method is the default global mode, which is to hang a global variable on the window and then use this variable directly. The specific process is like this. After we use require('jquery') in the source code, we can directly add jquery to externals to get a packaged trunk.js. However, before introducing this trunkjs, we must first introduce the jquery library. file, this library file will create a global variable jQuery, and the jquery of externals in our trunkjs is in global mode, so in fact when trunkjs introduces jquery, it will be referenced from the global variable, that is, module.export = jQuery

Of course, since it is through this externals method, we can actually use global variables directly without requiring the introduction.
jQuery("#content").html("<h1>hello world</h1>");If you have noticed the global mode I just mentioned, yes, you may have guessed it, I can use different output methods at will. If I want to run the packaged file in the node environment, I have to use the commonjs specification, so you have to write it like this.
externals: {
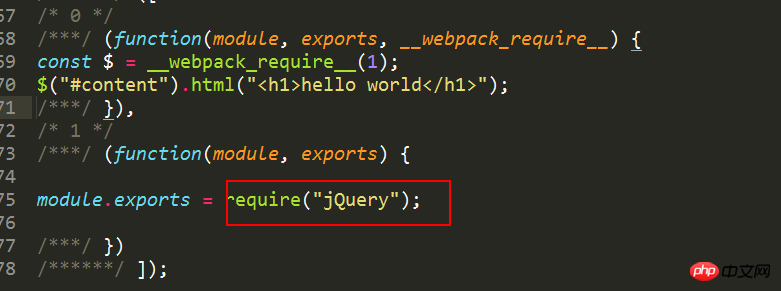
 jquery: "commonjs2 jQuery",
}It will look like this after packaging.
Then I also use lodash in my project, and I also want to remove it from the bundle. My code before was like this, citing the npm package
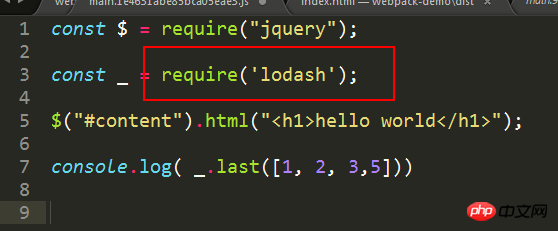
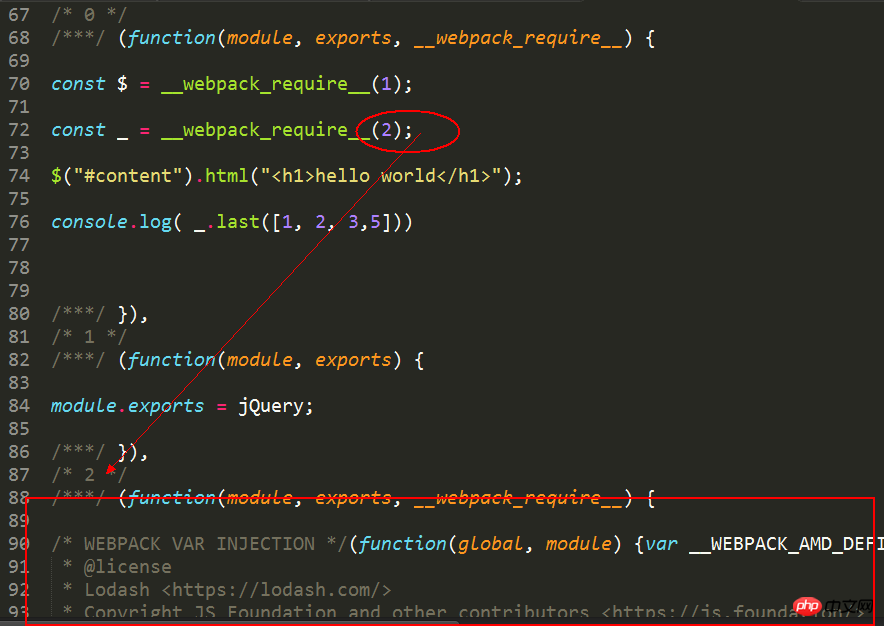
Now our externals configuration is as follows
externals: {
  jquery: "jQuery",
  _: "lodash"

}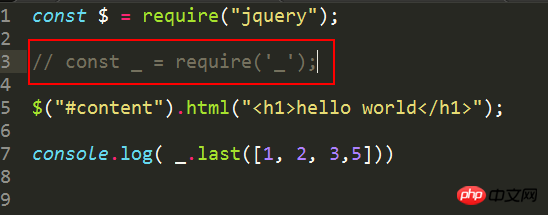
We must remove this const, otherwise an error lodash is not defined will be reported. Why is this so? Because our lodash output is in global format, let me give you a hint here. Let’s unify the output format first and add a libraryTarget field

What is this thing used for? What about?
It is the modular specification of our output files. Think about the commonjs jquery we configured above is running under node. In short, remember one sentence - the modular solutions we use most often are commonjs2 and umd. The former is for the node environment, and the latter is for the browser environment. There are a total of these specifications:
"var" - Export by setting a variable: var Library = xxx (default)
"this" - Export by setting a property of this: this[ "Library"] = xxx
"commonjs" - Export by setting a property of exports: exports["Library"] = xxx
"commonjs2" - Export by setting module.exports: module.exports = xxx
"amd" - Export to AMD (optionally named - set the name via the library option)
"umd" - Export to AMD, CommonJS2 or as property in root

然后报这个错误,也就是说我们的模块没有正确的输出,回到我们的externals,它更多的是指定当你引用一个包的时候,这个包(lodash)应该遵循哪种模块化方式(common,root,amd等等)引入,这意思就是说,打包的时候不需要关心他到底怎么输出。
externals: {
  jquery: "jQuery",
  lodash: {
   commonjs: 'lodash',
   commonjs2: 'lodash',
   amd: 'lodash',
   root: '_'
  }
},ok,记得要将之前的覆盖掉,替换成下面的require,因为在externals中我们规范的commmonjs规范为lodash

也就是说,这就是我们最初的代码,即没有用过externals时候的代码,看,也就是说我们只需要配置externals和libraryTarget就可以,其他的业务逻辑代码不需要改变。包括我们的项目中还用了echarts,这个通通不用改变!!!!!
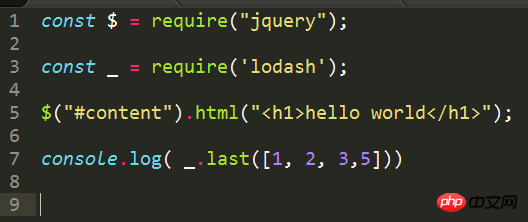
也就是说最终的代码是externals配合libraryTarget一起使用,如果去掉umd的话,会报这个错误

相应的源码是这样子
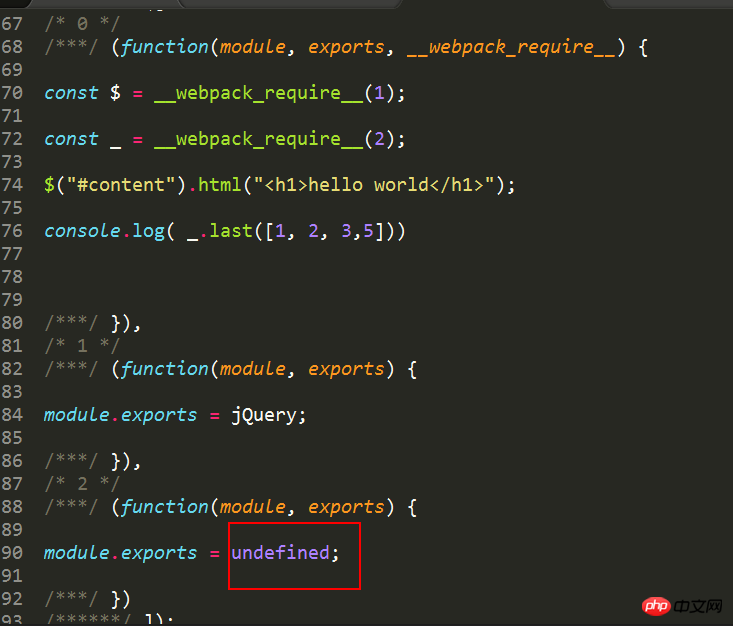
就是说我不知道通过那种方式输出,所以我应该告诉webpack,我通过umd方式输出,即将你的 lodash 暴露为所有的模块定义下都可运行的方式。它将在 CommonJS, AMD 环境下运行,或将模块导出到 global 下的变量.加上umd的源码如下
看到了吧,我通过require('lodash')引入模块,输出走的是commonjs规范,贴下最终的配置
entry: {
  main: './src/index.js'
 },
 externals: {
  jquery: "jQuery",
  lodash: {
   commonjs: 'lodash',
   commonjs2: 'lodash',
   amd: 'lodash',
   root: '_'
  }
 },
 output: {
  filename: '[name].[chunkhash].js',
  path: path.resolve(__dirname,'dist'),
  libraryTarget: 'umd'
},相关推荐:
The above is the detailed content of How to use externals in webpack. For more information, please follow other related articles on the PHP Chinese website!
 What is Avalanche
 How to crack zip file encryption
 bootmgr is missing and cannot boot
 Database vulnerability repair methods
 How to use the notnull annotation
 Why the computer keeps restarting automatically
 How to watch live broadcast playback records on Douyin
 Which brand does OnePlus mobile phone belong to?


