
This article mainly introduces the jQuery plug-in ImgAreaSelect to implement the avatar upload preview and cropping function. Friends who need it can refer to it. I hope it can help everyone.
In the previous section of the essay, we already know the basic knowledge about the jQuery plug-in ImgAreaSelect; now let’s look at an example:
First of all, we need to know what functions we should implement?
(1) The image can be uploaded and previewed
(2) Drag and crop the image so that it can display the cropped area
(3) Display the area to be cropped The coordinates
Secondly, how to reference the plug-in?
Let’s take a closer look!
The first step: first introduce the style and file package (introduce according to your own location)
<!--引入imgareaselect的css样式-->
<link rel="stylesheet" type="text/css" href="../jquery.imgareaselect-0.9.10/css/imgareaselect-default.css" rel="external nofollow" rel="external nofollow" />
<!--引入jquery包-->
<script type="text/javascript" src="../jquery-1.11.2.min.js"></script>
<!--引入imgareaselect的js文件-->
<script type="text/javascript" src="../jquery.imgareaselect-0.9.10/scripts/jquery.imgareaselect.pack.js"></script>
The second step: first use p layout style, as shown in the figure below
<body>
 <p style="float:left; width:300px;">
 <p>亲,请上传图片并裁剪</p>
 <p style="width:300px; height:300px;float: left;">
  <!--原图-->
  <img id="uploadPreview"/>
  <input id="uploadImage" type="file" name="photoimage" class="fimg1" onchange="PreviewImage();" /> <!--//对这个按钮加一个事件-->
 </p>
 </p>
 <p style="float:left; width:300px;">
 <p style="font-size:110%; font-weight:bold; padding-left:0.1em;">
 选区预览
 </p>
 <p style="margin:0 1em; width:100px; height:100px;border: 1px solid black;">
  <p id="preview" style="width:100px; height:100px; overflow:hidden;">
  <!--裁剪后的图片-->
  <img id="tp" style="width:200px; height:200px;">
  </p>
 </p>
 <!--做一个表格用来放选取图片的坐标-->
 <table style="margin-top:1em;">
  <thead>
  <tr>
  <th colspan="2" style="font-size:110%; font-weight:bold; text-align:left; padding-left: 0.1em;"> 坐标</th>
  </tr>
  </thead>
  <tbody>
  <tr>
  <td style="width:10%;"><b>X<sub>1</sub>:</b></td>
  <td style="width:30%;"><input type="text" id="x1" value="-" /></td>
  </tr>
  <tr>
  <td><b>Y<sub>1</sub>:</b></td>
  <td><input type="text" id="y1" value="-" /></td>
  </tr>
  <tr>
  <td><b>X<sub>2</sub>:</b></td>
  <td><input type="text" id="x2" value="-" /></td>
  </tr>
  <tr>
  <td><b>Y<sub>2</sub>:</b></td>
  <td><input type="text" id="y2" value="-" /></td>
  </tr>
  </tbody>
 </table>
 </p>
 </p>
 </body>
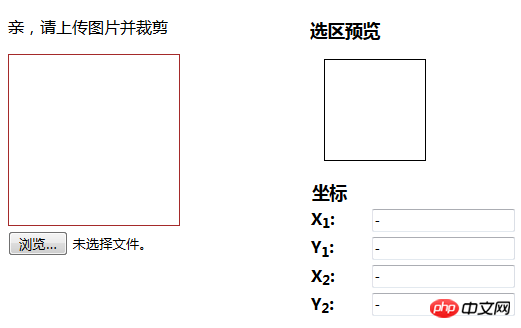
css style:
<style>
 #uploadPreview
 {
 width: 170px;
 height: 170px;
 background-position: center center;
 background-size: cover;
 border: 1px solid brown;
 -webkit-box-shadow: 0 0 0px 0px rgba(0, 0, 0, 0);
 display: inline-block;
 }
</style>Step 3: To achieve the upload preview effect of the image
Idea: Pass the src of the image through input to the first img, and then pass the src of the first img to the src of the second img
<script>
//通过input将图片路径传给第一个img
$("#uploadImage").on("change", function(){
 // 得到一个参考文件列表
 var files = !!this.files ? this.files : [];
 // 如果没有选择任何文件,或者没有文件读到就返回
 if (!files.length || !window.FileReader) return;
 // 只有进行选择的文件是一个形象
 if (/^image/.test( files[0].type)){
 // 创建一个新的FileReader的实例
 var reader = new FileReader();
 // 读取本地文件作为一个DataURL
 reader.readAsDataURL(files[0]);
 // 当加载时,图像数据设置为背景的p
 reader.onloadend = function(){
  //给第一个img添加路径
 $("#uploadPreview").attr("src",this.result);
  //给第二个img添加路径
  $("#tp").attr("src",this.result);
  //开启裁剪功能
 $('#uploadPreview ').imgAreaSelect( {handles:true, fadeSpeed:200, onSelectEnd : preview});
 }
 }
});
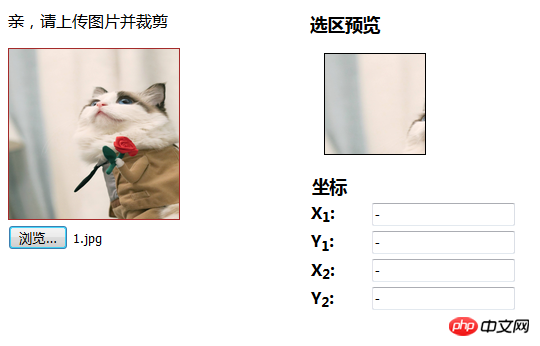
</script>In this way, the following effects can be achieved:
Click to browse

Click to select:
Step 4: Implement the area selection function
<script>
 function preview(img, selection)
 {
 if(!selection.width || !selection.height) //判断选取区域不为空
  return;
  //分别取高宽比率
 var scaleX = 100 / selection.width;
 var scaleY = 100 / selection.height;
 var img = new Image();
 //传路径
 img.src = document.getElementById('uploadPreview').src;
 //给裁剪的图片定义高和宽
 $('#preview img').css( {
  width : Math.round(scaleX * 170), //170为第一个img的宽,不然截取的图片会有所缺失,可以自己试试
  height: Math.round(scaleY * 170), //170为第一个img的高
  marginLeft: -Math.round(scaleX * selection.x1),
  marginTop: -Math.round(scaleY * selection.y1)
 });
 //显示坐标
 $('#x1').val(selection.x1);
 $('#y1').val(selection.y1);
 $('#x2').val(selection.x2);
 $('#y2').val(selection.y2);
 }
</script>This way you can achieve the following effects La~~~
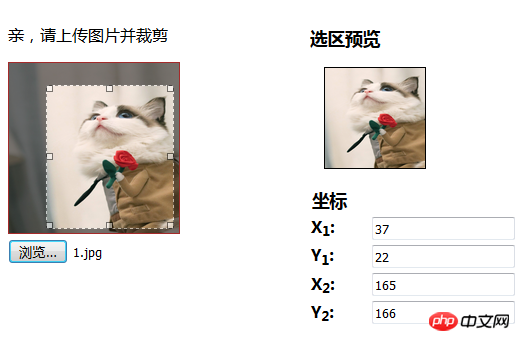
At this step, you can realize the uploading and cropping functions of the avatar. Of course, it will be more perfect if you add the path to the database later~~~~
(---------------------------------------------- --------------------------There should be a dividing line here-------------- -------------------------------------------------- -----)
If you just want to implement a simple image cropping function, then you can take a look at the following code, no comments will be made here~~~
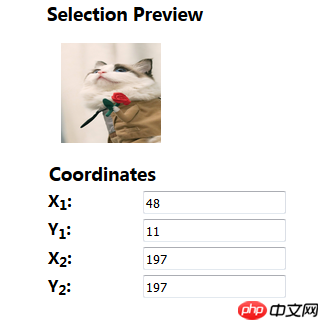
Of course, If you don’t understand the code above, you can also modify it by referring to the following one. Just add the image upload preview function~~~~
Rendering: (You can know by comparing the pictures, the following one It just lacks the browsing function, everything else is exactly the same)

<!DOCTYPE html>
<html>
 <head>
 <meta charset="UTF-8">
 <title></title>
  <!--在HTML头部加入:-->
 <link rel="stylesheet" type="text/css" href="../jquery.imgareaselect-0.9.10/css/imgareaselect-default.css" rel="external nofollow" rel="external nofollow" />
 <script type="text/javascript" src="../jquery-1.11.2.min.js"></script>
 <script type="text/javascript" src="../jquery.imgareaselect-0.9.10/scripts/jquery.imgareaselect.pack.js"></script>
 <script type="text/javascript">
 $(document).ready(function() {
 $('#photo').imgAreaSelect( {handles:true, fadeSpeed:200, onSelectEnd : preview});
 });
// 如果加上aspectRatio: '1:1',$('#photo').imgAreaSelect( {aspectRatio: '1:1',handles:true, fadeSpeed:200, onSelectEnd : preview});则选取区域固定为正方形。
 function preview(img, selection)
 {
 //等同于var scaleX = 100 / (selection.width || 1)
 //先对||前面的进行布尔运算,如果结果是true(即width存在且不是0),就使用width,否则使用||后的变量1
 //也就是先检查 selection.width 有没有值,有的话就用 100 / 该值再付给 scaleX,没的话就用 100 / 1 来赋值;
 if(!selection.width || !selection.height)
  return;
 var scaleX = 100 / selection.width;
 var scaleY = 100 / selection.height;
 //设置裁剪后图片的宽高
 $('#preview img').css( {
  width : Math.round(scaleX * 200),
  height: Math.round(scaleY * 200),
  marginLeft: -Math.round(scaleX * selection.x1),
  marginTop: -Math.round(scaleY * selection.y1)
 });
 $('#x1').val(selection.x1);
 $('#y1').val(selection.y1);
 $('#x2').val(selection.x2);
 $('#y2').val(selection.y2);
 $('w').val(selection.width);
 $('h').val(selection.height);
 }
 </script>
 </head>
 <body>
 <p>
 <!--选取的图片-->
 <p style="float:left; width:70%;">
 <p>
 Click and drag on the image to select an area.
 </p>
 <p style="margin:0 0.3em; width:200px; height:200px;">
  <img id="photo" src="./images/1.jpg" style="width:200px; height:200px;"/>
 </p>
 </p>
 <!--截取的图片-->
 <p style="float:left; width:30%;">
 <p style="font-size:110%; font-weight:bold; padding-left:0.1em;">
 Selection Preview
 </p>
 <p style="margin:0 1em; width:100px; height:100px;">
  <p id="preview" style="width:100px; height:100px; overflow:hidden;">
  <img src="./images/1.jpg" style="width:200px; height:200px;">
  </p>
 </p>
 <table style="margin-top:1em;">
  <thead>
  <tr>
  <th colspan="2" style="font-size:110%; font-weight:bold; text-align:left; padding-left: 0.1em;"> Coordinates</th>
  </tr>
  </thead>
  <tbody>
  <tr>
  <td style="width:10%;"><b>X<sub>1</sub>:</b></td>
  <td style="width:30%;"><input type="text" id="x1" value="-" /></td>
  </tr>
  <tr>
  <td><b>Y<sub>1</sub>:</b></td>
  <td><input type="text" id="y1" value="-" /></td>
  </tr>
  <tr>
  <td><b>X<sub>2</sub>:</b></td>
  <td><input type="text" id="x2" value="-" /></td>
  </tr>
  <tr>
  <td><b>Y<sub>2</sub>:</b></td>
  <td><input type="text" id="y2" value="-" /></td>
  </tr>
  </tbody>
 </table>
 </p>
 </p>
 </body>
</html>Related recommendations:
jQuery plug-in imgAreaSelect example explanation
Use the jQuery plug-in imgAreaSelect to obtain the image information of the selected domain
##imgareaselect + php to achieve image cropping
The above is the detailed content of jQuery plug-in ImgAreaSelect implements avatar upload preview and cropping functions. For more information, please follow other related articles on the PHP Chinese website!


