This article mainly introduces the basic tree and node acquisition operations implemented by the jQuery plug-in zTree. It analyzes the basic tree construction and node acquisition operations of the jQuery tree plug-in zTree in the form of examples. Friends who need it can refer to it. I hope Can help everyone.
The example in this article describes the basic tree and node acquisition operations implemented by the jQuery plug-in zTree. Share it with everyone for your reference, the details are as follows:
1. Implementation code:
<!DOCTYPE html>
<html>
<head>
  <title>zTree实现基本树</title>
  <meta http-equiv="content-type" content="text/html; charset=UTF-8">
  <link rel="stylesheet" type="text/css" href="zTree_v3/css/demo.css" rel="external nofollow" >
  <link rel="stylesheet" type="text/css" href="zTree_v3/css/zTreeStyle/zTreeStyle.css" rel="external nofollow" >
  <script type="text/javascript" src="zTree_v3/js/jquery-1.4.4.min.js"></script>
  <script type="text/javascript" src="zTree_v3/js/jquery.ztree.core.min.js"></script>
  <script type="text/javascript">
    <!--
    var setting = {
      data: {
        simpleData: {
          enable: true
        }
      }
    };
    var zNodes =[
      { id:1, pId:0, name:"湖北省", open:true},
      { id:11, pId:1, name:"武汉市", open:true},
      { id:111, pId:11, name:"汉口"},
      { id:112, pId:11, name:"汉阳"},
      { id:113, pId:11, name:"武昌"},
      { id:12, pId:1, name:"黄石市"},
      { id:121, pId:12, name:"黄石港区"},
      { id:122, pId:12, name:"西塞山区"},
      { id:123, pId:12, name:"下陆区"},
      { id:124, pId:12, name:"铁山区"},
      { id:13, pId:1, name:"黄冈市"},
      { id:2, pId:0, name:"湖南省", open:true},
      { id:21, pId:2, name:"长沙市", open:true},
      { id:211, pId:21, name:"芙蓉区"},
      { id:212, pId:21, name:"天心区"},
      { id:213, pId:21, name:"岳麓区"},
      { id:214, pId:21, name:"开福区"},
      { id:22, pId:2, name:"株洲市"},
      { id:221, pId:22, name:"天元区"},
      { id:222, pId:22, name:"荷塘区"},
      { id:223, pId:22, name:"芦淞区"},
      { id:224, pId:22, name:"石峰区"},
      { id:23, pId:2, name:"湘潭市"},
      { id:231, pId:23, name:"雨湖区"},
      { id:232, pId:23, name:"岳塘区"},
      { id:233, pId:23, name:"湘乡市"},
      { id:234, pId:23, name:"韶山市"}
    ];
    $(document).ready(function(){
      $.fn.zTree.init($("#baseTree"), setting, zNodes);
    });
    /**
     * 获取选中节点的编码和名称
     */
    function findSelect()
    {
       var treeObj = $.fn.zTree.getZTreeObj("baseTree");
       var nodes = treeObj.getSelectedNodes();
       for(var i=0;i<nodes.length;i++)
       {
         var nodeId = nodes[i].id;
         var nodeName = nodes[i].name;
         alert("树节点编码:"+nodeId+"\n"+"树节点名称:"+nodeName);
       }
    }
    //-->
  </script>
 </head>
<body>
<p class="content_wrap">
  <p class="zTreeDemoBackground left" style="text-align: center;">
    <ul id="baseTree" class="ztree" style="height: 300px; width:200px; overflow-y: auto"></ul>
    <input type="button" id="btn" onclick="findSelect()" value="获取选中节点"/>
  </p>
</p>
</body>
</html>2. Design renderings:
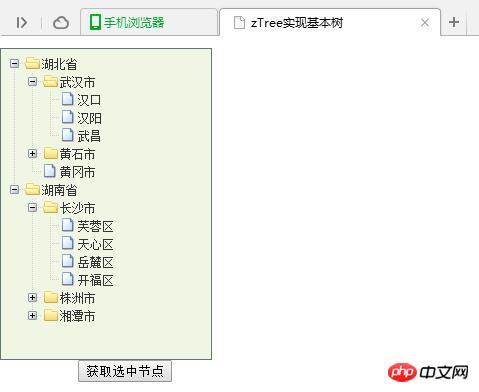
( 1) Initialization

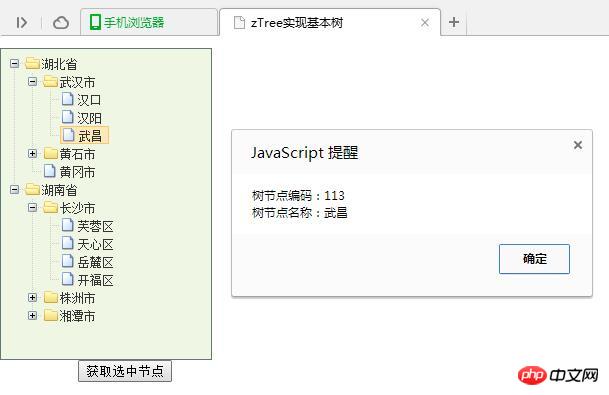
(2) Click button

var treeObj = $.fn.zTree.getZTreeObj("baseTree");
var nodes = treeObj.getSelectedNodes();Explanation of the multi-selection tree effect implemented by jQuery plug-in zTree
jquery ztree implements the right-click collection function detailed example
How to use the jQuery tree plug-in zTree correctly
The above is the detailed content of Detailed explanation of jQuery plug-in zTree to implement basic tree and node acquisition. For more information, please follow other related articles on the PHP Chinese website!


