
这次给大家带来怎么用AjaxFileUpload实现多文件上传,用AjaxFileUpload实现多文件上传的注意事项有哪些,下面就是实战案例,一起来看一下。
本文重点给大家介绍AjaxFileUpload+Struts2实现多文件上传功能,具体实现代码大家参考下本文。
单文件和多文件的实现区别主要修改两点,
一是插件ajaxfileupload.js里接收file文件ID的方式
二是后台action是数组形式接收
1、ajaxFileUpload文件下载地址http://www.phpletter.com/Demo/AjaxFileUpload-Demo/
2、引入jquery-1.8.0.min.js、ajaxFileUpload.js文件
3、文件上传页面核心代码
<body>
<form action="" enctype="multipart/form-data">
<h2>
多文件上传
</h2>
<input type="file" id="file1" name="file" />
</br>
<input type="file" id="file2" name="file" />
</br>
<input type="file" id="file3" name="file" />
</br>
<span>
<table id="down">
</table>
</span>
</br>
<input type="button" onclick="fileUpload();" value="上传">
</form>
</body>
<script type="text/javascript">
function fileUpload() {
var files = ['file1','file2','file3']; //将上传三个文件 ID 分别为file2,file2,file3
$.ajaxFileUpload( {
url : 'fileUploadAction', //用于文件上传的服务器端请求地址
secureuri : false, //一般设置为false
fileElementId : files, //文件上传的id属性 <input type="file" id="file" name="file" />
dataType : 'json', //返回值类型 一般设置为json
success : function(data, status) {
var fileNames = data.fileFileName; //返回的文件名
var filePaths = data.filePath; //返回的文件地址
for(var i=0;i<data.fileFileName.length;i++){
//将上传后的文件 添加到页面中 以进行下载
$("#down").after("<tr><td height='25'>"+fileNames[i]+
"</td><td><a href='downloadFile?downloadFilePath="+filePaths[i]+"'>下载</a></td></tr>")
}
}
})
}
</script>以上fileElementId属性接收的files参数为['file1','file2','file3']
由于是多文件,所以我们需要修改ajaxfileupload.js 找到以下代码
var oldElement = jQuery('#' + fileElementId);
var newElement = jQuery(oldElement).clone();
jQuery(oldElement).attr('id', fileId);
jQuery(oldElement).before(newElement);
jQuery(oldElement).appendTo(form);修改为:
for(var i in fileElementId){
  var oldElement = jQuery('#' + fileElementId[i]);
  var newElement = jQuery(oldElement).clone();
  jQuery(oldElement).attr('id', fileId);
  jQuery(oldElement).before(newElement);
  jQuery(oldElement).appendTo(form);
}4、文件上传Action
public class FileAction {
  private File[] file;       //文件
  private String[] fileFileName;  //文件名
  private String[] filePath;    //文件路径
  private String downloadFilePath; //文件下载路径
  private InputStream inputStream;
  /**
   * 文件上传
   * @return
   */
  public String fileUpload() {
    String path = ServletActionContext.getServletContext().getRealPath("/upload");
    File file = new File(path); // 判断文件夹是否存在,如果不存在则创建文件夹
    if (!file.exists()) {
      file.mkdir();
    }
    try {
      if (this.file != null) {
        File f[] = this.getFile();
        filePath = new String[f.length];
        for (int i = 0; i < f.length; i++) {
          String fileName = java.util.UUID.randomUUID().toString(); // 采用时间+UUID的方式随即命名
          String name = fileName + fileFileName[i].substring(fileFileName[i].lastIndexOf(".")); //保存在硬盘中的文件名
          FileInputStream inputStream = new FileInputStream(f[i]);
          FileOutputStream outputStream = new FileOutputStream(path+ "\\" + name);
          byte[] buf = new byte[1024];
          int length = 0;
          while ((length = inputStream.read(buf)) != -1) {
            outputStream.write(buf, 0, length);
          }
          inputStream.close();
          outputStream.flush();
          //文件保存的完整路径
          // 如:D:\tomcat6\webapps\struts_ajaxfileupload\\upload\a0be14a1-f99e-4239-b54c-b37c3083134a.png
          filePath[i] = path + "\\" + name;
        }
      }
    } catch (Exception e) {
      e.printStackTrace();
    }
    return "success";
  }
  /**
   * 文件下载
   * @return
   */
  public String downloadFile() {
    String path = downloadFilePath;
    HttpServletResponse response = ServletActionContext.getResponse();
    try {
      // path是指欲下载的文件的路径。
      File file = new File(path);
      // 取得文件名。
      String filename = file.getName();
      // 以流的形式下载文件。
      InputStream fis = new BufferedInputStream(new FileInputStream(path));
      byte[] buffer = new byte[fis.available()];
      fis.read(buffer);
      fis.close();
      // 清空response
      response.reset();
      // 设置response的Header
      String filenameString = new String(filename.getBytes("gbk"),"iso-8859-1");
      response.addHeader("Content-Disposition", "attachment;filename="+ filenameString);
      response.addHeader("Content-Length", "" + file.length());
      OutputStream toClient = new BufferedOutputStream(response.getOutputStream());
      response.setContentType("application/octet-stream");
      toClient.write(buffer);
      toClient.flush();
      toClient.close();
    } catch (IOException ex) {
      ex.printStackTrace();
    }
    return null;
  }
  /**
   * 省略set get方法
   */
}5、struts配置
<!DOCTYPE struts PUBLIC
  "-//Apache Software Foundation//DTD Struts Configuration 2.0//EN"
  "http://struts.apache.org/dtds/struts-2.0.dtd">
<struts>
  <package name="ajax_code" extends="json-default">
    <!-- 文件上传 -->
    <action name="fileUploadAction" class="com.itmyhome.FileAction" method="fileUpload">
      <result type="json" name="success">
        <param name="contentType">text/html</param>
      </result>
    </action>
  </package>
  <package name="jsp_code" extends="struts-default">
    <!-- 文件下载 -->
    <action name="downloadFile" class="com.itmyhome.FileAction" method="downloadFile">
      <result type="stream">
         <param name="contentType">application/octet-stream</param>
         <param name="inputName">inputStream</param>
         <param name="contentDisposition">attachment;filename=${fileName}</param>
         <param name="bufferSize">4096</param>
      </result>
    </action>
  </package>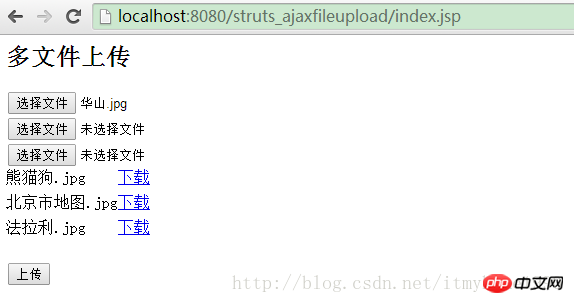
</struts>浏览器中输入:http://localhost:8080/struts_ajaxfileupload/index.jsp 即可进行文件上传
如图:
相信看了本文案例你已经掌握了方法,更多精彩请关注php中文网其它相关文章!
推荐阅读:
The above is the detailed content of How to use AjaxFileUpload to upload multiple files. For more information, please follow other related articles on the PHP Chinese website!


![[Web front-end] Node.js quick start](https://img.php.cn/upload/course/000/000/067/662b5d34ba7c0227.png)


