
This time I will bring you a detailed explanation of the steps for Vue to use vee-validate to verify the form. What are the precautions for Vue to use vee-validate to verify the form. Here is a practical case, let's take a look.
The Vue project encounters form verification, right? For me, form verification is a very tangled (dan) knotty (teng) content, and all kinds of judgments are so messy. It is convenient to use jquery's validate plug-in for form verification. You can also introduce jquery's validate plug-in into Vue (how to introduce jquery is introduced in my previous blog post, click to view). But since we are working on a Vue project, it is recommended not to introduce it unless it cannot be solved, because Vue has its own form validation plug-in, which is vee-validate.
I am not going to explain the usage function of vee-validate in detail here, but just to quickly understand how to use vee-validate in the project. When working on a project, there is not so much time for you to familiarize yourself with a plug-in. You must get it first. Again, if you want to know more about it, please check the relevant information by yourself.
1.npm install vee-validate: npm install vee-validate --save --registry=<a href="http://www.php.cn/wiki/373.html" target="_blank">https://</a>registry.npm.taobao.org --verbose
2. After successful installation, introduce it in main.js:

3. In the input tag# where you want to perform form verification ##Add relevant code:

{ "item": [ { "id": "_9e6hk2qh2", "field": "email", "msg": "email is required", "rule": "email", "scope": null } ] }, span tag passed There are several methods of errors to display, hide and prompt errors. Here are several commonly used errors methods: errors.first('field'): the first error message of the current field, string errors .collect('field'): all error information of the current field, array list errors.has('field'): whether there are errors in the current field, Boolean errors.all(): all errors of the current form, array list errors.any (): Whether there are any errors in the current form, Boolean value
v-validate="'required | email'"There are two validations, one is empty validation, and the other It is input error verification. Just write as many types of verification as you want here. For example, if you want to limit the number of words, add multiple max, that is, v-validate="'required | email | max:9'".
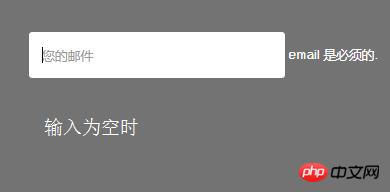

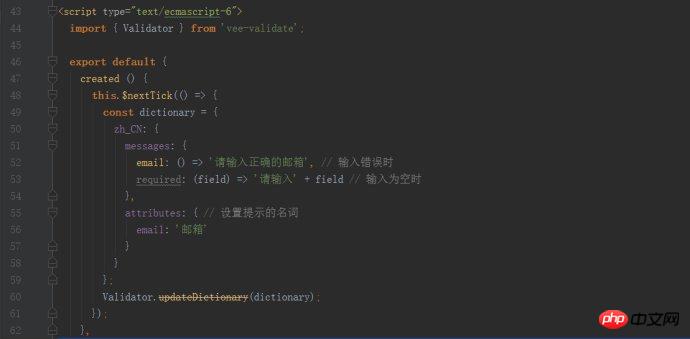



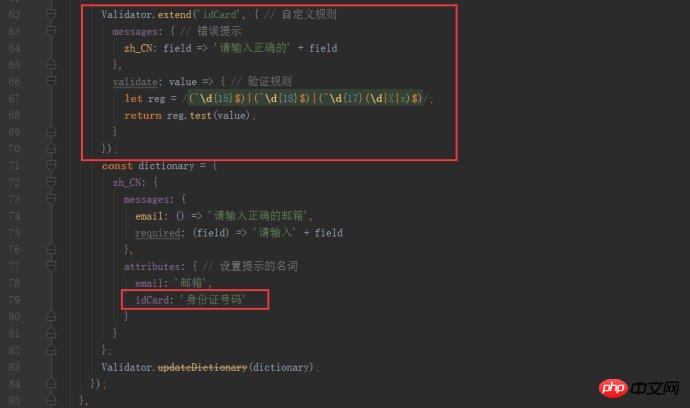


If you do not need an additional prompt label in the requirement and only need to display the warning color during error verification, you can write on the input label: class="{error:error.has('idCard') }"to fulfill. At this point, the basic verification needs can be met. More vee-validate plug-in functions will be updated and improved in the future. I hope it will be helpful to everyone.
I believe you have mastered the method after reading the case in this article. For more exciting information, please pay attention to other related articles on the php Chinese website!
Recommended reading:
detailed explanation of the steps to implement fuzzy query with jQuery
detailed explanation of node Async/Await asynchronous programming implementation
The above is the detailed content of Detailed explanation of the steps for Vue to use vee-validate to verify the form. For more information, please follow other related articles on the PHP Chinese website!


