
This time I will bring you a detailed explanation of the steps for component development with React. What are the precautions for component development with React? The following is a practical case. Let’s take a look. .
Understand several reference points for component design:
Component unpacking principles
Component Inter-communication
Two-way binding
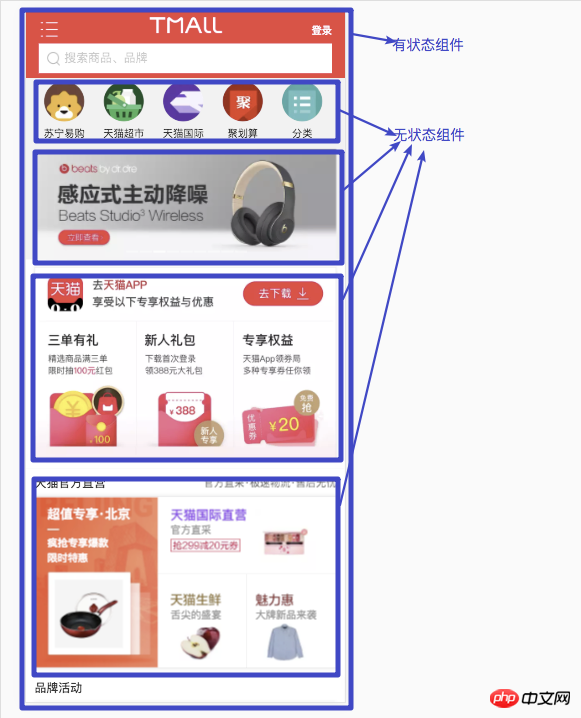
State management Can be divided into Stateful components Stateless components
Illustration
React.Component
is used to manage application data. For example, in business, the data required for the homepage is:
Recommended categories
Recommended ads
Recommended products
Code example
class MyComponent extends Component {
  constructor(props) {
    super(props)
    this.state = {
      推荐分类列表:[],
      推荐广告列表:[],
      推荐商品列表:[]
      }
  }
  render() {
    return ...首页>
  }
}This kind of component does not maintain state by itself, and data is transferred by attributes. Enter
Code sample
function Element(props) {
  let val = props.val
  return <p>组件 - ...</p>
}container componentsfunction##operation componentsdisplay components##1.2.1 Container component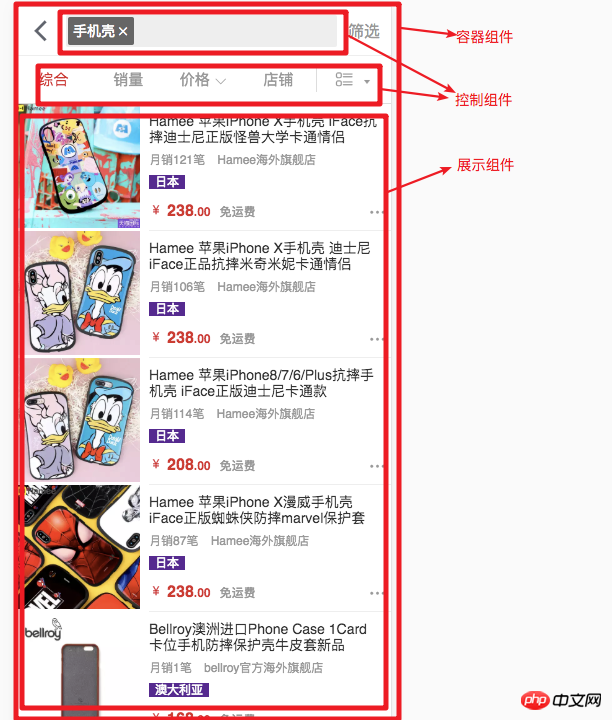
event
class Container extends Component {
  constructor(props) {
    super(props)
    this.state = {
      搜索关键字: '手机壳',
      排序: '综合',
      商品列表: []
      }
  }
  render() {
    return (
      <p>


      </p>
    )
  }
}Search box in the diagram, receiving attributes
keywords generated new dataEvent Method to return container componentCode example
function SearchInput(props) {
  let 关键字 = props.关键字
  return (
    <p>
      <input>
    </p>
  )
} diagram, receiving attributes
Product listCode example
function SearchInput(props) {
  let 商品列表 = props.商品列表
  return (
    <p>
      {商品列表.map((item, index) => (

      ))}
    </p>
  )
}Product information
The component is also adisplay componentis actually in a container component On the top, a, split the component as much as possible2. Communication between components
display componentillustration
we start writing Let’s take a look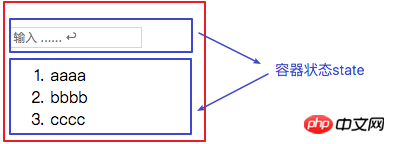
function InputView(props) {
  return (
    <p>
      <input>
    </p>
  )
}onKeyDown
message and return it to the parent containerSecond Step: Write the list display component
function ListView(props) {
  return (
    <ol>
      {props.datas &&
        props.datas.map((item, index) => (
          <li>{item}</li>
        ))}
    </ol>
  )
}map
Print the data list in a loopThe third step: Container component binding status and events
class ContainerView extends Component {
  constructor(props) {
    super(props)
    this.state = {list: []}
    this.handleChange = this.handleChange.bind(this)
  }
  handleChange(e) {
    if (e.keyCode === 13) {
      const value = e.target.value
      e.target.value = ''
      this.setState((state, props) => {
        let list = state.list
        list.push(value)
        return {list}
      })
    }
  }
  render() {
    return (
      <p>
        <inputview></inputview>
        <listview></listview>
      </p>
    )
  }
}e.keyCode === 13 表示一直监控到输入回车,开始更新状态
动图效果
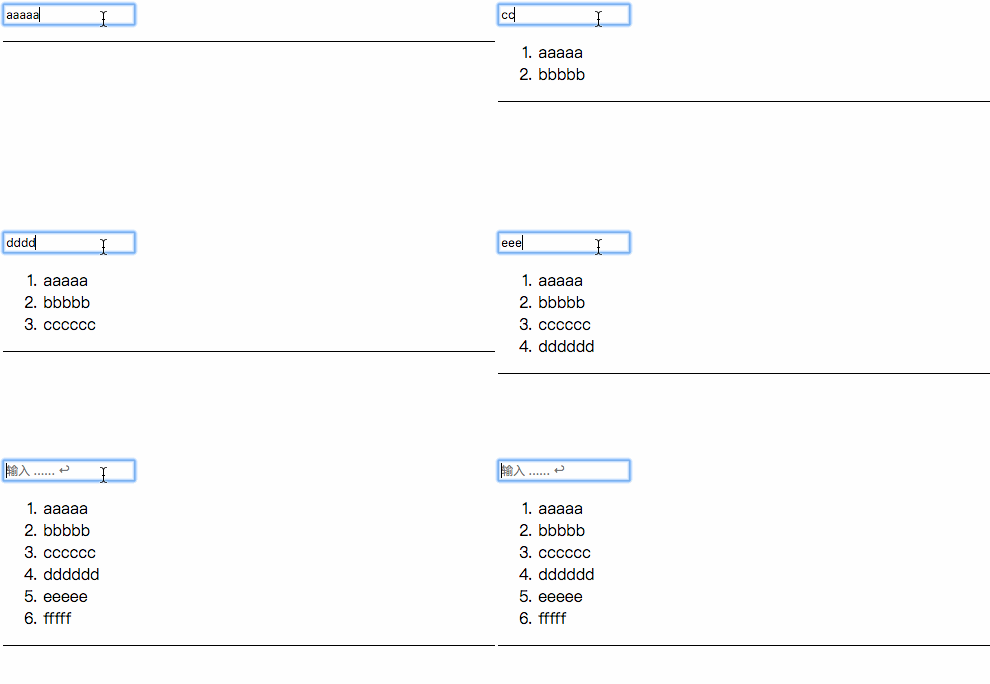
codepen
https://codepen.io/ducafecat/...
这个例子加入Detailed explanation of the steps for component development in React功能,这在表单操作中用的很频繁
图解说明
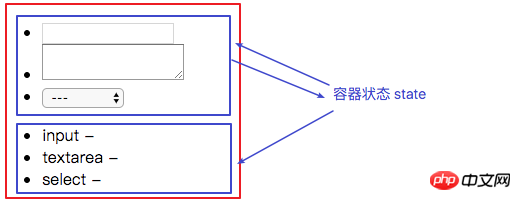
还是用代码说明
代码
class InputView extends Component {
  constructor(props) {
    super(props)
    this.form = props.form // 父容器 state.form
    this.sync = props.sync // 父容器 sync
    this.handleChange = this.handleChange.bind(this)
  }
  handleChange(e) {
    let name = e.target.attributes.name.value
    let value = e.target.value
    this.sync({name, value})
  }
  render() {
    return (
props.form 是容器传入的表单数据,结构如下
{
  input: '',
  textarea: '',
  select: ''
}按控件名称 key / val 结构
props.sync 是回传父容器的事件,相应代码如下
  handleChange(e) {
    let name = e.target.attributes.name.value
    let value = e.target.value
    this.sync({name, value})
}可以发现回传的是 {控件名, 控件值},这里是简写(键、值 名相同时可以写一个),完整格式是
{
  name: name,
  value: value
}代码
function ListView(props) {
  let form = props.form
  let list = []
  for (let key in form) {
    list.push({
      key,
      value: form[key]
    })
  }
  return (
这里做展示就简单了,接收到属性 form 后,格式化成数组 list ,然后 map 打印
代码
class ContainerView extends Component {
  constructor(props) {
    super(props)
    this.state = {form: {input: '', textarea: '', select: ''}}
    this.handleSync = this.handleSync.bind(this)
  }
  handleSync(item) {
    this.setState((prevState, props) => {
      let form = prevState.form
      form[item.name] = item.value
      return {form}
    })
  }
  render() {
    return (
      <p>
        <inputview></inputview>
        <listview></listview>
      </p>
    )
  }
}handleSync 中 form[item.name] = item.value 动态更新 key / value 达到更新 state
动图效果
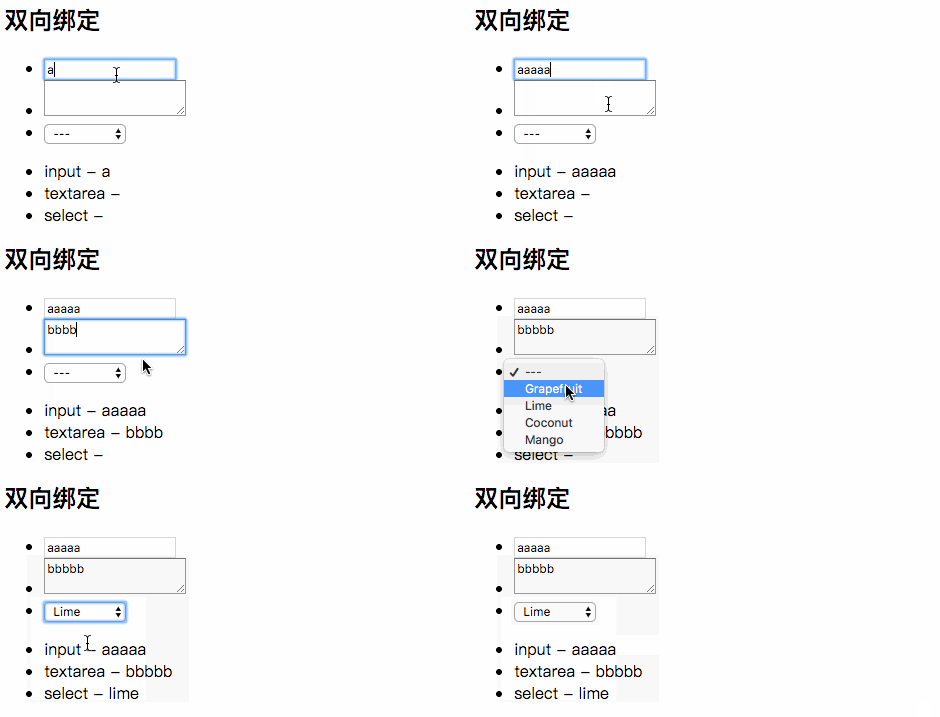
codepen
https://codepen.io/ducafecat/...
通过学习本章后,大家写具体功能代码前,可以先做下 UI组件架构设计
这个没有那么神秘,就是描述下有哪些组件、他们之间如何组装
如果大脑中抽象的不清楚,可以借助原型工具设计,自己能看懂就行,否则边写边设计容易乱掉
设计完成后,过几遍没啥问题了,再编写具体功能
Detailed explanation of the steps for component development in Reactjs-example / 4-1-inputListView.js
Detailed explanation of the steps for component development in Reactjs-example / 4-2-formView.js
Lifting State Up
Thinking in React
相信看了本文案例你已经掌握了方法,更多精彩请关注php中文网其它相关文章!
推荐阅读:
The above is the detailed content of Detailed explanation of the steps for component development in React. For more information, please follow other related articles on the PHP Chinese website!


