
This time I will show you how to use the Vue.js form control, and what are the precautions when using the Vue.js form control. The following is a practical case, let's take a look.
v-model directive: Creates a two-way data binding on a form control element. v-model will automatically choose the correct method to update the element based on the control type.
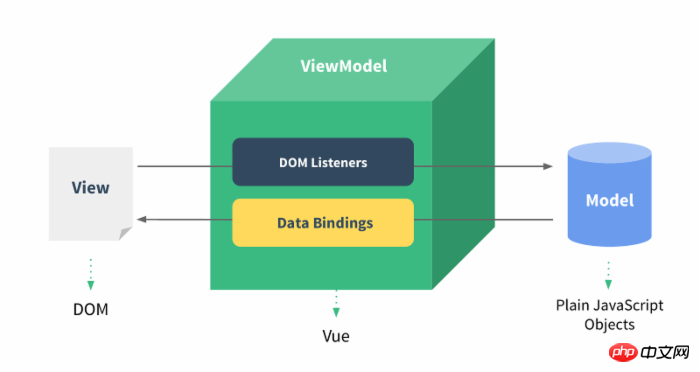
The example demonstrates the use of v-model in the input and textarea elements to achieve bidirectionality Data binding:
HTML
<!DOCTYPE html>
<html>
<head>
<meta charset="utf-8">
<title>Vue 测试实例</title>
<script src="https://cdn.bootcss.com/vue/2.2.2/vue.min.js"></script>
</head>
<body>
<p id="app">
 <p>input 元素:</p>
 <input v-model="message" placeholder="编辑我……">
 <p>消息是: {{ message }}</p>
 <p>textarea 元素:</p>
 <p style="white-space: pre">{{ message2 }}</p>
 <textarea v-model="message2" placeholder="多行文本输入……"></textarea>
</p>
<script>
new Vue({
 el: '#app',
 data: {
 message: 'Runoob',
 message2: 'PHP
 '
 }
})
</script>
</body>
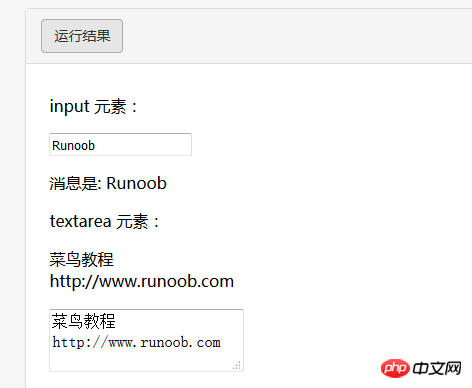
</html>The effect is as shown in the figure:
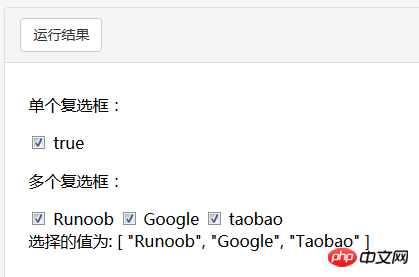
If the check box is a single one, it is a logical value. If there are multiple check boxes, it is bound to the same array:
HTML
<!DOCTYPE html>
<html>
<head>
<meta charset="utf-8">
<title>Vue 测试实例 - 菜鸟教程(runoob.com)</title>
<script src="https://cdn.bootcss.com/vue/2.2.2/vue.min.js"></script>
</head>
<body>
<p id="app">
 <p>单个复选框:</p>
 <input type="checkbox" id="checkbox" v-model="checked">
 <label for="checkbox">{{ checked }}</label>
 <p>多个复选框:</p>
 <input type="checkbox" id="runoob" value="Runoob" v-model="checkedNames">
 <label for="runoob">Runoob</label>
 <input type="checkbox" id="google" value="Google" v-model="checkedNames">
 <label for="google">Google</label>
 <input type="checkbox" id="taobao" value="Taobao" v-model="checkedNames">
 <label for="taobao">taobao</label>
 <br>
 <span>选择的值为: {{ checkedNames }}</span>
</p>
<script>
new Vue({
 el: '#app',
 data: {
 checked : false,
 checkedNames: []
 }
})
</script>
</body>
</html>The effect is as shown:
##HTML
<!DOCTYPE html>
<html>
<head>
<meta charset="utf-8">
<title>Vue 测试实例 </title>
<script src="https://cdn.bootcss.com/vue/2.2.2/vue.min.js"></script>
</head>
<body>
<p id="app">
 <input type="radio" id="runoob" value="Runoob" v-model="picked">
 <label for="runoob">Runoob</label>
 <br>
 <input type="radio" id="google" value="Google" v-model="picked">
 <label for="google">Google</label>
 <br>
 <span>选中值为: {{ picked }}</span>
</p>
<script>
new Vue({
 el: '#app',
 data: {
 picked : 'Runoob'
 }
})
</script>
</body>
</html>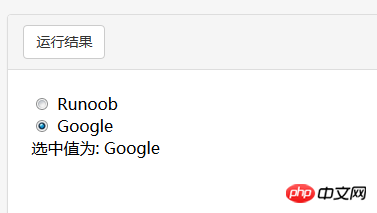
<!DOCTYPE html>
<html>
<head>
<meta charset="utf-8">
<title>Vue 测试实例 </title>
<script src="https://cdn.bootcss.com/vue/2.2.2/vue.min.js"></script>
</head>
<body>
<p id="app">
 <select v-model="selected" name="fruit">
 <option value="">选择一个网站</option>
 <option value="www.runoob.com">Runoob</option>
 <option value="www.google.com">Google</option>
 </select>
 <p id="output">
 选择的网站是: {{selected}}
 </p>
</p>
<script>
new Vue({
 el: '#app',
 data: {
 selected: ''
 }
})
</script>
</body>
</html>
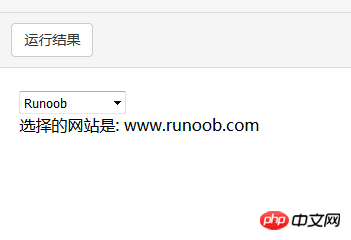
By default, v-model synchronizes the value and data of the input box in the input event, but you can add a modifier lazy , thus changing to synchronization in the change event:
<!-- 在 "change" 而不是 "input" 事件中更新 -->
<input v-model.lazy="msg" >
.number
If you want to automatically convert the user's input value to the Number type (if the conversion result of the original value is NaN, return the original value ), you can add a modifier number to v-model to process the input value:
<input v-model.number="age" type="number">
This is usually useful, because the value entered in HTML will always return the string type when type="number" .
.trim
If you want to
the first and last spaces entered by the user, you can add the trim modifier to v-model to filter the input: <input v-model.trim="msg">
Recommended reading:
How to use spirngmvc js to pass complex json parameters to the controller
##How to use Koa2 file upload and download
How to use js to transfer Json between front and backend
The above is the detailed content of How to use Vue.js form controls. For more information, please follow other related articles on the PHP Chinese website!


