Below I will share with you an example of Vue front-end engineering operation for building element-ui. It has a good reference value and I hope it will be helpful to everyone.
1. Install npm image
#(1) Download node.js and configure the environment variables of node.js
Check whether the PATH environment variable is configured with Node.js, click Start=》Run=》Enter "cmd" => Enter the command "path"
Check the Node.js version

Enter in the command window: npm install -g cnpm –registry=https://registry.npm.taobao.org

2. Install global vue-cli
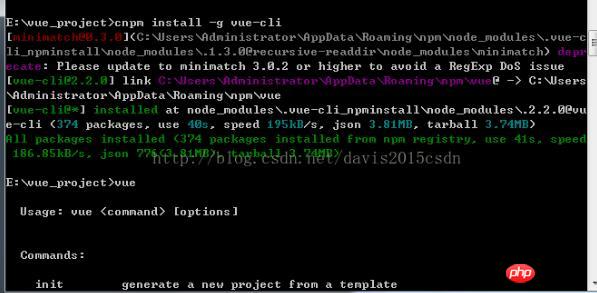
(1) npm install -g vue-cli and press Enter to verify whether the installation is successful. On the command line Enter vue, and the vue information comes out indicating that the installation is successful
3. Global installation of vue-cli
(1) npm install --global vue-cli
4. Create a new project based on the webpack template
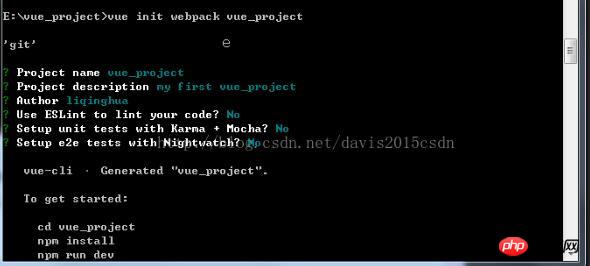
(1) vue init webpack my-project (project name)
(2)cd my-project
(3)npm install
(4)npm run dev

5. Environment to be installed
(1) npm install sass-loader --save-dev
(2) npm install gulp-sass
(3) npm install -- save axios
(4) npm install element-ui -S
(5) npm install vuex --save
6. Packages that need to be introduced (element-ui)
(1) import ElementUI from 'element-ui'
(2) import 'element-ui/lib/theme-default/index.css'
(3 ) import Vue from 'vue'
(4) Use: Vue.use(ElementUI)
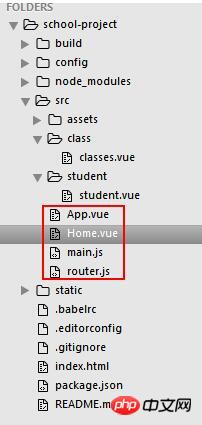
7. Project code structure
Project source code: https://github.com/davis0511/school-ui
(1)

(2) Home.vue
<template>
<el-row class="container">
<el-col :span="24" class="header">
<el-col :span="20" class="logo">
<img src="./assets/logo4.png" /> <span>学校管理<i class="txt">系统</i></span>
</el-col>
<el-col :span="4" class="userinfo">
<el-dropdown trigger="click">
<span class="el-dropdown-link userinfo-inner"><img :src="this.sysUserAvatar" /> {{sysUserName}}</span>
<el-dropdown-menu slot="dropdown">
<el-dropdown-item>我的消息</el-dropdown-item>
<el-dropdown-item>设置</el-dropdown-item>
<el-dropdown-item pided @click.native="logout">退出登录</el-dropdown-item>
</el-dropdown-menu>
</el-dropdown>
</el-col>
</el-col>
<el-col :span="24" class="main">
<aside>
<el-menu :default-active="$route.path" class="el-menu-vertical-demo" @open="handleopen" @close="handleclose" @select="handleselect"
theme="dark" unique-opened router>
<template v-for="(item,index) in $router.options.routes" v-if="!item.hidden">
<el-submenu :index="index+''" v-if="!item.leaf">
<template slot="title"><i :class="item.iconCls"></i>{{item.name}}</template>
<el-menu-item v-for="child in item.children" :index="child.path" v-if="!child.hidden">{{child.name}}</el-menu-item>
</el-submenu>
<el-menu-item v-if="item.leaf&&item.children.length>0" :index="item.children[0].path"><i :class="item.iconCls"></i>{{item.children[0].name}}</el-menu-item>
</template>
</el-menu>
</aside>
<section class="content-container">
<p class="grid-content bg-purple-light">
<el-col :span="24" class="breadcrumb-container">
<strong class="title">{{$route.name}}</strong>
<el-breadcrumb separator="/" class="breadcrumb-inner">
<el-breadcrumb-item v-for="item in $route.matched">
{{ item.name }}
</el-breadcrumb-item>
</el-breadcrumb>
</el-col>
<el-col :span="24" class="content-wrapper">
<transition>
<router-view></router-view>
</transition>
</el-col>
</p>
</section>
</el-col>
</el-row>
</template>
<script>
export default{
data() {
return {
sysUserName:''
}
},
methods:{
onSubmit() {
console.log('submit!');
},
handleopen() {
//console.log('handleopen');
},
handleclose() {
//console.log('handleclose');
},
handleselect: function (a, b) {
},
//退出登录
logout: function () {
var _this = this;
this.$confirm('确认退出吗?', '提示', {
//type: 'warning'
}).then(() => {
sessionStorage.removeItem('user');
_this.$router.push('/login');
}).catch(() => {
});
}
}
}
</script>
<style scoped lang="scss">
.container {
position: absolute;
top: 0px;
bottom: 0px;
width: 100%;
.header {
height: 60px;
line-height: 60px;
background: #1F2D3D;
color: #c0ccda;
.userinfo {
text-align: right;
padding-right: 35px;
.userinfo-inner {
color: #c0ccda;
cursor: pointer;
img {
width: 40px;
height: 40px;
border-radius: 20px;
margin: 10px 0px 10px 10px;
float: right;
}
}
}
.logo {
font-size: 22px;
img {
width: 40px;
float: left;
margin: 10px 10px 10px 18px;
}
.txt {
color: #20a0ff
}
}
}
.main {
background: #324057;
position: absolute;
top: 60px;
bottom: 0px;
overflow: hidden;
aside {
width: 230px;
}
.content-container {
background: #f1f2f7;
position: absolute;
right: 0px;
top: 0px;
bottom: 0px;
left: 230px;
overflow-y: scroll;
padding: 20px;
.breadcrumb-container {
margin-bottom: 15px;
.title {
width: 200px;
float: left;
color: #475669;
}
.breadcrumb-inner {
float: right;
}
}
.content-wrapper {
background-color: #fff;
box-sizing: border-box;
}
}
}
}
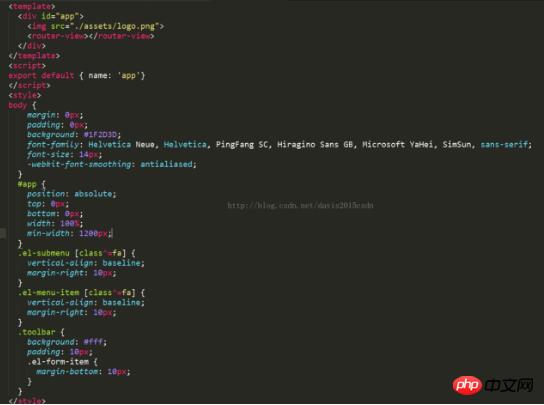
</style>(3)App.vue

import Vue from 'vue'
import Router from 'vue-router'
import App from './App'
import routes from './router'
import ElementUI from 'element-ui'
import 'element-ui/lib/theme-default/index.css'
Vue.use(Router)
Vue.use(ElementUI)
const router = new Router({
 routes
});
Vue.config.productionTip = false
new Vue({
 router,
 render: h => h(App)
}).$mount('#app')import Home from './Home'
import classes from './class/classes'
import student from './student/student'
let router = [
{
path: '/',
name: '学校',
component: Home,
redirect: '/classes',
iconCls: 'fa fa-id-card-o',
children: [
{ path: '/classes', component: classes, name: '班级管理' },
{ path: '/student', component: student, name: '学生管理' }
]
}
];
export default router;##8. After completion, npm run dev; The interface rendering is as follows:
 The above is what I compiled for everyone. I hope it will be helpful to everyone in the future.
Related articles:
How to use puppeteer to crack the sliding verification code of JiExperienceHow to use elementUI to implement in Vue Custom theme method#Bind events to dynamically generated tags in jquery (detailed tutorial)The above is the detailed content of How to build element-ui (detailed tutorial). For more information, please follow other related articles on the PHP Chinese website!
 The difference between MATE60 and MATE60PRO
 What is the difference between original screen and assembled screen?
 A complete list of commonly used public dns
 What does context mean?
 Is python front-end or back-end?
 What are the web servers?
 What system is qad?
 What are the virtual currencies that may surge in 2024?


