This time I will bring you the use of node swig rendering and what are the precautions for using node swig rendering. The following is a practical case, let's take a look.
First of all, of course, we use the express framework to build services on the node background.
var express = require('express');
var server = express();
server.listen(8080,'localhost',(req,res)=>{
   console.log('服务器启动...');
})After the startup is successful, start setting up the relevant configuration of the swig template. The specific code is as follows:
npm install swig -s
Installation After success, add swig configuration, the code is as follows:
//配置摸板引擎
var swig = require('swig');
//参数1,摸板引擎的名称,固定字段
//参数2,摸板引擎的方法
server.engine('html',swig.renderFile);
//摸板引擎存放目录的关键字,固定字段
//实际存在的目录,html文件就在html文件夹下面
server.set('views',__dirname+'/html');
//注册摸板引擎,固定字段
server.set('view engine','html');
//关闭swig缓存,缓存的目的也是提高node服务器的响应速度
swig.setDefaults({cache:false});Configure the data that needs to be rendered:
server.get('/',(req,res)=>{
  //render方法只有在使用摸板引擎之后才会生效,其中 参数1是需要渲染的摸板名称,参数2就是需要渲染到页面的一些参数
  res.render('temp',{
    name:'张三',
    user:{
      name:'栗子',
      age:18
    },
    lists:['item1','item2','item3','item4','item5',
    'item6','item7','item8','item9','item10','item11','item12',
    'item13','item14','item15','item16','item17','item18','item19',
    'item20','item21','item22','item23','item24','item25','item26']
  });
})The specific code of the html file is as follows:
<!DOCTYPE html>
<html lang="en">
<head>
  <meta charset="UTF-8">
  <meta name="viewport" content="width=device-width, initial-scale=1.0">
  <meta http-equiv="X-UA-Compatible" content="ie=edge">
  <title>Document</title>
</head>
<body>
  <p>摸板引擎</p>
  <!-- {{}} 插值表达式-->
  姓名:<p>{{name}}</p>
  {% if user.name == '栗子' && user.age == '18'%}
  姓名:<p>栗子</p>
  {% elseif user.name == '张三'%}
  <p>张三</p>
  {% endif %}
  <p>遍历数组</p>
  {% for items in lists%}
  <li>items</li>
  {% endfor %}

   <!-- 页面上面设置数据 -->
  {% set arr = [1,2,3,4,5]%}
  <p>{{arr.length}}</p>
  <!-- 如何引入页面-->
  {% include './common.html' %}
</body>
</html>The specific page display As follows:

The above describes how to use the swig template engine to pass parameters to page rendering. Let’s take a look at how to use swig to extract the public parts of html:
Public parts of the html page, such as header, public js css files, navigation bar, etc.
Set a public page:
<header>
  <title>node</title>
  <!-- css占位符主要用来显示其他页面的个性化的css文件,例如home.css about.css -->
  {% block css%}
  {% endblock %}
  <link rel="stylesheet" href="/static/css/layout.css" rel="external nofollow" >
</header>
<!-- 所以页面公共的导航栏 -->
<nav>
  <li><a href="">首页</a></li>
  <li><a href="">关于我们</a></li>
  <li><a href="">商品列表</a></li>
  <li><a href="">登录</a></li>
  <li><a href="">注册</a></li>
</nav>
 <!-- content占位符主要用来显示其他页面的个性化的内容显示,不同的页面有不同的显示方式 -->
{% block content%}
{% endblock %}
 <!-- js占位符主要用来显示其他页面的个性化的js文件,例如home.js about.js -->
{% block js%}
{% endblock %}
<script src="/static/js/layout.js"></script>home.html
<!-- 继承所有页面公共的页面模块layout.html -->
{% extends './layout.html'%}
{% block css %}
<link rel="stylesheet" href="/static/css/home.css" rel="external nofollow" >
{% endblock %}
{% block content %}
 <li><a href="">1</a></li>
 <li><a href="">2</a></li>
 <li><a href="">3</a></li>
 <li><a href="">4</a></li>
 <li><a href="">5</a></li>
 <li><a href="">6</a></li>
{% endblock %}
{% block js %}
<script src="/static/js/home.js"></script>
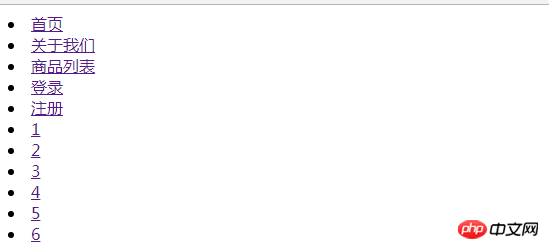
{% endblock %}When starting the node server and rendering the home page, you will see
server.get('/',(req,res)=>{
  res.render('www/home',{});
})
I believe you have mastered the method after reading the case in this article. For more exciting information, please pay attention to the php Chinese website Other related articles!
Recommended reading:
How to remove duplicates when merging multiple arrays in JS
How to make mouse clicks Shape pattern floating
The above is the detailed content of Rendering using node+swig. For more information, please follow other related articles on the PHP Chinese website!


