Components are one of the most powerful features of Vue.js. Components can extend HTML elements and encapsulate reusable code. This article mainly introduces the mobile phone verification code component in VUE. Friends who need it can refer to
What is a component:
Component is the most powerful component of Vue.js One of the functions. Components can extend HTML elements and encapsulate reusable code. At a high level, a component is a custom element to which Vue.js's compiler adds special functionality. In some cases, components can also be in the form of native HTML elements, extended with the is attribute.
Write in front:
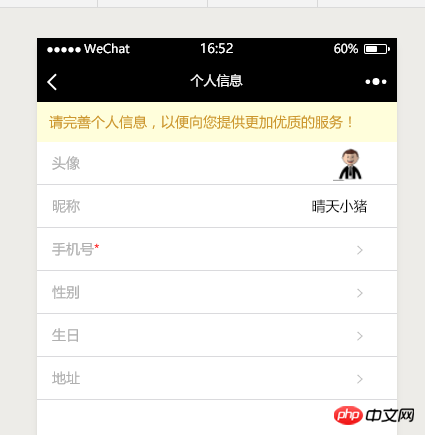
The function to be implemented today is to add a mobile phone verification code component to the personal information page (vue). When the user clicks on the mobile phone option, Pop up the verification code component to complete the function of verifying the mobile phone:


Considering the reuse of functions, I will pop up the current mobile phone verification function. The operation of the code is placed in a separate component:
<template >
<p>
<p class="bind-phone-box">
<p class="phone-title">绑定手机</p>
<p class="phone-content" v-on:click.stop="fillContent">
<input v-model="phoneNum" class="phone-num" type="text" placeholder="请输入手机号码">
<p class="verify-box clearfix">
<input class="verify-num" v-model="verifyNum" type="text" placeholder="请输入验证码"><input v-on:click="sendSmsCode" class="verify-btn" type="button" v-model="btnContent" v-bind="{'disabled':disabled}">
</p>
</p>
<p class="phone-submit clearfix">
<input class="submit-cancel" type="button" value="取消">
<input class="submit-confirm" v-on:click.stop="verificationCode" type="button" value="确定">
</p>
</p>
</p>
</template>and the current component is placed in the component that needs to use it. What needs to be noted here is that when controlling the display and hiding of the bound mobile phone component, A small problem arises: clicking the "Mobile" button needs to display the current component, but when to hide the current component? I think this way:
Situation 1: The user has already entered the mobile phone number and passed Verification, when clicking the "OK" button, the current component needs to be hidden;
Situation 2: The user has not completed the mobile phone verification, but does not want to continue, clicks anywhere on the current mobile phone (except for the "OK" button, mobile phone number input box and verification code input box) should hide the current component;
Based on these two situations, I added a container to the child component in the parent component:
<li class="mui-table-view-cell phone-li">
   <span v-on:click="verifyPhone" class="mui-navigate-right"><span>手机号<span class="necessary">*</span></span></span>
    <!-- 手机验证码 -->
  <p class="shade" v-show="verifyShow" v-on:click="verifyPhone">
    <!-- 手机验证码子组件 -->
    <phoneVerify></phoneVerify>
   </p>
</li>By controlling the parent p Display status is used to control the display status of sub-components.
methods:{
  // 手机号验证
  verifyPhone(){
   this.verifyShow=!this.verifyShow;
  },
},The logic control in the verification component is as follows:
<script>
// 引入弹窗组件
import { Toast } from 'mint-ui';
export default {
data(){
return {
phoneNum:"", //手机号
verifyNum:"", //验证码
btnContent:"获取验证码", //获取验证码按钮内文字
time:0, //发送验证码间隔时间
disabled:false //按钮状态
}
},
created(){
},
methods:{
// 获取验证码
sendSmsCode(){
var reg=11&& /^((13|14|15|17|18)[0-9]{1}\d{8})$/;//手机号正则验证
var phoneNum = this.phoneNum;
if(!phoneNum){//未输入手机号
Toast("请输入手机号码");
return;
}
if(!reg.test(phoneNum)){//手机号不合法
Toast("您输入的手机号码不合法,请重新输入");
}
this.time = 60;
this.timer();
// 获取验证码请求
var url = 'http://bosstan.asuscomm.com/api/common/sendSmsCode';
this.$http.post(url,{username:phoneNum},{emulateJSON:true}).then((response)=>{
console.log(response.body);
});
},
timer(){
if(this.time>0){
this.time--;
this.btnContent = this.time+"s后重新获取";
this.disabled = true;
var timer = setTimeout(this.timer,1000);
}else if(this.time == 0){
this.btnContent = "获取验证码";
clearTimeout(timer);
this.disabled = false;
}
},
// 验证验证码
verificationCode(){
var phoneNum = this.phoneNum;//手机号
var verifyNum = this.verifyNum;//验证码
var url = 'http://bosstan.asuscomm.com/api/common/verificationCode';
this.$http.post(url,{
username:phoneNum,
code:verifyNum
},{
emulateJSON:true
}).then((response)=>{
console.log(response.body);
});
},
fillContent(){
// console.log("fillContent");
}
}
}
</script>Among them, the logic of obtaining the verification code and verifying the SMS verification code has not yet been written.
PS: Here is a vue SMS verification code component example code for you:
Vue.component('timerBtn',{
template: '<button v-on:click="run" :disabled="disabled || time > 0">{{ text }}</button>',
props: {
second: {
type: Number,
default: 60
},
disabled: {
type: Boolean,
default: false
}
},
data:function () {
return {
time: 0
}
},
methods: {
run: function () {
this.$emit('run');
},
start: function(){
this.time = this.second;
this.timer();
},
stop: function(){
this.time = 0;
this.disabled = false;
},
setDisabled: function(val){
this.disabled = val;
},
timer: function () {
if (this.time > 0) {
this.time--;
setTimeout(this.timer, 1000);
}else{
this.disabled = false;
}
}
},
computed: {
text: function () {
return this.time > 0 ? this.time + 's 后重获取' : '获取验证码';
}
}
});<timer-btn ref="timerbtn" class="btn btn-default" v-on:run="sendCode" ></timer-btn>
var vm = new Vue({
  el:'#app',
  methods:{
    sendCode:function(){
      vm.$refs.timerbtn.setDisabled(true); //设置按钮不可用
      hz.ajaxRequest("sys/sendCode?_"+$.now(),function(data){
        if(data.status){
          vm.$refs.timerbtn.start(); //启动倒计时
        }else{
          vm.$refs.timerbtn.stop(); //停止倒计时
        }
      });
    },
  }
});The above is what I compiled for you. I hope that in the future It will be helpful to everyone.
Related articles:
Responsive principles in Vue (detailed tutorial)
How to implement dynamic loading of bar charts in angularjs
How to use scope in Angular scope
The above is the detailed content of How to add mobile verification code component in Vue. For more information, please follow other related articles on the PHP Chinese website!
 How to solve the problem of garbled characters when opening a web page
 What are the types of traffic?
 How to make a call without showing your number
 What does dhcp mean?
 How to trigger keypress event
 gt540
gt540
 Can Douyin sparks be lit again if they have been off for more than three days?
 How to connect to database using vb
 Server evaluation software


