This article mainly introduces the file upload function of SpringBoot Vue.js to achieve front-end and back-end separation. Friends who need it can refer to it.
This article requires certain knowledge of Vue and SpringBoot and is divided into two projects. , one is the front-end Vue project, and the other is the back-end SpringBoot project.
Back-end project construction
I am using SpringBoot1.5.10 JDK8 IDEA Use IDEA to create a new SpringBoot project, just click next
After the project is successfully created, the maven pom configuration is as follows
<dependencies>
  <dependency>
   <groupId>org.springframework.boot</groupId>
   <artifactId>spring-boot-starter</artifactId>
  </dependency>
  <!--加入web模块-->
  <dependency>
   <groupId>org.springframework.boot</groupId>
   <artifactId>spring-boot-starter-web</artifactId>
  </dependency>
  <dependency>
   <groupId>org.springframework.boot</groupId>
   <artifactId>spring-boot-starter-test</artifactId>
   <scope>test</scope>
  </dependency>
  <dependency>
   <groupId>com.alibaba</groupId>
   <artifactId>fastjson</artifactId>
   <version>1.2.39</version>
  </dependency>
 </dependencies>
Next write the upload API interface
@RestController
@RequestMapping("/upload")
@CrossOrigin
public class UploadController {
 @Value("${prop.upload-folder}")
 private String UPLOAD_FOLDER;
 private Logger logger = LoggerFactory.getLogger(UploadController.class);
 @PostMapping("/singlefile")
 public Object singleFileUpload(MultipartFile file) {
  logger.debug("传入的文件参数:{}", JSON.toJSONString(file, true));
  if (Objects.isNull(file) || file.isEmpty()) {
   logger.error("文件为空");
   return "文件为空,请重新上传";
  }
  try {
   byte[] bytes = file.getBytes();
   Path path = Paths.get(UPLOAD_FOLDER + file.getOriginalFilename());
   //如果没有files文件夹,则创建
   if (!Files.isWritable(path)) {
    Files.createDirectories(Paths.get(UPLOAD_FOLDER));
   }
   //文件写入指定路径
   Files.write(path, bytes);
   logger.debug("文件写入成功...");
   return "文件上传成功";
  } catch (IOException e) {
   e.printStackTrace();
   return "后端异常...";
  }
 }
}CrossOrigin annotation: Solve cross-domain problems. Because the front and back ends are completely separated, cross-domain problems are inevitable. Adding this annotation will make the Controller support cross-domain. If this annotation is removed, the front-end Ajax request will Not to the back end. This is just a cross-domain solution, there are other solutions that this article will not cover.
MultipartFile: SpringMVC's multipartFile object, used to receive the FormData passed in by the front-end request.
PostMapping is a new annotation introduced after Spring 4.3 to simplify the mapping of HTTP methods. It is equivalent to our commonly used @RequestMapping(value = "/xx", method = RequestMethod.POST).
The backend has been completed so far, it is very simple.
Front-end project construction
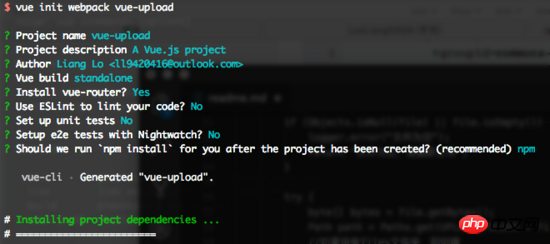
I am using Node8 Webpack3 Vue2
You need to install the node environment locally, and install Vue- cli, use Vue-cli to generate a Vue project.

After the project is successfully created, open it with WebStorm and you can write a simple upload example. The main code is as follows:
<template>
<p class="hello">
<h1>{{ msg }}</h1>
<form>
<input type="file" @change="getFile($event)">
<button class="button button-primary button-pill button-small" @click="submit($event)">提交</button>
</form>
</p>
</template>
<script>
import axios from 'axios';
export default {
name: 'HelloWorld',
data() {
return {
msg: 'Welcome to Your Vue.js App',
file: ''
}
},
methods: {
getFile: function (event) {
this.file = event.target.files[0];
console.log(this.file);
},
submit: function (event) {
//阻止元素发生默认的行为
event.preventDefault();
let formData = new FormData();
formData.append("file", this.file);
axios.post('http://localhost:8082/upload/singlefile', formData)
.then(function (response) {
alert(response.data);
console.log(response);
window.location.reload();
})
.catch(function (error) {
alert("上传失败");
console.log(error);
window.location.reload();
});
}
}
}
</script>Use Axios to send Ajax requests to the backend, and use H5's FormData object to encapsulate image data
Test
Start On the server side, directly run the main method of the BootApplication class, port 8082

Start the front end, the port defaults to 8080, cd to the front-end directory, and execute respectively:
npm install
npm run dev
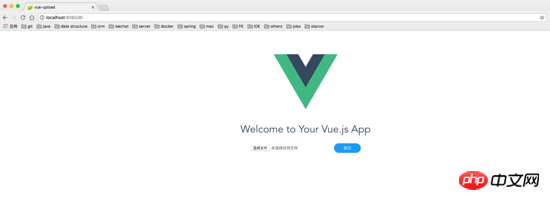
After successful startup, visit localhost:8080

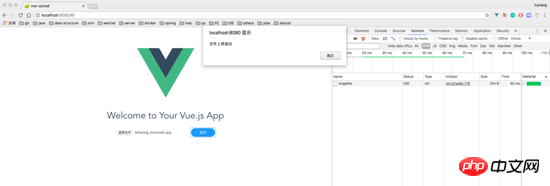
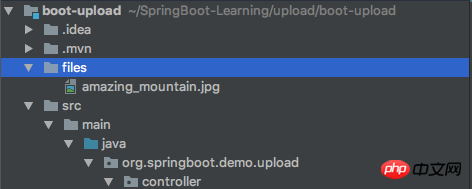
Select a picture to upload. You can see that after the upload is successful, There are also image files in the directory specified by the terminal


Summary
Here, one before and after The end-to-end upload demo is finished. This article is a simple demo that can only handle the upload of small files. Later I will write an article on SpringBoot Vue to implement large file upload in chunks, so stay tuned.
The above is the entire content of this article. I hope it will be helpful to everyone's study. For more related content, please pay attention to the PHP Chinese website!
Related recommendations:
Introduction to how projects built based on Vue-cli interact with the backend
About vue.js Front-end and back-end data interaction operation of submitting data
The above is the detailed content of SpringBoot and Vue.js implement the file upload function that separates the front and back ends. For more information, please follow other related articles on the PHP Chinese website!


