CSS에서 효과 만들기
작사: Oscar Jite-Orimiono✏️
프런트엔드 개발자라면 HTML, CSS, JavaScript를 설명하는 데 사용되는 하우스 비유를 들어보셨을 것입니다. HTML은 구조(벽, 방, 문 등)이고, CSS는 장식자(그림, 레이아웃, 가구)이며, JavaScript는 전기 및 배관에 기능을 제공합니다.
CSS를 별도로 살펴보겠습니다. 첫째는 훌륭하기 때문입니다. 둘째, CSS는 그 자체로 강력하며 어떤 경우에는 JavaScript가 필요하지 않은 곳에 일정 수준의 기능을 가져올 수 있습니다. CSS의 유일한 한계는 상상력이지만, 높은 수준의 기능을 유지해야 하기 때문에 상상력을 마음껏 발휘하지 않는 것이 가장 좋습니다.
이 게시물에서는 가상 3D 공간에서 요소를 제어하는 관련 속성과 작업을 사용하여 CSS로 3D 효과를 만드는 방법을 알아보고 그림자와 빛으로 시각적 환상도 다룰 것입니다.
뭔가가 3D인지 어떻게 알 수 있나요?
3D 공간의 객체에는 길이, 너비라는 3차원이 있습니다. 기술적으로는 '길이'와 동일하지만 일반적으로 더 짧은 쪽과 높이(또는 깊이)로 간주됩니다. 화면을 볼 때만 2D로 보이기 때문에 3D 효과를 만들려면 변환과 같은 CSS 속성이 필요합니다.
변형 속성에는 요소의 3D 크기와 위치를 제어하는 여러 작업이 있습니다. TranslateX()를 사용하여 수평 위치를 제어하고, TranslateY()를 사용하여 수직 위치를 제어하고, TranslateZ()를 사용하여 높이와 깊이를 제어합니다.
이 그림을 생각해 보세요. 두 개의 직사각형 요소가 있습니다. 하나는 작고 다른 하나는 큽니다. 작은 요소는 하위 요소이며 더 큰 상위 요소에 중첩되어 있습니다. 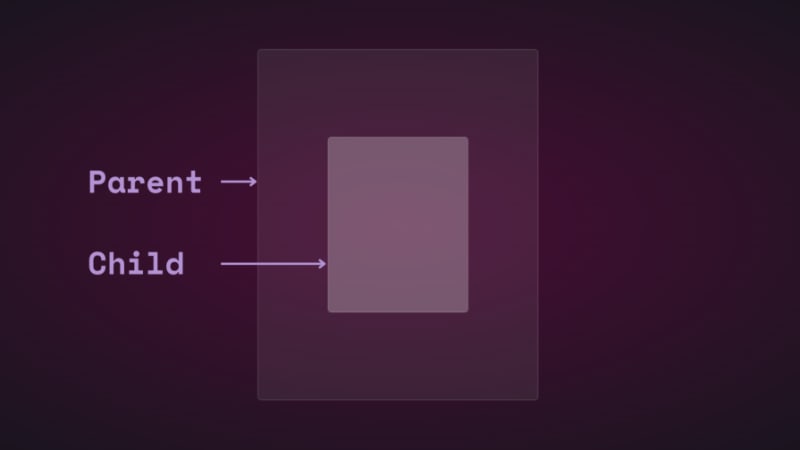
번역을 사용하여 하위 요소의 위치를 수직 및 수평으로 변경하면 이동하는 것을 볼 수 있습니다. 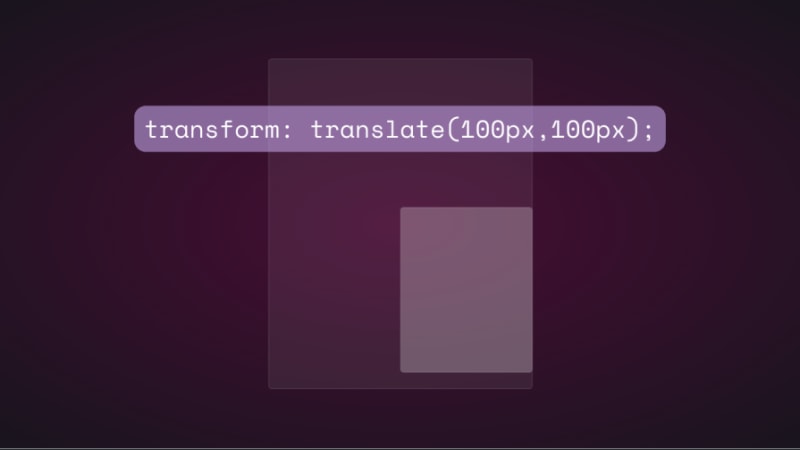
translateZ()를 추가하여 z축에서 하위 요소의 위치를 변경하려고 하면 아무 일도 일어나지 않습니다. Z축은 뷰포트에 수직이므로 하위 요소는 화면에서 멀어지면 더 작게 표시되고 가까워지면 더 크게 표시되어야 합니다. 그렇죠? 이것이 현실 세계에서 물체를 위에서 바라볼 때 작동하는 방식입니다. 그러나 관점이 없기 때문에 상황이 사실상 동일하게 작동하지 않습니다.
CSS에서 관점 속성과 관점() 연산자는 3D 변환이 작동하는 방식에 매우 중요합니다. 관점은 당신의 관점이며 깊이와 높이의 환상을 만듭니다.
perspective 속성은 상위 요소에 적용되는 반면,spective()는 하위 요소의 변환 속성과 함께 작동합니다. 그들은 대부분 같은 일을 합니다.
Perspective 속성이 TranslateZ()에 어떤 영향을 미치는지 살펴보겠습니다. 간단한 애니메이션을 사용하여 설명하겠습니다.
다음은 상위 및 하위 요소에 대한 HTML 및 CSS입니다.
<div class="parent">
    <div class="child">
    </div>
  </div>

.parent {
  display: flex;
  justify-content: center;
  align-items: center;
  background: rgba(255, 255, 255, 0.07);
  width: 400px;
  height: 500px;
  border: 0.5px solid rgba(255, 255, 255, 0.15);
  border-radius: 5px;
  z-index: 0;
}
.child {
  background: rgba(255, 255, 255, 0.25);
  width: 200px;
  height: 250px;
  border: 1px solid rgba(255, 255, 255, 0.15);
  border-radius: 5px;
  z-index: 1;
}
먼저 상위 요소에 원근감을 추가한 다음 하위 요소에 변환 애니메이션을 추가합니다.
.parent{
  perspective: 1000px;
}
.child{
   animation: transform 5s infinite ease-in-out alternate-reverse;
}
@keyframes transform{
  0%{
    transform: translateZ(-200px)
  }
  100%{
    transform: translateZ(200px)
  }
}
결과는 다음과 같습니다. 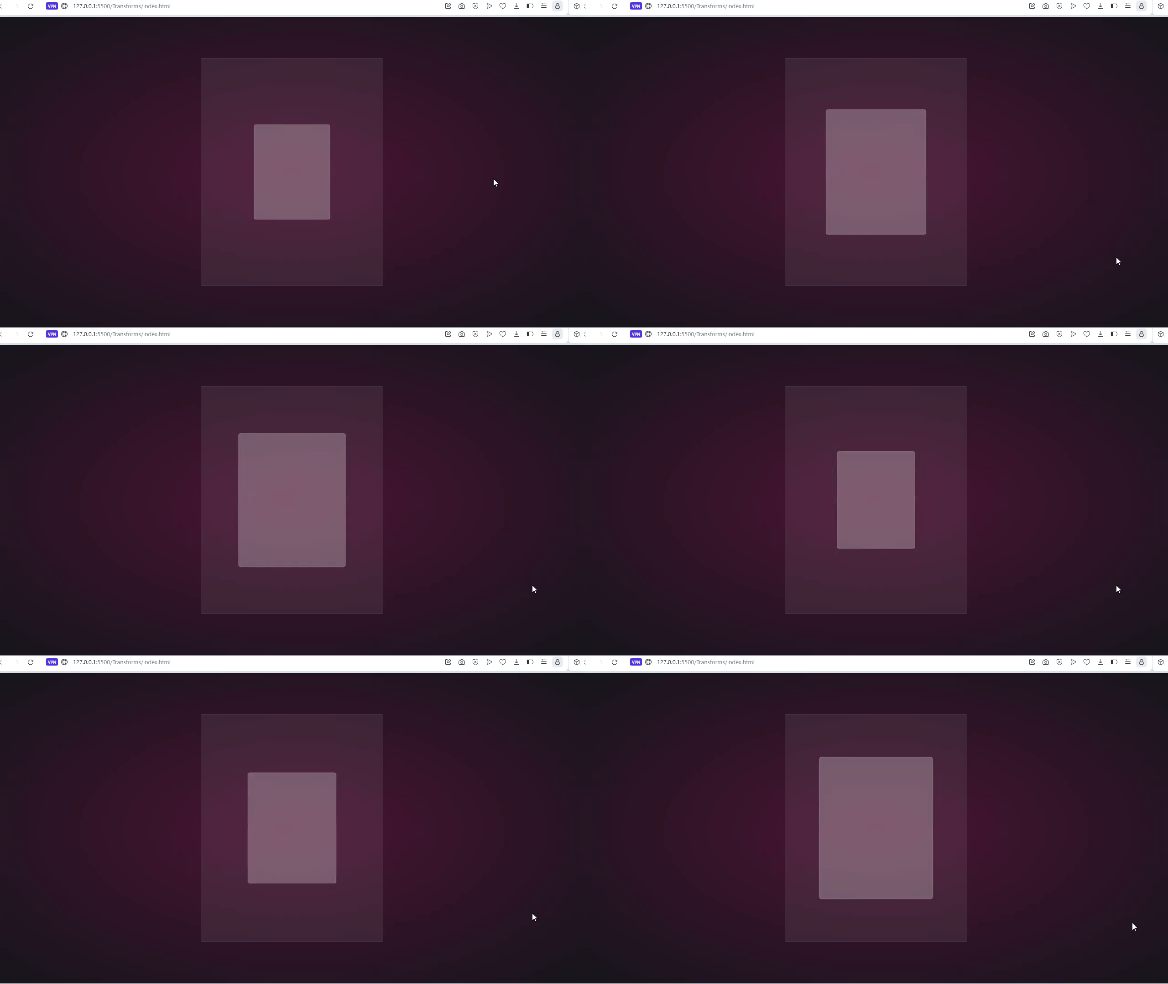
spective() 연산자를 사용해도 동일한 결과를 얻을 수 있습니다. 그러나 Rotate()와 함께 사용하면 다른 이야기가 됩니다.
X축을 따라 하위 항목을 회전시켜 어떤 일이 일어나는지 살펴보겠습니다.
.child{
  transform: perspective(10px) rotateX(2deg);
}
스크린샷은 다음과 같습니다. 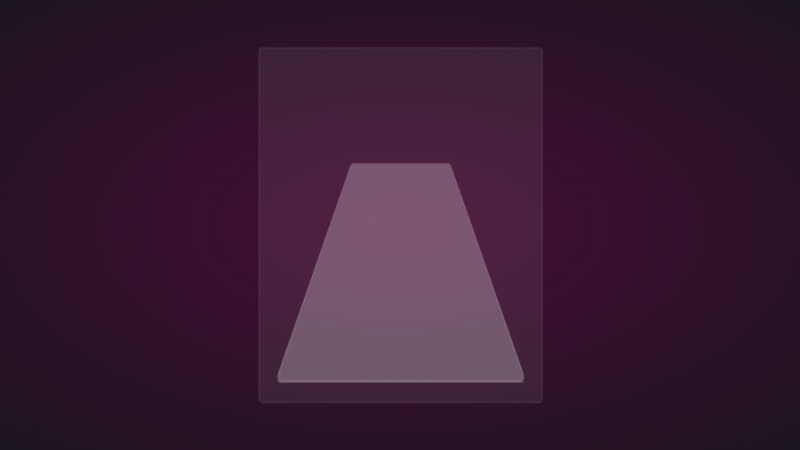
z축에 약간의 번역을 추가하면 다음과 같은 결과가 나옵니다. 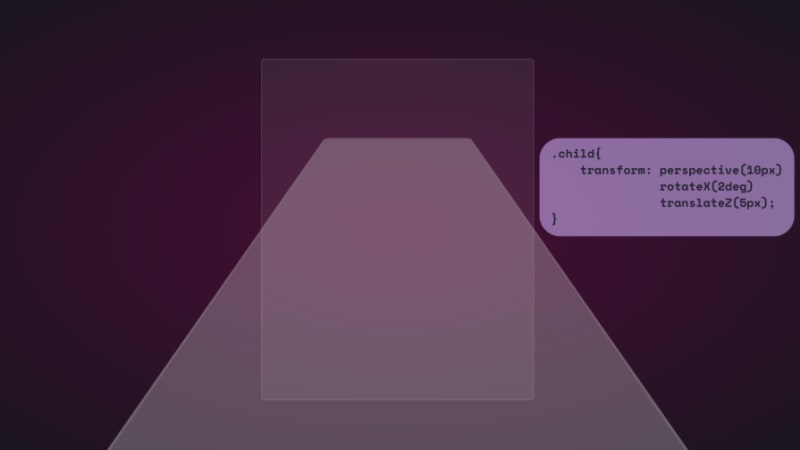
재미있게 설명하자면 다음과 같습니다. 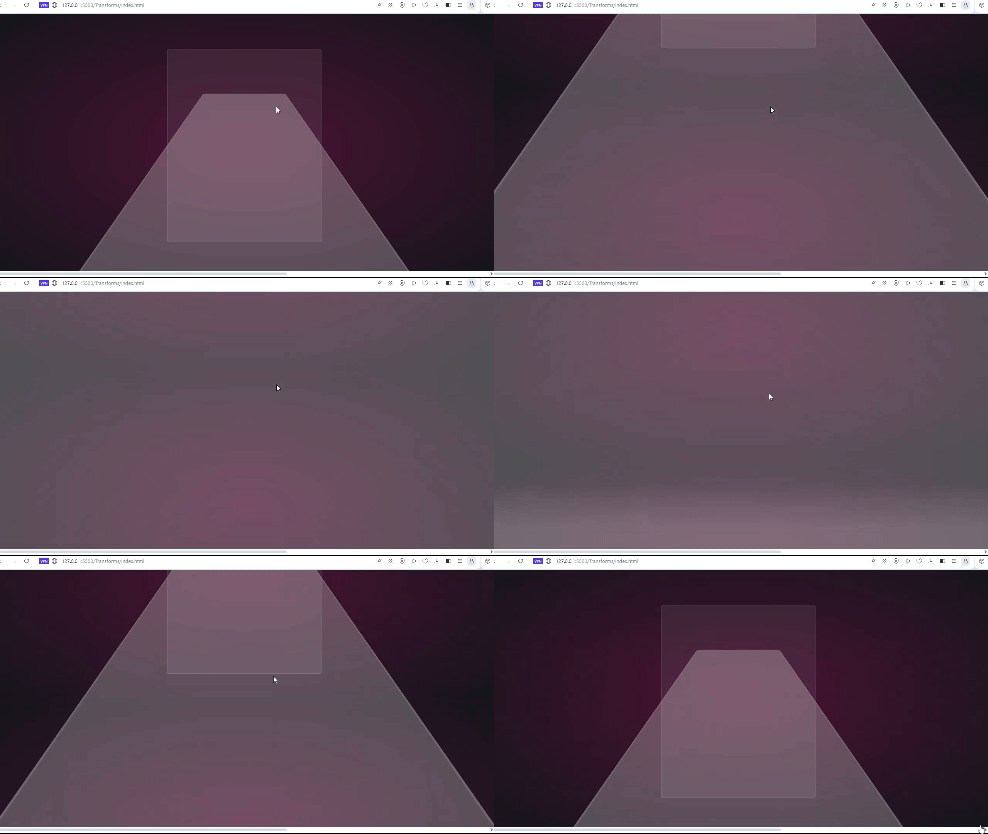
마치 원소의 표면에 있는 것 같아요. VR 헤드셋을 통해 볼 수 있다면 정말 좋을 것 같습니다.
독립형 속성을 사용할 수도 있습니다.
.parent {
  perspective: 10px;
}
.child {
  transform: rotateX(2deg) translateZ(5px);
}
결과는 동일하지만 뷰포트를 넘어 오버플로되지는 않습니다. 두 가지 모두 고유한 사용 사례가 있으며 진행하면서 이들과 나머지 변환 작업이 작동하는 모습을 살펴보겠습니다.
위 예에 사용된 작은 원근 값은 3D 효과를 과장하여 작동 방식을 확인하기 위한 것이었습니다. 대부분 위에서 요소를 보고 싶기 때문에 최대 1000px까지 훨씬 더 큰 값이면 충분합니다. 원근 값이 작으면 요소가 더욱 3D로 표시됩니다.
3D 변형 애니메이션이 포함된 CodePen이 있습니다.
이제 재미있는 부분을 살펴보고 CSS를 사용하여 3D 효과를 만들어 볼 시간입니다!
Reflection and shadow
How objects interact with light is another way to tell they’re in 3D space. We can use the perspective() operator to create reflections and shadows in CSS to generate the illusion that an element is floating in 3D space.
3D text reflection
This example will feature text, but you can use other HTML elements:
<div class="content">
    <h1>Text in space</h1>
  </div>
We’re creating a reflection, so we need light. You’ll need the text-shadow property to create this light effect:
.content h1 {
  position: relative;
  font-size: 5rem;
  font-weight: 600;
  color: #fff;
  margin: 3px;
  text-shadow: 0px 0px 10px #b393d350, 0px 0px 20px #b393d350;
  text-transform: uppercase;
}
You should have glowing text at this point: 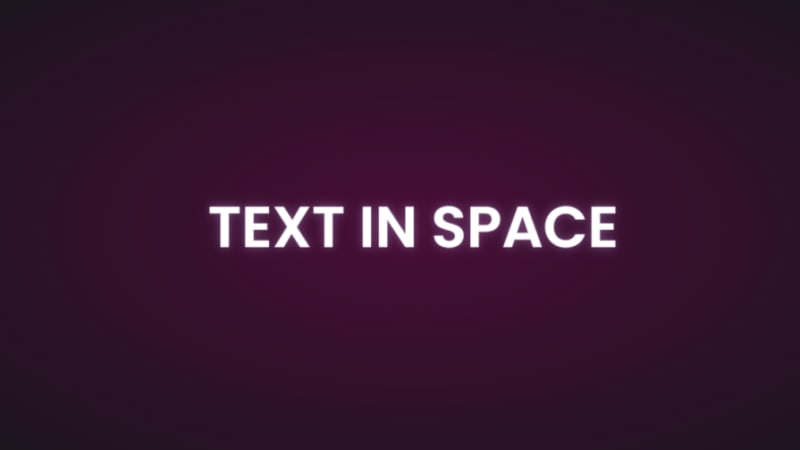
It’s time to add the reflection using a pseudo-element:
  .content h1::before {
    content: "";
    position: absolute;
    top: 80%;
    left: 0;
    height: 100%;
    width: 100%;
    background: #b393d3;
    transform: perspective(10px) rotateX(10deg) scale(1,0.2);
    filter: blur(1em);
    opacity: 0.5;
  }
First, we give the pseudo-element the same dimensions as the text. Then we add a background with the same color as the text-shadow. Next, we add the transform property with three operations.
We’ve already seen how the first two work, so let’s talk about scale(). Remember how the child element stretches beyond the viewport? This prevents that by resizing the element along the x and y directions.
In this example, the reflection we created with the pseudo-element keeps its original size on the x-axis but is reduced to less than half on the y-axis. The opacity and filter make it look like the light fades the further it moves from the text: 
The text looks like it’s floating and reflecting light off the floor.
3D shadow
We can also create shadows using a similar method to the light. Let’s work with an image this time.
Here’s the image we’ll work with for this example: 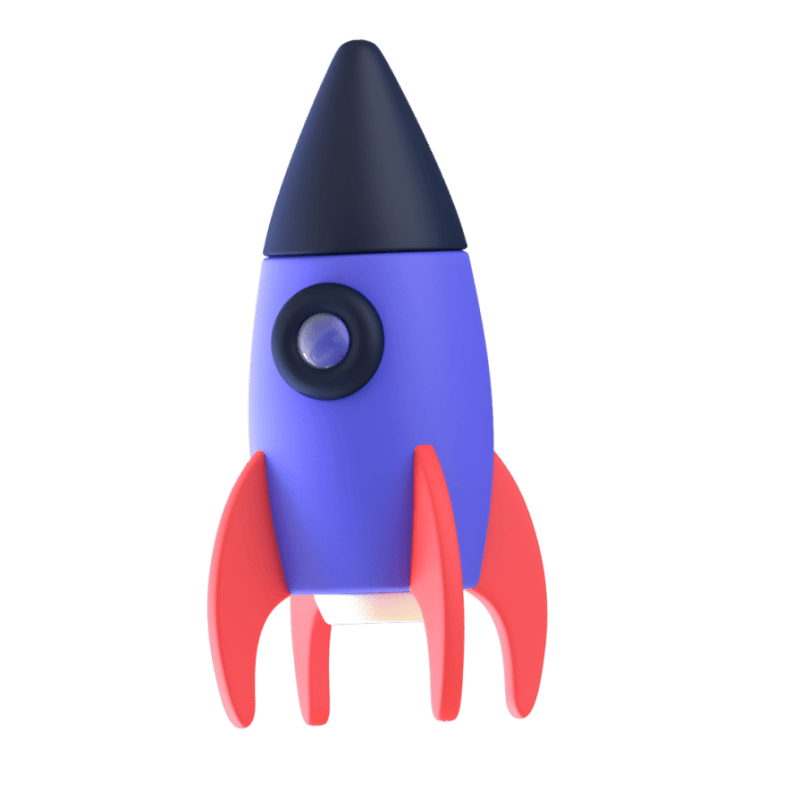
It’s nice to have the shadow match the shape and size of the element. In this case, we have a rocket, and this means our shadow should be round. Consequently, there’s no need for the perspective() operator.
Here’s the HTML:
<div class="content">
    <div class="rocket">
      <img src="rocket.png" alt="">
    </div>
  </div>
In CSS, go ahead and give the image any dimensions you want, then add a pseudo-element below it:
.rocket::before {
  content: "";
  position: absolute;
  bottom: -10%;
  left: 0;
  height: 50px;
  width: 100%;
  border-radius: 50%;
  background: radial-gradient(rgba(0, 0, 0, 0.8), transparent, transparent);
  transition: 0.5s;
}
The border-radius of 50 percent gives it an oval shape. You can add more height or a more specific width if you'd like. Shadows are black most of the time, so the background is a blurry radial-gradient fading from black to transparent.
Here’s a screenshot of how it should look at this point: 
Finally, let’s add some animation:
.rocket:hover img{
  transform: translateY(-40px);
}
.rocket:hover::before {
  opacity: 0.8;
  transform: scale(0.8);
}
This will move the rocket up and down, and the shadow will change as it moves. Hover on the rocket in the CodePen to see this 3D effect.
3D text animation
You can create 3D text with the CSS box-shadow property. You’ll need multiple shadow layers to create this effect.
Here’s the HTML:
<div class="content">
    <h1>3D text in 3D space</h1>
  </div>
Next, we need CSS to turn it into 3D text. We’ll use perspective and transform to tilt the text at an angle:
.content {
  position: relative;
  transform: translate(-50%, -50%);
  display: flex;
  align-items: center;
  justify-content: center;
  text-align: center;
  perspective: 1500px;
  transform-style: preserve-3d;
}
.content h1 {
  font-size: 5rem;
  font-weight: 600;
  color: #b393d3;
  text-shadow: 1px 4px 1px #480d35,
               1px 5px 1px #480d35,
               1px 6px 1px #480d35,/* to create the sides*/
               1px 10px 5px rgba(16, 16, 16, 0.5),
               1px 15px 10px rgba(16, 16, 16, 0.4),
               1px 20px 30px rgba(16, 16, 16, 0.3); /* real shadow */
  margin: 3px;
  transform: rotateX(15deg) rotateY(-20deg) rotateZ(10deg);
  text-transform: uppercase;
Here’s how the text should look at this point: 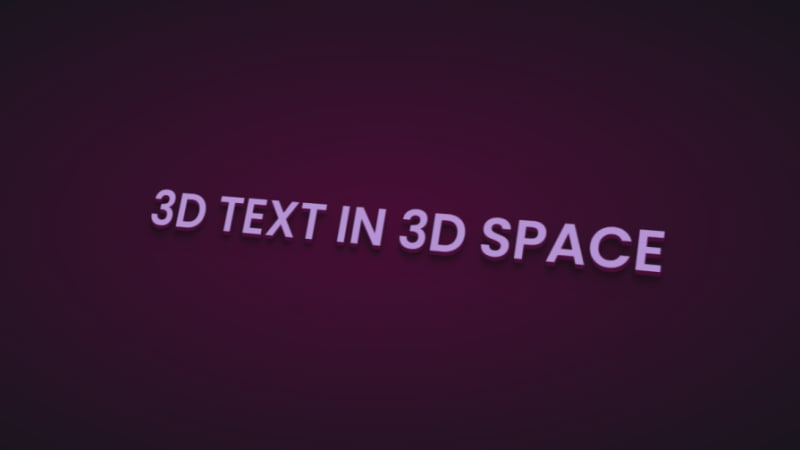
Now let’s add some animation:
.content:hover h1{
  transform: rotateX(2deg) rotateY(0deg) rotateZ(0deg);
  font-size: 4rem;
  transition: 500ms ease-in-out;
}
Here’s the 3D text plus tilt on hover effect on CodePen.
3D tilt effect
Let’s work with an image this time, and we’ll use the one below: 
Here’s the HTML:
<div class="text">
      <h2>Hover on the image</h2>
      <p>It uses a combination of all the rotate operators</p>
      <div class="tilt-img">
        <img src="7.jpg" alt="">
      </div>
    </div>
You could use a background image, but what’s important is that there’s a clear parent and child element.
In the CSS, use the transform property tilt the image at an angle, then reset it on hover:
.tilt-img {
  width: 600px;
  height: auto;
  margin-top: 20px;
  perspective: 1000px;
}
.tilt-img img {
  width: 100%;
  height: 100%;
  object-fit: contain;
  border-radius: 10px;
 transform: rotateX(15deg) rotateY(-5deg) rotateZ(1deg);
  box-shadow: 5px 5px 2px rgba(0, 0, 0, 0.5);
  transition: 2s;
}
.tilt-img:hover img{
  transform: none;
  box-shadow: 0px 2px 3px rgba(0, 0, 0, 0.5);
}
You can reverse it and add the tilt on hover, or change the transform values:
See the 3D image tilt with CSS on CodePen.
Tilt and mouse tracking
Here, we’re going to make an element tilt and follow the movement of the mouse when you hover over it. We’re going to work with vanilla-tilt.js, a JavaScript library.
Here’s what we’re aiming for: 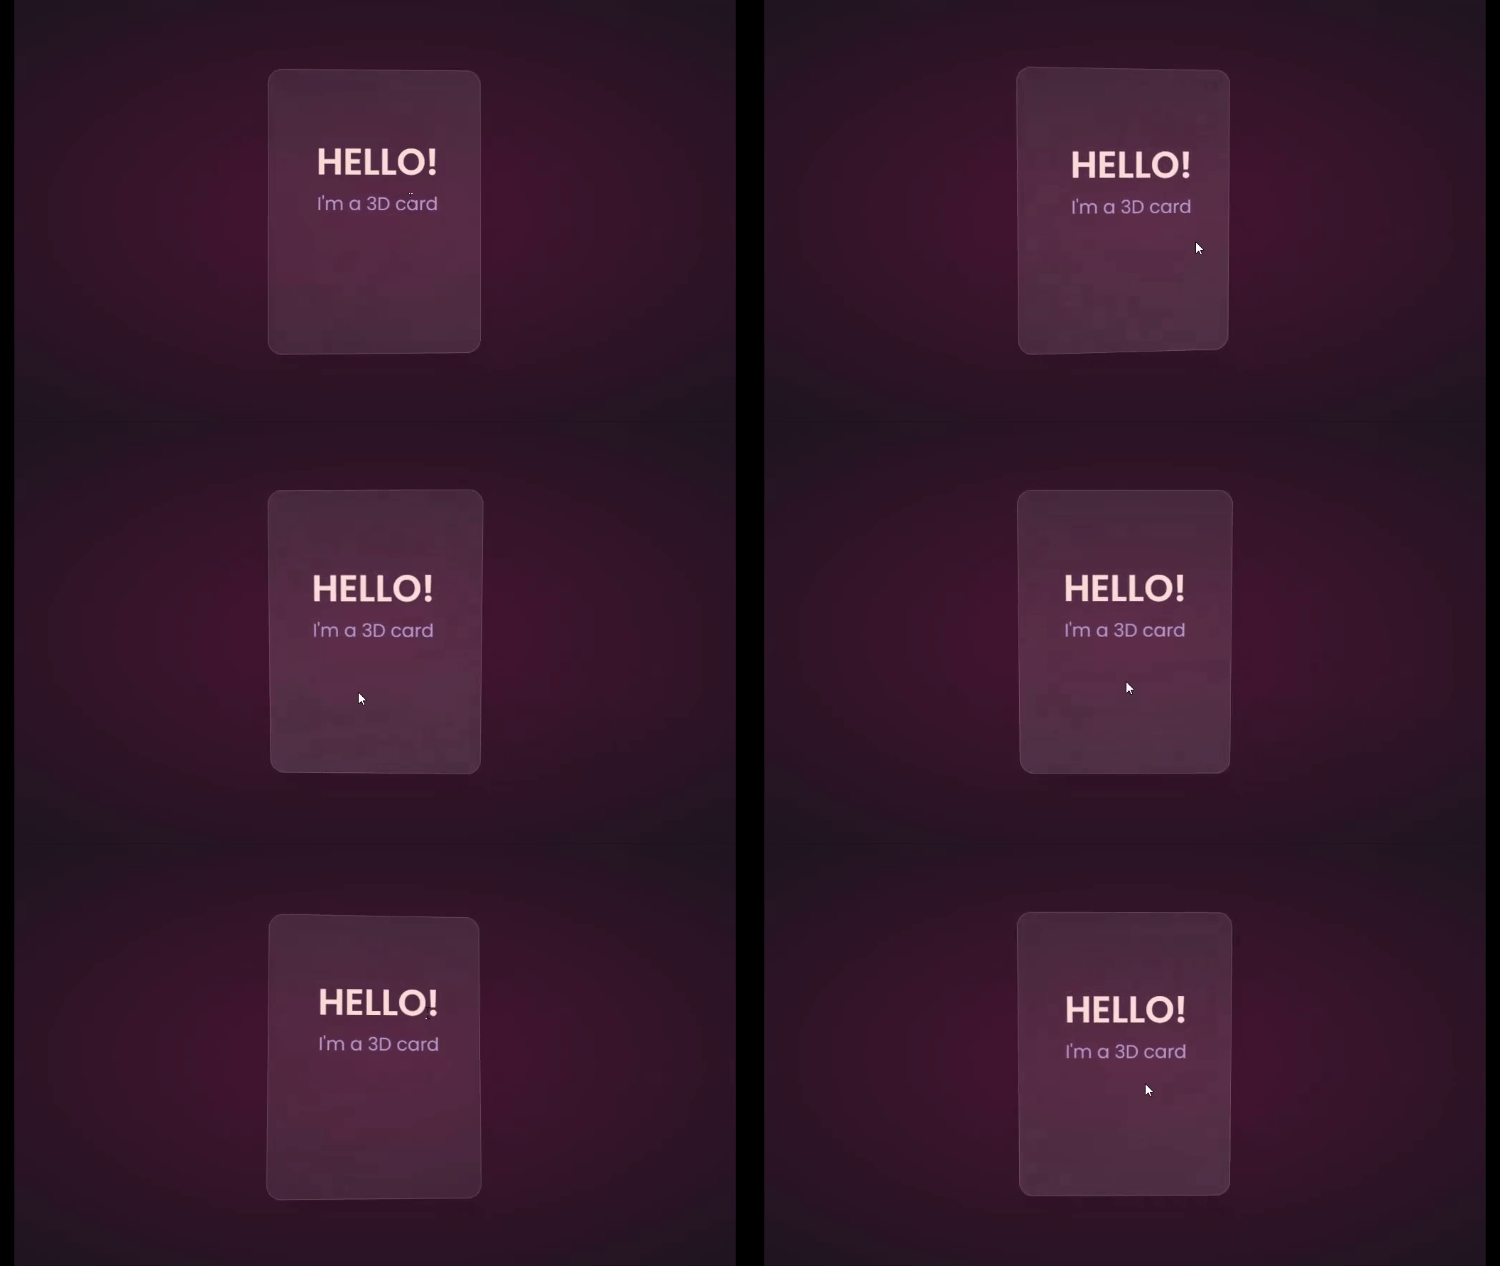
We’ll start with HTML, creating a card and some text:
<div class="box">
    <div class="elements">
      <h2>Hello!</h2>
      <p>I'm a 3D card</p>
    </div>
    <div class="card">
    </div>
  </div>
Next, we’ll style with CSS:
.box {
  position: relative;
  border-radius: 20px;
  transform-style: preserve-3d;
}
.box .card {
  position: relative;
  background: rgba(255, 255, 255, 0.07);
  width: 300px;
  min-height: 400px;
  backdrop-filter: blur(10px);
  border: 0.5px solid rgba(255, 255, 255, 0.15);
  border-radius: 20px;
  box-shadow: 0 25px 45px rgba(0,0,0,0.05);
}
.elements{
  position: absolute;
  top: 100px;
  left: 50px;
  width: 200px;
  height: auto;
  text-align: center;
  background: transparent;
  transform: translateZ(80px);
}
.elements h2{
  font-size: 3rem;
  font-weight: 600;
  color: #f6d8d5;
  text-transform: uppercase;
}
.elements p{
  font-size: 1.5rem;
  color: #b393d3;
}
The two CSS properties directly responsible for creating the 3D effect on the card are transform and transform-style.
First, we have the transform-style, set to preserve-3d, applied to the box. This means the card and any nested element are now in a 3D space. The transform property is applied to the text’s parent element, with the class name .elements. Here, translateZ(80px) moves the text toward the viewer.
These two properties combined create the illusion of depth, and the text will appear to be floating above the card.
Head to cdnjs.com to grab the Vanilla-tilt CDN and link it to your HTML document. Next, go to the main site and copy the VanillaTilt.init JavaScript function that controls the tilt. Add it just before the closing body tag:
<script type="text/javascript">
        VanillaTilt.init(document.querySelector(".your-element"), {
                max: 25,
                speed: 400
        });
</script>
Now all you have to do is replace .your-element with the class name of your element getting the 3D tilt effect, and you’re in business.
By default, the maximum tilt rotation and transition speed are defined by max and speed respectively. You can also add a glare, easing, or tilt direction and angle.
Here’s how to get the exact effect shown in the “HELLO” example above:
<script>
    VanillaTilt.init(document.querySelector(".box"), {
      max: 10,
      speed: 200,
      easing: "cubic-bezier(.03,.98,.52,.99)",
      reverse: true,
      glare: true,
      "max-glare": 0.1,
    });
  </script>
More functions and effects are listed on the main site.
Here’s a CodePen showing the 3D tilt effect.
Just to show that the library isn’t doing all the work and how important the transform and transform-style properties are for this 3D effect, here’s what it would look like if they weren’t included: 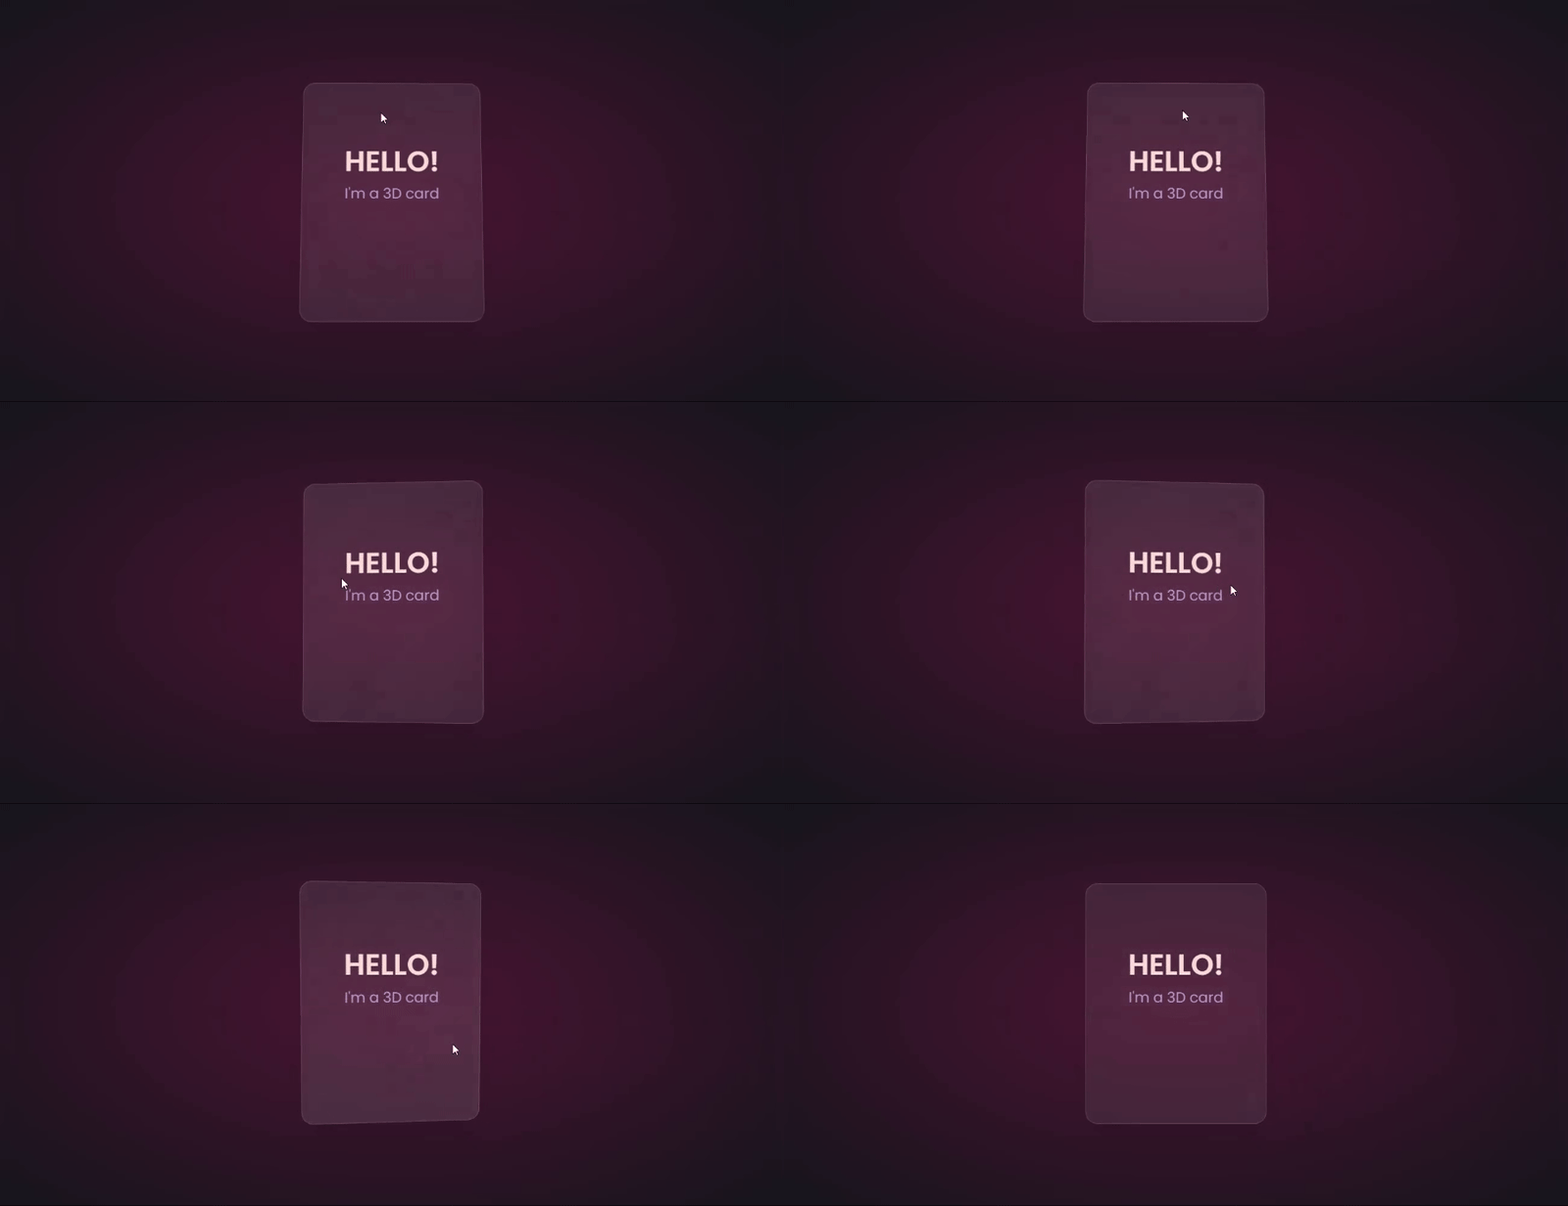
The text appears flush against the card and you’re left with only the tilting, which is nice, but not as nice as the 3D effect created when those properties are included.
Let’s explore another practical use case of this 3D effect.
Using the same card, we’ll add a background image and caption that’ll appear on hover:
.box .card {
  position: relative;
  background: url(/Captions/8.jpg) center;
  background-size: cover;
  background-repeat: no-repeat;
  width: 300px;
  min-height: 400px;
  border: 1px solid rgba(255, 255, 255, 0.15);
  border-radius: 10px;
  box-shadow: 0 25px 45px rgba(0,0,0,0.05);
  z-index: 0;
}
.elements{
  position: absolute;
  top: 60%;
  left: 30%;
  width: 250px;
  height: auto;
  padding: 10px;
  border-radius: 5px;
  text-align: center;
  background: rgba(255, 255, 255, 0.25);
  transform: translateZ(80px);
  z-index: 2;
  opacity: 0;
  transition: opacity 500ms;
}
.box:hover .elements{
  opacity: 1;
}
Here’s a CodePen with the result of the 3D image card with caption appearing on hover.
3D buttons
Buttons are common web components with many shapes, sizes, and purposes. No matter the button type, they all have one thing in common: you have to click on them to work. But how many times have you seen them actually “click”?
This will be a little micro-interaction that helps the user know they’ve done something. The main CSS property we’ll use for this 3D effect is the transform property.
Here’s how it should look: 
There are two distinct parts of this 3D button — the top with the "Click Me” text and the bottom and sides with a lighter color.
You’ll start with the HTML for the button:
<button class="btn"><span class="txt">Click Me</span></button>
In CSS, we’ll start with the bottom. That’s the button with the class name btn:
.btn {
  position: relative;
  background: #17151d;
  border-radius: 15px;
  border: none;
  cursor: pointer;
}
Next, we have the top of the button:
.text {
  display: block;
  padding: 10px 40px;
  border-radius: 15px;
  border: 1px solid rgba(255, 255, 255, 0.15);
  background: #480d35;
  font-size: 1.5rem;
  font-weight: 500;
  color: #b393d3;
  transform: translateY(-6px);
  transition: transform ease 0.1s;
}
The transform property is what creates the 3D effect of the button clicking. All that’s left is to reverse the transformation by a few pixels when you click on it:
.btn:active .text{
  transform: translateY(-2px);
}
And that’s how to create a 3D click button. Here’s a CodePen you can interact with.
Browser support for 3D transforms and final words
The transform property and its operators have excellent support across all the major browsers — unless you still use Internet Explorer. You can check it out yourself on CanIuse: 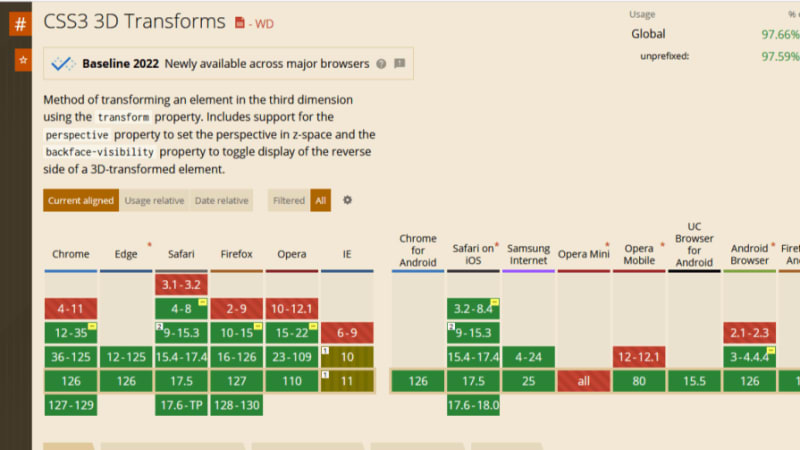
Unfortunately, the borders of the cards do not appear straight during animation on Firefox browsers, but it’s not clear why. Apart from that, the animation runs smoothly. Compare performance across browsers, and try different border thickness.
The web is your canvas, and CSS is your paintbrush. In this post, you’ve learned how to create 3D effects with the transform property. What other effects can you think of?
Is your frontend hogging your users' CPU?
As web frontends get increasingly complex, resource-greedy features demand more and more from the browser. If you’re interested in monitoring and tracking client-side CPU usage, memory usage, and more for all of your users in production, try LogRocket.
LogRocket is like a DVR for web and mobile apps, recording everything that happens in your web app, mobile app, or website. Instead of guessing why problems happen, you can aggregate and report on key frontend performance metrics, replay user sessions along with application state, log network requests, and automatically surface all errors.
Modernize how you debug web and mobile apps — start monitoring for free.
위 내용은 CSS에서 효과 만들기의 상세 내용입니다. 자세한 내용은 PHP 중국어 웹사이트의 기타 관련 기사를 참조하세요!

핫 AI 도구

Undresser.AI Undress
사실적인 누드 사진을 만들기 위한 AI 기반 앱

AI Clothes Remover
사진에서 옷을 제거하는 온라인 AI 도구입니다.

Undress AI Tool
무료로 이미지를 벗다

Clothoff.io
AI 옷 제거제

Video Face Swap
완전히 무료인 AI 얼굴 교환 도구를 사용하여 모든 비디오의 얼굴을 쉽게 바꾸세요!

인기 기사

뜨거운 도구

메모장++7.3.1
사용하기 쉬운 무료 코드 편집기

SublimeText3 중국어 버전
중국어 버전, 사용하기 매우 쉽습니다.

스튜디오 13.0.1 보내기
강력한 PHP 통합 개발 환경

드림위버 CS6
시각적 웹 개발 도구

SublimeText3 Mac 버전
신 수준의 코드 편집 소프트웨어(SublimeText3)
 Sass를 더 빨리 만들기위한 개념 증명
Apr 16, 2025 am 10:38 AM
새로운 프로젝트가 시작될 때, Sass 컴파일은 눈을 깜박이게합니다. 특히 BrowserSync와 짝을 이루는 경우 기분이 좋습니다.
 주간 플랫폼 뉴스 : HTML로드 속성, 주요 ARIA 사양 및 iframe에서 Shadow Dom으로 이동
Apr 17, 2025 am 10:55 AM
이번 주에 플랫폼 뉴스 라운드 업 RONDUP, Chrome은로드에 대한 새로운 속성, 웹 개발자를위한 접근성 사양 및 BBC Move를 소개합니다.
 HTML 대화 요소와 함께 일부 실습
Apr 16, 2025 am 11:33 AM
이것은 처음으로 HTML 요소를보고 있습니다. 나는 그것을 잠시 동안 알고 있었지만 아직 스핀을 위해 그것을 가져 갔다. 그것은 꽤 시원하고 있습니다
 PaperForm
Apr 16, 2025 am 11:24 AM
구매 또는 빌드는 기술 분야의 고전적인 논쟁입니다. 신용 카드 청구서에 라인 항목이 없기 때문에 물건을 구축하는 것이 저렴할 수 있지만
 주간 플랫폼 뉴스 : 텍스트 간격 북마크, 최상위 차단, 새로운 앰프 로딩 표시기
Apr 17, 2025 am 11:26 AM
이번 주에 타이포그래피를 검사하기위한 편리한 북마크 인 Roundup, JavaScript 모듈과 Facebook의 Facebook 등을 어떻게 가져 오는지 땜질하기 위해 대기하는 편리한 북마크 인 Roundup과 Facebook의
 'Podcast 구독'링크는 어디에서 링크해야합니까?
Apr 16, 2025 pm 12:04 PM
한동안 iTunes는 팟 캐스팅에서 큰 개 였으므로 "Podcast 구독"을 링크 한 경우 다음과 같습니다.
 직접 비자 스크립트 기반 분석을 호스팅하는 옵션
Apr 15, 2025 am 11:09 AM
사이트에서 방문자 및 사용 데이터를 추적하는 데 도움이되는 분석 플랫폼이 많이 있습니다. 아마도 널리 사용되는 Google 웹 로그 분석


