
이 블로그 게시물에서는 FACEIO 계정 설정부터 코드베이스 내 통합 구현까지 FACEIO의 얼굴 인증을 Next.js 애플리케이션에 통합하는 단계별 프로세스를 안내합니다.
전제조건
자세히 알아보기 전에 다음 사항이 준비되어 있는지 확인하세요.
Node.js 및 npm: 개발 시스템에 Node.js 및 npm이 설치되어 있는지 확인하세요. Node.js 공식 홈페이지에서 최신 버전을 다운로드 받으실 수 있습니다.
Next.js: Next.js 프로젝트를 설정해야 합니다. 아직 없으면 새로 만들 수 있습니다.
FACEIO 애플리케이션 설정
1.새 FACEIO 애플리케이션 만들기: FACEIO 콘솔에 로그인하고 "새 앱 만들기" 버튼을 클릭하세요.
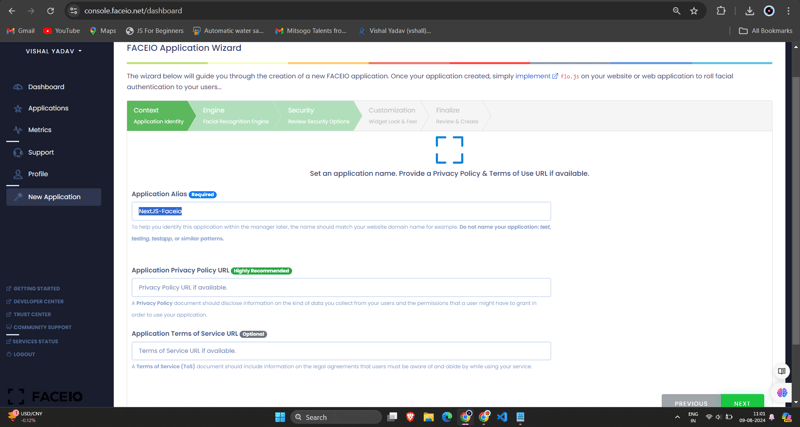
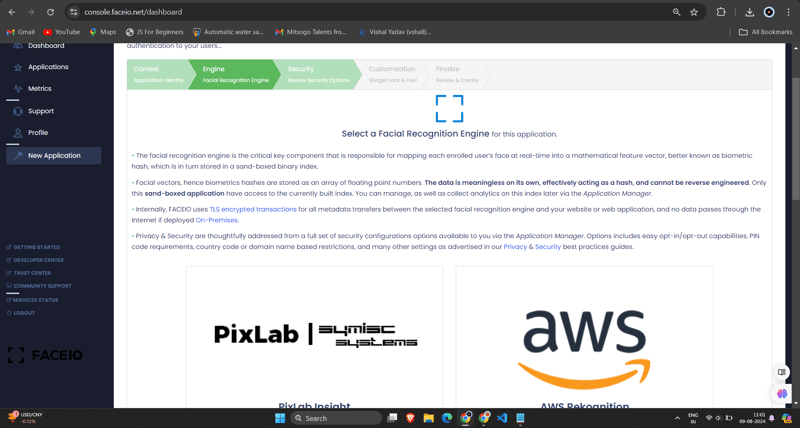
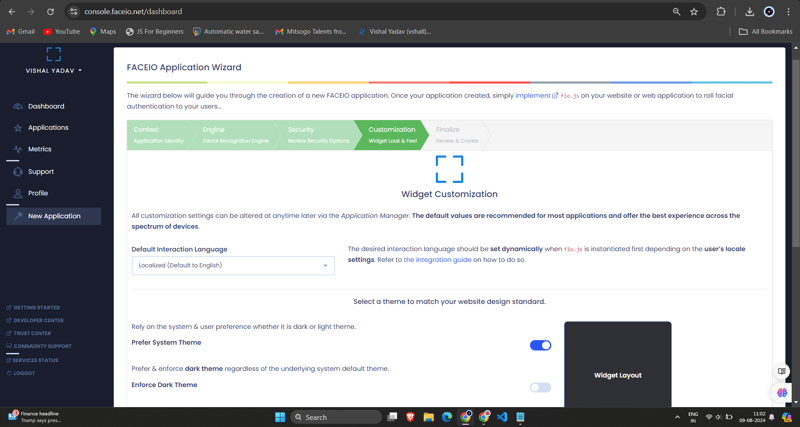
2.애플리케이션 구성: 애플리케이션 이름, 설명, 콜백 URL(Next.js 애플리케이션의 URL이 됨) 등 필수 정보를 입력합니다. 양식을 작성한 후 "앱 만들기"를 클릭하세요.
3.FACEIO_APP_ID 얻기: 애플리케이션을 생성하면 고유한 FACEIO_APP_ID가 제공됩니다. 이는 FACEIO를 Next.js 애플리케이션에 통합하는 데 사용할 식별자입니다.
Next.js 애플리케이션에 FACEIO 통합
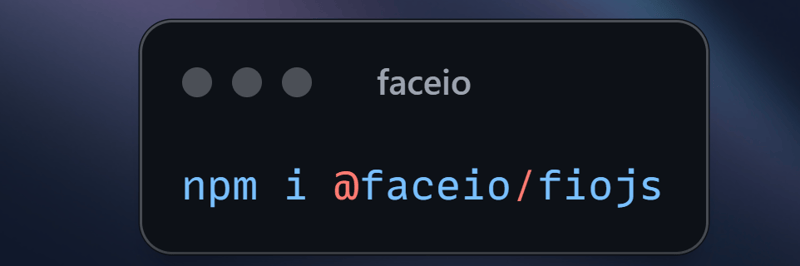
1.FACEIO NPM 패키지 설치: Next.js 프로젝트에서 npm 또는 Yarn을 사용하여 Faceio-npm 패키지를 설치합니다.
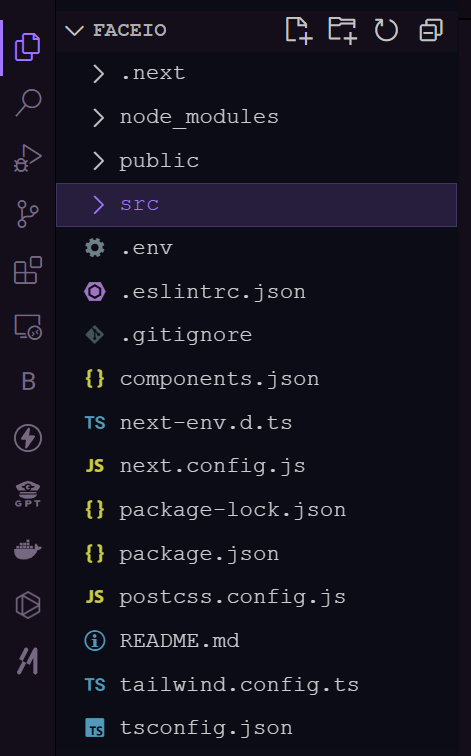
2.얼굴 인증 구성 요소 만들기: Next.js 프로젝트에서 다음 코드를 사용하여 Components/Dashboard.tsx(또는 원하는 다른 이름)라는 새 파일을 만듭니다.
// Dashboard.tsx
import React from "react";
import { Card, CardHeader, CardTitle, CardContent } from "@/components/ui/card";
import { Button } from "@/components/ui/button";
import { FaUserCircle, FaLock, FaCode, FaChartBar, FaSignOutAlt } from 'react-icons/fa';

interface DashboardProps {
  userEmail: string;
  onLogout: () => void;
}

const Dashboard: React.FC<DashboardProps> = ({ userEmail, onLogout }) => {
  return (
    <div className="max-w-7xl mx-auto p-4 md:p-6 space-y-6">
      <Card className="w-full bg-black text-white">
        <CardHeader className="flex flex-col sm:flex-row items-start sm:items-center justify-between space-y-4 sm:space-y-0">
          <div>
            <CardTitle className="text-2xl sm:text-3xl font-bold">Welcome to FaceIO</CardTitle>
            <p className="text-base sm:text-lg mt-2">Email: {userEmail}</p>
          </div>
          <Button
            variant="secondary"
            size="sm"
            onClick={onLogout}
            className="flex items-center w-full sm:w-auto justify-center mt-8"
          >
            <FaSignOutAlt className="mr-2" /> Logout
          </Button>
        </CardHeader>
        <CardContent>
          <p className="text-lg sm:text-xl mb-4">You have successfully logged in.</p>
        </CardContent>
      </Card>

      <h2 className="text-xl sm:text-2xl font-bold text-center my-6">Facial Authentication for the Web</h2>

      <div className="grid grid-cols-1 sm:grid-cols-2 gap-4 sm:gap-6">
        <Card>
          <CardHeader>
            <CardTitle className="flex items-center text-base sm:text-lg">
              <FaUserCircle className="mr-2" /> Secure & Easy
            </CardTitle>
          </CardHeader>
          <CardContent>
            <p className="text-sm sm:text-base">Cross-browser, secure & easy to implement. Passwordless Authentication SDKs powered by Face Recognition for Web Sites & Apps.</p>
          </CardContent>
        </Card>

        <Card>
          <CardHeader>
            <CardTitle className="flex items-center text-base sm:text-lg">
              <FaLock className="mr-2" /> Privacy-Focused
            </CardTitle>
          </CardHeader>
          <CardContent>
            <p className="text-sm sm:text-base">Your facial data is encrypted and securely stored. We prioritize user privacy and data protection.</p>
          </CardContent>
        </Card>

        <Card>
          <CardHeader>
            <CardTitle className="flex items-center text-base sm:text-lg">
              <FaCode className="mr-2" /> Developer-Friendly
            </CardTitle>
          </CardHeader>
          <CardContent>
            <p className="text-sm sm:text-base">Easy integration with clear documentation. Get started quickly and implement facial authentication in your projects.</p>
          </CardContent>
        </Card>

        <Card>
          <CardHeader>
            <CardTitle className="flex items-center text-base sm:text-lg">
              <FaChartBar className="mr-2" /> Analytics & Insights
            </CardTitle>
          </CardHeader>
          <CardContent>
            <p className="text-sm sm:text-base">Gain valuable insights into user authentication patterns and improve your applications security.</p>
          </CardContent>
        </Card>
      </div>

      <div className="flex flex-col sm:flex-row justify-center items-center space-y-4 sm:space-y-0 sm:space-x-4 mt-8">
        <Button variant="default" size="lg" className="w-full sm:w-auto">
          Get Started →
        </Button>
        <Button variant="outline" size="lg" className="w-full sm:w-auto">
          Integration Guide →
        </Button>
        <Button variant="secondary" size="lg" className="w-full sm:w-auto">
          FACEIO Console →
        </Button>
      </div>

      <Card className="mt-8 bg-gray-100">
        <CardContent className="text-center py-6">
          <p className="text-base sm:text-lg font-semibold">Ready to implement facial authentication in your project?</p>
          <p className="mt-2 text-sm sm:text-base">Check out our documentation and start securing your application today!</p>
        </CardContent>
      </Card>
    </div>
  );
};

export default Dashboard;
3.Dashboard.tsx 구성 요소를 Login.tsx 구성 요소로 가져오기:
/* eslint-disable react-hooks/exhaustive-deps */
"use client";
import {
Card,
CardContent,
CardDescription,
CardFooter,
CardHeader,
CardTitle,
} from "@/components/ui/card";
import { Terminal } from "lucide-react";
import { MailIcon, CheckCircleIcon } from "lucide-react";
import { Alert, AlertDescription, AlertTitle } from "@/components/ui/alert";
import { Input } from "@/components/ui/input";
import { Label } from "@/components/ui/label";
import { Button } from "./ui/button";
import faceIO from "@faceio/fiojs";
import { useEffect, useRef, useState } from "react";
import Link from "next/link";
import { toast } from "sonner";
import Dashboard from "./Dashboard";
type Props = {};
const Login: React.FC<Props> = ({}) => {
const faceioRef = useRef<faceIO | null>(null);
const [email, setEmail] = useState("");
const [userLogin, setUserLogin] = useState("");
const [isLoggedIn, setIsLoggedIn] = useState(false);
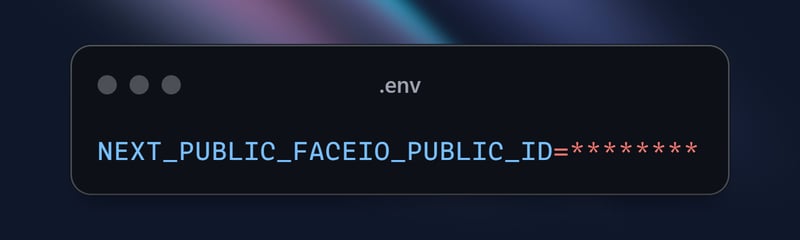
const publicKey = process.env.NEXT_PUBLIC_FACEIO_PUBLIC_ID as string;
const initialiseFaceio = async () => {
try {
faceioRef.current = new faceIO(publicKey);
console.log("FaceIO initialized successfully");
} catch (error) {
console.log(error);
handleError(error);
}
};
useEffect(() => {
initialiseFaceio();
}, []);
const handleRegister = async () => {
try {
if (!faceioRef.current) {
console.error("FaceIO instance is not initialized");
return;
}
await faceioRef.current?.enroll({
userConsent: false,
locale: "auto",
payload: { email: `${email}` },
});
toast.success("Successfully Registered user.");
} catch (error) {
handleError(error);
faceioRef.current?.restartSession();
}
};
const handleLogin = async () => {
try {
const authenticate = await faceioRef.current?.authenticate();
console.log("User authenticated successfully:", authenticate);
setUserLogin(authenticate.payload.email);
setIsLoggedIn(true);
toast.success("Successfully logged in.");
} catch (error) {
console.log(error);
handleError(error);
}
};
const handleLogout = () => {
setIsLoggedIn(false);
setUserLogin("");
toast.success("Successfully logged out.");
};
function handleError(errCode: any) {
const fioErrs = faceioRef.current?.fetchAllErrorCodes()!;
switch (errCode) {
case fioErrs.PERMISSION_REFUSED:
toast.info("Access to the Camera stream was denied by the end user");
break;
case fioErrs.NO_FACES_DETECTED:
toast.info(
"No faces were detected during the enroll or authentication process"
);
break;
case fioErrs.UNRECOGNIZED_FACE:
toast.info("Unrecognized face on this application's Facial Index");
break;
case fioErrs.MANY_FACES:
toast.info("Two or more faces were detected during the scan process");
break;
case fioErrs.FACE_DUPLICATION:
toast.info(
"User enrolled previously (facial features already recorded). Cannot enroll again!"
);
break;
case fioErrs.MINORS_NOT_ALLOWED:
toast.info("Minors are not allowed to enroll on this application!");
break;
case fioErrs.PAD_ATTACK:
toast.info(
"Presentation (Spoof) Attack (PAD) detected during the scan process"
);
break;
case fioErrs.FACE_MISMATCH:
toast.info(
"Calculated Facial Vectors of the user being enrolled do not matches"
);
break;
case fioErrs.WRONG_PIN_CODE:
toast.info("Wrong PIN code supplied by the user being authenticated");
break;
case fioErrs.PROCESSING_ERR:
toast.info("Server side error");
break;
case fioErrs.UNAUTHORIZED:
toast.info(
"Your application is not allowed to perform the requested operation (eg. Invalid ID, Blocked, Paused, etc.). Refer to the FACEIO Console for additional information"
);
break;
case fioErrs.TERMS_NOT_ACCEPTED:
toast.info(
"Terms & Conditions set out by FACEIO/host application rejected by the end user"
);
break;
case fioErrs.UI_NOT_READY:
toast.info(
"The FACEIO Widget could not be (or is being) injected onto the client DOM"
);
break;
case fioErrs.SESSION_EXPIRED:
toast.info(
"Client session expired. The first promise was already fulfilled but the host application failed to act accordingly"
);
break;
case fioErrs.TIMEOUT:
toast.info(
"Ongoing operation timed out (eg, Camera access permission, ToS accept delay, Face not yet detected, Server Reply, etc.)"
);
break;
case fioErrs.TOO_MANY_REQUESTS:
toast.info(
"Widget instantiation requests exceeded for freemium applications. Does not apply for upgraded applications"
);
break;
case fioErrs.EMPTY_ORIGIN:
toast.info("Origin or Referer HTTP request header is empty or missing");
break;
case fioErrs.FORBIDDDEN_ORIGIN:
toast.info("Domain origin is forbidden from instantiating fio.js");
break;
case fioErrs.FORBIDDDEN_COUNTRY:
toast.info(
"Country ISO-3166-1 Code is forbidden from instantiating fio.js"
);
break;
case fioErrs.SESSION_IN_PROGRESS:
toast.info(
"Another authentication or enrollment session is in progress"
);
break;
case fioErrs.NETWORK_IO:
default:
toast.info(
"Error while establishing network connection with the target FACEIO processing node"
);
break;
}
}
if (isLoggedIn) {
return <Dashboard userEmail={userLogin} onLogout={handleLogout} />;
}
return (
<div className="min-h-screen bg-gradient-to-r from-cyan-500 to-blue-500 flex items-center justify-center p-4 w-full">
<Card className="w-[400px] bg-white shadow-xl rounded-xl overflow-hidden">
<CardHeader className="bg-gray-50 border-b p-6">
<CardTitle className="text-2xl font-bold text-gray-800">
Secure Workspace
</CardTitle>
<CardDescription className="text-sm text-gray-600">
Authenticate to access your personalized work environment
</CardDescription>
</CardHeader>
<CardContent className="p-6 space-y-4">
<div className="space-y-2">
<Label
htmlFor="email"
className="text-sm font-medium text-gray-700"
>
Work Email
</Label>
<Input
id="email"
type="email"
placeholder="you@company.com"
className="w-full px-3 py-2 border rounded-md"
onChange={(e) => setEmail(e.target.value)}
/>
</div>
<div className="space-y-4">
<Button
className="w-full bg-blue-600 hover:bg-blue-700 text-white font-medium py-2 rounded-md transition duration-300 ease-in-out"
onClick={handleLogin}
>
Access Workspace
</Button>
<Button
className="w-full bg-gray-100 hover:bg-gray-200 text-gray-800 font-medium py-2 rounded-md transition duration-300 ease-in-out"
onClick={handleRegister}
disabled={!email.includes("@")}
>
Register New Account
</Button>
</div>
</CardContent>
<CardFooter className="bg-gray-50 border-t p-4">
<div className="w-full text-center text-xs text-gray-500">
Protected by FaceIO™ Technology.
<Link
href="https://faceio.net/security-policy"
className="text-blue-600 hover:underline ml-1"
>
Learn about our security measures
</Link>
</div>
</CardFooter>
</Card>
{userLogin && !isLoggedIn && (
<div className="fixed bottom-4 right-4 bg-green-100 border-l-4 border-green-500 text-green-700 p-4 rounded-md shadow-lg">
<div className="flex">
<div className="flex-shrink-0">
<CheckCircleIcon className="h-5 w-5 text-green-500" />
</div>
<div className="ml-3">
<p className="text-sm font-medium">Workspace Access Granted</p>
<p className="text-xs mt-1">Logged in as: {userLogin}</p>
</div>
</div>
</div>
)}
</div>
);
};
export default Login;
'NEXT_PUBLIC_FACEIO_PUBLIC_ID'를 FACEIO 콘솔에서 얻은 실제 FACEIO_APP_ID로 바꿔야 합니다.
import { buttonVariants } from "@/components/ui/button";
import { cn } from "@/lib/utils";
import Link from "next/link";
import { FaUserShield, FaImage, FaCode, FaRobot } from 'react-icons/fa';

export default function Home() {
  const demos = [
    { title: "FACIO Web Authentication", href: "/faceio", icon: FaUserShield },
    { title: "Image Processing", href: "/imageprocessing", icon: FaImage },
    { title: "Code Generation", href: "/codegeneration", icon: FaCode },
    { title: "AI Assistant", href: "/aiassistant", icon: FaRobot },
  ];

  return (
    <div className="max-h-screen  bg-gradient-to-br from-purple-700 via-blue-600 to-teal-500 text-white p-8 w-full">
      <div className="max-w-6xl mx-auto">
        <h1 className="text-5xl md:text-7xl font-bold text-center mb-8 animate-fade-in-down">
          PixLab Faceio
        </h1>
        <p className="text-xl text-center mb-12 animate-fade-in-up">
          Explore cutting-edge technologies and innovative solutions
        </p>

        <div className="grid grid-cols-1 md:grid-cols-2 gap-8">
          {demos.map((demo, index) => (
            <Link
              key={demo.href}
              href={demo.href}
              className={cn(
                buttonVariants({ variant: "outline" }),
                "h-40 text-lg font-semibold flex flex-col items-center justify-center space-y-4 bg-white bg-opacity-10 backdrop-filter backdrop-blur-lg rounded-xl hover:bg-opacity-20 transition-all duration-300 animate-fade-in",
                { 'animate-delay-100': index % 2 === 1 }
              )}
            >
              <demo.icon className="text-4xl" />
              {demo.title}
            </Link>
          ))}
        </div>

        <div className="mt-16 text-center animate-fade-in-up animate-delay-300">
          <h2 className="text-3xl font-bold mb-4">Why Choose PixLab?</h2>
          <ul className="text-lg space-y-2">
            <li>✨ Cutting-edge technologies</li>
            <li>? High-performance solutions</li>
            <li>? Advanced security features</li>
            <li>? Seamless integrations</li>
          </ul>
        </div>

        <footer className="mt-16 text-center text-sm opacity-75 animate-fade-in-up animate-delay-500">
          © 2024 PixLab. All rights reserved. Empowering innovation through technology.
        </footer>
      </div>
    </div>
  );
}
그렇습니다! 이제 FACEIO의 얼굴 인증이 Next.js 애플리케이션에 통합되었습니다. 사용자가 "얼굴로 인증" 버튼을 클릭하면 FACEIO 위젯이 나타나 인증 과정을 안내합니다.
FACEIO 위젯 캡처 - 등록
FACEIO 위젯의 기능을 보여주기 위해 등록 과정을 GIF로 캡처해 보겠습니다.
이 GIF는 Next.js 애플리케이션 내 FACEIO 얼굴 등록 프로세스의 사용자 경험을 보여줍니다. 사용자는 손쉽게 얼굴을 등록할 수 있으며, 이는 향후 로그인 시 원활한 인증에 사용됩니다.
FACEIO 위젯 작동 모습 캡처
FACEIO 위젯의 기능을 보여주기 위해 인증 프로세스를 GIF로 캡처해 보겠습니다.
이 GIF는 Next.js 애플리케이션 내 FACEIO 얼굴 인증 프로세스의 사용자 경험을 보여줍니다.
FACEIO 애플리케이션에 대한 주요 보안 모범 사례
중복 등록 제거: 동일한 사용자가 여러 번 등록하는 것을 방지하여 잠재적인 충돌이나 오용을 방지하는 설정을 활성화합니다.
스푸핑 방지 조치 강화: 얼굴 스푸핑 시도를 탐지하고 차단하는 기능을 활성화하여 시스템이 실제 실제 사용자와만 상호 작용하도록 보장합니다.
PIN 고유성 보장: 무단 액세스를 방지하려면 애플리케이션 내에서 각 사용자의 PIN이 고유한지 확인하세요.
지역 제한 구현: 보안 제어를 강화하기 위해 FACEIO 위젯의 인스턴스화를 승인된 도메인 이름 및 국가로 제한합니다.
Next.js 앱에서 FACEIO를 사용할 때의 이점
FACEIO를 Next.js 애플리케이션에 통합하면 다음과 같은 여러 이점을 얻을 수 있습니다.
향상된 사용자 환경: FACEIO 위젯은 원활하고 직관적인 인증 흐름을 제공하므로 사용자가 애플리케이션에 쉽게 로그인할 수 있습니다.
교차 플랫폼 호환성: FACEIO는 다양한 기기와 브라우저에서 작동하여 일관된 사용자 경험을 보장합니다.
간편한 통합: Faceio-npm 패키지는 통합 프로세스를 단순화하여 Next.js 애플리케이션에 얼굴 인증을 빠르게 추가할 수 있습니다.
FACEIO 커뮤니티 포럼: FACEIO 커뮤니티에서 문제에 대한 도움을 받을 수 있습니다.
결론
이 블로그 게시물에서는 FACEIO의 얼굴 인증 서비스를 Next.js 애플리케이션에 통합하는 방법을 배웠습니다. 여기에 설명된 단계를 따르면 이제 사용자에게 안전하고 사용자 친화적인 인증 환경을 제공하여 웹 애플리케이션의 전반적인 품질을 향상시킬 수 있습니다.
추가 질문이 있거나 추가 지원이 필요한 경우 언제든지 FACEIO 지원팀에 문의하거나 포괄적인 FACEIO 설명서를 살펴보세요.
즐거운 코딩하세요!
이 구현의 전체 소스 코드를 보려면 GitHub 저장소를 방문하여 프로젝트를 자세히 살펴보세요.
위 내용은 FACEIO를 사용하여 Next.js 앱에서 원활한 얼굴 인증의 상세 내용입니다. 자세한 내용은 PHP 중국어 웹사이트의 기타 관련 기사를 참조하세요!


![[웹 프런트엔드] Node.js 빠른 시작](https://img.php.cn/upload/course/000/000/067/662b5d34ba7c0227.png)


