Lemon Squeezy를 통한 간편한 결제 | Next.js 통합이 간편해졌습니다.
소개
많은 기업가에게 결제 과정은 인내심의 궁극적인 시험처럼 느껴집니다. 마침내 모든 것을 풀었다고 생각하는 순간, 또 다른 복잡한 문제가 나타나며 순조로운 항해는 아직 먼 꿈이라는 사실을 상기시켜 줍니다.

당신도 같은 생각인가요? 레몬 스퀴지는 당신의 아스피린입니다!
이 마법의 결제 묘약은 모든 것을 단순화하므로 결제 드라마를 버리고 재미있는 일에 집중할 수 있습니다. 더 이상 코딩 왜곡이 필요하지 않습니다. 팀에 결제 유니콘을 두는 것과 같습니다.
왜 레몬스퀴지인가?
세금 준수 분야의 박사 학위가 필요하지 않거나 지불 문제로 인한 끝없는 아스피린 공급 없이 SaaS 비즈니스를 운영한다고 상상해 보세요. LemonSqueezy는 결제 및 구독부터 글로벌 세금 준수 및 사기 방지에 이르기까지 모든 과정을 간소화합니다.
또한 다중 통화 지원과 모든 종류의 디지털 제품을 위한 매장이 준비되어 있습니다. 이는 지루한 일을 모두 처리하는 기술에 정통한 비즈니스 파트너를 갖는 것과 같기 때문에 귀하는 자신이 가장 잘하는 일인 창작에 집중할 수 있습니다! 디지털 제작자, 기업가 및 코딩 솔루션보다 버튼 클릭을 선호하는 모든 사람에게 적합합니다.
프로젝트 설정
자세히 살펴보기 전에 내 GitHub 저장소에서 전체 코드를 찾아보고 내 Instagram에서 데모를 볼 수 있다는 점을 말씀드리고 싶습니다. 이제 GitHub의 이 프로젝트에는 두 가지 결제 옵션이 있습니다. 첫 번째는 전통적인 일회성 결제입니다. 두 번째, 화려한 구독 모델입니다.
하지만 이번 튜토리얼에서는 일회성 결제로 올인하겠습니다. 아, 그리고 제 예에서는 월간 집 청소 서비스를 사례 연구로 사용하고 있습니다. 다소 터무니없게 들릴 수도 있지만, 이 모든 것이 우리 코딩 연습의 일부입니다! ?
1. 레몬스퀴지 설정
시작하려면 Lemon Squeezy에 매장과 일부 제품 및 변형 제품을 만들어야 합니다.
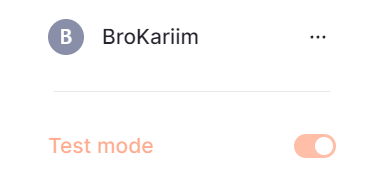
테스트 모드가 켜져 있는지 확인하세요. 스토어를 게시하면 꺼집니다. 왼쪽 하단에서 확인하세요.
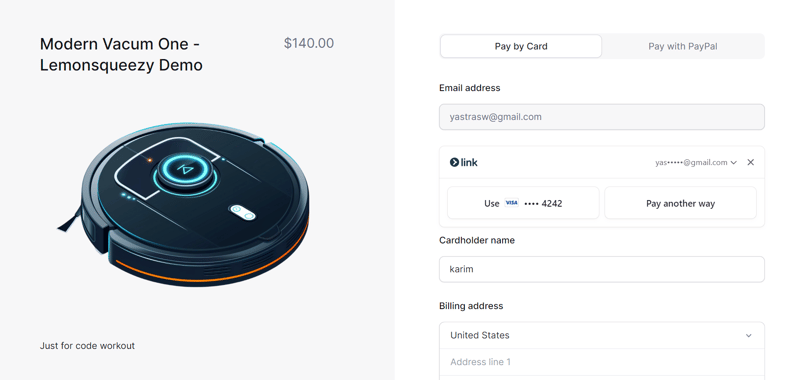
제 제품은 이렇게 생겼어요
다음으로 https://app.lemonsqueezy.com/settings/api에서 API 키를 생성하여 매장에 연결해 보겠습니다.
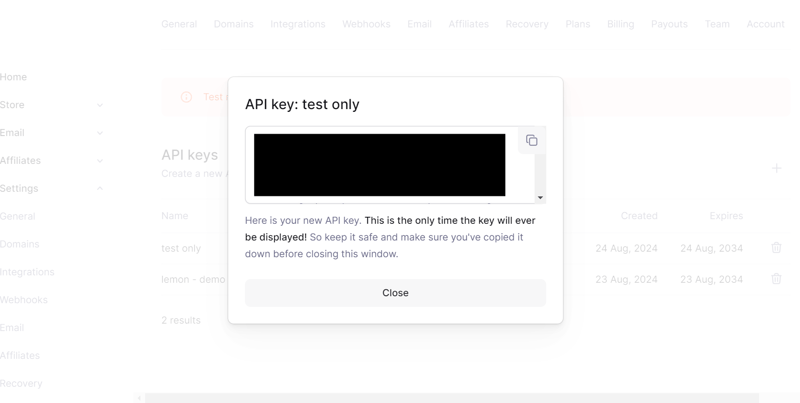
다음을 Next.js 프로젝트에 환경 변수로 추가하세요.
LEMONSQUEEZY_API_KEY="[YOUR API KEY]"
2. 경로 핸들러 설정
다음으로 결제 프로세스를 처리하기 위한 API 경로를 만듭니다. 이 부분에서 우리가 원하는 최종 결과는 나중에 프런트엔드 섹션에 전달할 checkoutUrl을 얻는 것입니다.
export const dynamic = "force-dynamic";

export async function POST(req: NextRequest) {
  try {

    const reqData = await req.json();

    if (!reqData.productId) {
      console.error("Product ID is missing");
      return NextResponse.json({ message: "Product ID is required" }, { status: 400 });
    }


    const response = await lemonSqueezyApiInstance.post("/checkouts", {
      data: {
        type: "checkouts",
        attributes: {
          checkout_data: {
            custom: {
              user_id: "123",
            },
          },
        },
        relationships: {
          store: {
            data: {
              type: "stores",
              id: process.env.LEMON_SQUEEZY_STORE_ID?.toString(),
            },
          },
          variant: {
            data: {
              type: "variants",
              id: reqData.productId.toString(),
            },
          },
        },
      },
    });

    const checkoutUrl = response.data.data.attributes.url;
    console.log(response.data);
    return NextResponse.json({ checkoutUrl });
  } catch (error) {
    console.error("Error in POST /api/lemonsqueezy:", error);
    return NextResponse.json({ message: "An error occured" }, { status: 500 });
  }
}
이 코드에 대한 간단한 설명은 다음과 같습니다.
- 먼저 페이지가 항상 동적으로 렌더링되도록 보장합니다. 이는 내보내기 const 동적 = "force-dynamic";을 사용하여 실시간 데이터에 중요합니다.
- 이 API 경로에 대한 POST 요청을 처리하는 비동기 함수를 정의합니다. 이 함수는 먼저 제품 ID가 제공되었는지 확인합니다. 그렇지 않은 경우 오류 메시지를 반환합니다.
- 다음으로 Lemonsqueezy에 대한 Api 호출을 수행하여 매장 ID 및 제품 변형과 같은 세부정보를 포함하여 새로운 결제 세션을 생성합니다.
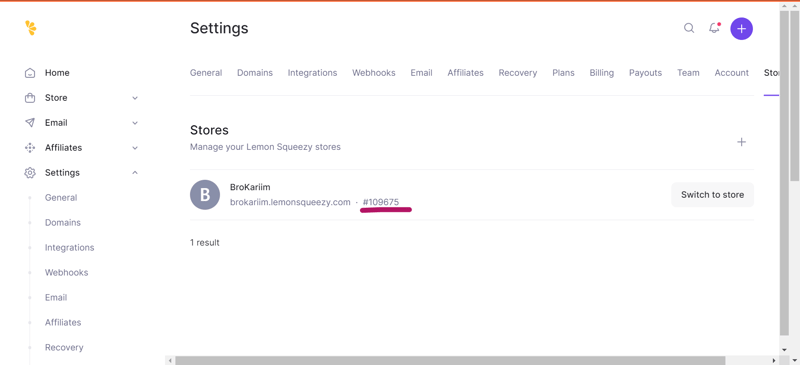
- 상점 ID를 얻으려면 해당 설정으로 이동하세요.
- Api 호출 후 응답에서 결제 URL을 추출합니다.
const checkoutUrl = response.data.data.attributes.url;
- 마지막으로 다음 URL이 응답으로 반환됩니다.
NextResponse.json({ checkoutUrl })을 반환합니다.
API가 올바르게 작동하는지 확인하려면 테스트해야 합니다. 저는 이를 위해 Postman이라는 도구를 사용합니다. 시작하기 전에 제품의 변형 ID가 필요합니다. LemonSqueezy 대시보드에서 찾을 수 있습니다.

모든 것이 올바르게 작동하면 checkoutUrl이 포함된 응답을 받아야 합니다

3. CreatIng the UI & Call the item data
Now that we've laid the groundwork, our next step is time to make the frontend look good, I am a huge fan of TailwindCSS so i make the pricing card with them
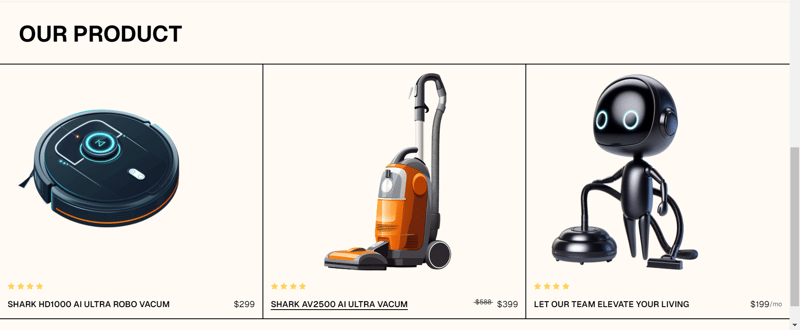
the code is availale here
Next lets set up an async function that calls the API route we just created. The function will send a POST request with the productId and, in return, get the checkout URL. Once you have the URL, open it in a new tab to send the user to the payment page.
 const buyProcut1 = async () => {
    try {
      const response = await axios.post("../api/lemonsqueezy", {
        productId: "495244",
      });

      console.log(response.data);
      window.open(response.data.checkoutUrl, "_blank");
    } catch (error) {
      console.error(error);
      alert("Failed to buy product #1");
    }
  };
That code is about
- Defines an asynchronous function called buyProduct1
- Next send a request to your server with a specific productId, If success opens a new browser tab with the checkout URL
- If anything goes wrong during the process, it catches the problem, logs it, and shows an alert to the user saying the purchase failed.
4. Setup Webhook
Last but not least, we're setting up webhooks to keep track of orders. Head back to your LemonSqueezy dashboard and set up a webhook.
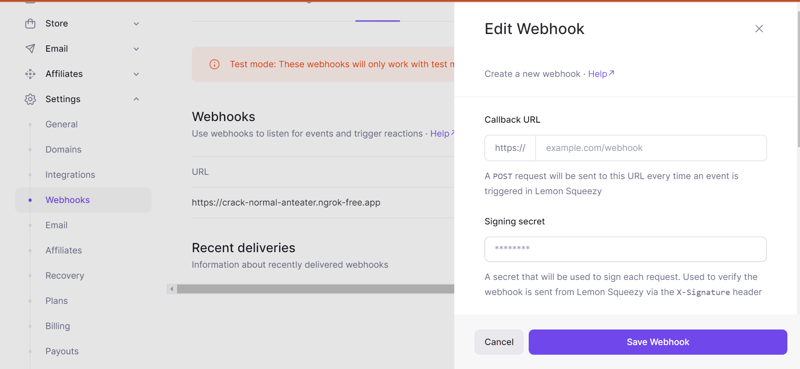
For the URL, you’ll need something publicly accessible, which is tricky during local development. This is where ngrok comes in handy.
ngrok will give you a temporary public URL that forwards to your local machine, You can check this link to setup ngrok in your device :
https://dashboard.ngrok.com/get-started/setup/
Just like before, the code to handle the webhook is already done for you. All you need to do is set it up in your route handler and enjoy the sweet
Let's stay in touch on Instagram, Twitter, and GitHub—where the real magic happens.
Thanks for sticking around! ?

위 내용은 Lemon Squeezy를 통한 간편한 결제 | Next.js 통합이 간편해졌습니다.의 상세 내용입니다. 자세한 내용은 PHP 중국어 웹사이트의 기타 관련 기사를 참조하세요!

핫 AI 도구

Undresser.AI Undress
사실적인 누드 사진을 만들기 위한 AI 기반 앱

AI Clothes Remover
사진에서 옷을 제거하는 온라인 AI 도구입니다.

Undress AI Tool
무료로 이미지를 벗다

Clothoff.io
AI 옷 제거제

Video Face Swap
완전히 무료인 AI 얼굴 교환 도구를 사용하여 모든 비디오의 얼굴을 쉽게 바꾸세요!

인기 기사

뜨거운 도구

메모장++7.3.1
사용하기 쉬운 무료 코드 편집기

SublimeText3 중국어 버전
중국어 버전, 사용하기 매우 쉽습니다.

스튜디오 13.0.1 보내기
강력한 PHP 통합 개발 환경

드림위버 CS6
시각적 웹 개발 도구

SublimeText3 Mac 버전
신 수준의 코드 편집 소프트웨어(SublimeText3)
 Python vs. JavaScript : 학습 곡선 및 사용 편의성
Apr 16, 2025 am 12:12 AM
Python은 부드러운 학습 곡선과 간결한 구문으로 초보자에게 더 적합합니다. JavaScript는 가파른 학습 곡선과 유연한 구문으로 프론트 엔드 개발에 적합합니다. 1. Python Syntax는 직관적이며 데이터 과학 및 백엔드 개발에 적합합니다. 2. JavaScript는 유연하며 프론트 엔드 및 서버 측 프로그래밍에서 널리 사용됩니다.
 JavaScript 및 웹 : 핵심 기능 및 사용 사례
Apr 18, 2025 am 12:19 AM
웹 개발에서 JavaScript의 주요 용도에는 클라이언트 상호 작용, 양식 검증 및 비동기 통신이 포함됩니다. 1) DOM 운영을 통한 동적 컨텐츠 업데이트 및 사용자 상호 작용; 2) 사용자가 사용자 경험을 향상시키기 위해 데이터를 제출하기 전에 클라이언트 확인이 수행됩니다. 3) 서버와의 진실한 통신은 Ajax 기술을 통해 달성됩니다.
 자바 스크립트 행동 : 실제 예제 및 프로젝트
Apr 19, 2025 am 12:13 AM
실제 세계에서 JavaScript의 응용 프로그램에는 프론트 엔드 및 백엔드 개발이 포함됩니다. 1) DOM 운영 및 이벤트 처리와 관련된 TODO 목록 응용 프로그램을 구축하여 프론트 엔드 애플리케이션을 표시합니다. 2) Node.js를 통해 RESTFULAPI를 구축하고 Express를 통해 백엔드 응용 프로그램을 시연하십시오.
 JavaScript 엔진 이해 : 구현 세부 사항
Apr 17, 2025 am 12:05 AM
보다 효율적인 코드를 작성하고 성능 병목 현상 및 최적화 전략을 이해하는 데 도움이되기 때문에 JavaScript 엔진이 내부적으로 작동하는 방식을 이해하는 것은 개발자에게 중요합니다. 1) 엔진의 워크 플로에는 구문 분석, 컴파일 및 실행; 2) 실행 프로세스 중에 엔진은 인라인 캐시 및 숨겨진 클래스와 같은 동적 최적화를 수행합니다. 3) 모범 사례에는 글로벌 변수를 피하고 루프 최적화, Const 및 Lets 사용 및 과도한 폐쇄 사용을 피하는 것이 포함됩니다.
 Python vs. JavaScript : 커뮤니티, 라이브러리 및 리소스
Apr 15, 2025 am 12:16 AM
Python과 JavaScript는 커뮤니티, 라이브러리 및 리소스 측면에서 고유 한 장점과 단점이 있습니다. 1) Python 커뮤니티는 친절하고 초보자에게 적합하지만 프론트 엔드 개발 리소스는 JavaScript만큼 풍부하지 않습니다. 2) Python은 데이터 과학 및 기계 학습 라이브러리에서 강력하며 JavaScript는 프론트 엔드 개발 라이브러리 및 프레임 워크에서 더 좋습니다. 3) 둘 다 풍부한 학습 리소스를 가지고 있지만 Python은 공식 문서로 시작하는 데 적합하지만 JavaScript는 MDNWebDocs에서 더 좋습니다. 선택은 프로젝트 요구와 개인적인 이익을 기반으로해야합니다.
 Python vs. JavaScript : 개발 환경 및 도구
Apr 26, 2025 am 12:09 AM
개발 환경에서 Python과 JavaScript의 선택이 모두 중요합니다. 1) Python의 개발 환경에는 Pycharm, Jupyternotebook 및 Anaconda가 포함되어 있으며 데이터 과학 및 빠른 프로토 타이핑에 적합합니다. 2) JavaScript의 개발 환경에는 Node.js, VScode 및 Webpack이 포함되어 있으며 프론트 엔드 및 백엔드 개발에 적합합니다. 프로젝트 요구에 따라 올바른 도구를 선택하면 개발 효율성과 프로젝트 성공률이 향상 될 수 있습니다.
 JavaScript 통역사 및 컴파일러에서 C/C의 역할
Apr 20, 2025 am 12:01 AM
C와 C는 주로 통역사와 JIT 컴파일러를 구현하는 데 사용되는 JavaScript 엔진에서 중요한 역할을합니다. 1) C는 JavaScript 소스 코드를 구문 분석하고 추상 구문 트리를 생성하는 데 사용됩니다. 2) C는 바이트 코드 생성 및 실행을 담당합니다. 3) C는 JIT 컴파일러를 구현하고 런타임에 핫스팟 코드를 최적화하고 컴파일하며 JavaScript의 실행 효율을 크게 향상시킵니다.
 Python vs. JavaScript : 사용 사례 및 응용 프로그램 비교
Apr 21, 2025 am 12:01 AM
Python은 데이터 과학 및 자동화에 더 적합한 반면 JavaScript는 프론트 엔드 및 풀 스택 개발에 더 적합합니다. 1. Python은 데이터 처리 및 모델링을 위해 Numpy 및 Pandas와 같은 라이브러리를 사용하여 데이터 과학 및 기계 학습에서 잘 수행됩니다. 2. 파이썬은 간결하고 자동화 및 스크립팅이 효율적입니다. 3. JavaScript는 프론트 엔드 개발에 없어서는 안될 것이며 동적 웹 페이지 및 단일 페이지 응용 프로그램을 구축하는 데 사용됩니다. 4. JavaScript는 Node.js를 통해 백엔드 개발에 역할을하며 전체 스택 개발을 지원합니다.


