HTML 목록 스타일
- 목록은 형식화된 방식으로 데이터를 배치하기 위한 일반적인 요구 사항입니다. 예를 들어 호텔의 피자 메뉴 콘텐츠를 표시해야 하는 웹페이지를 만든 경우 HTML 목록 스타일이 될 가능성이 높습니다. 명확하고 분리된 방식으로 나타납니다.
- 다른 경우로는 학급의 최고 성과자 사이에 나타난 일련의 학생들이 있는 경우가 있습니다. 이러한 맥락에서 요구 사항은 순위가 오름차순으로 1위 학생을 맨 위에 배치하고 다른 학생을 그 아래에 배치하는 것입니다. 이를 위해 이를 정렬된 목록으로 형식화해야 합니다.
- 또 다른 유형은 Javascript와 Html을 함께 사용하여 만들 수 있는 사용자 정의 목록으로, 개체의 역학도 설정할 수 있으며 목록에 사용자 정의된 전망을 적용할 수 있습니다.
HTML의 다양한 목록 스타일
다음은 다양한 HTML 목록 스타일에 대한 설명입니다.
1) 순서가 지정되지 않은 목록
여기서 콘텐츠 표시 순서는 신경 쓸 필요가 없습니다. HTML 페이지에서 사용자 앞에 형식이 잘 맞고 명확한 방식으로 배치되도록 항목을 잘 배치하면 됩니다.
HTML 언어에는 이러한 목록을 처리하는 태그가 두 개 있으며, 이 태그만 사용하여 탐색 바와 세로 사이드바를 만들 수 있습니다.
- : 순서가 지정되지 않은 목록을 나타냅니다. 순위를 매길 필요가 없거나 무작위 순서로 배치할 필요가 없을 때마다 이 태그가 통합됩니다.
- : 이는 목록 항목, 즉 순서가 지정되지 않은 목록, 즉
- 아래에 배치될 항목 세트를 나타냅니다. 태그는
- 꼬리표. 이러한 마크업으로 표시된 항목은 시작 부분에 자동으로 글머리 기호나 원이 표시됩니다. 이것이 기본 HTML 기능입니다.
이제
- 에 대한 코드를 살펴보겠습니다. 그리고
- 순서가 지정되지 않은 목록을 기반으로 하며 HTML 페이지가 어떻게 보이는지; 해당 파일을 실행한 후에는 메모장과 같은 편집기에서 작성하고 ".html" 확장자로 파일을 저장할 수 있습니다. 따라서 어떤 브라우저에서든 열 수 있습니다.
예제 조각 –
코드:
<html>
<head> HTML Lists </head>
<body>
<h2> list of pizzas <h2>
<ul>
<li style="color:red"> farmhouse </li>
<li style="color:green"> peppy paneer </li>
<li style="color:blue"> onion pizza </li>
</ul>
</body>
</html>
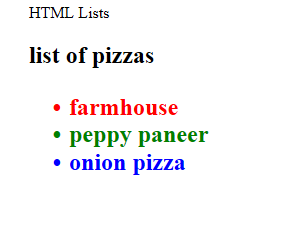
로그인 후 복사출력:

2) 순서가 지정된 목록
이제 수업 순위에 따라 학생들을 순서대로 배치하는 경우를 살펴보겠습니다. 이는
- HTML의 태그이며 여러 개의
- 태그에는 목록 항목이 포함됩니다.
- : 이 태그는 순서가 지정된 목록을 설정하는 데 사용되며 모든 요소는 그 안에 있는
- 태그.
- 태그에 대해서는 위에서 설명했습니다.
이 경우에도 예시를 보시고 위와 같이 저장을 해주시면 됩니다.
코드:
<html>
<head> HTML Lists </head>
<body>
<h2> list of students <h2>
<ol>
<li style="color:red"> John </li>
<li style="color:green"> Harris </li>
<li style="color:blue"> Plunket </li>
</ol>
</body>
</html>
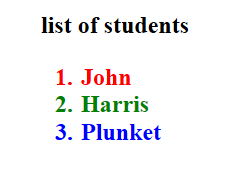
로그인 후 복사출력/HTML 페이지

이제 HTML 페이지에 CSS 속성을 추가하여 목록을 사용자 정의하거나 형식을 잘 지정할 수 있는 몇 가지 변형을 살펴보겠습니다. 이렇게 하면 페이지 모양이 더 좋아집니다.
- 순서가 지정되지 않은 목록에는 다음과 같은 속성을 부여할 수 있습니다.
- 목록 스타일 유형 – 디스크, 원형, 정사각형 또는 없음이 될 수 있습니다. 따라서 여기서 없음을 선택하면 순서가 지정되지 않은 목록 항목에 표시된 원이 표시되지 않습니다.
예 –
코드:
<html>
<head> HTML Lists </head>
<body>
<h2> list of students <h2>
<ul style="list-style-type:none">
<li style="color:red"> John </li>
<li style="color:green"> Harris </li>
<li style="color:blue"> Plunket </li>
</ul>
</body>
</html>
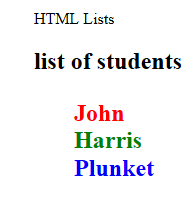
로그인 후 복사출력/HTML 페이지 –

그래서 원형 글머리 기호는 더 이상 존재하지 않습니다. 위에 제공된 옵션을 사용하여 맞춤설정할 수 있습니다.
마찬가지로 주문 목록 값을 숫자, 로마자, 알파벳으로 표시할지 여부를 선택하는 조항이 있습니다.
- 에서 속성 유형을 설정할 수 있습니다. 동일한 태그를 사용하며 유형은 다음 값을 사용할 수 있습니다.
유형: “1”,” A”,” a”, “I”,” i.”
동일한 예제 코드를 살펴보겠습니다 –
코드:
<html>
<head> HTML Lists </head>
<body>
<h2> list of students <h2>
<ol type = "i">
<li style="color:red"> John </li>
<li style="color:green"> Harris </li>
<li style="color:blue"> Plunket </li>
</ol>
</body>
</html>
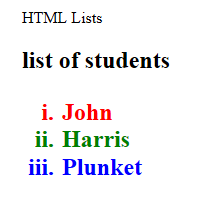
로그인 후 복사출력/HTML 페이지 –

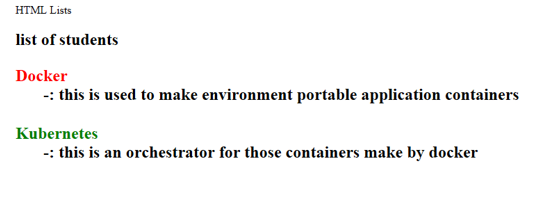
마찬가지로 설명을 추가해야 하는 항목을 정의할 수 있는 설명 목록도 있습니다. 일부 키워드에 대한 몇 가지 정의를 배치해야 하는 페이지를 만들고 있다고 가정하면 설명 목록을 선택할 수 있습니다.
태그
동일한 작업을 처리하기 위해 다음과 같은 태그가 있습니다.
– 이 태그는 설명 용어를 제공합니다
– this tag carries the description of each term
Example –
Code:
<html>
<head> HTML Lists </head>
<body>
<h2> list of students <h2>
<dl>
<dt style="color:red"> Docker </dt>
<dd> -: this is used to make environment portable application containers </dd>
<br>
<dt style="color:green"> Kubernetes </dt>
<dd> -: this is an orchestrator for those containers make by docker </dd>
</dl>
</body>
</html>
로그인 후 복사Output/HTML page –

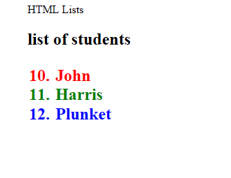
You can also define the start property in the ordered lists in
- tag, which tells from where the count starts. Let’s see an example of the same –
Code:
<html>
<head> HTML Lists </head>
<body>
<h2> list of students <h2>
<ol type = "1" start="10">
<li style="color:red"> John </li>
<li style="color:green"> Harris </li>
<li style="color:blue"> Plunket </li>
</>
</body>
</html>
로그인 후 복사Output:

Conclusion
So we saw various lists in which we can place data; this data can be rendered from the model to view using javascript frameworks; what we have shown is a static page, and it can be made dynamic with JS. These lists can be formatted with bootstrap to make them look like navbars or sidebars too.
위 내용은 HTML 목록 스타일의 상세 내용입니다. 자세한 내용은 PHP 중국어 웹사이트의 기타 관련 기사를 참조하세요!
- 태그에는 목록 항목이 포함됩니다.

핫 AI 도구

Undresser.AI Undress
사실적인 누드 사진을 만들기 위한 AI 기반 앱

AI Clothes Remover
사진에서 옷을 제거하는 온라인 AI 도구입니다.

Undress AI Tool
무료로 이미지를 벗다

Clothoff.io
AI 옷 제거제

Video Face Swap
완전히 무료인 AI 얼굴 교환 도구를 사용하여 모든 비디오의 얼굴을 쉽게 바꾸세요!

인기 기사

뜨거운 도구

메모장++7.3.1
사용하기 쉬운 무료 코드 편집기

SublimeText3 중국어 버전
중국어 버전, 사용하기 매우 쉽습니다.

스튜디오 13.0.1 보내기
강력한 PHP 통합 개발 환경

드림위버 CS6
시각적 웹 개발 도구

SublimeText3 Mac 버전
신 수준의 코드 편집 소프트웨어(SublimeText3)
 HTML의 테이블 테두리
Sep 04, 2024 pm 04:49 PM
HTML의 테이블 테두리 안내. 여기에서는 HTML의 테이블 테두리 예제를 사용하여 테이블 테두리를 정의하는 여러 가지 방법을 논의합니다.
 HTML의 중첩 테이블
Sep 04, 2024 pm 04:49 PM
HTML의 Nested Table에 대한 안내입니다. 여기에서는 각 예와 함께 테이블 내에 테이블을 만드는 방법을 설명합니다.
 HTML 여백-왼쪽
Sep 04, 2024 pm 04:48 PM
HTML 여백-왼쪽 안내. 여기에서는 HTML margin-left에 대한 간략한 개요와 코드 구현과 함께 예제를 논의합니다.
 HTML 테이블 레이아웃
Sep 04, 2024 pm 04:54 PM
HTML 테이블 레이아웃 안내. 여기에서는 HTML 테이블 레이아웃의 값에 대해 예제 및 출력 n 세부 사항과 함께 논의합니다.
 HTML 입력 자리 표시자
Sep 04, 2024 pm 04:54 PM
HTML 입력 자리 표시자 안내. 여기서는 코드 및 출력과 함께 HTML 입력 자리 표시자의 예를 논의합니다.
 PHP에서 HTML/XML을 어떻게 구문 분석하고 처리합니까?
Feb 07, 2025 am 11:57 AM
이 튜토리얼은 PHP를 사용하여 XML 문서를 효율적으로 처리하는 방법을 보여줍니다. XML (Extensible Markup Language)은 인간의 가독성과 기계 구문 분석을 위해 설계된 다목적 텍스트 기반 마크 업 언어입니다. 일반적으로 데이터 저장 AN에 사용됩니다
 HTML 정렬 목록
Sep 04, 2024 pm 04:43 PM
HTML 순서 목록에 대한 안내입니다. 여기서는 HTML Ordered 목록 및 유형에 대한 소개와 각각의 예에 대해서도 설명합니다.
 HTML 온클릭 버튼
Sep 04, 2024 pm 04:49 PM
HTML onclick 버튼에 대한 안내입니다. 여기에서는 각각의 소개, 작업, 예제 및 다양한 이벤트의 onclick 이벤트에 대해 설명합니다.


