

HTML 버튼 태그

HTML 버튼 태그를 사용하면 HTML 문서를 사용하여 웹 페이지에 활성 버튼 컨트롤을 만들 수 있습니다. 이 <버튼> 요소는 body 태그 내에 선언됩니다. 버튼 요소가 왜 필요한가요? 일반적으로 사용자가 웹페이지에 액세스할 때 가장 흔히 하는 일은 웹사이트의 어딘가를 클릭하여 다음 URL 페이지로 이동하는 것입니다. 이렇게 하려면 Button 요소만으로는 이 작업을 수행할 수 없습니다. 이는 웹 양식에 기본 제출 버튼 클릭이 있는 양식 작업에 의해 생성됩니다.
버튼은
구문:
다른 HTML 태그와 마찬가지로 버튼 태그에도 여는 태그와 닫는 태그가 모두 있으며, 버튼 유형은 속성을 사용하여 정의됩니다.
<button>
// some stuff like content / image
</button>
HTML 버튼 태그의 속성
필수 속성이 없으므로 특수 속성은 사용되지 않았습니다. 대신에 type=" 속성이 있는 일반 버튼으로 사용됩니다. “이 요소도 버튼 태그의 변경 사항을 변경하는 속성과 함께 CSS를 사용하여 스타일이 지정되었습니다. 이러한 속성은 CSS 글꼴 모음, 글꼴 가중치, 텍스트 장식 및 글꼴 스타일입니다. 배경색과 같은 색상 속성과 text-overflow 및 text-indent와 같은 레이아웃 속성
| S.no | Attribute Name | Description | Example |
| 1 | autofocus | It is considered a Boolean attribute. | |
| 2 | disabled | Making a button non-clickable. | |
| 3 | Form | It Creates a form | |
| 4 | formaction | It specifies the current location for submitting the form data. | |
| 5 | formnovalidate | It appears in gray and gives non-validation features. | |
| 6 | Formmethod | It specifies the methods while referring to the next web page(get the post of HTTP methods) | |
| 7 | formtarget | It specifies the target path for the server response when a form action is done. | |
| 8 | formenctype | It has been used when a form is submitted to the webserver for the response; it activates the type of content used. | |
| 8 | name | It specifies the button name used in the form element, which is used by form inputs. | |
| 9 | type | It specifies the type of button being used. It has three default values submit, reset, and text. | < button type “……” > |
| 10 | value | It gives an initial value when a button is used along with the form data | |
| 11 | tabindex | It specifies the tab key and the order does the preference. | |
| 12 | onclick | When a button is pressed, it runs a small javascript code behind it. |
Examples to Implement in HTML Button Tag
Below are examples of implementing an HTML Button Tag:
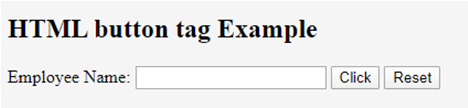
Example #1
Code:
<!DOCTYPE html>
<html lang="en">
<head>
<title> HTML button tag Example</title>
</head>
<body>
<h2>HTML button tag Example </h2>
<form action="/examples/html/action.php" method="post">
<p>
Employee Name: <input type="text" name="Employee-Name">
<button type="submit" value="Submit">Click</button>
<button type="reset" value="Reset">Reset</button>
</p>
</form>
</body>
</html>
Output:
Example #2
Code:
<!DOCTYPE html>
<html>
<head>
<h3> <center> Example using CSS </center><h3>
</head>
<body>
Normal Class
<button type="button">Add to the First class</button>
<hr />
Economic Class
<button type="button" style="color: pink;"><b> Book Economic Class </b></button>
<hr />
Bussiness class
<button type="button" style="color: orange;"><b> Book Bussiness  Class </b></button>
<hr />
Departure
<button type="button" style="font: bold 12px Open Sans;">Norway </button><br />
</body>
</html>
Output:

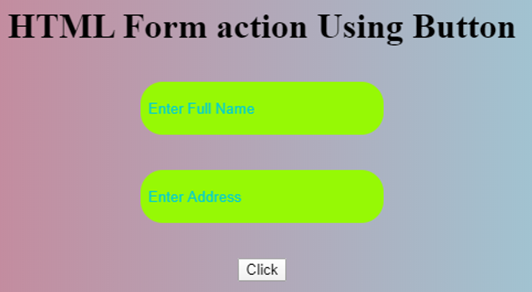
Example #3
With CSS: Here, we have used padding and margin property. Here are some ways to look at the page better. To create a button with rounded corners, use border-radius.
Code:
<html>
<style>
body {
color: #000;
height: 90vh;
background: linear-gradient(-90deg, #a1c3d1 0%, #c48b9e 100%) no-repeat;
text-align: center;
}
input {
width: 280px;
display: block;
margin: 2rem auto;
border: 3px solid #fbc7ff;
padding: 7px;
background: transparent;
border-radius: 25px;
outline: none;
}
::placeholder {
color: #00ced1;
}
.btn {
background:#96f905;
border: none;
height: 3rem;
border-radius: 20px;
width: 220px;
display: block;
color: #96f905;
outline: none;
margin: 2rem auto;
}
</style>
<body>
<h1>HTML Form action Using Button</h1>
<form action="/action_page.php" method="get">
<input type="text" name=" Full Name" placeholder="Enter Full Name" class="btn">
<input type="text" name=" Address" placeholder="Enter Address" class="btn">
<button type="press" value="Press"> Click </button>
</form>
</body>
</htmlOutput:
Example #4
The below example shows how to use the attribute autofocus with button element; in an example, when a page Loads, it focuses on the first HTML control.
Code:
<!DOCTYPE html>
<html>
<head>
<title>
Button Demo
<button>autofocus Attribute
</title>
</head>
<body style="text-align:center">
<h1 style="color: blue;">
EDUCBA Web Tutorial
</h1>
<h2> Button Tag
<button>autofocus Attribute
</h2>
<h2> Button Tag
<button>autofocus Attribute
</h2>
<button id="GFG"
autofocus>
Press
</button>
<br>
</body>
</html>
Output:

Example #5
onclick attribute demo. In the below example, I have used JavaScript to take action in the button; meanwhile, it alerts a dialog box with a text message. We use a JavaScript function to make the critical decision by activating the button with onclick().
Code:
<!DOCTYPE html>
<html>
<head>
<title>HTML  On Click Button Demo</title>
</head>
<body>
<h3> HTML  On Click Button Demo</h3>
<button onclick="alert('Hi Welcome to EDUCBA!')"> Press me... </button>
</body>
</html>Output: Before the button press

Alert Message – After the Button click

Example #6
Code:
<!DOCTYPE html>
<html>
<head>
<script type="text/javascript" src="scripts.js">
</script>
<link rel="stylesheet" href="styles.css">
<script type="text/javascript" src="scripts.js"></script>
<link rel="stylesheet" href="styles.css">
</head>
<body>
<p>The button loads to the next web page!</p>
<a href="https://www.educba.com" target="_blank">
<button>Submit!</button>
</a>
</body>
</html>
Output:

Conclusion
In summary, we have learned about the HTML Button tag. This tag initiates an action and submits content within an HTML document. Important aspects of the website create an easy button, CSS, and JavaScript to look colorful. You can also learn many options related to buttons.
위 내용은 HTML 버튼 태그의 상세 내용입니다. 자세한 내용은 PHP 중국어 웹사이트의 기타 관련 기사를 참조하세요!

핫 AI 도구

Undresser.AI Undress
사실적인 누드 사진을 만들기 위한 AI 기반 앱

AI Clothes Remover
사진에서 옷을 제거하는 온라인 AI 도구입니다.

Undress AI Tool
무료로 이미지를 벗다

Clothoff.io
AI 옷 제거제

Video Face Swap
완전히 무료인 AI 얼굴 교환 도구를 사용하여 모든 비디오의 얼굴을 쉽게 바꾸세요!

인기 기사
뜨거운 도구

메모장++7.3.1
사용하기 쉬운 무료 코드 편집기

SublimeText3 중국어 버전
중국어 버전, 사용하기 매우 쉽습니다.

스튜디오 13.0.1 보내기
강력한 PHP 통합 개발 환경

드림위버 CS6
시각적 웹 개발 도구

SublimeText3 Mac 버전
신 수준의 코드 편집 소프트웨어(SublimeText3)
뜨거운 주제
 7926
7926
 15
1652
14
1411
52
1303
25
1249
29
15
1652
14
1411
52
1303
25
1249
29

 HTML의 테이블 테두리
Sep 04, 2024 pm 04:49 PM
HTML의 테이블 테두리
Sep 04, 2024 pm 04:49 PM
HTML의 테이블 테두리 안내. 여기에서는 HTML의 테이블 테두리 예제를 사용하여 테이블 테두리를 정의하는 여러 가지 방법을 논의합니다.
 HTML의 중첩 테이블
Sep 04, 2024 pm 04:49 PM
HTML의 중첩 테이블
Sep 04, 2024 pm 04:49 PM
HTML의 Nested Table에 대한 안내입니다. 여기에서는 각 예와 함께 테이블 내에 테이블을 만드는 방법을 설명합니다.
 HTML 여백-왼쪽
Sep 04, 2024 pm 04:48 PM
HTML 여백-왼쪽
Sep 04, 2024 pm 04:48 PM
HTML 여백-왼쪽 안내. 여기에서는 HTML margin-left에 대한 간략한 개요와 코드 구현과 함께 예제를 논의합니다.
 HTML 테이블 레이아웃
Sep 04, 2024 pm 04:54 PM
HTML 테이블 레이아웃
Sep 04, 2024 pm 04:54 PM
HTML 테이블 레이아웃 안내. 여기에서는 HTML 테이블 레이아웃의 값에 대해 예제 및 출력 n 세부 사항과 함께 논의합니다.
 HTML 입력 자리 표시자
Sep 04, 2024 pm 04:54 PM
HTML 입력 자리 표시자
Sep 04, 2024 pm 04:54 PM
HTML 입력 자리 표시자 안내. 여기서는 코드 및 출력과 함께 HTML 입력 자리 표시자의 예를 논의합니다.
 HTML 정렬 목록
Sep 04, 2024 pm 04:43 PM
HTML 정렬 목록
Sep 04, 2024 pm 04:43 PM
HTML 순서 목록에 대한 안내입니다. 여기서는 HTML Ordered 목록 및 유형에 대한 소개와 각각의 예에 대해서도 설명합니다.
 HTML 온클릭 버튼
Sep 04, 2024 pm 04:49 PM
HTML 온클릭 버튼
Sep 04, 2024 pm 04:49 PM
HTML onclick 버튼에 대한 안내입니다. 여기에서는 각각의 소개, 작업, 예제 및 다양한 이벤트의 onclick 이벤트에 대해 설명합니다.
 HTML에서 텍스트 이동
Sep 04, 2024 pm 04:45 PM
HTML에서 텍스트 이동
Sep 04, 2024 pm 04:45 PM
HTML에서 텍스트 이동 안내. 여기서는 Marquee 태그가 구문과 함께 작동하는 방식과 구현할 예제에 대해 소개합니다.
