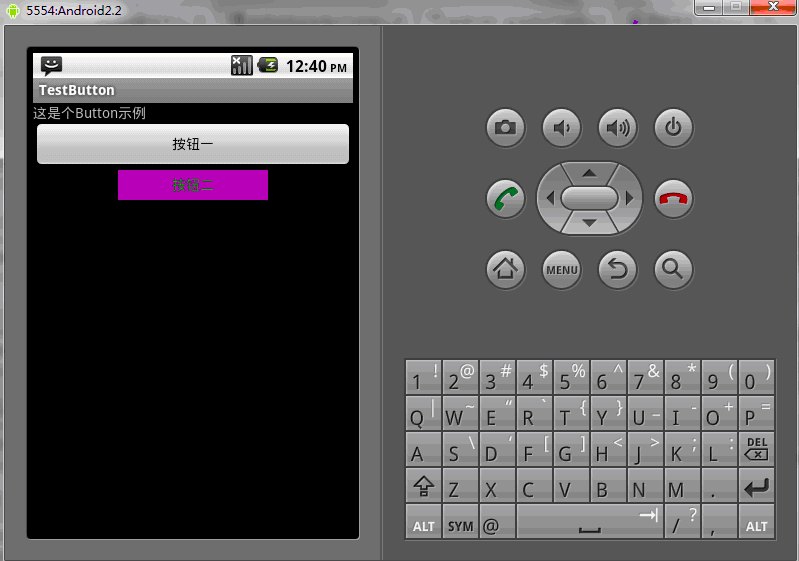
버튼인 버튼은 안드로이드에서 가장 일반적으로 사용되는 구성 요소 중 하나입니다. 버튼은 두 가지 방법으로 사용할 수 있습니다. 하나는 XML로 구성하고 다른 하나는
프로그램에서 직접 사용합니다. XML 레이아웃 파일 여기에서 다음 단위를 만나게 됩니다.
px: 화면의 픽셀
in: 인치
mm: 밀리미터
pt: 파운드, 1/72인치
dp: 밀도를 기반으로 한 추상 단위, 160dpi 화면인 경우 1dp=1px
dip: dp와 동일
sp : dp와 유사하지만 사용자의 글꼴 크기 기본 설정에 따라 크기가 조정됩니다.
텍스트 단위는 sp를 사용하고 그렇지 않으면 dip을 사용하는 것이 좋습니다
예 1: XML의 레이아웃, 향후 컨트롤을 수정하는 것이 더 편리할 것이며 또한 MVC 패턴
main.xml 레이아웃 파일
<?xml version="1.0" encoding="utf-8"?>
<LinearLayout xmlns:android="http://schemas.android.com/apk/res/android"
    android:orientation="vertical"
    android:layout_width="fill_parent"
    android:layout_height="fill_parent"
    >
<TextView
    android:layout_width="fill_parent"
    android:layout_height="wrap_content"
    android:text="这是个Button示例"
    />
<Button
        android:layout_width="fill_parent"------充满父控件
        android:layout_height="wrap_content"------充满内容
        android:id="@+id/button1"----设置button的ID
        android:text="按钮一"    ------设置按钮的文本显示信息,也可以用string
/>
<Button
        android:layout_width="150dip"---按钮二的宽度
        android:layout_height="30dip"---按钮二的高度
        android:background="#aa00aa"---设置按钮背景颜色
        android:textColor="#00aa00"---设置按钮二里的文本颜色
        android:layout_gravity="center"---设置控件居中显示,注意:android:gravity="center"表是文本在控件中居中显示
        android:id="@+id/button2"
        android:text="按钮二"
/>
</LinearLayout>TestButton.java 소스 코드
package org.loulijun.button;

import android.app.Activity;
import android.os.Bundle;
import android.view.Gravity;
import android.view.View;
import android.widget.Button;
import android.widget.Toast;

public class TestButton extends Activity {
    /** Called when the activity is first created. */
        private Button btn1,btn2;
    @Override
    public void onCreate(Bundle savedInstanceState) {
        super.onCreate(savedInstanceState);
        setContentView(R.layout.main);
        btn1=(Button)findViewById(R.id.button1);---获得父控件id
        btn2=(Button)findViewById(R.id.button2);
        //为控件设置监听,当点击了按钮一,就弹出一个提示,当点击按钮二,退出程序
        btn1.setOnClickListener(new Button.OnClickListener()
        {

                        @Override
                        public void onClick(View arg0) {
                                // TODO Auto-generated method stub
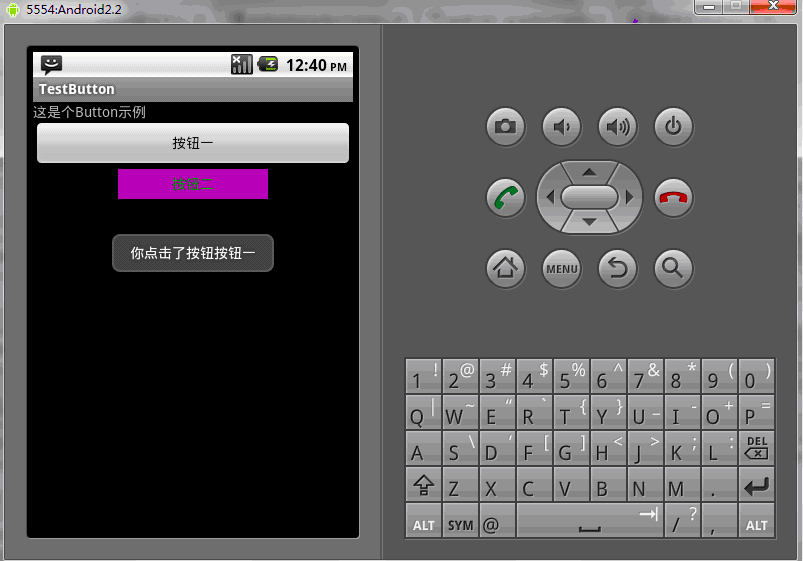
                                Toast toast=Toast.makeText(TestButton.this, "你点击了按钮"+btn1.getText().toString(), Toast.LENGTH_SHORT);
                                toast.setGravity(Gravity.TOP,0,150);
                                toast.show();
                        }

        });
        btn2.setOnClickListener(new Button.OnClickListener()
        {

                        @Override
                        public void onClick(View v) {
                                // TODO Auto-generated method stub
                                TestButton.this.finish();
                        }

        });
    }
}실행 결과:


물론 프로그램에서 직접 해당 메소드를 사용하여 Button의 해당 속성을 설정할 수도 있습니다
public class TestButton extends Activity{
private Button btn1,btn2;
public void onCreate(Bundle savedInstanceState)
{
        super.onCreate(savedInstanceState);
        setContentView(R.layout.main);
        btn1=(Button)findViewById(R.id.button1);
        btn2=(Button)findViewById(R.id.button2);
        btn1.setWidth(150);--设置按钮宽度,当然也可以用setHeight()来设置高度
        btn2.setWidth(100);
        btn1.setText("按钮一");---设置按钮文本显示信息
        btn2.setText("安妮二");
        btn1.setTextColor(Color.GREEN);---设置按钮内文本颜色
        btn2.setTextColor(Color.RED);
        btn1.setTextSize(30);---设置按钮内文本大小
        btn2.setTextSize(20);
        btn2.setBackgroundColor(Color.RED);---设置按钮背景颜色
}
}위 내용은 안드로이드 UI 컨트롤 시리즈: 버튼(button) 관련 내용은 PHP 중국어 홈페이지(www.php.cn)를 참고해주세요!