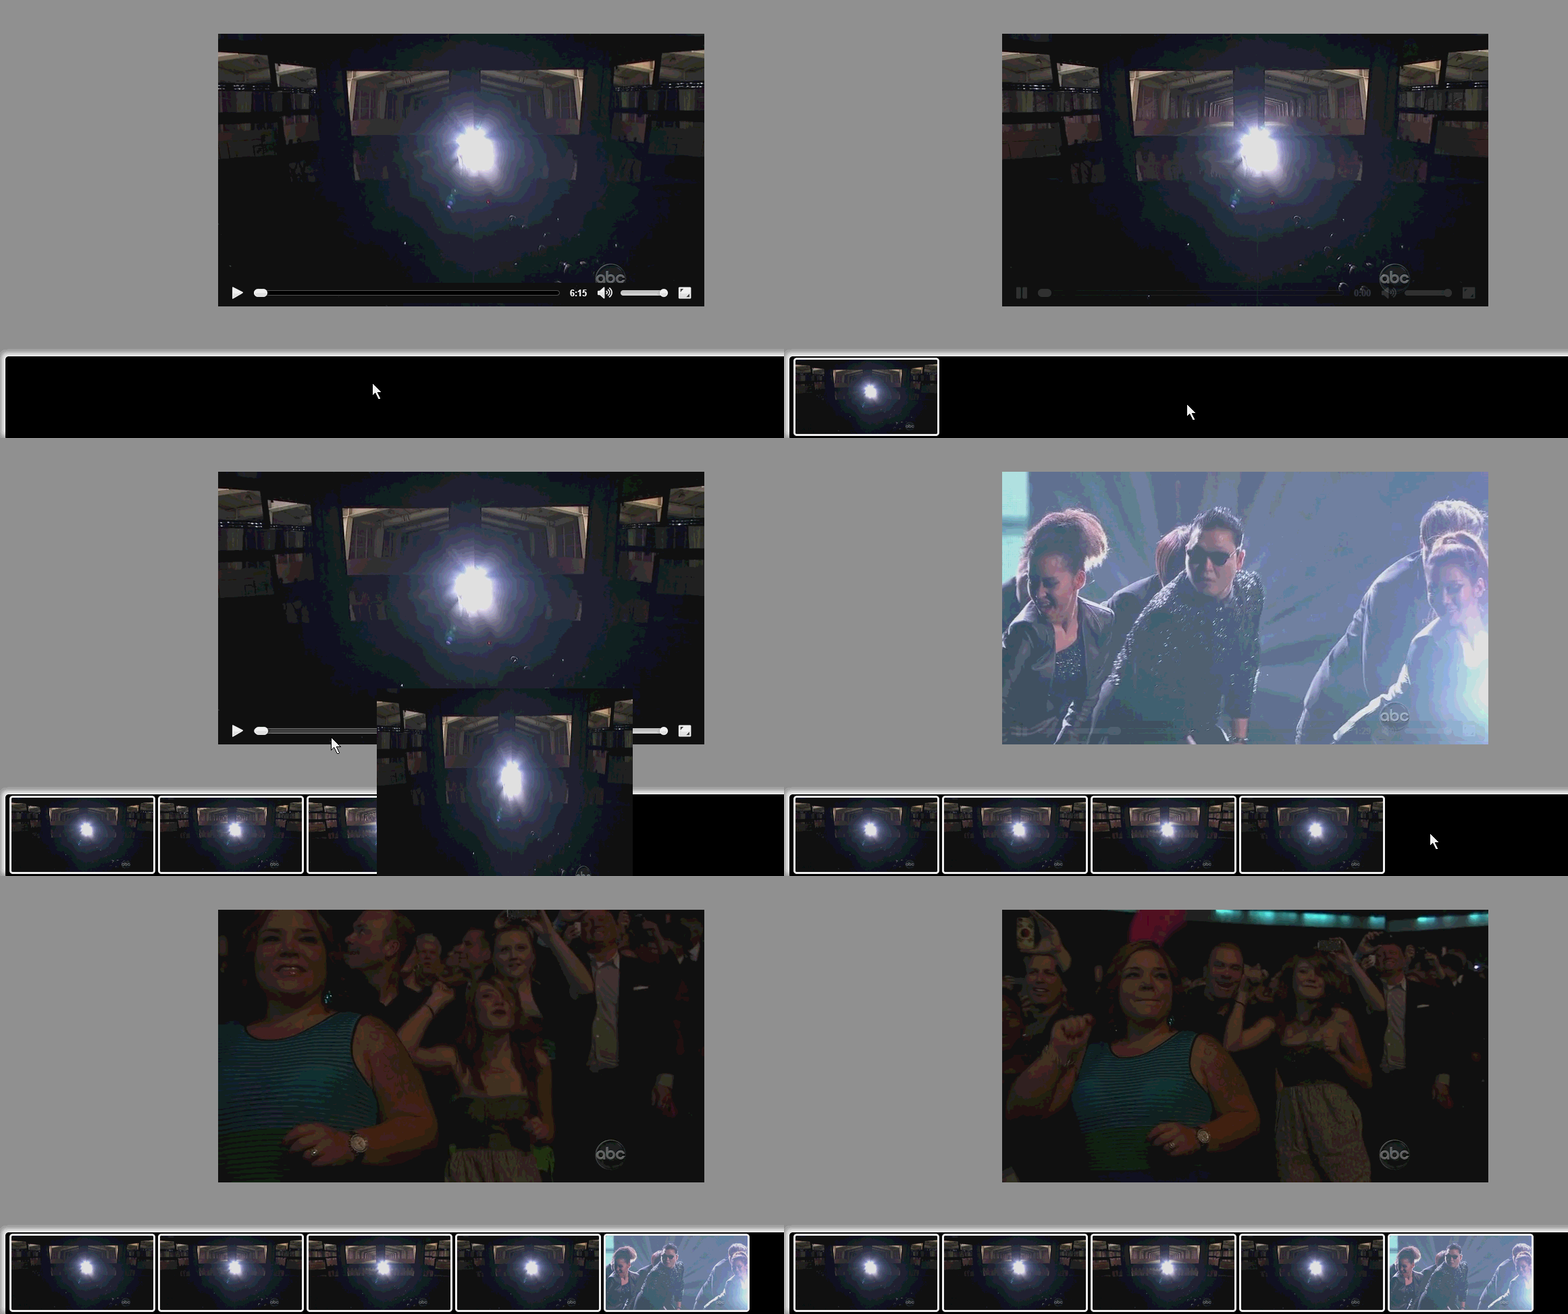
일반 동영상 사이트에서는 사용자가 업로드한 동영상의 스크린샷을 찍어서 동영상의 표시 이미지로 사용할 수 있습니다. 이러한 기능은 사용자에게 추가 디스플레이 사진을 업로드하도록 요청하는 대신 사용자에게 좋은 경험을 제공하기 위해 프로젝트에 도입될 수도 있습니다.
렌더링: 
아직도 매우 좋아 보입니다. 핵심 코드는 매우 간단합니다.
_canvas = document.createElement("canvas");
_ctx = _canvas.getContext("2d");
_ctx.fillStyle = '#ffffff';
_ctx.fillRect(0, 0, _videoWidth, _videoWidth);
_ctx.drawImage(_video, 0, 0, _videoWidth, _videoHeight, 0, 0, _videoWidth, _videoHeight);
var dataUrl = _canvas.toDataURL("image/png");
핵심 코드는 바로 이 줄입니다. ctx.drawImage를 사용할 때 첫 번째 매개변수는 비디오 개체일 수 있으며 DataUrl은 캔버스를 통해 얻어지고 Img 태그에 할당됩니다. . 이것이 핵심 포인트입니다.
아래 전체 예를 살펴보세요.
HTML:
<!DOCTYPE html>
<html>
<head>
    <title></title>
    <meta charset="utf-8">

    <style type="text/css">


        html
        {
            overflow: hidden;
        }

        body
        {
            background-color: #999;
        }

        video
        {
            display: block;
            margin: 60px auto 0;
        }

        #shotBar
        {
            position: absolute;
            bottom: 5px;
            height: 120px;
            width: 98%;
            background-color: #000;
            box-shadow: -5px -5px 10px #fff;
            border-radius: 5px;
            padding: 2px;
            overflow: auto;
        }

        #shotBar img
        {
            border: 3px solid #fff;
            border-radius: 5px;
            height: 110px;
            width: 210px;
            margin-left: 4px;
        }


    </style>

    <script type="text/javascript" src="../../../jquery-1.8.3.js"></script>

    <script type="text/javascript" src="videoshot.js"></script>

    <script type="text/javascript">

        $(function ()
        {
            ZhangHongyang.click2shot.init();
        });

    </script>


</head>
<body>


<video src="media/style.mp4" controls id="video">
</video>
<p id="shotBar">
</p>
</body>
</html>
html과 css는 모두 매우 간단합니다.
주로 Js 코드를 살펴보세요.
/**
 * Created with JetBrains WebStorm.
 * User: zhy
 * Date: 14-6-18
 * Time: 上午12:24
 * To change this template use File | Settings | File Templates.
 */

var ZhangHongyang = {};
ZhangHongyang.click2shot = (function ()
{
    var _ID_VIDEO = "video";
    var _ID_SHOTBAR = "shotBar";
    var _videoWidth = 0;
    var _videoHeight = 0;
    var _canvas = null;
    var _ctx = null;
    var _video = null;

    function _init()
    {
        _canvas = document.createElement("canvas");
        _ctx = _canvas.getContext("2d");
        _video = document.getElementById(_ID_VIDEO);


        _video.addEventListener("canplay", function ()
        {
            _canvas.width = _videoWidth = _video.videoWidth;
            _canvas.height = _videoHeight = _video.videoHeight;
            console.log(_videoWidth + " , " + _videoHeight);
            _ctx.fillStyle = '#ffffff';
            _ctx.fillRect(0, 0, _videoWidth, _videoWidth);
            $("#" + _ID_SHOTBAR).click(_click2shot);

            _video.removeEventListener("canplay", arguments.callee);
        });

    }

    function _click2shot(event)
    {
        _video.pause();
        _ctx.drawImage(_video, 0, 0, _videoWidth, _videoHeight, 0, 0, _videoWidth, _videoHeight);
        var dataUrl = _canvas.toDataURL("image/png");

        //创建一个和video相同位置的图片
        var $imgBig = $("<img/>");

        $imgBig.width(_videoWidth).height(_videoHeight).css({position: "absolute", left: _video.offsetLeft,
        top: _video.offsetTop, width: _videoWidth + "px", height: _videoWidth + "px"}).attr("src", dataUrl);
        $("body").append($imgBig);

        //创建缩略图,准备加到shotBar
        var $img = $("<img>");
        $img.attr("src", dataUrl);
        $(this).append($img);

        var offset = _getOffset($img[0]);
        $img.hide();
        //添加动画效果
        $imgBig.animate({left: offset.x + "px", top: offset.y + "px", width: $img.width() + "px", height: $img.height() + "px"}, 200, function ()
        {
            $img.attr("src", dataUrl).show();
            $imgBig.remove();
            _video.play();
        });


    }

    /**
     * 获取元素在显示区域的leftOffset和topOffset
     * @param elem
     * @returns {{x: (Number|number), y: (Number|number)}}
     * @private
     */
    function _getOffset(elem)
    {
        var pos = {x: elem.offsetLeft, y: elem.offsetTop};
        var offsetParent = elem.offsetParent;
        while (offsetParent)
        {
            pos.x += offsetParent.offsetLeft;
            pos.y += offsetParent.offsetTop;
            offsetParent = offsetParent.offsetParent;
        }
        return pos;
    }


    return {init: _init}

})();
video.canplay 이벤트에서 속성과 일부 작업을 얻은 후에는 주의해야 합니다. , 제거해야 합니다. EventLinstener를 제거해야 합니다. 그렇지 않으면 재생이 일시 중지될 때 이 메서드가 항상 호출됩니다. 해당 이벤트를 클릭하면 영상이 일시정지된 후 영상 위치에 그림이 생성되고, jquery animation을 이용하여 썸네일 위치로 이동한 후 문서가 삭제되고 썸네일이 표시됩니다. , 애니메이션 효과가 발생합니다.
사진을 직접 업로드하는 등의 작업을 직접 추가할 수 있습니다. 또 다른 매우 중요한 점이 있습니다: canvas.toDataURL("image/png"); 정상적으로 사용하려면 서버에서 액세스해야 할 수도 있습니다. 작성한 페이지를 마음대로 시작할 수 있습니다. 보안 질문을 신고하세요.
위 내용은 Youku 동영상 스크린샷 기능을 모방한 HTML5 CSS3 예시 내용입니다. 더 많은 관련 내용은 PHP 중국어 홈페이지(www.php.cn)를 참고해주세요!