반응형 레이아웃에 대한 간단한 사례 소개
반응형 레이아웃
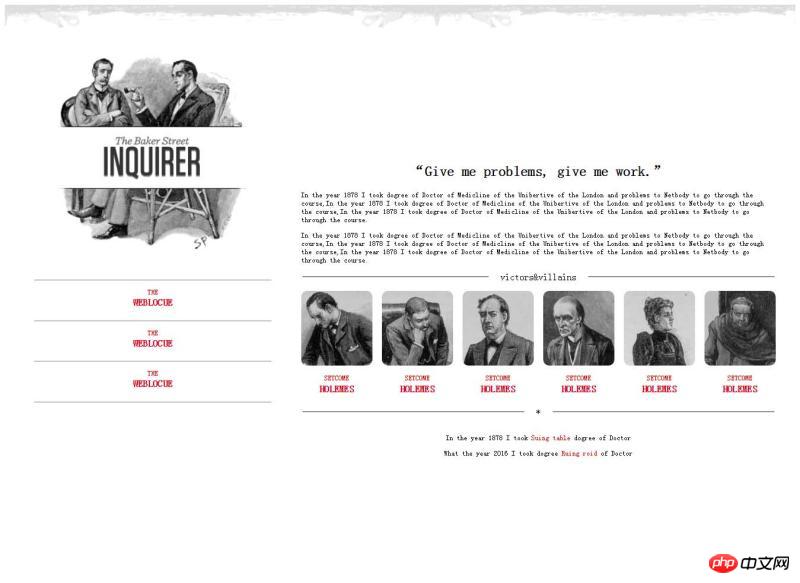
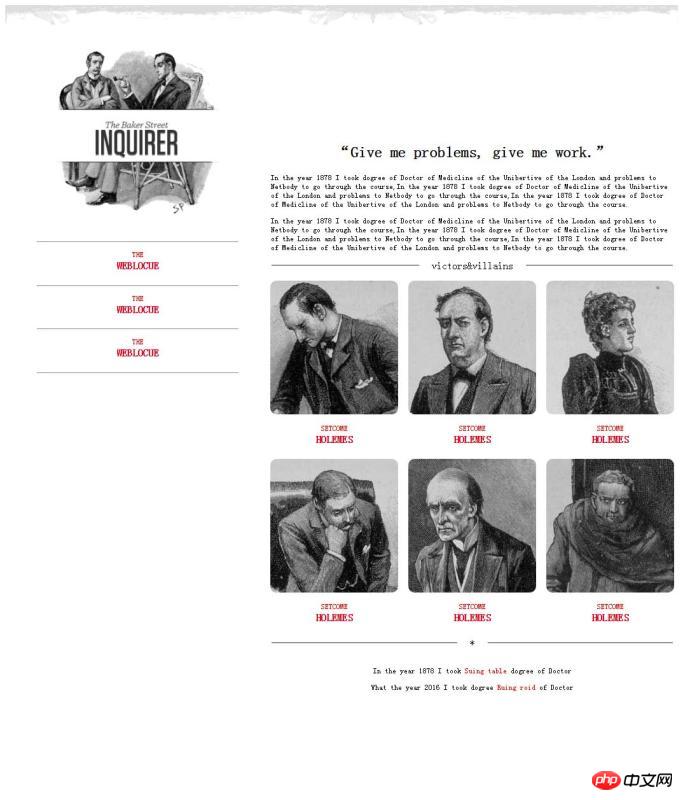
반응형 레이아웃은 다양한 해상도의 기기에 대응하는 유연성이 뛰어나 일상적인 웹 디자인에서 기본적으로 사용됩니다. 디자인을 통해 우리에게 좋은 사용자 탐색 페이지를 제공하고 더 나은 고객 경험을 제공할 수 있습니다. 제가 만든 간단한 반응형 레이아웃을 공유하겠습니다.


다른 페이지는 다양한 브라우저 페이지 크기에 맞게 조정되며 해상도가 변경됨에 따라 변경됩니다. 코드는 아래와 같습니다:
<!DOCTYPE html>
<html>
<head>
<meta charset="utf-8" />
<title></title>
<style>
  p{
    font-size: 12px;
  }
  header{
    width: 100%;
  }
  header img{
    width: 100%;
  }
  @media (min-width: 1300px) and (max-width:1400px) {
    #left{
      float: left;
      width: 30%;
      margin: 0px 50px;
    }
    #left #logo-bg{
      margin: 10% 10%;
      width: 80%;
      position: relative;
    }
    #left #logo{
      float: left;
      width: 12%;
      position: absolute;
      left: 13%;
      top: 230px;
    }
    #left p{
      margin-bottom: -20px;
    }
    #left p,h4{
      text-align: center;
      color: red;
    }
    #right{
      float: left;
      width: 60%;
      margin: 15% 0px;
    }
    #right h2{
      text-align: center;
    }
    #right fieldset{
      text-align: center;
      border-left: none;
      border-right: none;
      border-bottom: none;
    }
    #right fieldset legend{
      padding: 0px 20px;
    }
    #fen{
      width: 100%;
      -webkit-column-count: 6;
      -moz-column-count: 6;
      -o-column-count: 6;
      -ms-column-count: 6;
      column-count: 6;
      -webkit-column-gap: 1em;
      -moz-column-gap: 1em;
      -o-column-gap: 1em;
      -ms-column-gap: 1em;
      column-gap: 1em;
    }
    #fen img{
      width: 100%;
      border-radius: 10px 10px 10px 10px;
    }
    #fen p,h4{
      text-align: center;
      color: red;
    }
    #fen p{
      margin-bottom: -20px;
    }
    #di p{
      text-align: center;
    }
    #di p span{
       color: red;
    }
  }
  @media (min-width: 1000px) and (max-width:1300px){
    #left{
      float: left;
      width: 30%;
      margin: 0px 50px;
    }
    #left #logo-bg{
      margin: 10% 10%;
      width: 80%;
      position: relative;
    }
    #left #logo{
      width: 12%;
      position: absolute;
      left: 14%;
      top: 190px;
    }
    #left p{
      margin-bottom: -20px;
    }
    #left p,h4{
      text-align: center;
      color: red;
    }
    #right{
      float: left;
      width: 60%;
      margin: 15% 0px;
    }
    #right h2{
      text-align: center;
    }
    #right fieldset{
      text-align: center;
      border-left: none;
      border-right: none;
      border-bottom: none;
    }
    #right fieldset legend{
      padding: 0px 20px;
    }
    #fen{
      width: 100%;
      -webkit-column-count: 3;
      -moz-column-count: 3;
      -o-column-count: 3;
      -ms-column-count: 3;
      column-count: 3;
      -webkit-column-gap: 1em;
      -moz-column-gap: 1em;
      -o-column-gap: 1em;
      -ms-column-gap: 1em;
      column-gap: 1em;
    }
    #fen img{
        width: 100%;
        border-radius: 10px 10px 10px 10px;
    }
    #fen p,h4{
        text-align: center;
        color: red;
      }
    #fen p{
        margin-bottom: -20px;
    }
    #di p{
      text-align: center;
    }
    #di p span{
      color: red;
    }
  }
</style>
</head>
<body>
  <header>
    <img  src="/static/imghw/default1.png"  data-src="img/rag.png"  class="lazy"   / alt="반응형 레이아웃에 대한 간단한 사례 소개" >
  </header>
  <aside id="left">
    <img  src="/static/imghw/default1.png"  data-src="img/logo-bg.png"  class="lazy"   id="logo-bg"/ alt="반응형 레이아웃에 대한 간단한 사례 소개" >
    <img  src="/static/imghw/default1.png"  data-src="img/logo.png"  class="lazy"   id="logo" / alt="반응형 레이아웃에 대한 간단한 사례 소개" >
    <hr />
    <p>THE</p>
    <h4 id="WEBLOCUE">WEBLOCUE</h4>
    <hr />
    <p>THE</p>
    <h4 id="WEBLOCUE">WEBLOCUE</h4>
    <hr />
    <p>THE</p>
    <h4 id="WEBLOCUE">WEBLOCUE</h4>
    <hr />
  </aside>
  <article id="right">
    <h2 id="Give-nbsp-me-nbsp-problems-nbsp-give-nbsp-me-nbsp-work">“Give me problems, give me work.”</h2>
    <p>In the year 1878 I took dogree of Doctor of Medicline of the Unibertive of the London and problems to Netbody to go through the course,In the year 1878 I took dogree of Doctor of Medicline of the Unibertive of the London and problems to Netbody to go through the course,In the year 1878 I took dogree of Doctor of Medicline of the Unibertive of the London and problems to Netbody to go through the course.</p>
    <p>In the year 1878 I took dogree of Doctor of Medicline of the Unibertive of the London and problems to Netbody to go through the course,In the year 1878 I took dogree of Doctor of Medicline of the Unibertive of the London and problems to Netbody to go through the course,In the year 1878 I took dogree of Doctor of Medicline of the Unibertive of the London and problems to Netbody to go through the course.</p>
    <fieldset><legend>victors</legend></fieldset>
    <p id="fen">
      <img  src="/static/imghw/default1.png"  data-src="img/1.jpg"  class="lazy"   / alt="반응형 레이아웃에 대한 간단한 사례 소개" >
      <p>SETCOME</p>
      <h4 id="HOLEMES">HOLEMES</h4>
      <img  src="/static/imghw/default1.png"  data-src="img/2.jpg"  class="lazy"   / alt="반응형 레이아웃에 대한 간단한 사례 소개" >
      <p>SETCOME</p>
      <h4 id="HOLEMES">HOLEMES</h4>
      <img  src="/static/imghw/default1.png"  data-src="img/3.jpg"  class="lazy"   / alt="반응형 레이아웃에 대한 간단한 사례 소개" >
      <p>SETCOME</p>
      <h4 id="HOLEMES">HOLEMES</h4>
      <img  src="/static/imghw/default1.png"  data-src="img/4.jpg"  class="lazy"   / alt="반응형 레이아웃에 대한 간단한 사례 소개" >
      <p>SETCOME</p>
      <h4 id="HOLEMES">HOLEMES</h4>
      <img  src="/static/imghw/default1.png"  data-src="img/5.jpg"  class="lazy"   / alt="반응형 레이아웃에 대한 간단한 사례 소개" >
      <p>SETCOME</p>
      <h4 id="HOLEMES">HOLEMES</h4>
      <img  src="/static/imghw/default1.png"  data-src="img/6.jpg"  class="lazy"   / alt="반응형 레이아웃에 대한 간단한 사례 소개" >
      <p>SETCOME</p>
      <h4 id="HOLEMES">HOLEMES</h4>
    </p>
    <fieldset><legend>*</legend></fieldset>
    <p id="di">
      <p>In the year 1878 I took <span>Suing table</span> dogree of Doctor</p>
      <p>What the year 2016 I took dogree <span>Ruing roid</span> of Doctor</p>
    </p>
  </article>
</body>
</html>시간 문제로 인해 충분히 설명하지 못했는데 양해해 주시기 바랍니다.
위의 간단한 반응형 레이아웃 사례는 모두 편집자가 공유한 내용이므로 참고가 되셨으면 좋겠고, PHP 중국어 홈페이지도 지원해 주시길 바랍니다.
반응형 레이아웃의 좀 더 간단한 사례 소개와 관련 글은 PHP 중국어 홈페이지를 주목해주세요!

핫 AI 도구

Undresser.AI Undress
사실적인 누드 사진을 만들기 위한 AI 기반 앱

AI Clothes Remover
사진에서 옷을 제거하는 온라인 AI 도구입니다.

Undress AI Tool
무료로 이미지를 벗다

Clothoff.io
AI 옷 제거제

Video Face Swap
완전히 무료인 AI 얼굴 교환 도구를 사용하여 모든 비디오의 얼굴을 쉽게 바꾸세요!

인기 기사

뜨거운 도구

메모장++7.3.1
사용하기 쉬운 무료 코드 편집기

SublimeText3 중국어 버전
중국어 버전, 사용하기 매우 쉽습니다.

스튜디오 13.0.1 보내기
강력한 PHP 통합 개발 환경

드림위버 CS6
시각적 웹 개발 도구

SublimeText3 Mac 버전
신 수준의 코드 편집 소프트웨어(SublimeText3)

뜨거운 주제
 7751
7751
 15
15
 1643
1643
 14
14
 1398
1398
 52
52
 1293
1293
 25
25
 1234
1234
 29
29
 HTML과 CSS를 사용하여 반응형 블로그 목록 레이아웃을 만드는 방법
Oct 21, 2023 am 10:00 AM
HTML과 CSS를 사용하여 반응형 블로그 목록 레이아웃을 만드는 방법 오늘날 디지털 시대에 블로그는 사람들이 자신의 의견과 경험을 공유하는 중요한 플랫폼이 되었습니다. 그리고 더 많은 독자의 관심을 끌기 위해서는 아름답고 반응이 빠른 블로그 목록 레이아웃이 중요합니다. 이 기사에서는 HTML과 CSS를 사용하여 간단하면서도 기능적인 반응형 블로그 목록 레이아웃을 만드는 방법을 알아봅니다. 먼저 몇 가지 기본 HTML 코드를 준비해야 합니다. 다음은 간단한 블로그 목록 레이아웃의 HTML 구조입니다. <
 반응형 레이아웃 디자인을 위한 단위 선택 가이드
Jan 27, 2024 am 08:26 AM
모바일 기기의 대중화와 기술의 발달로 인해 반응형 레이아웃은 디자이너에게 필수적인 기술 중 하나가 되었습니다. 반응형 레이아웃은 다양한 크기의 화면에 최상의 사용자 경험을 제공하도록 설계되어 웹 페이지가 다양한 장치에서 레이아웃을 자동으로 조정하여 콘텐츠의 가독성과 유용성을 보장합니다. 올바른 단위를 선택하는 것은 반응형 레이아웃 디자인의 핵심 단계 중 하나입니다. 이 기사에서는 일반적으로 사용되는 몇 가지 단위를 소개하고 단위 선택에 대한 제안을 제공합니다. 픽셀(px): 픽셀은 화면에서 가장 작은 단위이며, 화면 크기가 변해도 자동으로 변하지 않습니다.
 HTML과 CSS를 사용하여 반응형 블로그 레이아웃을 만드는 방법
Oct 21, 2023 am 10:54 AM
HTML과 CSS를 사용하여 반응형 블로그 레이아웃을 만드는 방법 오늘날의 인터넷 시대에 블로그는 사람들이 지식, 경험 및 이야기를 공유하는 중요한 플랫폼이 되었습니다. 매력적이고 반응이 빠른 블로그를 디자인하면 콘텐츠가 다양한 크기와 장치에서 더 잘 표시되어 사용자 경험이 향상됩니다. 이 문서에서는 특정 코드 예제를 제공하면서 HTML과 CSS를 사용하여 반응형 블로그 레이아웃을 만드는 방법을 소개합니다. 1. HTML 구조 먼저 블로그의 기본 HTML 구조를 구축해야 합니다. 다음은
 최고의 반응형 레이아웃 프레임워크를 살펴보세요. 경쟁이 치열합니다!
Feb 19, 2024 pm 05:19 PM
반응형 레이아웃 프레임워크 경쟁: 최고의 선택은 누구일까요? 모바일 기기의 대중화와 다양화로 인해 웹 페이지의 반응형 레이아웃이 점점 더 중요해지고 있습니다. 사용자의 다양한 기기와 화면 크기를 수용하려면 웹 페이지를 디자인하고 개발할 때 반응형 레이아웃 프레임워크를 채택하는 것이 필수적입니다. 그러나 너무 많은 프레임워크 옵션이 있기 때문에 우리는 다음과 같은 질문을 하지 않을 수 없습니다. 어느 것이 최선의 선택입니까? 다음은 세 가지 인기 있는 반응형 레이아웃 프레임워크인 Bootstrap, Foundation 및 Tailwind에 대한 비교 평가입니다.
 HTML 반응형 레이아웃 디자인 가이드 구현 방법
Jan 27, 2024 am 08:26 AM
HTML을 사용하여 반응형 레이아웃 디자인을 구현하는 방법 모바일 장치의 인기와 인터넷의 급속한 발전으로 인해 반응형 레이아웃은 디자이너에게 필수적인 기술이 되었습니다. 반응형 레이아웃을 사용하면 웹사이트가 다양한 기기의 다양한 화면 크기와 해상도에 자동으로 적응하여 사용자가 더 나은 탐색 환경을 누릴 수 있습니다. 이 기사에서는 HTML을 사용하여 반응형 레이아웃 디자인을 구현하는 방법을 소개하고 구체적인 코드 예제를 제공합니다. @미디어 쿼리 사용 @미디어 쿼리는 다양한 미디어 조건에 따라 적용할 수 있는 CSS3의 기능입니다.
 CSS 레이아웃 튜토리얼: 2열 반응형 레이아웃을 구현하는 가장 좋은 방법
Oct 18, 2023 am 11:04 AM
CSS 레이아웃 튜토리얼: 2열 반응형 레이아웃을 구현하는 가장 좋은 방법 소개: 웹 디자인에서 반응형 레이아웃은 웹 페이지가 사용자 기기의 화면 크기와 해상도에 따라 자동으로 레이아웃을 조정할 수 있도록 하는 매우 중요한 기술입니다. 사용자 경험. 이 튜토리얼에서는 CSS를 사용하여 간단한 2열 반응형 레이아웃을 구현하는 방법과 구체적인 코드 예제를 제공합니다. 1. HTML 구조: 먼저 아래와 같이 기본 HTML 구조를 만들어야 합니다. <!DOCTYPEht
 반응형 레이아웃에서 HTML 고정 위치 지정을 사용하기 위한 실용적인 팁
Jan 20, 2024 am 09:55 AM
반응형 레이아웃에서 HTML 고정 위치 지정의 응용 기술, 특정 코드 예제가 필요합니다. 모바일 장치의 인기와 반응형 레이아웃에 대한 사용자 요구가 증가함에 따라 개발자는 웹 디자인에서 더 많은 어려움에 직면해 있습니다. 주요 문제 중 하나는 요소가 다양한 화면 크기에서 페이지의 특정 위치에 고정될 수 있도록 고정 위치 지정을 구현하는 방법입니다. 이 기사에서는 반응형 레이아웃에서 HTML 고정 위치 지정의 적용 기술을 소개하고 구체적인 코드 예제를 제공합니다. HTML의 고정 위치 지정은 CSS의 위치 속성을 통해 이루어집니다.
 HTML 및 CSS를 사용하여 반응형 사진 앨범 디스플레이 레이아웃을 만드는 방법
Oct 19, 2023 am 08:51 AM
HTML 및 CSS를 사용하여 반응형 사진 앨범 표시 레이아웃을 만드는 방법 사진 앨범 표시 레이아웃은 웹사이트의 일반적인 페이지 레이아웃 유형이며 사진, 사진, 이미지 및 기타 콘텐츠를 표시하는 데 사용할 수 있습니다. 모바일 장치가 대중화되는 오늘날의 환경에서 좋은 사진 앨범 표시 레이아웃은 다양한 화면 크기에 적응할 수 있고 다양한 장치에서 좋은 표시 효과를 나타낼 수 있는 반응형 디자인이 필요합니다. 이 문서에서는 HTML과 CSS를 사용하여 반응형 사진 앨범 표시 레이아웃을 만드는 방법을 소개하고 구체적인 코드 예제를 제공합니다. 독자들이 지침을 통과할 수 있기를 바랍니다.


