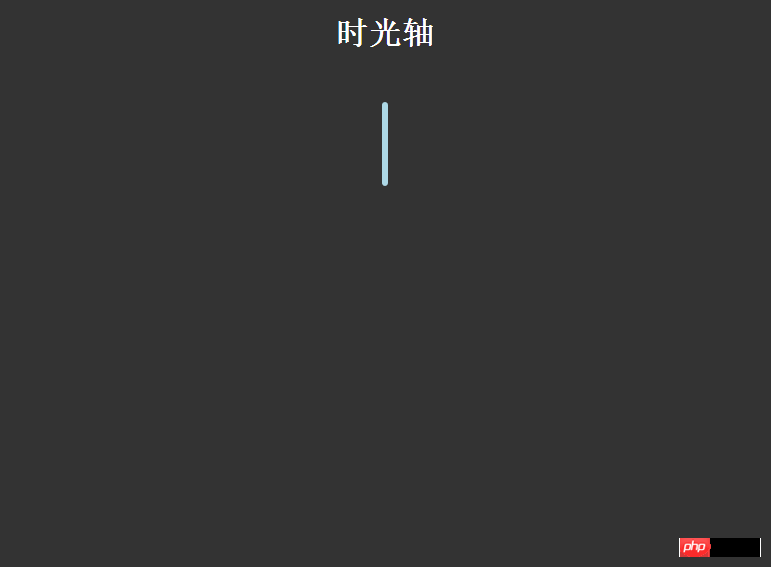
타임라인 효과의 CSS3 구현
최근에 컴퓨터를 켰을 때 Geek Academy의 신규 사용자가 한 달 동안 무료 VIP를 받는 것을 보고 들어가서 그 과정에 대해 이야기하지 않겠습니다. 실제 전투 경로 지도 페이지:

타임라인과 약간 비슷하며, 마우스를 움직일 때마다 스크린샷을 확장하고 소개하는 드롭다운 효과가 있습니다. 정보, 효과는 꽤 좋습니다. 하지만 이 효과는 동적 추가에는 그다지 유연하지 않은 것 같습니다. 높이가 너비만큼 유연하지 않기 때문에 하나씩 추가해야 합니다. 그 중 많은 제품이 디스플레이 효과를 위해 만들어졌습니다.
물론, 이 아이디어를 바탕으로 더 간단한 유사한 효과도 만들었습니다. 주로 전체 레이아웃 효과를 각 콘텐츠를 모방하지는 않고, 오프닝 애니메이션도 직접 추가해 더욱 재미있게 만들었습니다. ...
먼저 효과를 살펴보겠습니다.

효과는 아마도 이렇습니다. :
HTML 구조:
<p class="timezone">
            <p class="time">
                <h2 id="">2015-07-02</h2>
                <p>
                    <p>暴走大事件第一季</p>
                    <ul>

                    </ul>
                </p>
            </p>
            <p class="timeLeft" style="top: 100px;">
                <h2 id="">2015-07-02</h2>
                <p>
                    <p>暴走大事件第二季</p>
                    <ul>

                    </ul>
                </p>
</p>여기서는 HTML 구조가 단순화되었습니다. .time 클래스는 오른쪽에 표시되고, .timeLeft는 왼쪽에 표시됩니다. 여백만 추가하고 각 부분의 내용을 삭제했습니다.
CSS 스타일 코드는 다음과 같습니다.
body{
                background: #333;
            }
            h1{
                text-align: center;
                color:#fff;
            }
            .timezone{
                width:6px;
                height: 350px;
                background: lightblue;
                margin: 0 auto;
                margin-top:50px;
                border-radius: 3px;
                position: relative;
                -webkit-animation: heightSlide 2s linear;
            }
            @-webkit-keyframes heightSlide{
                0%{
                    height: 0;
                }
                100%{
                    height: 350px;
                }
            }
            .timezone:after{
                content: '未完待续...';
                width: 100px;
                color:#fff;
                position: absolute;
                margin-left: -35px;
                bottombottom: -30px;
                -webkit-animation: showIn 4s ease;
            }
            .timezone .time,.timezone .timeLeft{
                position: absolute;
                margin-left: -10px;
                margin-top:-10px;
                width:20px;
                height:20px;
                border-radius: 50%;
                border:4px solid rgba(255,255,255,0.5);
                background: lightblue;
                -webkit-transition: all 0.5s;
                -webkit-animation: showIn ease;
            }
            .timezone .time:nth-child(1){
                -webkit-animation-duration:1s;
            }
            .timezone .timeLeft:nth-child(2){
                -webkit-animation-duration:1.5s;
            }
            .timezone .time:nth-child(3){
                -webkit-animation-duration:2s;
            }
            .timezone .timeLeft:nth-child(4){
                -webkit-animation-duration:2.5s;
            }
            @-webkit-keyframes showIn{
                0%,70%{
                    opacity: 0;
                }
                100%{
                    opacity: 1;
                }
            }
            .timezone .time h2,.timezone .timeLeft h2{
                position: absolute;
                margin-left: -120px;
                margin-top: 3px;
                color:#eee;
                font-size: 14px;
                cursor:pointer;
                -webkit-animation: showIn 3s ease;
            }
            .timezone .timeLeft h2{
                margin-left: 60px;
                width: 100px;
            }
            .timezone .time:hover,.timezone .timeLeft:hover{
                border:4px solid lightblue;
                background: lemonchiffon;
                box-shadow: 0 0 2px 2px rgba(255,255,255,0.4);
            }
            .timezone .time p,.timezone .timeLeft p{
                position: absolute;
                top:50%;
                margin-top: -25px;
                left:50px;
                width: 300px;
                height: 50px;
                background: lightblue;
                border:3px solid #eee;
                border-radius: 10px;
                z-index: 2;
                overflow: hidden;
                cursor:pointer;
                -webkit-animation: showIn 3s ease;
                -webkit-transition: all 0.5s;
            }
            .timezone .timeLeft p{
                left:-337px;
            }
            .timezone .time p:hover,.timezone .timeLeft p:hover{
                height: 170px;
            }
            .timezone .time p p,.timezone .timeLeft p p{
                color: #fff;
                font-weight: bold;
                text-align: center;
            }
            .timezone .time:before,.timezone .timeLeft:before{
                content: '';
                position: absolute;
                top:0px;
                left: 32px;
                width: 0px;
                height: 0px;
                border:10px solid transparent;
                border-right:10px solid #eee;
                z-index:-1;
                -webkit-animation: showIn 3s ease;
            }
            .timezone .timeLeft:before{
                left:-33px;
                border:10px solid transparent;
                border-left:10px solid #eee;
            }
            .timezone .time p ul,.timezone .timeLeft p ul{
                list-style: none;
                width:300px;
                padding:5px 0 0;
                border-top:2px solid #eee;
                color:#fff;
                text-align: center;
            }
            .timezone .time p li,.timezone .timeLeft p li{
                display: inline-block;
                height: 25px;
                line-height: 25px;
}이 CSS 스타일 코드는 참고용으로만 사용되었으며, 주요 내용은 정리되지 않았습니다. 애니메이션을 이해하는 것 역시 전체 레이아웃에 따라 달라집니다. 최고의 소원!
위 내용은 이 글의 전체 내용입니다. 모든 분들의 학습에 도움이 되기를 바랍니다.
CSS3 타임라인 효과 구현과 관련된 더 많은 기사를 보려면 PHP 중국어 웹사이트를 주목하세요!

핫 AI 도구

Undresser.AI Undress
사실적인 누드 사진을 만들기 위한 AI 기반 앱

AI Clothes Remover
사진에서 옷을 제거하는 온라인 AI 도구입니다.

Undress AI Tool
무료로 이미지를 벗다

Clothoff.io
AI 옷 제거제

AI Hentai Generator
AI Hentai를 무료로 생성하십시오.

인기 기사

뜨거운 도구

메모장++7.3.1
사용하기 쉬운 무료 코드 편집기

SublimeText3 중국어 버전
중국어 버전, 사용하기 매우 쉽습니다.

스튜디오 13.0.1 보내기
강력한 PHP 통합 개발 환경

드림위버 CS6
시각적 웹 개발 도구

SublimeText3 Mac 버전
신 수준의 코드 편집 소프트웨어(SublimeText3)

뜨거운 주제
 7555
7555
 15
15
 1382
1382
 52
52
 83
83
 11
11
 59
59
 19
19
 28
28
 96
96
 순수한 CSS3로 물결 효과를 얻는 방법은 무엇입니까? (코드 예)
Jun 28, 2022 pm 01:39 PM
순수한 CSS3로 물결 효과를 얻는 방법은 무엇입니까? 이 기사에서는 SVG 및 CSS 애니메이션을 사용하여 물결 효과를 만드는 방법을 소개합니다. 도움이 되길 바랍니다.
 CSS를 능숙하게 사용하여 다양한 이상한 모양의 버튼 구현(코드 포함)
Jul 19, 2022 am 11:28 AM
이 글에서는 CSS를 활용하여 자주 나타나는 다양한 모양의 버튼을 쉽게 구현하는 방법을 알려드리겠습니다. 도움이 되셨으면 좋겠습니다.
 공간을 차지하지 않고 CSS에서 요소를 숨기는 방법
Jun 01, 2022 pm 07:15 PM
두 가지 방법: 1. 표시 속성을 사용하여 요소에 "display:none;" 스타일을 추가합니다. 2. 요소를 숨기려면 위치 및 상단 속성을 사용하여 요소의 절대 위치를 설정하세요. 요소에 "position:absolute;top:-9999px;" 스타일을 추가하세요.
 PPT에서 타임라인을 만드는 방법
Mar 20, 2024 pm 04:11 PM
많은 친구들은 항상 PPT를 만들 때 제작이 너무 단조롭고 그 안에 있는 모든 사람이나 모든 것의 특성을 강조하지 않는다고 느낍니다. 그렇다면 우리의 PPT를 덜 단조롭게 만들고, 좀 더 체계적으로 내용을 전달하기 위해 PPT에 있는 타임라인을 활용해 좀 더 생동감 있게 만들 수 있는 방법은 무엇일까요? 그리고 흥미롭지? 다음은 에디터와 함께 살펴보겠습니다. 일단 익히면 친구들 앞에서 실력을 뽐낼 수 있습니다. 1. 먼저 PPT를 열고 빈 문서를 새로 만든 다음 [삽입]을 클릭하고 [SmartArt 그래픽]을 클릭합니다. 2. [프로세스]를 클릭하고 하나를 클릭한 다음 확인을 누릅니다. 3. 우리 마음대로 할 수 있어
 CSS3에서 레이스 테두리를 구현하는 방법
Sep 16, 2022 pm 07:11 PM
CSS에서는 border-image 속성을 사용하여 레이스 테두리를 만들 수 있습니다. border-image 속성은 이미지를 사용하여 테두리를 생성할 수 있습니다. 즉, 배경 이미지를 레이스 스타일로 지정하기만 하면 됩니다. "border-image: url(이미지 경로)은 이미지 테두리 너비가 안쪽으로 반복되는지 여부입니다.
 텍스트 캐러셀과 이미지 캐러셀도 순수 CSS를 사용하여 구현할 수 있다는 것이 밝혀졌습니다!
Jun 10, 2022 pm 01:00 PM
텍스트 회전판과 이미지 회전판을 만드는 방법은 무엇입니까? 누구나 가장 먼저 생각하는 것은 js를 사용할지 여부입니다. 실제로 순수 CSS를 사용하여 구현하는 방법도 모두에게 도움이 되기를 바랍니다.
 CSS3에서 마우스를 클릭하여 이미지를 확대하는 방법
Apr 25, 2022 pm 04:52 PM
구현 방법: 1. ":active" 선택기를 사용하여 그림에 대한 마우스 클릭 상태를 선택합니다. 2. 변환 속성과 scale() 함수를 사용하여 그림 확대 효과를 얻습니다. 구문은 "img:active {transform; : scale(x축 배율, y축 배율);}".
 PHP를 사용하여 타임라인 기능을 개발하는 방법
Aug 18, 2023 pm 11:39 PM
PHP를 사용하여 타임라인 기능을 개발하는 방법 소개: 타임라인은 타임라인을 표시하는 일반적인 기능으로 사용자가 이벤트의 전개 및 순서를 명확하게 이해할 수 있도록 이벤트를 시간순으로 정렬할 수 있습니다. PHP는 웹 개발에 널리 사용되는 스크립팅 언어로, 강력한 데이터 처리 및 데이터베이스 운영 기능을 갖추고 있어 타임라인 기능 개발에 적합합니다. 이 기사에서는 PHP를 사용하여 타임라인 기능을 개발하는 방법을 소개하고 코드 예제를 제공합니다. 단계: 데이터베이스 및 데이터 테이블 생성 먼저 데이터베이스와 해당 데이터를 생성해야 합니다.


