C# 개발예제 – 맞춤형 스크린샷 툴 (7) 돋보기 기능 추가 코드 예시
스크린샷을 찍을 때 특정 부분을 정확하게 캡쳐해야 할 경우가 있기 때문에, 스크린샷을 찍을 때 스크린샷의 위치를 더 쉽게 찾을 수 있도록 돋보기 기능이 필요합니다. 스크린샷 찍기.
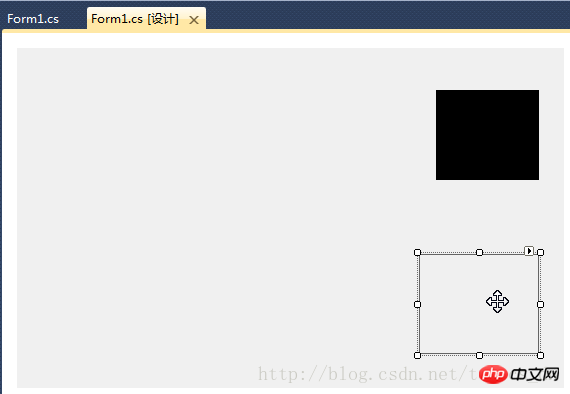
PictureBox 추가, 이름 속성 은 "
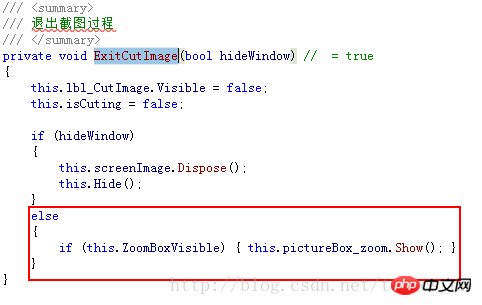
For 로 설정됩니다. > m1_Load"이벤트 핸들러함수 에 다음 코드 추가:
 //设置放大镜的大小
this.pictureBox_zoom.Width = this.ZoomBoxWidth;
this.pictureBox_zoom.Height = this.ZoomBoxHeight; 
 조건 끝에 코드를 추가합니다. "ShowForm" 메서드:
if (this.ZoomBoxVisible)
                {
                    UpdateCutInfoLabel(UpdateUIMode.ShowZoomBox);
                    this.pictureBox_zoom.Show();
}if (this.pictureBox_zoom.Visible || (updateUIMode & UpdateUIMode.ShowZoomBox) != UpdateUIMode.None)
{
Point zoomLocation = new Point(MousePosition.X + 15, MousePosition.Y + 22);
if (zoomLocation.Y + this.pictureBox_zoom.Height > this.Height)
{
if (zoomLocation.X + this.pictureBox_zoom.Width > this.Width)
{
zoomLocation = new Point(MousePosition.X - this.pictureBox_zoom.Width - 10, MousePosition.Y - this.pictureBox_zoom.Height - 10);
}
else
{
zoomLocation = new Point(MousePosition.X + 15, MousePosition.Y - this.pictureBox_zoom.Height - 15);
}
}
else
{
if (zoomLocation.X + this.pictureBox_zoom.Width > this.Width)
{
zoomLocation = new Point(MousePosition.X - this.pictureBox_zoom.Width - 15, MousePosition.Y);
}
}
this.pictureBox_zoom.Location = zoomLocation;
if (!this.pictureBox_zoom.Visible)
{
this.pictureBox_zoom.Show();
}
}로그인 후 복사
"Form1_if (this.pictureBox_zoom.Visible || (updateUIMode & UpdateUIMode.ShowZoomBox) != UpdateUIMode.None)
{
Point zoomLocation = new Point(MousePosition.X + 15, MousePosition.Y + 22);
if (zoomLocation.Y + this.pictureBox_zoom.Height > this.Height)
{
if (zoomLocation.X + this.pictureBox_zoom.Width > this.Width)
{
zoomLocation = new Point(MousePosition.X - this.pictureBox_zoom.Width - 10, MousePosition.Y - this.pictureBox_zoom.Height - 10);
}
else
{
zoomLocation = new Point(MousePosition.X + 15, MousePosition.Y - this.pictureBox_zoom.Height - 15);
}
}
else
{
if (zoomLocation.X + this.pictureBox_zoom.Width > this.Width)
{
zoomLocation = new Point(MousePosition.X - this.pictureBox_zoom.Width - 15, MousePosition.Y);
}
}
this.pictureBox_zoom.Location = zoomLocation;
if (!this.pictureBox_zoom.Visible)
{
this.pictureBox_zoom.Show();
}
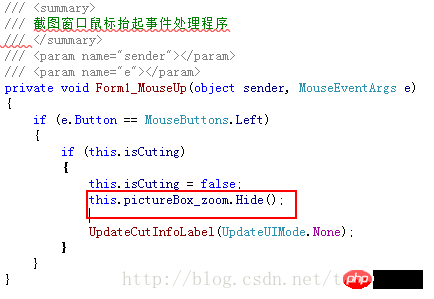
}KeyUp에 다음 코드를 추가합니다. " 이벤트 핸들러:

        /// <summary>
        /// 放大镜组件重绘事件处理程序
        /// 实时显示鼠标指针位置放大后的图像
        /// </summary>
        /// <param name="sender"></param>
        /// <param name="e"></param>
        private void pictureBox_zoom_Paint(object sender, PaintEventArgs e)
        {
            Bitmap bmp_lbl = new Bitmap(e.ClipRectangle.Width, e.ClipRectangle.Height);
            int srcWidth = (int)(this.ZoomBoxWidth / 10);
            int srcHeight = (int)(this.ZoomBoxHeight / 10);

            Bitmap bmp = new Bitmap(srcWidth, srcHeight);
            Rectangle srcRect = new Rectangle(MousePosition.X - 5, MousePosition.Y - 4, srcWidth, srcHeight);
            if (!isCuting)
            {
                srcRect = new Rectangle(MousePosition.X - 6, MousePosition.Y - 5, srcWidth, srcHeight);
            }
            Graphics g = Graphics.FromImage(bmp);
            g.DrawImage(screenImage, 0, 0, srcRect, GraphicsUnit.Pixel);
            g.Dispose();

            //Zoom
            int x, y;
            for (int row = 0; row < bmp.Height; row++)
            {
                for (int col = 0; col < bmp.Width; col++)
                {
                    Color pc = bmp.GetPixel(col, row);
                    for (int h = 0; h < 10; h++)
                    {
                        for (int w = 0; w < 10; w++)
                        {
                            x = col * 10 + w;
                            y = row * 10 + h;
                            if (x < bmp_lbl.Width && y < bmp_lbl.Height)
                            {
                                bmp_lbl.SetPixel(x, y, pc);
                            }
                        }
                    }
                }
            }

            e.Graphics.DrawImage(bmp_lbl, 0, 0);

            int blockX = e.ClipRectangle.Width / 2;
            int blockY = e.ClipRectangle.Height / 2;

            SolidBrush brush = new SolidBrush(Color.FromArgb(10, 124, 202));
            Pen pen = new Pen(brush, 2.0F);
            e.Graphics.DrawLine(pen, new Point(0, blockY), new Point(e.ClipRectangle.Width, blockY));
            e.Graphics.DrawLine(pen, new Point(blockX, 0), new Point(blockX, e.ClipRectangle.Height));

            g.Dispose();
            bmp_lbl.Dispose();
}위 내용은 C# 개발예제 – 맞춤형 스크린샷 툴 (7) 돋보기 기능 추가 코드 예시의 상세 내용입니다. 자세한 내용은 PHP 중국어 웹사이트의 기타 관련 기사를 참조하세요!

핫 AI 도구

Undresser.AI Undress
사실적인 누드 사진을 만들기 위한 AI 기반 앱

AI Clothes Remover
사진에서 옷을 제거하는 온라인 AI 도구입니다.

Undress AI Tool
무료로 이미지를 벗다

Clothoff.io
AI 옷 제거제

AI Hentai Generator
AI Hentai를 무료로 생성하십시오.

인기 기사

뜨거운 도구

메모장++7.3.1
사용하기 쉬운 무료 코드 편집기

SublimeText3 중국어 버전
중국어 버전, 사용하기 매우 쉽습니다.

스튜디오 13.0.1 보내기
강력한 PHP 통합 개발 환경

드림위버 CS6
시각적 웹 개발 도구

SublimeText3 Mac 버전
신 수준의 코드 편집 소프트웨어(SublimeText3)

뜨거운 주제
 7518
7518
 15
15
 1378
1378
 52
52
 81
81
 11
11
 53
53
 19
19
 21
21
 67
67
 C#을 사용한 Active Directory
Sep 03, 2024 pm 03:33 PM
C#을 사용한 Active Directory 가이드. 여기에서는 소개와 구문 및 예제와 함께 C#에서 Active Directory가 작동하는 방식에 대해 설명합니다.
 C#의 난수 생성기
Sep 03, 2024 pm 03:34 PM
C#의 난수 생성기 가이드입니다. 여기서는 난수 생성기의 작동 방식, 의사 난수 및 보안 숫자의 개념에 대해 설명합니다.
 C# 데이터 그리드 보기
Sep 03, 2024 pm 03:32 PM
C# 데이터 그리드 뷰 가이드. 여기서는 SQL 데이터베이스 또는 Excel 파일에서 데이터 그리드 보기를 로드하고 내보내는 방법에 대한 예를 설명합니다.
 멀티 스레딩과 비동기 C#의 차이
Apr 03, 2025 pm 02:57 PM
멀티 스레딩과 비동기식의 차이점은 멀티 스레딩이 동시에 여러 스레드를 실행하는 반면, 현재 스레드를 차단하지 않고 비동기식으로 작업을 수행한다는 것입니다. 멀티 스레딩은 컴퓨팅 집약적 인 작업에 사용되며 비동기식은 사용자 상호 작용에 사용됩니다. 멀티 스레딩의 장점은 컴퓨팅 성능을 향상시키는 것이지만 비동기의 장점은 UI 스레드를 차단하지 않는 것입니다. 멀티 스레딩 또는 비동기식을 선택하는 것은 작업의 특성에 따라 다릅니다. 계산 집약적 작업은 멀티 스레딩을 사용하고 외부 리소스와 상호 작용하고 UI 응답 성을 비동기식으로 유지 해야하는 작업을 사용합니다.


