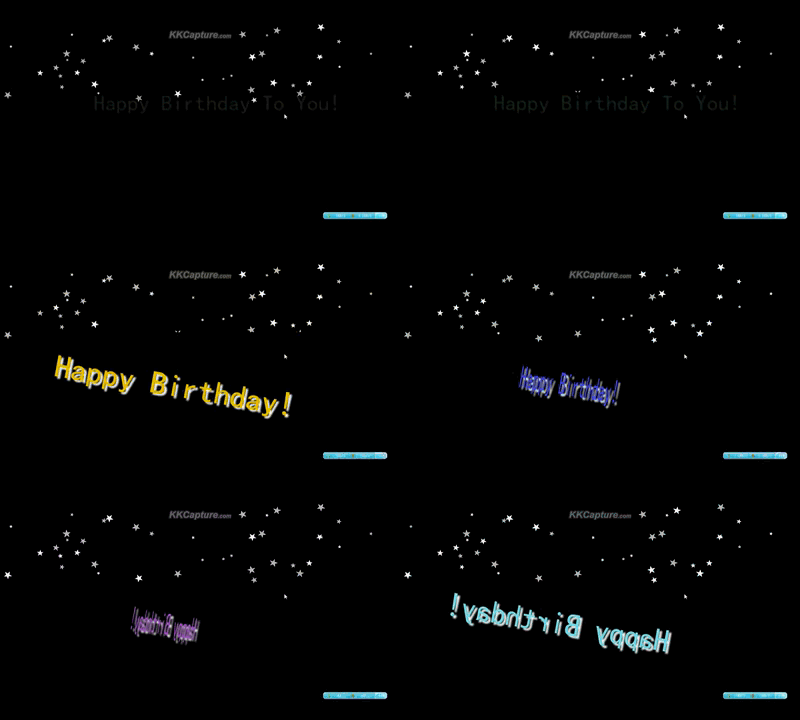
스타 애니메이션 그리기에 앞서 자바스크립트 지식을 소개하겠습니다.
객체 지향: JavaScript는 본질적으로 객체 지향 언어가 아니지만, 너무 복잡하기 때문에 일반적으로 코드 양이 적은 간단한 프로그램에만 적합합니다. 스크립트는 브라우저 예외를 직접적으로 발생시킵니다. 그러나 JavaScript에는 여전히 객체지향적인 특성이 있습니다. 다중 프로세스 및 다중 개체 스크립트 프로그램의 경우 개체를 빌드하는 것이 좋습니다. 그러면 스크립트 유지, 수정 및 호출이 매우 편리합니다. javascript에서 객체를 생성하는 것은 매우 간단합니다. Java 및 C++보다 훨씬 간단합니다. 예를 들어 자동차 객체를 생성하는 경우는
<pre name="code" class="javascript"><span style="font-size:18px;">var Car=function()//构建车的对象
{     this.color="red";
      this.price=100000;
      this.length=2.5;
      this.speed=80;   //车的一些属性
      this.x=0;
      this.updatePos=function()  //更新车位置的方法
      {    this.x+=this.speed;
      }
}
</span>setInterval():这是javascript中的定时器函数,有两个参数,前面是待执行的代码, 后面一个是间隔时间。但是有几点需要注意的问题。
1:假设有一个函数GetPos()需要用定时器执行, 可以setInterval(GetPos,1000)或者setInterval("GetPos()",1000) 如果写成setInterval(GetPos,1000)一般只会执行一次这个函数,我曾经犯过这个错误。
2:在setInterval()中尽量使用全局变量,因为它重复调用,局部变量容易出错。

好了,罗嗦了一会儿,我想大家应该都知道这些的。
这个gif图片中包括了星星对象和文字(后面讲述)对象。 对于绘制星星,应该充分利用五角星的对称性。 在HTML5 canvas对象中,大家最好要灵活使用坐标变换,我把主要的坐标变换函数说一下:
<span style="color:#ff0000;">
<span style="font-size:18px;">save() //保存当前画布状态
restore()回复画布状态
translate(x,y) //将画布中心坐标平移至x,y
rotate(angle) //将画布旋转angle角度
transform 和setTransform是对画布矩形进行变换的,比较难用</span></span>
现在构建星星对象,星星在天空中需要哪些属性呢? 一般有坐标、亮度、大小、倾斜角度等,我定义的如下
<span style="font-size:18px;">   this.x = -1;
    this.y = -1;  //表示横纵坐标
    this.style = "";
    this.r = -1;
    this.scale = 1; //表示缩放倍数
    this.angle = 0; //旋转的角度
    this.angle1 = 0; //辅助参数</span>
例如我绘制五分之一图形函数:
<span style="font-size:18px;"> this.drawPartStar = function () //部分
    {
        cxt.save();
        cxt.beginPath();
        cxt.lineCap = "round"; cxt.lineWidth = 5;
        cxt.fillStyle = this.style;
        cxt.translate(this.x, this.y); //位移
        cxt.rotate(this.angle1);
        //cxt.globalAlpha = this.alpha; //设置透明度
        cxt.moveTo(0, 0);
        var xx = 0 - this.r * Math.sin(36 / 180 * 3.14);
        var yy = 0 - this.r * Math.cos(36 / 180 * 3.14);
        cxt.lineTo(xx, yy);
        xx = 0;
        yy = 0 - this.r * Math.cos(36 / 180 * 3.14)
        - this.r * Math.sin(36 / 180 * 3.14) * Math.tan(72 / 180 * 3.14);
        cxt.lineTo(xx, yy);
        xx = this.r * Math.sin(36 / 180 * 3.14);
        yy = 0 - this.r * Math.cos(36 / 180 * 3.14);
        cxt.lineTo(xx, yy);
        cxt.lineTo(0, 0);
        cxt.closePath();
        cxt.fill();
        cxt.restore();
    }</span>
<span style="font-size:18px;">this.drawStar = function () //绘制完整的花
    {
        for (var i = 0; i <= 4; i++) {
            this.angle1 = i * 72 / 180 * 3.14 + this.angle;
            this.drawPartStar();
        }
    }</span>
<span style="font-size:18px;">var x=(n-m)*Math.random()+m;</span>
好了,到这里星星对象创建过程结束,其次需要构建这些星星。 由于星星数目多,可以使用数组对象,每一个数组对象都是一个星星对象:
<span style="font-size:18px;">
var stars = new Array();   //创建星星对象
    var starCount = 40; //星星的数目,默认是40

for (var m = 0; m < starCount; m++) //
    {
        var s = new star(cxt);
        s.init();stars[m] = s;
    }</span>
<span style="font-size:18px;">
/***************演示闪烁星星的函数**********************/
    function playStars() //演示星星
    {
        for (var n = 0; n < starCount; n++)
       {
        stars[n].getColor();
        stars[n].drawStar();
        }
    }</span>
setInterval("playStars()",500);
这样,闪烁的星星就全部做完了。
以上就是我说的利用对象构建闪烁星星的过程。 大家可以看到利用对象的简便和独立性,希望还不熟悉的朋友可以熟悉这种方法。
最后把star.js中关于星星对象的全部代码写在这里供大家参考
<span style="font-size:18px;">

/******star.js******/
/****以下是星星的对象**********************************/
var star = function (cxt) //定义星的对象
{
    this.x = -1;
    this.y = -1;  //表示横纵坐标
    this.style = "";
    this.r = -1;
    this.scale = 1; //表示缩放倍数
    this.angle = 0; //旋转的角度
    this.angle1 = 0; //辅助参数
    this.getPos = function () //获取随机坐标
    {
        var xx = 20 + 1200 * Math.random();
        var yy = 20 + 250 * Math.random();
        this.x = Math.ceil(xx); this.y = Math.ceil(yy); //获取了随机坐标
    }
    this.getAngle = function () //得到随机的角度
    {
        this.angle = Math.random() * Math.PI;
    }
    this.getR = function () //获取半径
    {
        var i = 1 + 4 * Math.random();
        this.r = Math.ceil(i); //获取随机半径
    }
    this.getColor = function () //获取随机颜色
    {
        var n = Math.random();
        if (n < 0.5)
            this.style = "white";
        else
            this.style = "#BBAAB1"; //灰白色

    }
    this.drawPartStar = function () //部分
    {
        cxt.save();
        cxt.beginPath();
        cxt.lineCap = "round"; cxt.lineWidth = 5;
        cxt.fillStyle = this.style;
        cxt.translate(this.x, this.y); //位移
        cxt.rotate(this.angle1);
        //cxt.globalAlpha = this.alpha; //设置透明度
        cxt.moveTo(0, 0);
        var xx = 0 - this.r * Math.sin(36 / 180 * 3.14);
        var yy = 0 - this.r * Math.cos(36 / 180 * 3.14);
        cxt.lineTo(xx, yy);
        xx = 0;
        yy = 0 - this.r * Math.cos(36 / 180 * 3.14)
        - this.r * Math.sin(36 / 180 * 3.14) * Math.tan(72 / 180 * 3.14);
        cxt.lineTo(xx, yy);
        xx = this.r * Math.sin(36 / 180 * 3.14);
        yy = 0 - this.r * Math.cos(36 / 180 * 3.14);
        cxt.lineTo(xx, yy);
        cxt.lineTo(0, 0);
        cxt.closePath();
        cxt.fill();
        cxt.restore();
    }
    this.drawStar = function () //绘制完整的花
    {
        for (var i = 0; i <= 4; i++) {
            this.angle1 = i * 72 / 180 * 3.14 + this.angle;
            this.drawPartStar();
        }
    }
    this.init = function ()  //初始化函数
    {
        this.getPos();
        this.getR();
        this.getColor();
        this.getAngle();
    }
}
/*****************以上是星星的对象**************************/</span
>위 내용은 HTML5 애플리케이션 - 생일 축하 애니메이션 - 스타 구현을 위한 샘플 코드 공유의 상세 내용입니다. 자세한 내용은 PHP 중국어 웹사이트의 기타 관련 기사를 참조하세요!