WeChat 애플릿을 활용한 팝업 페이지 개발 방법 소개
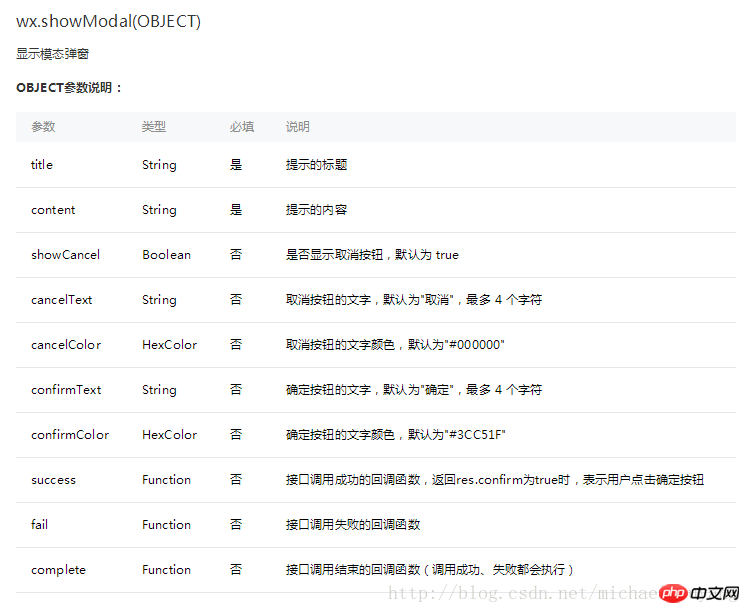
미니 프로그램 개발 과정에서 팝업 페이지를 개발하는 상황이 발생하게 됩니다. 먼저 미니 프로그램 팝업 페이지에 대한 공식적인 설명을 살펴보겠습니다. API의 인터페이스는 다음과 같습니다 
공식 코드 예시를 보면 asert처럼 단순하다고 생각하면 실제 내용을 볼 수 없습니다. 팝업창이 필요합니다. 그래서 오늘 HTML51.COM은 여러분의 참고를 위해 팝업 애플릿 튜토리얼을 작성했습니다.
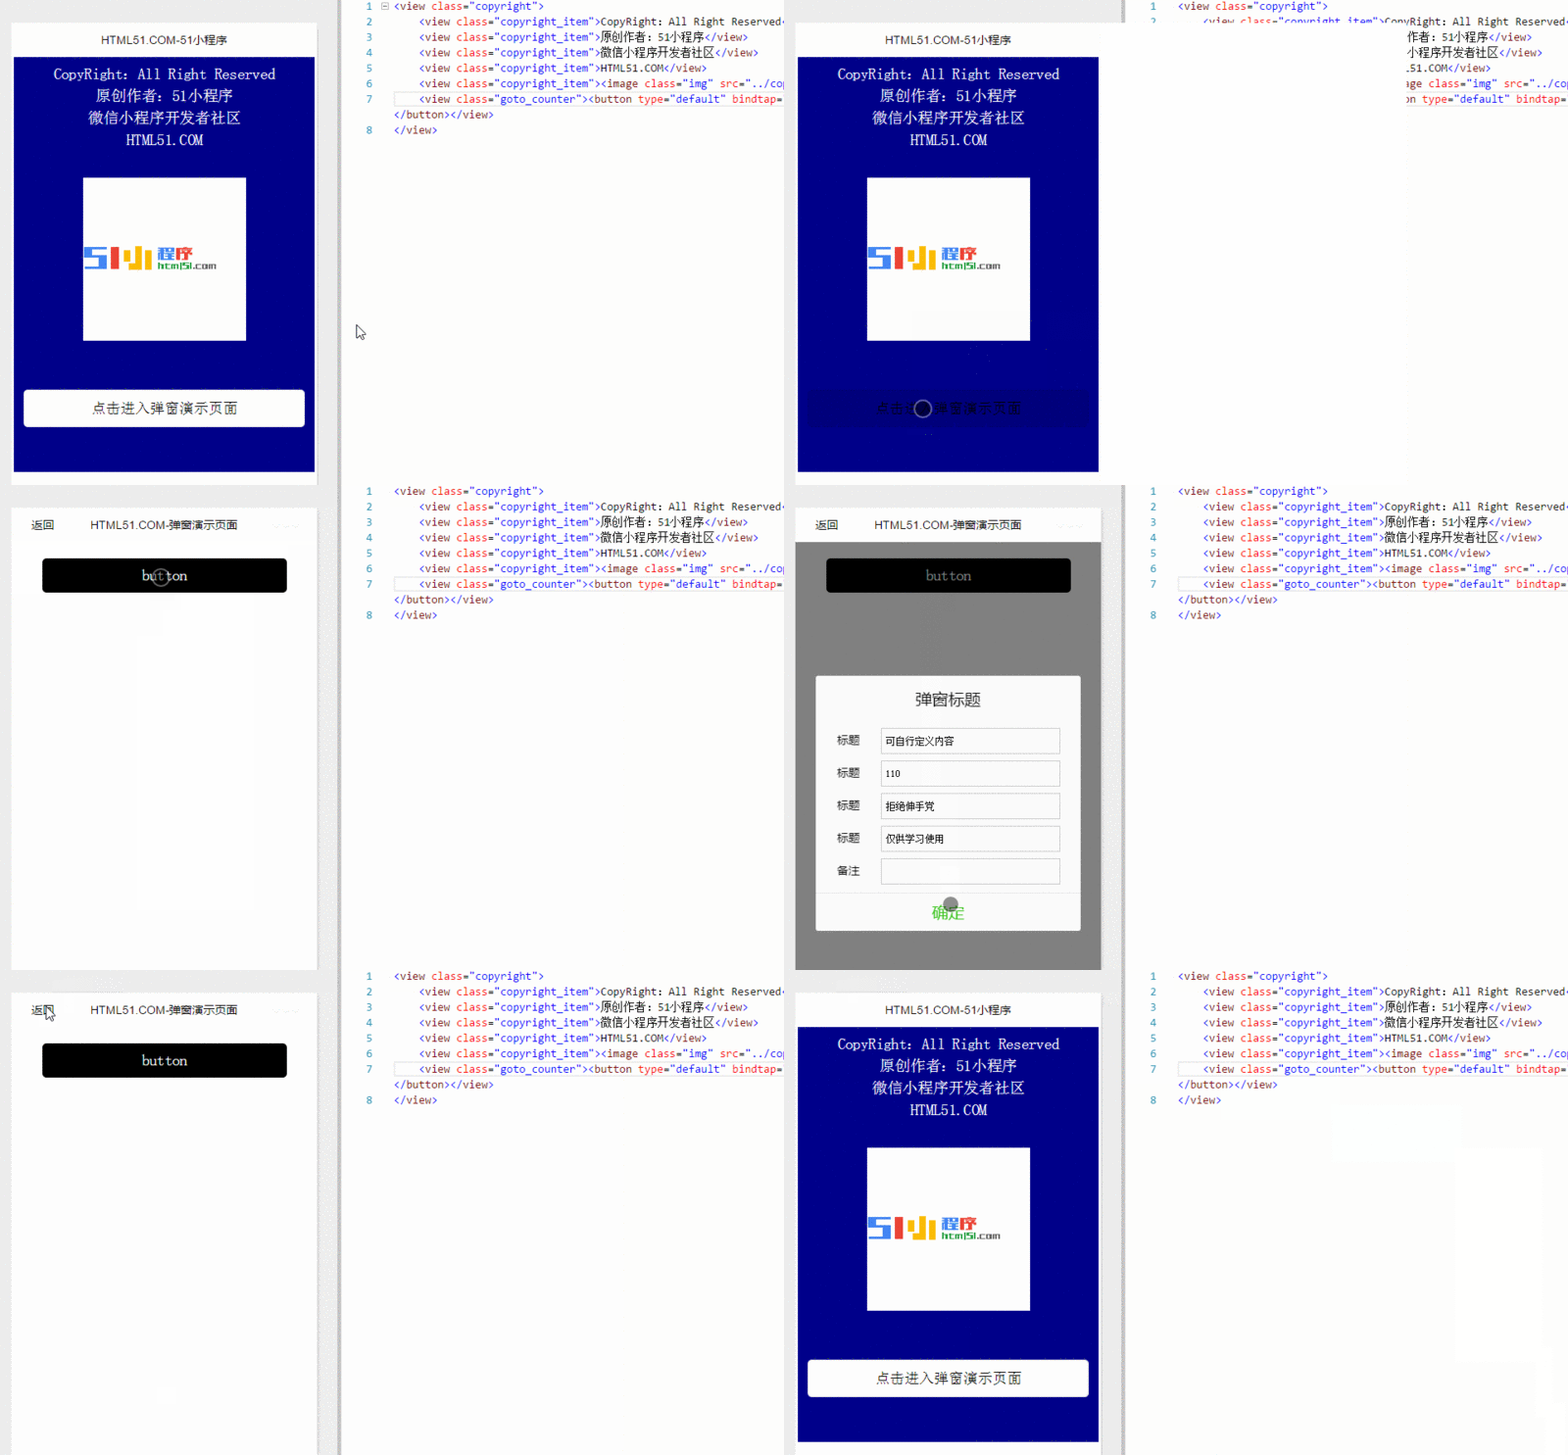
먼저 홈페이지의 동적 렌더링을 살펴보겠습니다. 
가장 먼저 보이는 것은 홈페이지 코드입니다.
<view class="copyright">
    <view class="copyright_item">CopyRight:All Right Reserved</view>
    <view class="copyright_item">原创作者:51小程序</view>
    <view class="copyright_item">微信小程序开发者社区</view>
    <view class="copyright_item">HTML51.COM</view>
    <view class="copyright_item"><image class="img" src="../copyright/image/logo.png"/></view>
    <view class="goto_counter"><button type="default" bindtap="goto_counter">点击进入弹窗演示页面</button></view>
</view>물론이죠. , 요점은 이것이 아닙니다.
index.wxml의 코드는 다음과 같습니다.
<!--使用animation属性指定需要执行的动画-->
<view animation="{{animationData}}" class="drawer_box" wx:if="{{showModalStatus}}">

  <!--drawer content-->
  <view class="drawer_title">弹窗标题</view>
  <view class="drawer_content">
    <view class="top grid">
      <label class="title col-0">标题</label>
      <input class="input_base input_h30 col-1" name="rName" value="可自行定义内容"></input>
    </view>
    <view class="top grid">
      <label class="title col-0">标题</label>
      <input class="input_base input_h30 col-1" name="mobile" value="110"></input>
    </view>
    <view class="top grid">
      <label class="title col-0">标题</label>
      <input class="input_base input_h30 col-1" name="phone" value="拒绝伸手党"></input>
    </view>
    <view class="top grid">
      <label class="title col-0">标题</label>
      <input class="input_base input_h30 col-1" name="Email" value="仅供学习使用"></input>
    </view>
    <view class="top bottom grid">
      <label class="title col-0">备注</label>
      <input class="input_base input_h30 col-1" name="bz"></input>
    </view>
  </view>
  <view class="btn_ok" bindtap="powerDrawer" data-statu="close">确定</view>
</view>index.wxss의 코드는 다음과 같습니다.
.btn {
  width: 80%;
  padding: 20rpx 0;
  border-radius: 10rpx;
  text-align: center;
  margin: 40rpx 10%;
  background: #000;
  color: #fff;
}

/*mask*/
.drawer_screen {
  width: 100%;
  height: 100%;
  position: fixed;
  top: 0;
  left: 0;
  z-index: 1000;
  background: #000;
  opacity: 0.5;
  overflow: hidden;
}

/*content*/
.drawer_box {
  width: 650rpx;
  overflow: hidden;
  position: fixed;
  top: 50%;
  left: 0;
  z-index: 1001;
  background: #FAFAFA;
  margin: -150px 50rpx 0 50rpx;
  border-radius: 3px;
}

.drawer_title{
  padding:15px;
  font: 20px "microsoft yahei";
  text-align: center;
}
.drawer_content {
  height: 210px;
  overflow-y: scroll; /*超出父盒子高度可滚动*/
}

.btn_ok{
  padding: 10px;
  font: 20px "microsoft yahei";
  text-align: center;
  border-top: 1px solid #E8E8EA;
  color: #3CC51F;
}

.top{
    padding-top:8px;
}
.bottom {
    padding-bottom:8px;
}
.title {
    height: 30px;
    line-height: 30px;
    width: 160rpx;
    text-align: center;
    display: inline-block;
    font: 300 28rpx/30px "microsoft yahei";
}

.input_base {
    border: 2rpx solid #ccc;
    padding-left: 10rpx;
    margin-right: 50rpx;
}
.input_h30{
    height: 30px;
    line-height: 30px;
}
.input_h60{
    height: 60px;
}
.input_view{
    font: 12px "microsoft yahei";
    background: #fff;
    color:#000;
    line-height: 30px;
}

input {
    font: 12px "microsoft yahei";
    background: #fff;
    color:#000 ;
}
radio{
    margin-right: 20px;
}
.grid { display: -webkit-box; display: box; }
.col-0 {-webkit-box-flex:0;box-flex:0;}
.col-1 {-webkit-box-flex:1;box-flex:1;}
.fl { float: left;}
.fr { float: right;}index.js의 코드는 다음과 같습니다.
으르르위 내용은 WeChat 애플릿을 활용한 팝업 페이지 개발 방법 소개의 상세 내용입니다. 자세한 내용은 PHP 중국어 웹사이트의 기타 관련 기사를 참조하세요!

핫 AI 도구

Undresser.AI Undress
사실적인 누드 사진을 만들기 위한 AI 기반 앱

AI Clothes Remover
사진에서 옷을 제거하는 온라인 AI 도구입니다.

Undress AI Tool
무료로 이미지를 벗다

Clothoff.io
AI 옷 제거제

AI Hentai Generator
AI Hentai를 무료로 생성하십시오.

인기 기사

뜨거운 도구

메모장++7.3.1
사용하기 쉬운 무료 코드 편집기

SublimeText3 중국어 버전
중국어 버전, 사용하기 매우 쉽습니다.

스튜디오 13.0.1 보내기
강력한 PHP 통합 개발 환경

드림위버 CS6
시각적 웹 개발 도구

SublimeText3 Mac 버전
신 수준의 코드 편집 소프트웨어(SublimeText3)

뜨거운 주제
 7526
7526
 15
15
 1378
1378
 52
52
 81
81
 11
11
 54
54
 19
19
 21
21
 74
74
 HTML의 테이블 테두리
Sep 04, 2024 pm 04:49 PM
HTML의 테이블 테두리 안내. 여기에서는 HTML의 테이블 테두리 예제를 사용하여 테이블 테두리를 정의하는 여러 가지 방법을 논의합니다.
 HTML 여백-왼쪽
Sep 04, 2024 pm 04:48 PM
HTML 여백-왼쪽 안내. 여기에서는 HTML margin-left에 대한 간략한 개요와 코드 구현과 함께 예제를 논의합니다.
 HTML의 중첩 테이블
Sep 04, 2024 pm 04:49 PM
HTML의 Nested Table에 대한 안내입니다. 여기에서는 각 예와 함께 테이블 내에 테이블을 만드는 방법을 설명합니다.
 HTML 테이블 레이아웃
Sep 04, 2024 pm 04:54 PM
HTML 테이블 레이아웃 안내. 여기에서는 HTML 테이블 레이아웃의 값에 대해 예제 및 출력 n 세부 사항과 함께 논의합니다.
 HTML 입력 자리 표시자
Sep 04, 2024 pm 04:54 PM
HTML 입력 자리 표시자 안내. 여기서는 코드 및 출력과 함께 HTML 입력 자리 표시자의 예를 논의합니다.
 HTML 정렬 목록
Sep 04, 2024 pm 04:43 PM
HTML 순서 목록에 대한 안내입니다. 여기서는 HTML Ordered 목록 및 유형에 대한 소개와 각각의 예에 대해서도 설명합니다.
 HTML에서 텍스트 이동
Sep 04, 2024 pm 04:45 PM
HTML에서 텍스트 이동 안내. 여기서는 Marquee 태그가 구문과 함께 작동하는 방식과 구현할 예제에 대해 소개합니다.
 HTML 온클릭 버튼
Sep 04, 2024 pm 04:49 PM
HTML onclick 버튼에 대한 안내입니다. 여기에서는 각각의 소개, 작업, 예제 및 다양한 이벤트의 onclick 이벤트에 대해 설명합니다.


