기능 설명:
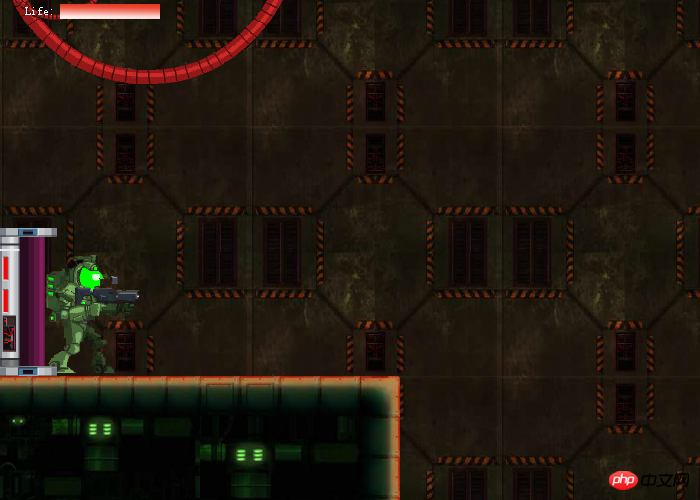
HTML5플래시 게임 "더블 에이전트"를 기반으로 한 횡스크롤 슈팅 게임입니다. 왼쪽 및 오른쪽 화살표 키는 이동을 제어하고 위쪽 화살표 키는 점프를 제어합니다.
이 게임은 자체 개발한 HTML5 게임 프레임워크인 cnGameJS효과 미리보기:

1. 다층 맵에 대하여
전 HTML5 게임인 "탱크 지원팀"에서 "라는 맵만 사용했습니다. 단순 단층 맵은 돌을 제외한 열린 공간이 한 층만 있다는 의미입니다. 하지만 이 단층 맵은 상대적으로 한계가 큽니다. 장면 기반 게임을 구현해야 하는 경우( 예를 들어 Super Mario 및 위의 게임), 단 하나의 레이어만 있는 맵으로는 충분하지 않은 경우가 많습니다. 왜냐하면 게임 주인공이 서 있는 장애물 외에도 게임 배경 및 기타 요소(예: 뒤의 벽)도 있기 때문입니다. 등), 따라서 여러 레이어 표시의 목적을 달성하려면 지도 객체를 레이어링해야 합니다.
새 레이어 객체:
각 레이어 객체는 레이어의 스프라이트를 유지하고 담당합니다. 레이어 객체의 값은 다음과 같습니다.
/**
        *层对象
        **/
        var layer = function(id,mapMatrix, options) {

            if (!(this instanceof arguments.callee)) {
                return new arguments.callee(id,mapMatrix, options);
            }
            this.init(id,mapMatrix, options);
        }
        layer.prototype={

            /**
            *初始化
            **/
            init: function(id,mapMatrix,options) {
                /**
                *默认对象
                **/
                var defaultObj = {
                    cellSize: [32, 32],   //方格宽,高
                    x: 0,                      //layer起始x
                    y: 0                  //layer起始y

                };
                options = options || {};
                options = cg.core.extend(defaultObj, options);
                this.id=options.id;
                this.mapMatrix = mapMatrix;
                this.cellSize = options.cellSize;
                this.x = options.x;
                this.y = options.y;
                this.row = mapMatrix.length; //有多少行
                this.width=this.cellSize[0]* mapMatrix[0].length;
                this.height=this.cellSize[1]* this.row;
                this.spriteList=new cg.SpriteList();//该层上的sprite列表
                this.imgsReference=options.imgsReference;//图片引用字典:{"1":{src:"xxx.png",x:0,y:0},"2":{src:"xxx.png",x:1,y:1}}
                this.zIindex=options.zIndex;
            },
            /**
            *添加sprite
            **/
            addSprites:function(sprites){
                if (cg.core.isArray(sprites)) {
                    for (var i = 0, len = sprites.length; i < len; i++) {
                        arguments.callee.call(this, sprites[i]);
                    }
                }
                else{
                    this.spriteList.add(sprites);
                    sprites.layer=this;
                }

            },
            /**
            *获取特定对象在layer中处于的方格的值
            **/
            getPosValue: function(x, y) {
                if (cg.core.isObject(x)) {
                    y = x.y;
                    x = x.x;
                }
                var isUndefined = cg.core.isUndefined;
                y = Math.floor(y / this.cellSize[1]);
                x = Math.floor(x / this.cellSize[0]);
                if (!isUndefined(this.mapMatrix[y]) && !isUndefined(this.mapMatrix[y][x])) {
                    return this.mapMatrix[y][x];
                }
                return undefined;
            },
            /**
            *获取特定对象在layer中处于的方格索引
            **/
            getCurrentIndex: function(x, y) {
                if (cg.core.isObject(x)) {
                    y = x.y;
                    x = x.x;
                }
                return [Math.floor(x / this.cellSize[0]), Math.floor(y / this.cellSize[1])];
            },
            /**
            *获取特定对象是否刚好与格子重合
            **/
            isMatchCell: function(x, y) {
                if (cg.core.isObject(x)) {
                    y = x.y;
                    x = x.x;
                }
                return (x % this.cellSize[0] == 0) && (y % this.cellSize[1] == 0);
            },
            /**
            *设置layer对应位置的值
            **/
            setPosValue: function(x, y, value) {
                this.mapMatrix[y][x] = value;
            },
            /**
            *更新层上的sprite列表
            **/
            update:function(duration){
                this.spriteList.update(duration);

            },
            /**
            *根据layer的矩阵绘制layer和该layer上的所有sprite
            **/
            draw: function() {
                var mapMatrix = this.mapMatrix;
                var beginX = this.x;
                var beginY = this.y;
                var cellSize = this.cellSize;
                var currentRow;
                var currentCol
                var currentObj;
                var row = this.row;
                var img;
                var col;
                for (var i = beginY, ylen = beginY + row * cellSize[1]; i < ylen; i += cellSize[1]) {    //根据地图矩阵,绘制每个方格
                    currentRow = (i - beginY) / cellSize[1];
                    col=mapMatrix[currentRow].length;
                    for (var j = beginX, xlen = beginX + col * cellSize[0]; j < xlen; j += cellSize[0]) {
                        currentCol = (j - beginX) / cellSize[0];
                        currentObj = this.imgsReference[mapMatrix[currentRow][currentCol]];
                        if(currentObj){
                            currentObj.x = currentObj.x || 0;
                            currentObj.y = currentObj.y || 0;
                            img = cg.loader.loadedImgs[currentObj.src];
                            //绘制特定坐标的图像
                            cg.context.drawImage(img, currentObj.x, currentObj.y, cellSize[0], cellSize[1], j, i, cellSize[0], cellSize[1]);
                        }
                    }
                }
                //更新该layer上所有sprite
                this.spriteList.draw();

            }
}그러면 다양한 레이어를 쉽게 생성하여 지도에 추가할 수 있습니다.
/*    背景矩阵    */
var bgMatrix = [
                    [1,1,1],
                    [1,1,1],
                    [1,1,1]
                ];

this.map = new cnGame.Map({width:3000,height:3000});
var newLayer=new cnGame.Layer("bg",bgMatrix, { cellSize: [1000, 1000], width: this.map.width, height: this.map.height });
newLayer.imgsReference={ "1": { src: srcObj.bg }};
this.map.addLayer(newLayer);2. 모바일 씬에 대하여 >
지난 HTML5 "Game Super Mario Game Demo"에서는 움직임을 변환하여 플레이어 고정 및 씬 이동 효과를 구현했습니다. 그러나 이 구현 방법은 더 큰 문제를 안고 있는데, 이는 맵과 플레이어의 xy 값 변화를 방해하므로 많은 불편을 초래하게 됩니다. 더 나은 구현은 플레이어와 지도의 xy 값을 그대로 유지하고 원점 좌표를 그릴 때만 변경하는 것입니다.
뷰 객체의 새로운 방법: applyInView:
ApplyInView 메서드
의 기능은 지도와 플레이어의 실제 좌표를 변경하지 않는 것입니다. 다음으로, 그릴 때 뷰가 고정되고 다른 게임 요소가 상대적으로 이동합니다. 예를 들어, 뷰의 중간점을 기준으로 플레이어를 고정해야 하며, 지도의 다른 모든 게임 요소는 뷰를 기준으로 이동해야 합니다. this.view=new cnGame.View({map:this.map,x:0,y:0,width:cnGame.width,height:cnGame.height});
this.view.centerElem(this.player,true); this.view.applyInView(function(){
map.draw();
});/**
*使坐标相对于view
**/
applyInView:function(func){
cg.context.save();
cg.context.translate(-this.x, -this.y);
func();
cg.context.restore();
},캔버스
에 고정되어 있으며, 다른 요소의 좌표는 항상 뷰를 시각적으로 기준으로 합니다.위 내용은 HTML5 기반 가로 슈팅 게임에 대한 자세한 설명의 상세 내용입니다. 자세한 내용은 PHP 중국어 웹사이트의 기타 관련 기사를 참조하세요!