이 글에서는 일부 CSS 체크박스 체크박스 스타일의 코드 공유를 주로 소개합니다. 간단한 페이지 컨트롤 디자인이 필요한 친구들이 참고할 수 있습니다
체크박스는 아마도 모든 웹사이트에서 사용하는 HTML 요소이지만 대부분의 사람들은 스타일을 지정하지 않으므로 대부분의 웹사이트에서 동일하게 보입니다. 웹사이트의 체크박스 스타일을 다르게 하거나 체크박스처럼 보이지 않게 만드는 것은 어떨까요?
이 튜토리얼에서는 웹사이트에서 사용할 수 있는 5가지 선택 상자를 만들어 보겠습니다. 
우리가 만들 체크박스 스타일을 보려면 데모를 보세요.
데모 주소
먼저 모든 체크박스를 숨기려면 CSS를 추가해야 합니다. 다음으로 모양을 변경하겠습니다. 이렇게 하려면 CSS 파일에 코드 조각을 추가해야 합니다. 를 통해 체크박스를 처리할 수 있음을 의미합니다.
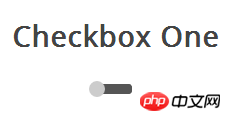
이 체크박스 스타일은 잠금 해제 슬라이더와 유사하며 슬라이더가 선택되어 있고 선택 해제되어 있습니다상태는 다음과 같습니다. 다른 위치에 표시됩니다. 슬라이더
버튼 (라벨 라벨)을 클릭하면 체크박스가 선택되고 슬라이더가 ON 위치로 이동합니다.
/**
 * 隐藏默认的checkbox
 */
input[type=checkbox] {
 visibility: hidden;
}<section>
<!-- Checbox One -->
<h3>Checkbox One</h3>
<p class="checkboxOne">
<input type="checkbox" value="1" id="checkboxOneInput" name="" />
<label for="checkboxOneInput"></label>
</p>
</section>/**
* Create the slider bar
*/
.checkboxOne {
width: 40px;
height: 10px;
background: #555;
margin: 20px 80px;
position: relative;
border-radius: 3px;
}/**
* Create the slider from the label
*/
.checkboxOne label {
display: block;
width: 16px;
height: 16px;
border-radius: 50%;
-webkit-transition: all .5s ease;
-moz-transition: all .5s ease;
-o-transition: all .5s ease;
-ms-transition: all .5s ease;
transition: all .5s ease;
cursor: pointer;
position: absolute;
top: -3px;
left: -3px;
background: #ccc;
}스타일 2
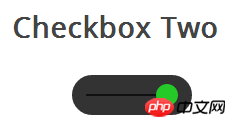
체크박스 스타일은 스타일과 비슷하지만 차이점은 이 슬라이더 버튼의 색상이 변한다는 점입니다. 슬라이더 버튼을 클릭하면 스트립의 반대쪽으로 이동하여 버튼의 색상이 변경됩니다.HTML 코드는 스타일 1과 완전히 동일합니다. /**
* Move the slider in the correct position if the checkbox is clicked
*/
.checkboxOne input[type=checkbox]:checked + label {
left: 27px;
} 이 p는 스타일보다 큰 스트립이 됩니다. 레이블은 여전히 슬라이더로 사용됩니다.
<section>
  <!-- Checbox Two -->
  <h3>Checkbox Two</h3>
   <p class="checkboxTwo">
    <input type="checkbox" value="1" id="checkboxTwoInput" name="" />
    <label for="checkboxTwoInput"></label>
   </p>
</section>:before<🎜를 사용해야 합니다. >
의사 클래스새 요소를 만듭니다.
/**
 * Checkbox Two
 */
.checkboxTwo {
 width: 120px;
 height: 40px;
 background: #333;
 margin: 20px 60px;

 border-radius: 50px;
 position: relative;
}스타일 1과 동일합니다. 다음으로 라벨용 CSS 스타일을 작성하고 이를 슬라이더로 사용합니다.
/**
 * Create the line for the circle to move across
 */
.checkboxTwo:before {
 content: '';
 position: absolute;
 top: 19px;
 left: 14px;
 height: 2px;
 width: 90px;
 background: #111;
}스타일 1과 유사한 선택 상태를 만들고 선택 시 레이블의 왼쪽 및 배경 속성을 변경하고 싶습니다. 样式三 这个复选框的样式比样式二更复杂一些,它和前面的例子一样会左右滑动,并且当改变选中和未选中的状态时,滑块滑动到另一侧并且在原位置显示对应的文本。 首先,我们写HTML代码,这和前面是相同的。 然后,我们用相同的方式把p作为滑块,下面的代码会创建一个黑色圆角的条带,我们可以把滑块和文本放到里面。 当滑块处于未选中状态时,滑块会在左侧,并且右边显示”OFF”,当点击的时候,滑块移动到右侧,左侧显示”ON”。 和前面一样,我们来添加滑块的样式,当被点击时它会移动到另一侧,并且改变颜色。 样式四 在这个样式中,我们会创建两个圆形,当点击时改变里面的圆形的颜色表示选中与未选中的状态。 接下来我们要为checkbox创建外面的圆形,使用CSS的border-radius属性,并且设置为100%就可以创建一个正圆形。 然后我们用label元素来创建一个小一点的圆形,它会根据checkbox状态来改变颜色。 当复选框被选中的时候,我们要改变内圈的背景颜色来表示选中状态。 样式五 这个复选框的样式有些不同,它看起来只是比浏览器默认的checkbox样式稍微好了些,但是不同的是我们可以根据自己的需要来定义它的样式了。 在前面的例子中,我们把p作为checkbox的滑动条带或者外部的圆圈,但是这一次我们不需要了,可以使用p元素来设置复选框的区域。 label标签用于Click事件和我们要定义的复选框的方框样式。 接下来,我们要创建方框中的对勾,对于这一点,我们可以使用:after伪类创建一个新的元素,为了实现这个样式,我们可以创建一个5px x 9px的长方形并给他加上边框。这时候我们去掉上面和右边的边框之后,它会看起来像一个字母L。然后我们可以使用CSS的transform属性让它旋转一下,这样看起来就像是一个对勾。 在上面的CSS中,我们已经设置它的透明度为0.2,所以你会看到的复选框有一个半透明的对勾。你可以在悬停的时候加深一点,在选中时,可以把设置为不透明。/**
* Create the click event for the checkbox
*/
.checkboxTwo input[type=checkbox]:checked + label {
left: 84px;
background: #26ca28;
}
<section>
  <!-- Checbox Three -->
  <h3>Checkbox Three</h3>
   <p class="checkboxThree">
    <input type="checkbox" value="1" id="checkboxThreeInput" name="" />
    <label for="checkboxThreeInput"></label>
   </p>
</section>/**
* Checkbox Three
*/
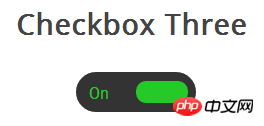
.checkboxThree {
width: 120px;
height: 40px;
background: #333;
margin: 20px 60px;
border-radius: 50px;
position: relative;
}
但是元素数量不足以让我们实现这些功能,所以我们要用:before和:after两个伪类创建两个元素,分别放置”ON”和”OFF”。/**
* Create the text for the On position
*/
.checkboxThree:before {
content: 'On';
position: absolute;
top: 12px;
left: 13px;
height: 2px;
color: #26ca28;
font-size: 16px;
}
/**
* Create the label for the off position
*/
.checkboxThree:after {
content: 'Off';
position: absolute;
top: 12px;
left: 84px;
height: 2px;
color: #ddd;
font-size: 16px;
}/**
* Create the pill to click
*/
.checkboxThree label {
display: block;
width: 52px;
height: 22px;
border-radius: 50px;
-webkit-transition: all .5s ease;
-moz-transition: all .5s ease;
-o-transition: all .5s ease;
-ms-transition: all .5s ease;
transition: all .5s ease;
cursor: pointer;
position: absolute;
top: 9px;
z-index: 1;
left: 12px;
background: #ddd;
}
/**
* Create the checkbox event for the label
*/
.checkboxThree input[type=checkbox]:checked + label {
left: 60px;
background: #26ca28;
}
和前面一样的HTML代码。<section>
<!-- Checbox Four -->
<h3>Checkbox Four</h3>
<p class="checkboxFour">
<input type="checkbox" value="1" id="checkboxFourInput" name="" />
<label for="checkboxFourInput"></label>
</p>
</section><section>
<!-- Checbox Four -->
<h3>Checkbox Four</h3>
<p class="checkboxFour">
<input type="checkbox" value="1" id="checkboxFourInput" name="" />
<label for="checkboxFourInput"></label>
</p>
</section>/**
* Create the checkbox button
*/
.checkboxFour label {
display: block;
width: 30px;
height: 30px;
border-radius: 100px;
-webkit-transition: all .5s ease;
-moz-transition: all .5s ease;
-o-transition: all .5s ease;
-ms-transition: all .5s ease;
transition: all .5s ease;
cursor: pointer;
position: absolute;
top: 5px;
left: 5px;
z-index: 1;
background: #333;
-webkit-box-shadow:inset 0px 1px 3px rgba(0,0,0,0.5);
-moz-box-shadow:inset 0px 1px 3px rgba(0,0,0,0.5);
box-shadow:inset 0px 1px 3px rgba(0,0,0,0.5);
}/**
* Create the checked state
*/
.checkboxFour input[type=checkbox]:checked + label {
background: #26ca28;
}
首先还是一样的HTML代码<section>
<!-- Checbox Five -->
<h3>Checkbox Five</h3>
<p class="checkboxFive">
<input type="checkbox" value="1" id="checkboxFiveInput" name="" />
<label for="checkboxFiveInput"></label>
</p>
</section>/**
* Checkbox Five
*/
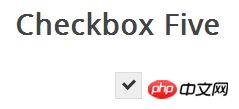
.checkboxFive {
width: 25px;
margin: 20px 100px;
position: relative;
}/**
* Create the box for the checkbox
*/
.checkboxFive label {
cursor: pointer;
position: absolute;
width: 25px;
height: 25px;
top: 0;
left: 0;
background: #eee;
border:1px solid #ddd;
}/**
* Display the tick inside the checkbox
*/
.checkboxFive label:after {
opacity: 0.2;
content: '';
position: absolute;
width: 9px;
height: 5px;
background: transparent;
top: 6px;
left: 7px;
border: 3px solid #333;
border-top: none;
border-right: none;
-webkit-transform: rotate(-45deg);
-moz-transform: rotate(-45deg);
-o-transform: rotate(-45deg);
-ms-transform: rotate(-45deg);
transform: rotate(-45deg);
}/**
* Create the hover event of the tick
*/
.checkboxFive label:hover::after {
opacity: 0.5;
}
/**
* Create the checkbox state for the tick
*/
.checkboxFive input[type=checkbox]:checked + label:after {
opacity: 1;
}
위 내용은 최신 CSS Checkbox 스타일 코드 공유의 상세 내용입니다. 자세한 내용은 PHP 중국어 웹사이트의 기타 관련 기사를 참조하세요!