이 글은 위챗 미니 프로그램의 실제 로그인 페이지 제작 코드를 구체적으로 소개하고 있습니다. 관심 있는 친구들이 참고할 수 있도록
학생들이 사용할 수 있는 로그인 페이지 사례를 제공합니다. 🎜>
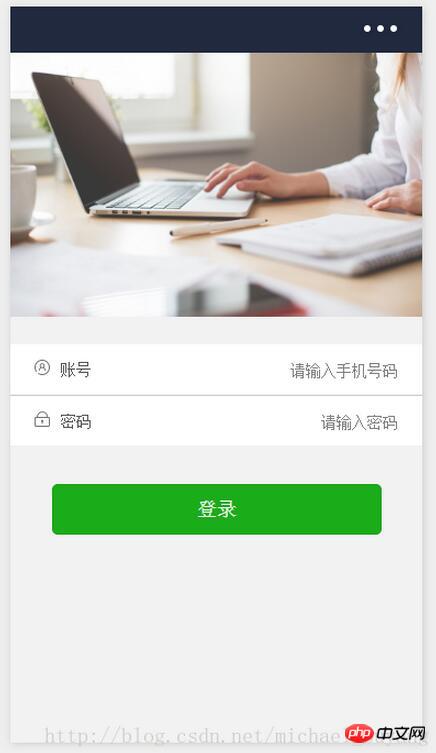
프로젝트 렌더링:

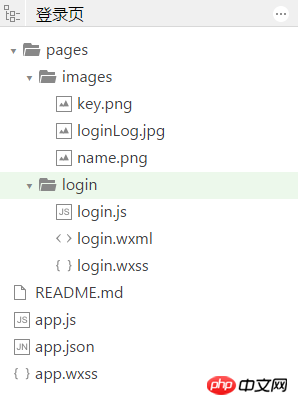
디렉토리 구조:

이미지 리소스:
name.png


<view class="container">
 <view class="login-icon">
 <image class="login-img" src="../images/loginLog.jpg"></image>
 </view>
 <view class="login-from">

 <!--账号-->
 <view class="inputView">
  <image class="nameImage" src="../images/name.png"></image>
  <label class="loginLab">账号</label>
  <input class="inputText" placeholder="请输入账号" bindinput="phoneInput" />
 </view>
 <view class="line"></view>

 <!--密码-->
 <view class="inputView">
  <image class="keyImage" src="../images/key.png"></image>
  <label class="loginLab">密码</label>
  <input class="inputText" password="true" placeholder="请输入密码" bindinput="passwordInput" />
 </view>

 <!--按钮-->
 <view class="loginBtnView">
  <button class="loginBtn" type="primary" size="{{primarySize}}" loading="{{loading}}" plain="{{plain}}" disabled="{{disabled}}" bindtap="login">登录</button>
 </view>
 </view>
</view>page{
height: 100%;
}
.container {
height: 100%;
display: flex;
flex-direction: column;
padding: 0;
box-sizing: border-box;
background-color: #f2f2f2
}
/*登录图片*/
.login-icon{
flex: none;
}
.login-img{
width: 750rpx;
}
/*表单内容*/
.login-from {
margin-top: 20px;
flex: auto;
height:100%;
}
.inputView {
background-color: #fff;
line-height: 44px;
}
/*输入框*/
.nameImage, .keyImage {
margin-left: 22px;
width: 14px;
height: 14px
}
.loginLab {
margin: 15px 15px 15px 10px;
color: #545454;
font-size: 14px
}
.inputText {
flex: block;
float: right;
text-align: right;
margin-right: 22px;
margin-top: 11px;
color: #cccccc;
font-size: 14px
}
.line {
width: 100%;
height: 1px;
background-color: #cccccc;
margin-top: 1px;
}
/*按钮*/
.loginBtnView {
width: 100%;
height: auto;
background-color: #f2f2f2;
margin-top: 0px;
margin-bottom: 0px;
padding-bottom: 0px;
}
.loginBtn {
width: 80%;
margin-top: 35px;
}Page({
data: {
phone: '',
password:''
},
// 获取输入账号
phoneInput :function (e) {
this.setData({
phone:e.detail.value
})
},
// 获取输入密码
passwordInput :function (e) {
this.setData({
password:e.detail.value
})
},
// 登录
login: function () {
if(this.data.phone.length == 0 || this.data.password.length == 0){
wx.showToast({
title: '用户名和密码不能为空',
icon: 'loading',
duration: 2000
})
}else {
// 这里修改成跳转的页面
wx.showToast({
title: '登录成功',
icon: 'success',
duration: 2000
})
}
}
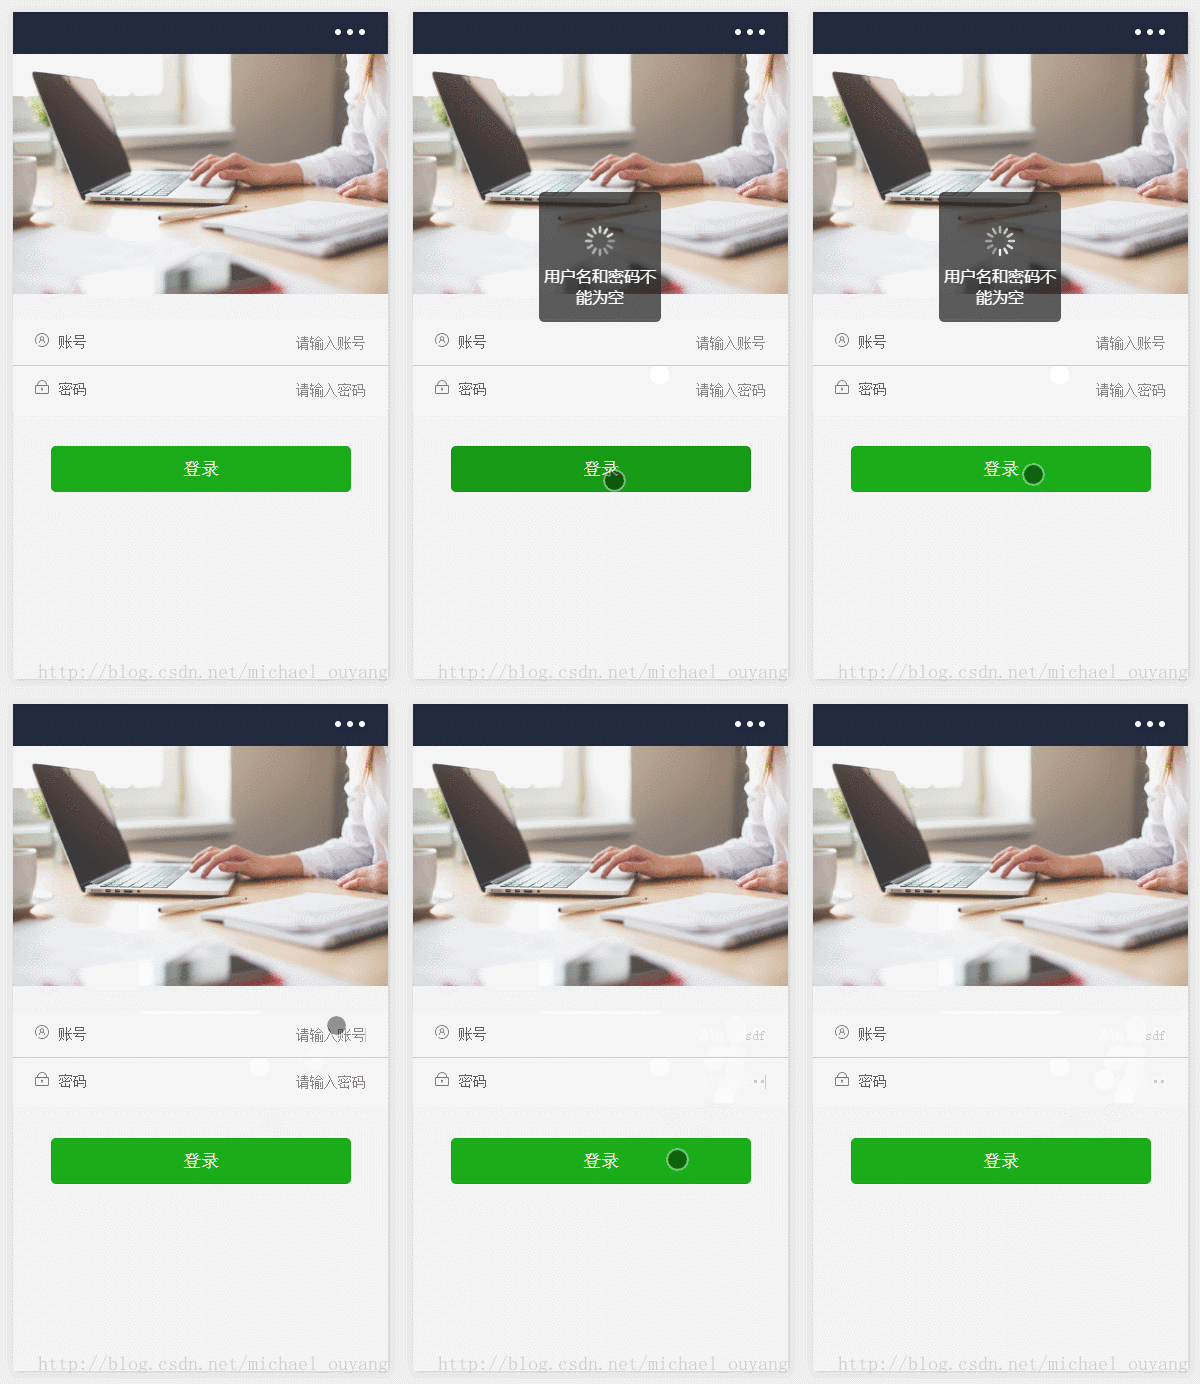
})결과 실행:

위 내용은 WeChat 애플릿의 로그인 페이지 제작 예시에 대한 자세한 설명의 상세 내용입니다. 자세한 내용은 PHP 중국어 웹사이트의 기타 관련 기사를 참조하세요!