
이 글에서는 Spring Boot(web+freemarker) 시작 관련 정보를 주로 소개하고 있으니 필요하신 분들은 참고하시면 됩니다
1. maven 파일 pom.xml
<?xml version="1.0" encoding="UTF-8"?>
<project xmlns="http://maven.apache.org/POM/4.0.0"
     xmlns:xsi="http://www.w3.org/2001/XMLSchema-instance"
     xsi:schemaLocation="http://maven.apache.org/POM/4.0.0 http://maven.apache.org/xsd/maven-4.0.0.xsd">
  <modelVersion>4.0.0</modelVersion>
  <groupId>com.hdwang</groupId>
  <artifactId>spring-boot-test</artifactId>
  <version>1.0-SNAPSHOT</version>
  <name>spring-boot-test</name>
  <description>project for test Spring Boot</description>
  <properties>
    <project.build.sourceEncoding>UTF-8</project.build.sourceEncoding>
    <java.version>1.8</java.version>
  </properties>
  <!-- Inherit defaults from Spring Boot -->
  <parent>
    <groupId>org.springframework.boot</groupId>
    <artifactId>spring-boot-starter-parent</artifactId>
    <version>1.5.4.RELEASE</version>
    <relativePath/>
  </parent>
  <dependencies>
    <!-- Add typical dependencies for a web application -->
    <dependency>
      <groupId>org.springframework.boot</groupId>
      <artifactId>spring-boot-starter-web</artifactId>
    </dependency>
    <dependency>
      <groupId>org.springframework.boot</groupId>
      <artifactId>spring-boot-starter-freemarker</artifactId>
    </dependency>
    <!-- auto redeploy -->
    <dependency>
      <groupId>org.springframework.boot</groupId>
      <artifactId>spring-boot-devtools</artifactId>
      <optional>true</optional>
    </dependency>
  <!-- Package as an executable jar -->
  <build>
    <plugins>
      <plugin>
        <groupId>org.springframework.boot</groupId>
        <artifactId>spring-boot-maven-plugin</artifactId>
      </plugin>
    </plugins>
  </build>
</project>2. 구조 (static /templates/application.properties/logback.xml 이름은 모두 합의되어 있으며 특정 이름만 사용할 수 있습니다. 자세한 내용은 공식 spring boot 문서를 참고하세요. 다음 이름은 구성 중 하나입니다. 방법)
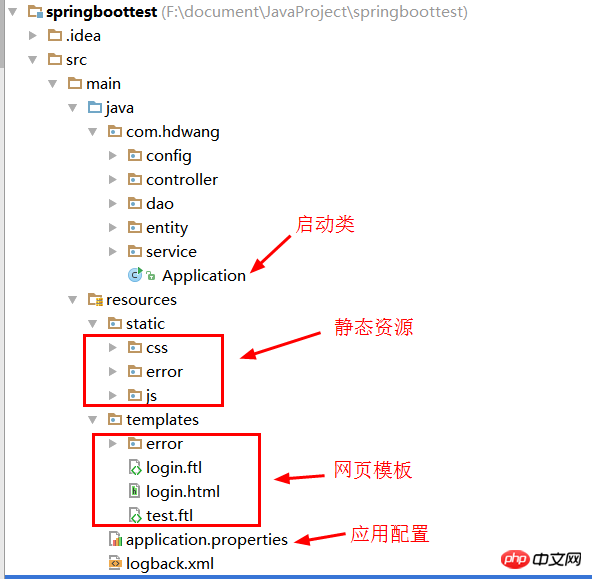
3. 시작 클래스 생성(최상위 수준에 배치하고 하위 계층(하위 폴더)의 클래스만 스캔하여 삽입할 수 있음)
@SpringBootApplication
public class Application {
  /**
   * main function
   * @param args params
   */
  public static void main(String[] args){
    SpringApplication.run(Application.class,args);
  }
}4. 컨트롤러 생성(에서) Application 클래스의 하위 디렉터리)
@Controller
@RequestMapping("/common")
public class Common {
  @Value("${msg:Welcome!}")
  private String msg;
  /**
   * get a page
   * @return a page with name called return value
   */
  @RequestMapping("login")
  public String getLoginPage(ModelMap map){
    map.put("welcomeMsg",this.msg);
    return "login";
  }
}5. 웹 페이지 템플릿 로그인 .ftl을 만듭니다(freemarker는 ftl 접미사를 사용해야 하며 저는 오랫동안 이것에 속았습니다! js/css 등은 해당 폴더에 /static이 포함되어 있지 않아서 오랫동안 속았었다는 점 참고하세요!)
<!DOCTYPE html>
<html>
<head>
  <meta charset="UTF-8" />
  <title>login</title>
  <link href="/css/home.css" rel="external nofollow" rel="stylesheet" type="text/css" />
  <script type="text/javascript" src="/js/jquery-2.0.3.min.js"></script>
  <script type="text/javascript" src="/js/home.js"></script>
</head>
<body>
<h1>login page</h1>
<h2>${welcomeMsg}</h2>
<form>
  <p>
   <label>用户名:<input type="text" id="username"/></label>
  </p>
  <p>
   <label>密码:<input type="password"/></label>
  </p>
  <p>
    <input type="submit" value="提交"/>
    <input type="reset" value="重置" />
  </p>
</form>
</body>
</html>6. 애플리케이션 구성 파일 쓰기
새 application.properties를 생성합니다. 파일을 만들고 다음 내용을 추가합니다.
msg=Ladies and gentleman,Welcome!
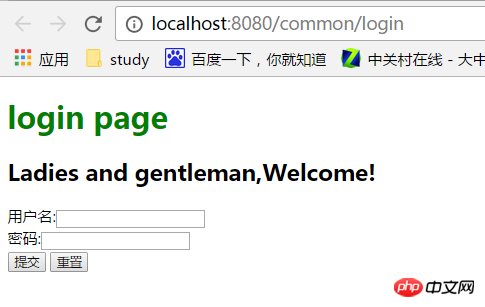
7. 브라우저에서
Visit를 실행합니다. http://localhost:8080/common/login
8. 패키지 만들기
java -jar xxx.jar 그리고 이 패키지를 실행하세요
위 내용은 Spring Boot JAVA 입문 상세 설명(web+freemarker)의 상세 내용입니다. 자세한 내용은 PHP 중국어 웹사이트의 기타 관련 기사를 참조하세요!


![[웹 프런트엔드] Node.js 빠른 시작](https://img.php.cn/upload/course/000/000/067/662b5d34ba7c0227.png)


