

MySQL 설치를 위한 인코딩 설정에 대한 자세한 그래픽 설명

1. MySQL 설치
Mac OS 다운로드 그런 다음 제어판에서 MySQL 서버를 시작 및 종료하고
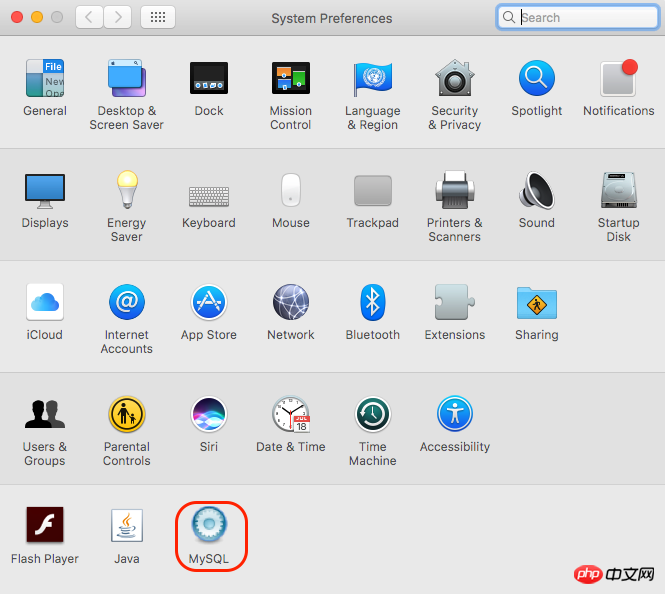
클라이언트를 설치할 수 있습니다: MySQL Workbench.app,
. 서버에서 MySQL Workbench를 열고 초기 비밀번호를 입력한 후 초기 비밀번호를 변경하라는 메시지가 표시됩니다.
2. 터미널에서 로그인 경로를 설정하세요:
/Users/**/에 새 파일을 생성하세요: .bash_profile
파일을 입력하세요:
export PATH=${PATH}:/usr/local/mysql/bin저장하세요. 터미널에서 "mysql -u root -p"를 사용하여 로그인할 수 있습니다.
3. 데이터베이스 인코딩 문제
터미널에서 MySQL 클라이언트(mysql -u root -p)에 로그인하여 데이터베이스 인코딩을 확인합니다. 명령은 다음과 같습니다.
mysql> SHOW VARIABLES LIKE 'char%';
character_set_database | latin1
character_set_server | latin1
에는 인코딩 설정이 필요하지만 설치 파일에 my가 없습니다. cnf 파일은 인터넷에 있는 많은 솔루션이 쓸모가 없기 때문에 자신만의 my.cnf 파일만 만들 수 있습니다.
MySQL 서버를 닫고 MacVim을 사용하여 my.cnf를 생성한 후 다음 내용을 입력합니다.
# Example MySQL config file for medium systems.
#
# This is for a system with little memory (32M - 64M) where MySQL plays
# an important part, or systems up to 128M where MySQL is used together with
# other programs (such as a web server)
#
# MySQL programs look for option files in a set of
# locations which depend on the deployment platform.
# You can copy this option file to one of those
# locations. For information about these locations, see:
# http://dev.mysql.com/doc/mysql/en/option-files.html #
# In this file, you can use all long options that a program supports.
# If you want to know which options a program supports, run the program
# with the "--help" option.
# The following options will be passed to all MySQL clients
[client] default-character-set=utf8
#password = your_password
port = 3306
socket = /tmp/mysql.sock
# Here follows entries for some specific programs
# The MySQL server
[mysqld]
character-set-server=utf8
init_connect='SET NAMES utf8
port = 3306
socket = /tmp/mysql.sock
skip-external-locking
key_buffer_size = 16M
max_allowed_packet = 1M
table_open_cache = 64
sort_buffer_size = 512K
net_buffer_length = 8K
read_buffer_size = 256K
read_rnd_buffer_size = 512K
myisam_sort_buffer_size = 8M
character-set-server=utf8
init_connect='SET NAMES utf8' # Don't listen on a TCP/IP port at all. This can be a security enhancement, # if all processes that need to connect to mysqld run on the same host.
# All interaction with mysqld must be made via Unix sockets or named pipes.
# Note that using this option without enabling named pipes on Windows
# (via the "enable-named-pipe" option) will render mysqld useless! #
#skip-networking
# Replication Master Server (default)
# binary logging is required for replication
log-bin=mysql-bin
# binary logging format - mixed recommended
binlog_format=mixed
# required unique id between 1 and 2^32 - 1
# defaults to 1 if master-host is not set
# but will not function as a master if omitted
server-id = 1
# Replication Slave (comment out master section to use this)
#
# To configure this host as a replication slave, you can choose between
# two methods :
#
# 1) Use the CHANGE MASTER TO command (fully described in our manual) -
# the syntax is:
#
# CHANGE MASTER TO MASTER_HOST=<host>, MASTER_PORT=<port>,
# MASTER_USER=<user>, MASTER_PASSWORD=<password> ;
#
# where you replace <host>, <user>, <password> by quoted strings and
# <port> by the master's port number (3306 by default). #
# Example:
#
# CHANGE MASTER TO MASTER_HOST='125.564.12.1', MASTER_PORT=3306,
# MASTER_USER='joe', MASTER_PASSWORD='secret';
#
# OR
#
# 2) Set the variables below. However, in case you choose this method, then
# start replication for the first time (even unsuccessfully, for example
# if you mistyped the password in master-password and the slave fails to
# connect), the slave will create a master.info file, and any later
# change in this file to the variables' values below will be ignored and # overridden by the content of the master.info file, unless you shutdown
# the slave server, delete master.info and restart the slaver server.
# For that reason, you may want to leave the lines below untouched
# (commented) and instead use CHANGE MASTER TO (see above)
#
# required unique id between 2 and 2^32 - 1
# (and different from the master)
# defaults to 2 if master-host is set
# but will not function as a slave if omitted
#server-id = 2
#
# The replication master for this slave - required
#master-host = <hostname>
#
# The username the slave will use for authentication when connecting
# to the master - required
#master-user = <username>
#
# The password the slave will authenticate with when connecting to
# the master - required
#master-password = <password>
#
# The port the master is listening on.
# optional - defaults to 3306
#master-port = <port>
#
# binary logging - not required for slaves, but recommended
#log-bin=mysql-bin
# Uncomment the following if you are using InnoDB tables
#innodb_data_home_dir = /usr/local/mysql/data
#innodb_data_file_path = ibdata1:10M:autoextend
#innodb_log_group_home_dir = /usr/local/mysql/data
# You can set .._buffer_pool_size up to 50 - 80 %
# of RAM but beware of setting memory usage too high
#innodb_buffer_pool_size = 16M
#innodb_additional_mem_pool_size = 2M
# Set .._log_file_size to 25 % of buffer pool size
#innodb_log_file_size = 5M
#innodb_log_buffer_size = 8M
#innodb_flush_log_at_trx_commit = 1
#innodb_lock_wait_timeout = 50
[mysqldump]
quick
max_allowed_packet = 16M
[mysql]
no-auto-rehash
# Remove the next comment character if you are not familiar with SQL
#safe-updates
default-character-set=utf8
[myisamchk]
key_buffer_size = 20M
sort_buffer_size = 20M
read_buffer = 2M
write_buffer = 2M
[mysqlhotcopy]
interactive-timeout파일을 /etc/ 디렉터리에 저장 및 저장하고 mysql 서버를 다시 시작합니다. 즉, 수정이 성공한 것입니다.
여전히 한자를 삽입할 수 없는 경우 데이터베이스와 테이블을 다시 생성하십시오.
위 내용은 MySQL 설치를 위한 인코딩 설정에 대한 자세한 그래픽 설명의 상세 내용입니다. 자세한 내용은 PHP 중국어 웹사이트의 기타 관련 기사를 참조하세요!

핫 AI 도구

Undresser.AI Undress
사실적인 누드 사진을 만들기 위한 AI 기반 앱

AI Clothes Remover
사진에서 옷을 제거하는 온라인 AI 도구입니다.

Undress AI Tool
무료로 이미지를 벗다

Clothoff.io
AI 옷 제거제

AI Hentai Generator
AI Hentai를 무료로 생성하십시오.

인기 기사
뜨거운 도구

메모장++7.3.1
사용하기 쉬운 무료 코드 편집기

SublimeText3 중국어 버전
중국어 버전, 사용하기 매우 쉽습니다.

스튜디오 13.0.1 보내기
강력한 PHP 통합 개발 환경

드림위버 CS6
시각적 웹 개발 도구

SublimeText3 Mac 버전
신 수준의 코드 편집 소프트웨어(SublimeText3)
뜨거운 주제
 7489
7489
 15
1377
52
77
11
52
19
19
41
15
1377
52
77
11
52
19
19
41

 MySQL : 초보자를위한 데이터 관리의 용이성
Apr 09, 2025 am 12:07 AM
MySQL : 초보자를위한 데이터 관리의 용이성
Apr 09, 2025 am 12:07 AM
MySQL은 설치가 간단하고 강력하며 데이터를 쉽게 관리하기 쉽기 때문에 초보자에게 적합합니다. 1. 다양한 운영 체제에 적합한 간단한 설치 및 구성. 2. 데이터베이스 및 테이블 작성, 삽입, 쿼리, 업데이트 및 삭제와 같은 기본 작업을 지원합니다. 3. 조인 작업 및 하위 쿼리와 같은 고급 기능을 제공합니다. 4. 인덱싱, 쿼리 최적화 및 테이블 파티셔닝을 통해 성능을 향상시킬 수 있습니다. 5. 데이터 보안 및 일관성을 보장하기위한 지원 백업, 복구 및 보안 조치.
 Navicat Premium을 만드는 방법
Apr 09, 2025 am 07:09 AM
Navicat Premium을 만드는 방법
Apr 09, 2025 am 07:09 AM
Navicat Premium을 사용하여 데이터베이스 생성 : 데이터베이스 서버에 연결하고 연결 매개 변수를 입력하십시오. 서버를 마우스 오른쪽 버튼으로 클릭하고 데이터베이스 생성을 선택하십시오. 새 데이터베이스의 이름과 지정된 문자 세트 및 Collation의 이름을 입력하십시오. 새 데이터베이스에 연결하고 객체 브라우저에서 테이블을 만듭니다. 테이블을 마우스 오른쪽 버튼으로 클릭하고 데이터 삽입을 선택하여 데이터를 삽입하십시오.
 Navicat에서 데이터베이스 비밀번호를 검색 할 수 있습니까?
Apr 08, 2025 pm 09:51 PM
Navicat에서 데이터베이스 비밀번호를 검색 할 수 있습니까?
Apr 08, 2025 pm 09:51 PM
Navicat 자체는 데이터베이스 비밀번호를 저장하지 않으며 암호화 된 암호 만 검색 할 수 있습니다. 솔루션 : 1. 비밀번호 관리자를 확인하십시오. 2. Navicat의 "비밀번호 기억"기능을 확인하십시오. 3. 데이터베이스 비밀번호를 재설정합니다. 4. 데이터베이스 관리자에게 문의하십시오.
 MySQL : 쉽게 학습하기위한 간단한 개념
Apr 10, 2025 am 09:29 AM
MySQL : 쉽게 학습하기위한 간단한 개념
Apr 10, 2025 am 09:29 AM
MySQL은 오픈 소스 관계형 데이터베이스 관리 시스템입니다. 1) 데이터베이스 및 테이블 작성 : CreateAbase 및 CreateTable 명령을 사용하십시오. 2) 기본 작업 : 삽입, 업데이트, 삭제 및 선택. 3) 고급 운영 : 가입, 하위 쿼리 및 거래 처리. 4) 디버깅 기술 : 확인, 데이터 유형 및 권한을 확인하십시오. 5) 최적화 제안 : 인덱스 사용, 선택을 피하고 거래를 사용하십시오.
 MariaDB 용 Navicat에서 데이터베이스 비밀번호를 보는 방법은 무엇입니까?
Apr 08, 2025 pm 09:18 PM
MariaDB 용 Navicat에서 데이터베이스 비밀번호를 보는 방법은 무엇입니까?
Apr 08, 2025 pm 09:18 PM
MariaDB 용 Navicat은 암호가 암호화 된 양식으로 저장되므로 데이터베이스 비밀번호를 직접 볼 수 없습니다. 데이터베이스 보안을 보장하려면 비밀번호를 재설정하는 세 가지 방법이 있습니다. Navicat을 통해 비밀번호를 재설정하고 복잡한 비밀번호를 설정하십시오. 구성 파일을 봅니다 (권장되지 않음, 위험이 높음). 시스템 명령 줄 도구를 사용하십시오 (권장되지 않으면 명령 줄 도구에 능숙해야 함).
 Navicat에서 MySQL에 새로운 연결을 만드는 방법
Apr 09, 2025 am 07:21 AM
Navicat에서 MySQL에 새로운 연결을 만드는 방법
Apr 09, 2025 am 07:21 AM
응용 프로그램을 열고 새로운 연결 (Ctrl n)을 선택하여 Navicat에서 새로운 MySQL 연결을 만들 수 있습니다. "MySQL"을 연결 유형으로 선택하십시오. 호스트 이름/IP 주소, 포트, 사용자 이름 및 비밀번호를 입력하십시오. (선택 사항) 고급 옵션을 구성합니다. 연결을 저장하고 연결 이름을 입력하십시오.
 MySQL 및 SQL : 개발자를위한 필수 기술
Apr 10, 2025 am 09:30 AM
MySQL 및 SQL : 개발자를위한 필수 기술
Apr 10, 2025 am 09:30 AM
MySQL 및 SQL은 개발자에게 필수적인 기술입니다. 1.MySQL은 오픈 소스 관계형 데이터베이스 관리 시스템이며 SQL은 데이터베이스를 관리하고 작동하는 데 사용되는 표준 언어입니다. 2.MYSQL은 효율적인 데이터 저장 및 검색 기능을 통해 여러 스토리지 엔진을 지원하며 SQL은 간단한 문을 통해 복잡한 데이터 작업을 완료합니다. 3. 사용의 예에는 기본 쿼리 및 조건 별 필터링 및 정렬과 같은 고급 쿼리가 포함됩니다. 4. 일반적인 오류에는 구문 오류 및 성능 문제가 포함되며 SQL 문을 확인하고 설명 명령을 사용하여 최적화 할 수 있습니다. 5. 성능 최적화 기술에는 인덱스 사용, 전체 테이블 스캔 피하기, 조인 작업 최적화 및 코드 가독성 향상이 포함됩니다.
 Navicat에서 SQL을 실행하는 방법
Apr 08, 2025 pm 11:42 PM
Navicat에서 SQL을 실행하는 방법
Apr 08, 2025 pm 11:42 PM
Navicat에서 SQL을 수행하는 단계 : 데이터베이스에 연결하십시오. SQL 편집기 창을 만듭니다. SQL 쿼리 또는 스크립트를 작성하십시오. 실행 버튼을 클릭하여 쿼리 또는 스크립트를 실행하십시오. 결과를 봅니다 (쿼리가 실행 된 경우).
