
이 글에서는 주로 laravel5.4+vue+element의 간단한 구성 샘플 코드를 소개하고 있으며, 관심 있는 친구들은 참고하시면 됩니다.
이제 laravel이 5.4 버전으로 출시되었으니 vue를 소개하는 것이 더 편리해졌습니다.
1. laravel5.4를 다운로드하세요. 다운로드 주소는 다음과 같습니다. (내부 구성 파일은 거의 작성되어 있습니다.)
2. package.json을 엽니다
내용은 다음과 같습니다
{
 "private": true,
 "scripts": {
  "dev": "node node_modules/cross-env/bin/cross-env.js NODE_ENV=development node_modules/webpack/bin/webpack.js --progress --hide-modules --config=node_modules/laravel-mix/setup/webpack.config.js",
  "watch": "node node_modules/cross-env/bin/cross-env.js NODE_ENV=development node_modules/webpack/bin/webpack.js --watch --progress --hide-modules --config=node_modules/laravel-mix/setup/webpack.config.js",
  "hot": "node node_modules/cross-env/bin/cross-env.js NODE_ENV=development node_modules/webpack-dev-server/bin/webpack-dev-server.js --inline --hot --config=node_modules/laravel-mix/setup/webpack.config.js",
  "production": "node node_modules/cross-env/bin/cross-env.js NODE_ENV=production node_modules/webpack/bin/webpack.js --progress --hide-modules --config=node_modules/laravel-mix/setup/webpack.config.js"
 },
 "devDependencies": {
  "axios": "^0.15.2",
  "bootstrap-sass": "^3.3.7",
  "jquery": "^3.1.0",
  "laravel-mix": "^0.6.0",
  "lodash": "^4.16.2",
  "vue": "^2.0.1"
 }
}수정
{
 "private": true,
 "scripts": {
  "dev": "cross-env NODE_ENV=development node_modules/webpack/bin/webpack.js --progress --hide-modules --config=node_modules/laravel-mix/setup/webpack.config.js",
  "watch": "cross-en NODE_ENV=development node_modules/webpack/bin/webpack.js --watch --progress --hide-modules --config=node_modules/laravel-mix/setup/webpack.config.js",
  "hot": "cross-env NODE_ENV=development node_modules/webpack-dev-server/bin/webpack-dev-server.js --inline --hot --config=node_modules/laravel-mix/setup/webpack.config.js",
  "production": "cross-env NODE_ENV=production node_modules/webpack/bin/webpack.js --progress --hide-modules --config=node_modules/laravel-mix/setup/webpack.config.js"
 },
 "devDependencies": {
  "axios": "^0.15.3",
  "bootstrap-sass": "^3.3.7",
  "jquery": "^3.1.1",
  "laravel-mix": "^0.8.3",
  "cross-env": "^3.2.3",
  "lodash": "^4.17.4",
  "vue": "^2.1.10",
  "element-ui": "^1.2.8",
  "vue-loader": "^11.3.4",
  "vue-router": "^2.4.0"
 }
}수정한 부분을 확인하세요
lodash 버전이 ^4로 변경되었습니다. 17 . 4, 그렇지 않으면 컴파일하는 동안 오류가 발생합니다. 빨간색 글꼴에 주의하세요
laravel5.4의 믹스는 사용하기 매우 쉽습니다. 한 번 살펴보시기 바랍니다. 이 주소는
3입니다. 루트 디렉터리에 설치하세요
cnpm, 특히 Windows 사용자입니다. 그렇지 않으면 오류가 보고됩니다
4. 그러면 resources/assets/js/bootstrap.js
30줄 이상이 있습니다
.
코드는 다음과 같습니다.
window.axios.defaults.headers.common = { 'X-CSRF-TOKEN': ......., 'X-Requested-With': 'XMLHttpRequest'};'X-CSRF-TOKEN' 항목을 넣고 다음과 같이 코드를
로 변경합니다.
'X-CSRF-TOKEN': document.querySelector('meta[name="X-CSRF-TOKEN"]').content,
그렇지 않으면 csrf를 성공적으로 얻을 수 없습니다
5. 자산/js/app.js
여기에서 간단한 테스트와 element
/**
 * First we will load all of this project's JavaScript dependencies which
 * includes Vue and other libraries. It is a great starting point when
 * building robust, powerful web applications using Vue and Laravel.
 */

require('./bootstrap');

/**
 * Next, we will create a fresh Vue application instance and attach it to
 * the page. Then, you may begin adding components to this application
 * or customize the JavaScript scaffolding to fit your unique needs.
 */

import App from "./components/Example.vue"

const app = new Vue({
  el: '#app',
  render: h => h(App)
}); 6. resources/views/welcome.blade.php
<!DOCTYPE html>
<html lang="{{ config('app.locale') }}">
<head>
<meta charset="utf-8">
<meta http-equiv="X-UA-Compatible" content="IE=edge">
<meta name="viewport" content="width=device-width, initial-scale=1">
<meta name="X-CSRF-TOKEN" content="{{csrf_token()}}">
<title>123</title>
</head>
<body>
<p id="app"></p>
<script src="{{ mix('js/app.js') }}"></script>
</body>
</html>을 수정한 다음 npm run watch
를 실행하세요.
이것은 간단하고 성공적인 설정입니다
두 번째 방법은 mix를 사용하지 않습니다
아래 사진은 제가 옮긴 파일입니다. laravel5.4
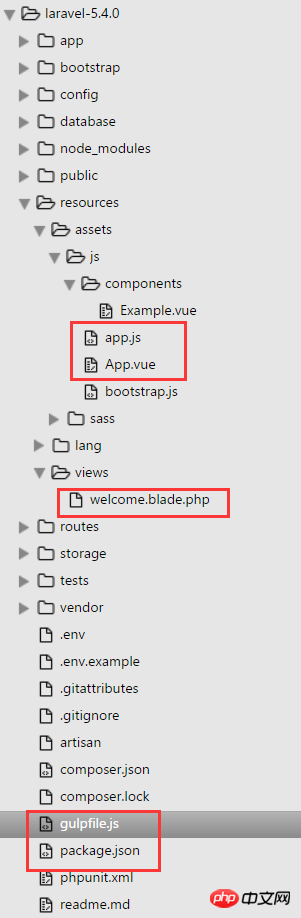 2. laravel5.4 디렉터리): Composer install
3. 새 .env 파일을 만들고 .env.example을 .env 파일에 복사합니다.
4 키 생성, 명령줄: PHP artisan key: generate
5. 구성 파일 package.json, 내용은 다음과 같습니다.
{
 "private": true,
 "scripts": {
  "prod": "gulp --production",
  "dev": "gulp watch"
 },
 "devDependencies": {
  "babel-core": "^6.20.0",
  "babel-loader": "^6.2.9",
  "css-loader": "^0.25.0",
  "element-ui": "^1.1.1",
  "gulp": "^3.9.1",
  "handsontable": "0.27.0",
  "laravel-elixir": "^6.0.0-15",
  "laravel-elixir-vue-2": "^0.2.0",
  "laravel-elixir-webpack-official": "^1.0.10",
  "style-loader": "^0.13.1",
  "vue": "^2.1.4",
  "vue-loader": "^10.0.0",
  "vue-resource": "^1.0.3",
  "vue-router": "^2.1.1",
  "vue-template-compiler": "^2.1.4",
  "axios": "^0.15.2",
  "bootstrap-sass": "^3.3.7",
  "jquery": "^3.1.0",
  "laravel-mix": "^0.5.0",
  "lodash": "^4.16.2"
 },
 "dependencies": {}
}
에 새 App.vue 파일을 만듭니다. 7.resources/assets/js, 다음 콘텐츠 포함:
<template>
 <p id="app">
  <router-view></router-view>
 </p>
</template>
8.resources/assets/js/app.js
/**
* First we will load all of this project's JavaScript dependencies which
* includes Vue and other libraries. It is a great starting point when
* building robust, powerful web applications using Vue and Laravel.
*/
require('./bootstrap');
/**
* Next, we will create a fresh Vue application instance and attach it to
* the page. Then, you may begin adding components to this application
* or customize the JavaScript scaffolding to fit your unique needs.
*/
import App from './App.vue'
import VueRouter from 'vue-router'
import ElementUI from 'element-ui'
import 'element-ui/lib/theme-default/index.css'
Vue.use(VueRouter)
Vue.use(ElementUI)
const router = new VueRouter({
routes: [
{ path: '/', component: require('./components/Example.vue') }
]
})
const app = new Vue({
el: '#app',
router,
template: '<App/>',
components: { App }
});9 resources/view/welcome.blade.php를 다음으로 변경:
<!DOCTYPE html>
<html lang="en">
<head>
<meta charset="UTF-8">
<title>Hello</title>
</head>
<body>
<p id="app"></p>
<script src="{{ asset('js/app.js') }}"></script>
</body>
</html>const elixir = require('laravel-elixir');
const path = require('path');
require('laravel-elixir-vue-2');
/*
|--------------------------------------------------------------------------
| Elixir Asset Management
|--------------------------------------------------------------------------
|
| Elixir provides a clean, fluent API for defining some basic Gulp tasks
| for your Laravel application. By default, we are compiling the Sass
| file for our application, as well as publishing vendor resources.
|
*/
elixir(mix => {
// Elixir.webpack.config.module.loaders = [];
Elixir.webpack.mergeConfig({
resolveLoader: {
root: path.join(__dirname, 'node_modules'),
},
module: {
loaders: [
{
test: /\.css$/,
loader: 'style!css'
}
]
}
});
mix.sass('app.scss')
.webpack('app.js')
});위 내용은 laravel5.4+vue+element는 간단한 구성 예제를 구현합니다.의 상세 내용입니다. 자세한 내용은 PHP 중국어 웹사이트의 기타 관련 기사를 참조하세요!


![[웹 프런트엔드] Node.js 빠른 시작](https://img.php.cn/upload/course/000/000/067/662b5d34ba7c0227.png)


