

Java 동시성 스레드 사용 및 시작 스레드 구축

스레드 작성
스레드 설명
스레드는 프로그램의 실행 스레드입니다. Java 가상 머신을 사용하면 애플리케이션이 여러 스레드를 동시에 실행할 수 있습니다.
각 스레드에는 우선순위가 있으며 우선순위가 높은 스레드의 실행이 우선순위가 낮은 스레드보다 우선합니다. 각 스레드는 데몬으로 표시되거나 표시되지 않을 수 있습니다. 스레드에서 실행되는 코드가 새 Thread 개체를 생성하면 새 스레드의 초기 우선순위는 생성 스레드의 우선순위로 설정되고, 생성 스레드가 데몬 스레드인 경우에만 새 스레드는 데몬입니다.
Java Virtual Machine이 시작되면 일반적으로 데몬이 아닌 단일 스레드가 있습니다(일반적으로 지정된 클래스의 기본 메서드를 호출합니다). Java Virtual Machine은 다음 조건 중 하나가 발생할 때까지 스레드를 계속 실행합니다.
1. Runtime 클래스의 종료 메소드가 호출되고 보안 관리자가 종료 작업이 발생하도록 허용합니다.
2. 데몬 스레드가 아닌 모든 스레드는 run 메서드 호출에서 반환되거나 run 메서드 외부로 전파되는 예외를 발생시켜 실행을 중지했습니다.스레드를 구현하는 방법은 다음 장에서 소개하겠습니다
소스 코드 참조는 다음과 같습니다.
/**
 * A <i>thread</i> is a thread of execution in a program. The Java
 * Virtual Machine allows an application to have multiple threads of
 * execution running concurrently.
 * <p>
 * Every thread has a priority. Threads with higher priority are
 * executed in preference to threads with lower priority. Each thread
 * may or may not also be marked as a daemon. When code running in
 * some thread creates a new <code>Thread</code> object, the new
 * thread has its priority initially set equal to the priority of the
 * creating thread, and is a daemon thread if and only if the
 * creating thread is a daemon.
 * <p>
 * When a Java Virtual Machine starts up, there is usually a single
 * non-daemon thread (which typically calls the method named
 * <code>main</code> of some designated class). The Java Virtual
 * Machine continues to execute threads until either of the following
 * occurs:
 * <ul>
 * <li>The <code>exit</code> method of class <code>Runtime</code> has been
 *     called and the security manager has permitted the exit operation
 *     to take place.
 * <li>All threads that are not daemon threads have died, either by
 *     returning from the call to the <code>run</code> method or by
 *     throwing an exception that propagates beyond the <code>run</code>
 *     method.
 * </ul>
 * <p>
 * There are two ways to create a new thread of execution. One is to
 * declare a class to be a subclass of <code>Thread</code>. This
 * subclass should override the <code>run</code> method of class
 * <code>Thread</code>. An instance of the subclass can then be
 * allocated and started. For example, a thread that computes primes
 * larger than a stated value could be written as follows:
 * <hr><blockquote><pre class="brush:php;toolbar:false">
 *     class PrimeThread extends Thread {
 *         long minPrime;
 *         PrimeThread(long minPrime) {
 *             this.minPrime = minPrime;
 *         }
 *
 *         public void run() {
 *             // compute primes larger than minPrime
 *              . . .
 *         }
 *     }
* *
* The following code would then create a thread and start it running: *
** PrimeThread p = new PrimeThread(143); * p.start(); *로그인 후 복사
* The other way to create a thread is to declare a class that
* implements the Runnable interface. That class then
* implements the run method. An instance of the class can
* then be allocated, passed as an argument when creating
* Thread, and started. The same example in this other
* style looks like the following:
*
 *     class PrimeRun implements Runnable {
 *         long minPrime;
 *         PrimeRun(long minPrime) {
 *             this.minPrime = minPrime;
 *         }
 *
 *         public void run() {
 *             // compute primes larger than minPrime
 *              . . .
 *         }
 *     }
 *
로그인 후 복사
*
* The following code would then create a thread and start it running: *
** PrimeRun p = new PrimeRun(143); * new Thread(p).start(); *로그인 후 복사
* Every thread has a name for identification purposes. More than * one thread may have the same name. If a name is not specified when * a thread is created, a new name is generated for it. *
* Unless otherwise noted, passing a {@code null} argument to a constructor * or method in this class will cause a {@link NullPointerException} to be * thrown. * * @author unascribed * @see Runnable * @see Runtime#exit(int) * @see #run() * @see #stop() * @since JDK1.0 */ publicclass Thread implements Runnable {
필수 정보
스레드를 실행하기 전에 먼저 스레드 객체를 생성해야 합니다. 스레드가 속한 스레드 그룹, 스레드 우선순위, 데몬 스레드인지 여부 등 스레드에 필요한 속성을 제공합니다. 새 Thread에서는 Thread 개체를 인스턴스화하기 위해 다음 메서드가 호출됩니다. 초기화 코드는 다음과 같습니다.
    /**
     * Initializes a Thread.
     *
     * @param g the Thread group
     * @param target the object whose run() method gets called
     * @param name the name of the new Thread
     * @param stackSize the desired stack size for the new thread, or
     *        zero to indicate that this parameter is to be ignored.
     * @param acc the AccessControlContext to inherit, or
     *            AccessController.getContext() if null
     */
    private void init(ThreadGroup g, Runnable target, String name,
    long stackSize, AccessControlContext acc) {
    if (name == null) {
    throw new NullPointerException("name cannot be null");
        }
        this.name = name;        //当前线程作为该线程的父线程
        Thread parent = currentThread();
        SecurityManager security = System.getSecurityManager();        //线程组的获取:如果传入的参数为空首先获取系统默认的安全组,如果为空获取父线程的安全组
        if (g == null) {
        /* Determine if it's an applet or not */

            /* If there is a security manager, ask the security manager
               what to do. */
            if (security != null) {
                g = security.getThreadGroup();
            }            /* If the security doesn't have a strong opinion of the matter
               use the parent thread group. */
            if (g == null) {
                g = parent.getThreadGroup();
            }
        }        /* checkAccess regardless of whether or not threadgroup is
           explicitly passed in. */
        g.checkAccess();        /*
         * Do we have the required permissions?
         */
        if (security != null) {            if (isCCLOverridden(getClass())) {
                security.checkPermission(SUBCLASS_IMPLEMENTATION_PERMISSION);
            }
        }

        g.addUnstarted();
        this.group = g;        //设置daemon 、priority 属性为父线程对应的值
        this.daemon = parent.isDaemon();
        this.priority = parent.getPriority();

        if (security == null || isCCLOverridden(parent.getClass()))
        this.contextClassLoader = parent.getContextClassLoader();
        else
            this.contextClassLoader = parent.contextClassLoader;
            this.inheritedAccessControlContext =
                acc != null ? acc : AccessController.getContext();
                this.target = target;
        setPriority(priority);        //将父线程的InheritableThreadLocal复制过来
        if (parent.inheritableThreadLocals != null)
        this.inheritableThreadLocals =
                ThreadLocal.createInheritedMap(parent.inheritableThreadLocals);
                /* Stash the specified stack size in case the VM cares */
        this.stackSize = stackSize;        /* Set thread ID */
        //生成线程id(一个long型的字段threadSeqNumber)
        tid = nextThreadID();
}결론
새로 생성된 Thread 객체(new Thread())는 상위 스레드(현재 스레드)에 의해 공간이 할당되고 하위 스레드는 상위 스레드의
Daemon 및 우선 순위를 상속받습니다. thread 리소스를 로드하는 contextClassLoader와 상속 가능한 ThreadLocal도 하위 스레드에 스레드 ID를 할당합니다. 실행 가능한 스레드 개체는 초기화 작업을 완료하고 힙 메모리에서 실행되기를 기다리고 있습니다. 빌드 방법
Thread 상속
Code
//方法1通过继承Thread实现class MyThread extends Thread{

    //需要实现的方法,该方法执行具体的业务逻辑
    @Override    public void run() {
        System.out.println(Thread.currentThread().getName()
                +" @@@@ MyThread。run()我是通过继承Thread实现的多线程");
    }

}Instructions
스레드 소스 코드 검색(Thread는 Runnable 구현)을 통해 스레드가 실제로 스레드의 인스턴스를 나타내는 실행 가능한 인터페이스를 구현하는 인스턴스라는 것을 발견했습니다. , and,
스레드를 시작하는 유일한 방법은 Thread 클래스의 start() 인스턴스 메서드를 이용하는 것입니다. start() 메서드는 새 스레드를 시작하고 run() 메서드를 실행하는 기본 메서드입니다. 이러한 방식으로 멀티스레딩을 구현하는 것은 매우 간단합니다. 자신의 클래스를 통해 Thread를 직접 확장하고 run() 메서드를 재정의하면 새 스레드를 시작하고 자신이 정의한 run() 메서드를 실행할 수 있습니다. run() 메서드의 메서드 본문은 스레드가 완료해야 하는 작업을 나타내며, 이를
스레드 실행 본문이라고 합니다. 이 스레드 클래스 개체가 생성되면 새 스레드가 생성되고 스레드 새 상태로 들어갑니다. 스레드 객체가 참조하는 start() 메서드를 호출하면 스레드가 준비 상태로 진입합니다. 이때 CPU 스케줄링 타이밍에 따라 스레드가 즉시 실행되지 않을 수도 있습니다. 인터페이스 Runnable 구현
Code
//方法2通过实现runnable接口
//实现Runnable接口,并重写该接口的run()方法,该run()方法同样是线程执行体,创建Runnable实现类的实例,
//并以此实例作为Thread类的target来创建Thread对象,该Thread对象才是真正的线程对象。class MyRunnable implements Runnable{

    @Override    public void run() {
        System.out.println(Thread.currentThread().getName()+
        " @@@@ MyRunnable。run()我是通过实现Runnable接口实现的多线程");
    }

}Callable 및 Future를 사용하여 반환된 결과로 멀티스레딩 구현
Callable 및 Future 인터페이스를 사용하여 스레드를 생성합니다. 특히 Callable 인터페이스의 구현 클래스를 생성하고 clam() 메서드를 구현합니다. 그리고 FutureTask 클래스를 사용하여 Callable 구현 클래스의 객체를 래핑하고 이 FutureTask 객체를 Thread 객체의 대상으로 사용하여 스레드를 생성합니다.
값을 반환할 수 있는 작업은 Callable 인터페이스를 구현해야 합니다. 마찬가지로 반환 값이 없는 작업은 Runnable 인터페이스를 구현해야 합니다. Callable 작업을 실행한 후 Future 개체를 얻을 수 있습니다. Callable 작업에서 반환된 개체를 가져오려면 개체에 대해 get을 호출하세요. 스레드 풀 인터페이스 ExecutorService와 결합하면 반환된 결과로 전설적인 멀티스레딩을 실현할 수 있습니다. Executor의 사용법은 다음 글에서 자세히 소개하겠습니다. //方法3通过Executor框架实现class MyCallable implements Callable<Integer>{
//需要实现call方法而不是run方法
@Override public Integer call() throws Exception { return 100;
}
}
소스 코드 분석에 따르면:
- 1 객체 초기화가 완료된 후 start 메서드를 실행하여 스레드를 실행하고 Java 가상 머신은 스레드의 run 메서드를 호출하여
- 2. start 메소드를 호출한 후 두 개의 스레드가 동시에 실행되는 것으로 확인됩니다. 현재 스레드(상위 스레드는 [Java 가상 머신에 이를 동기적으로 알립니다. 스레드 플래너가 유휴 상태인 경우 시작 메서드를 호출하는 스레드는 즉시 시작되어야 합니다], 호출에서 시작 메서드로 반환) 및 다른 스레드(실행 메서드 실행).
- 3. 스레드를 여러 번 시작하는 것은 불법입니다. 특히 스레드 실행이 끝나면 다시 시작할 수 없습니다.
Start 메소드 소스코드 설명은 다음과 같습니다.
/**
* Causes this thread to begin execution; the Java Virtual Machine
* calls the <code>run</code> method of this thread.
* <p>
* The result is that two threads are running concurrently: the
* current thread (which returns from the call to the
* <code>start</code> method) and the other thread (which executes its
* <code>run</code> method).
* <p>
* It is never legal to start a thread more than once.
* In particular, a thread may not be restarted once it has completed
* execution.
*
* @exception IllegalThreadStateException if the thread was already
* started.
* @see #run()
* @see #stop()
*/
public synchronized void start() {
/**
* This method is not invoked for the main method thread or "system"
* group threads created/set up by the VM. Any new functionality added
* to this method in the future may have to also be added to the VM.
*
* A zero status value corresponds to state "NEW".
*/ if (threadStatus != 0)
throw new IllegalThreadStateException();
/* Notify the group that this thread is about to be started
* so that it can be added to the group's list of threads
* and the group's unstarted count can be decremented. */
group.add(this); boolean started = false; try {
start0();
started = true;
} finally { try { if (!started) {
group.threadStartFailed(this);
}
} catch (Throwable ignore) {
/* do nothing. If start0 threw a Throwable then
it will be passed up the call stack */
}
}
}
private native void start0();参考代码
public class TestCreateThread {    public static void main(String[] args) {
        Thread myThread = new MyThread();
        myThread.setName("myThread");
        myThread.start();

        Runnable myRunnable = new MyRunnable();
        Thread myRunnableThread = new Thread(myRunnable);
        myRunnableThread.setName("myRunnableThread");
        myRunnableThread.start();

        Thread myRunnableThread2 = new MyThread(myRunnable);
        myRunnableThread2.setName("myRunnableThread2");
        myRunnableThread2.start();        //执行结果参考如下:
        //myThread @@@@ MyThread。run()我是通过继承Thread实现的多线程
        //myRunnableThread2 @@@@ MyThread。run()我是通过继承Thread实现的多线程
        //myRunnableThread @@@@ MyRunnable。run()我是通过实现Runnable接口实现的多线程

        //测试callable方法
        // 创建MyCallable对象
        Callable<Integer> myCallable = new MyCallable();
        //使用FutureTask来包装MyCallable对象
        FutureTask<Integer> ft = new FutureTask<Integer>(myCallable);
        //FutureTask对象作为Thread对象的target创建新的线程
        Thread thread = new Thread(ft);
        thread.start();//启用

        //获取信息
        try {            //取得新创建的新线程中的call()方法返回的结果
            //当子线程此方法还未执行完毕,ft.get()方法会一直阻塞,
            //直到call()方法执行完毕才能取到返回值。
            int sum = ft.get();
            System.out.println("sum = " + sum);
        } catch (InterruptedException e) {
            e.printStackTrace();
        } catch (ExecutionException e) {
            e.printStackTrace();
        }        //使用ExecutorService处理多线程
        ExecutorService pool = Executors.newFixedThreadPool(10);
        Future<Integer> f = pool.submit(myCallable);
        // 关闭线程池
        pool.shutdown();
        try {            int sum1 = f.get();
            System.out.println("sum1 = " + sum1);
        } catch (InterruptedException e) {            // TODO Auto-generated catch block
            e.printStackTrace();
        } catch (ExecutionException e) {
            e.printStackTrace();
        }
    }
}启动线程的注意事项

无论何种方式,启动一个线程,就要给它一个名字!这对排错诊断系统监控有帮助。否则诊断问题时,无法直观知道某个线程的用途。
Thread与Runnable的关系
实现关系
Thread实现接口Runnable,并且实现了run方法,代码参考如下:
//如果该线程是使用独立的 Runnable 运行对象构造的,则调用该 Runnable 对象的 run 方法;
//否则,该方法不执行任何操作并返回。
//Thread 的子类应该重写该方法。
/**
* If this thread was constructed using a separate
* <code>Runnable</code> run object, then that
* <code>Runnable</code> object's <code>run</code> method is called;
* otherwise, this method does nothing and returns.
* <p>
* Subclasses of <code>Thread</code> should override this method.
*
* @see #start()
* @see #stop()
* @see #Thread(ThreadGroup, Runnable, String)
*/
@Override
public void run() { if (target != null) {
target.run();
}
}
}区别
当执行到Thread类中的run()方法时,会首先判断target是否存在,存在则执行target中的run()方法,也就是实现了Runnable接口并重写了run()方法的类中的run()方法。当时如果该Runnable的子类是通过一个继承Thread的子类(该且重写了run方法),则真正执行的是Thread子类重写的run方法(由于多态的原因)。
위 내용은 Java 동시성 스레드 사용 및 시작 스레드 구축의 상세 내용입니다. 자세한 내용은 PHP 중국어 웹사이트의 기타 관련 기사를 참조하세요!

핫 AI 도구

Undresser.AI Undress
사실적인 누드 사진을 만들기 위한 AI 기반 앱

AI Clothes Remover
사진에서 옷을 제거하는 온라인 AI 도구입니다.

Undress AI Tool
무료로 이미지를 벗다

Clothoff.io
AI 옷 제거제

AI Hentai Generator
AI Hentai를 무료로 생성하십시오.

인기 기사
뜨거운 도구

메모장++7.3.1
사용하기 쉬운 무료 코드 편집기

SublimeText3 중국어 버전
중국어 버전, 사용하기 매우 쉽습니다.

스튜디오 13.0.1 보내기
강력한 PHP 통합 개발 환경

드림위버 CS6
시각적 웹 개발 도구

SublimeText3 Mac 버전
신 수준의 코드 편집 소프트웨어(SublimeText3)
뜨거운 주제
 7555
7555
 15
1382
52
83
11
59
19
28
96
15
1382
52
83
11
59
19
28
96


 자바의 웨카
Aug 30, 2024 pm 04:28 PM
자바의 웨카
Aug 30, 2024 pm 04:28 PM
Java의 Weka 가이드. 여기에서는 소개, weka java 사용 방법, 플랫폼 유형 및 장점을 예제와 함께 설명합니다.
 Java의 스미스 번호
Aug 30, 2024 pm 04:28 PM
Java의 스미스 번호
Aug 30, 2024 pm 04:28 PM
Java의 Smith Number 가이드. 여기서는 정의, Java에서 스미스 번호를 확인하는 방법에 대해 논의합니다. 코드 구현의 예.
 Java Spring 인터뷰 질문
Aug 30, 2024 pm 04:29 PM
Java Spring 인터뷰 질문
Aug 30, 2024 pm 04:29 PM
이 기사에서는 가장 많이 묻는 Java Spring 면접 질문과 자세한 답변을 보관했습니다. 그래야 면접에 합격할 수 있습니다.
 Java 8 Stream foreach에서 나누거나 돌아 오시겠습니까?
Feb 07, 2025 pm 12:09 PM
Java 8 Stream foreach에서 나누거나 돌아 오시겠습니까?
Feb 07, 2025 pm 12:09 PM
Java 8은 스트림 API를 소개하여 데이터 컬렉션을 처리하는 강력하고 표현적인 방법을 제공합니다. 그러나 스트림을 사용할 때 일반적인 질문은 다음과 같은 것입니다. 기존 루프는 조기 중단 또는 반환을 허용하지만 스트림의 Foreach 메소드는이 방법을 직접 지원하지 않습니다. 이 기사는 이유를 설명하고 스트림 처리 시스템에서 조기 종료를 구현하기위한 대체 방법을 탐색합니다. 추가 읽기 : Java Stream API 개선 스트림 foreach를 이해하십시오 Foreach 메소드는 스트림의 각 요소에서 하나의 작업을 수행하는 터미널 작동입니다. 디자인 의도입니다
 Java의 날짜까지의 타임스탬프
Aug 30, 2024 pm 04:28 PM
Java의 날짜까지의 타임스탬프
Aug 30, 2024 pm 04:28 PM
Java의 TimeStamp to Date 안내. 여기서는 소개와 예제와 함께 Java에서 타임스탬프를 날짜로 변환하는 방법에 대해서도 설명합니다.
 캡슐의 양을 찾기위한 Java 프로그램
Feb 07, 2025 am 11:37 AM
캡슐의 양을 찾기위한 Java 프로그램
Feb 07, 2025 am 11:37 AM
캡슐은 3 차원 기하학적 그림이며, 양쪽 끝에 실린더와 반구로 구성됩니다. 캡슐의 부피는 실린더의 부피와 양쪽 끝에 반구의 부피를 첨가하여 계산할 수 있습니다. 이 튜토리얼은 다른 방법을 사용하여 Java에서 주어진 캡슐의 부피를 계산하는 방법에 대해 논의합니다. 캡슐 볼륨 공식 캡슐 볼륨에 대한 공식은 다음과 같습니다. 캡슐 부피 = 원통형 볼륨 2 반구 볼륨 안에, R : 반구의 반경. H : 실린더의 높이 (반구 제외). 예 1 입력하다 반경 = 5 단위 높이 = 10 단위 산출 볼륨 = 1570.8 입방 단위 설명하다 공식을 사용하여 볼륨 계산 : 부피 = π × r2 × h (4
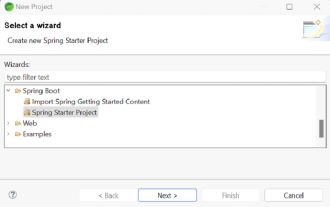 Spring Tool Suite에서 첫 번째 Spring Boot 응용 프로그램을 실행하는 방법은 무엇입니까?
Feb 07, 2025 pm 12:11 PM
Spring Tool Suite에서 첫 번째 Spring Boot 응용 프로그램을 실행하는 방법은 무엇입니까?
Feb 07, 2025 pm 12:11 PM
Spring Boot는 강력하고 확장 가능하며 생산 가능한 Java 응용 프로그램의 생성을 단순화하여 Java 개발에 혁명을 일으킨다. Spring Ecosystem에 내재 된 "구성에 대한 협약"접근 방식은 수동 설정, Allo를 최소화합니다.
