어제 WeChat 애플릿 개발자 도구를 다운로드하고 문서를 간략하게 읽은 후 그의 방법을 사용하여 Ajax 요청을 구현했습니다. 이 글에서는 주로 WeChat 애플릿 ajax를 통해 서버 데이터와 템플릿 순회 데이터를 요청하는 기능을 소개하고, WeChat 애플릿 ajax 호출과 템플릿 wx:for 루프 목록 렌더링과 관련된 작업 기술을 예제 형식으로 분석합니다. 모든 사람에게 도움이 되기를 바랍니다.

헤더 제목과 하단 탭 구성은 모두 app.json 파일에 있으며, 하단에는 최소 2개, 최대 5개의 탭이 있습니다. 다음은 app.json 파일 코드 및 관련 설명입니다
{
 "pages":[
  "pages/index/index",
  "pages/tucao/tucao",
  "pages/center/center"
 ],
 "window":{
  "backgroundTextStyle":"",
  "navigationBarBackgroundColor": "red",
  "navigationBarTitleText": "一个标题而已",
  "navigationBarTextStyle":"white"
 },
 "tabBar": {
  "list": [{
   "pagePath": "pages/index/index",
   "text": "首页",
   "iconPath": "/images/public/menu-cd.png",
   "selectedIconPath": "/images/public/menu.png"
  },{
   "pagePath": "pages/tucao/tucao",
   "text": "吐槽",
   "iconPath": "/images/public/hot-cd.png",
   "selectedIconPath": "/images/public/hot.png"
  },{
   "pagePath": "pages/center/center",
   "text": "我的",
   "iconPath": "/images/public/center-cd.png",
   "selectedIconPath": "/images/public/center.png"
  }],
  "borderStyle": "white"
 }
}여기서 WeChat 애플릿 wx.request를 통해 서버 데이터에 대한 ajax 요청을 구현합니다. 한 프로그램에 물어보세요. 다음은 index.js의 코드입니다wx.request实现ajax请求服务器数据的,一个程序里面最多能有五个这样的请求。下面是index.js的代码
//index.js
//获取应用实例
var app = getApp()
Page({
 data: {
  motto: 'Hello World',
  userInfo: {},
  Industry:{}
 },
 onLoad: function (res) {
  var that = this
  //调用应用实例的方法获取全局数据
  app.getUserInfo(function(userInfo){
   //更新数据
   that.setData({
    userInfo:userInfo
   })
  })
  wx.request({
   url: 'http://xx.xxxxx.com/xxx.php',//上线的话必须是https,没有appId的本地请求貌似不受影响
   data: {},
   method: 'GET', // OPTIONS, GET, HEAD, POST, PUT, DELETE, TRACE, CONNECT
   // header: {}, // 设置请求的 header
   success: function(res){
    console.log(res.data.result)
    that.setData({
     Industry:res.data.result
    })
   },
   fail: function() {
    // fail
   },
   complete: function() {
    // complete
   }
  })
 }
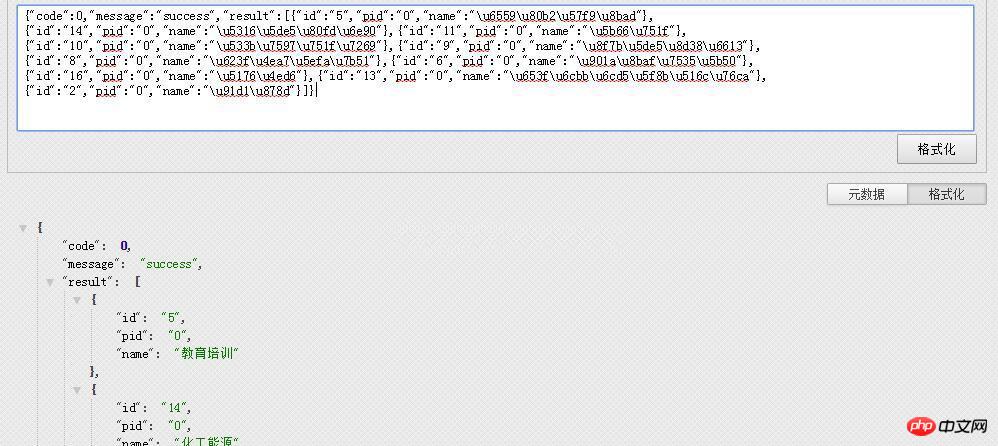
})其中http://xx.xxxxx.com/xxx.php的返回数据格式是一个json,格式如下

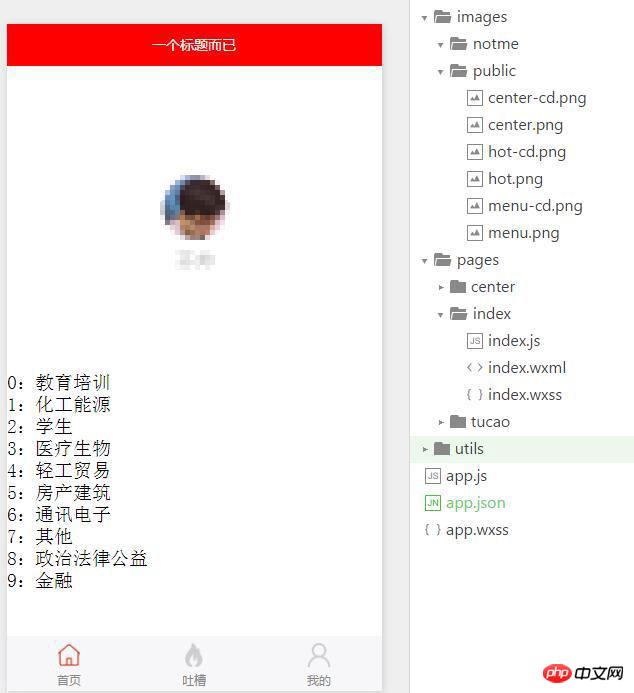
展示页面就简单了,变量{{array}} 微信模版遍历数据使用 wx:for
<!--index.wxml-->
<view class="container">
 <view bindtap="bindViewTap" class="userinfo">
  <image class="userinfo-avatar" src="{{userInfo.avatarUrl}}" background-size="cover"></image>
  <text class="userinfo-nickname">{{userInfo.nickName}}</text>
 </view>
</view>
<view wx:for="{{Industry}}" wx:ket="{{index}}">
  {{index}}:{{item.name}}
</view>wx:for를 사용하여 데이터를 탐색합니다. index.wxml 코드는 다음과 같습니다. rrreee관련 권장사항:
WeChat 애플릿 요청 네트워크 요청 동작 예시에 대한 자세한 설명
🎜🎜WeChat 애플릿 표시 드롭다운 목록 기능 구현 방법🎜🎜🎜🎜방법 액션 시트를 사용하려면 하단 메뉴가 팝업됩니다🎜🎜위 내용은 WeChat 애플릿 Ajax 구현 요청 서버 데이터 인스턴스의 상세 내용입니다. 자세한 내용은 PHP 중국어 웹사이트의 기타 관련 기사를 참조하세요!