Angular는 zTree와 결합하여 노드 데이터 인스턴스 공유를 비동기식으로 로드합니다.
이 글은 주로 zTree와 결합된 Angular를 사용하여 노드 데이터를 비동기적으로 로드하는 방법과 어려움을 공유합니다. 이와 관련하여 필요한 친구들이 참고할 수 있기를 바랍니다.
1 전제 조건
1.1 새 Angle4 프로젝트 만들기

1.2 zTree 공식 웹사이트로 이동하여 zTree
zTree 공식 웹사이트로 이동: 클릭하여
Sanshao에서 사용하는 버전: 클릭하여
로 이동
2 프로그래밍 단계

zTree 객체를 인쇄해 보면 알 수 있듯이 zTree 객체는 init 메소드를 사용하여 zTree 구조를 구현합니다. init 메소드는 세 개의 매개변수를 받습니다.
매개변수 1: DOM 노드 Ul Tag
Parameter 2 : 기본 구성 객체
Parameter 3 : 제목 정보 배열
2.1 인덱스에 관련 JS 및 CSS를 소개합니다. html

1 2 3 4 5 6 7 8 9 10 11 12 13 14 15 16 17 18 19 |
|
view code
2.2 TS 파일에 jquery 객체 선언
1 |
|
2.3 TS 파일에 코드 작성
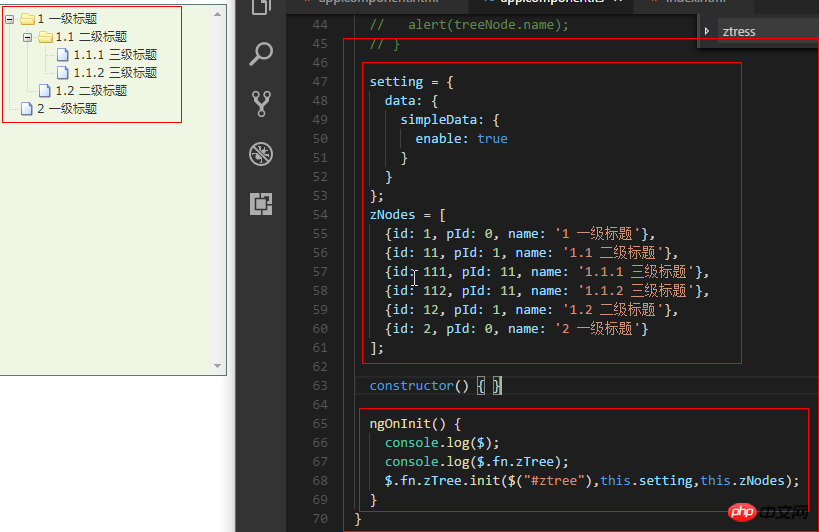
1 2 3 4 5 6 7 8 9 10 11 12 13 14 15 16 17 18 19 20 21 22 23 24 25 26 27 28 29 30 31 32 33 34 35 36 37 38 39 40 41 42 43 44 45 46 47 48 49 50 51 52 53 54 55 56 57 58 59 60 61 62 |
|
코드 보기
2.4 HTML에 코드 작성
1 |
|
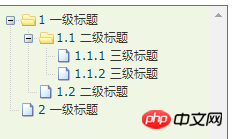
2.5 효과 표시
3 zTree 기본 기능
3.1 연결선을 표시하지 않음
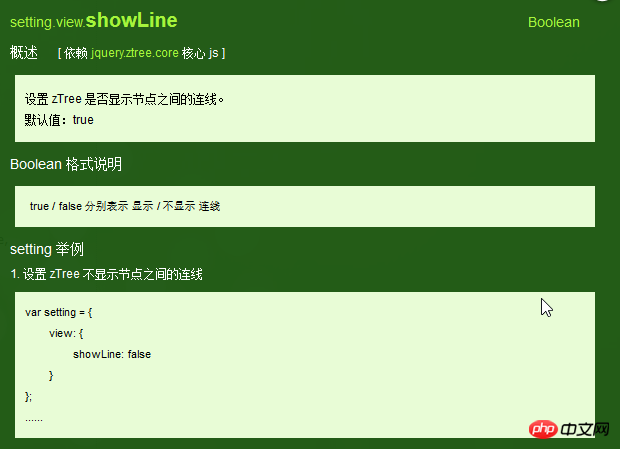
3.1.1 공식 문서
제목 사이에 연결선을 표시하지 않음
3.1.2 프로그래밍 단계
showLine 값만 지정하기 기본 구성 객체의 속성을 false로
1 2 3 4 5 6 7 8 9 10 |
|
3.2 노드 아이콘을 표시하지 않음
3.2.1 공식 문서
노드 앞의 아이콘을 제거

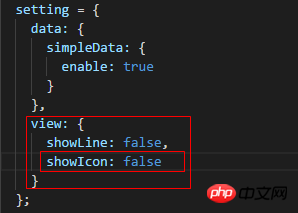
3.2.2 프로그래밍 단계
기본 구성 객체의 showicon 속성을 false
1 2 3 4 5 6 7 8 9 10 11 |
|
view code
3.3에 설정하십시오.
3.3.2 프로그래밍 단계 아이콘 설정/ treeNode 노드 데이터 iconOpen /iconClose 속성을 사용할 수 있습니다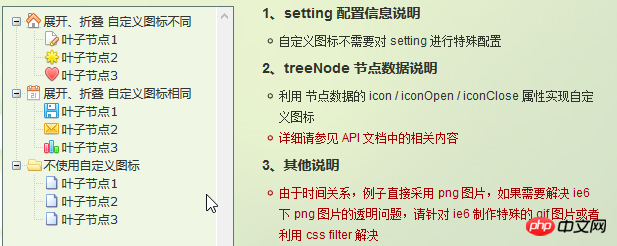

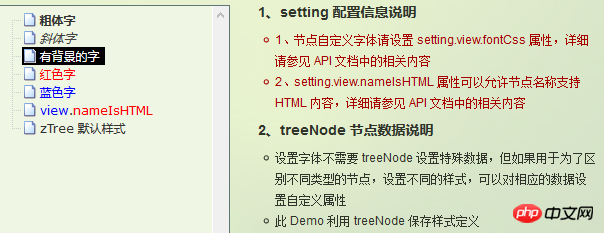
3.4.2 프로그래밍 단계treeNode 노드 데이터에 대한 글꼴 속성을 설정합니다. 글꼴 속성의 값은 개체이며 개체의 내용은 스타일의 데이터와 동일합니다
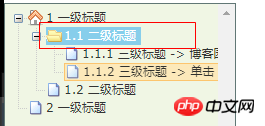
3.5 하이퍼링크
 참고 01: 클릭 속성은 가장 간단한 클릭 이벤트 작업만 수행할 수 있습니다. 에 해당하는 콘텐츠입니다. 작업이 더 복잡하다면 onClick 이벤트 콜백 함수를 사용하세요.
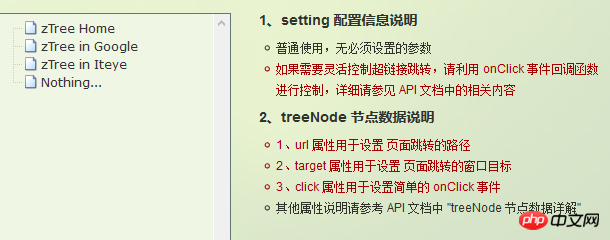 팁 02: target 속성 속성 값이 _blank 및 _self
_blank인 경우 -> 새 창에서 열기
_self -> 원래 창에서 열기
1 2 3 4 5 6 7 8 9 |
|
코드 보기
3.6.1 공식 문서
노드 제목을 클릭하면 해당 메소드가 트리거됩니다
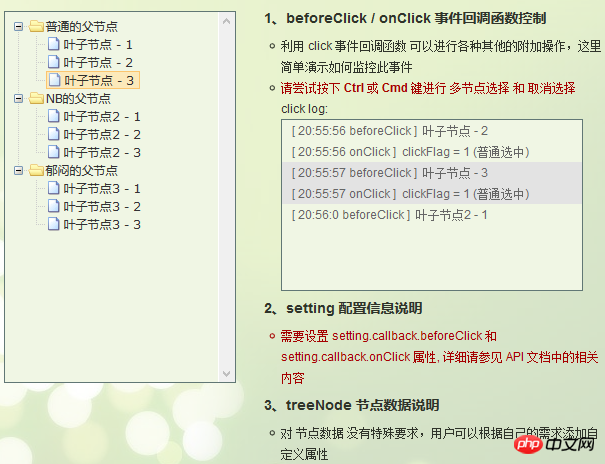
3.6.2 编程步骤
设置基本配置对象的onClick属性
技巧01:onClick属性值是一个方法的引用,我们需要自己编写这个方法

1 2 3 4 5 6 7 8 9 10 11 12 13 14 15 16 17 |
|
View Code
编写onClick触发方法

1 2 3 |
|
View Code
3.6.3 代码汇总
1 2 3 4 5 6 7 8 9 10 11 12 13 14 15 16 17 18 19 20 21 22 23 24 25 26 27 28 29 30 31 32 33 34 35 36 37 38 39 40 41 42 43 44 45 46 47 48 49 50 51 52 53 54 55 56 57 58 59 60 61 62 63 64 65 66 67 |
|
View Code
3.7 异步加载节点数据
3.7.1 官方文档
节点的数据是从后台进行获取的
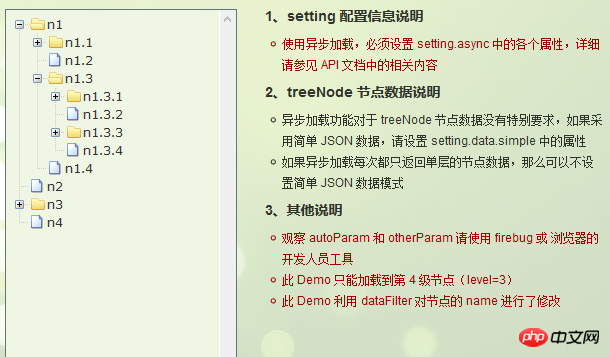
3.7.2 编程步骤
技巧01:异步加载节点数据时init方法不用传递第三个参数

> 准备一个后台用于返回JSON格式的数据
技巧01:返回的JSON数据是一个列表,格式为
1 2 3 4 5 6 7 8 9 10 11 12 |
|
技巧02:三少偷懒,是利用json-server模拟的后台数据,哈哈;json-server
> 设置基本配置对象的async属性

1 2 3 4 5 6 7 8 9 10 11 12 13 14 15 16 17 18 19 20 21 22 23 24 25 |
|
View Code
> 编写响应数据处理方法

1 2 3 4 5 6 7 8 9 |
|
View Code
3.7.3 代码总汇
1 2 3 4 5 6 7 8 9 10 11 12 13 14 15 16 17 18 19 20 21 22 23 24 25 |
|
模拟后台响应数据
1 |
|
HTML
1 2 3 4 5 6 7 8 9 10 11 12 13 14 15 16 17 18 19 20 21 22 23 24 25 26 27 28 29 30 31 32 33 34 35 36 37 38 39 40 41 42 43 44 45 46 47 48 49 50 51 52 53 54 55 56 57 58 59 60 61 62 63 64 65 66 67 68 69 70 71 72 73 74 75 |
|
TS
3.7.4 效果展示

相关推荐:
위 내용은 Angular는 zTree와 결합하여 노드 데이터 인스턴스 공유를 비동기식으로 로드합니다.의 상세 내용입니다. 자세한 내용은 PHP 중국어 웹사이트의 기타 관련 기사를 참조하세요!

핫 AI 도구

Undresser.AI Undress
사실적인 누드 사진을 만들기 위한 AI 기반 앱

AI Clothes Remover
사진에서 옷을 제거하는 온라인 AI 도구입니다.

Undress AI Tool
무료로 이미지를 벗다

Clothoff.io
AI 옷 제거제

AI Hentai Generator
AI Hentai를 무료로 생성하십시오.

인기 기사

뜨거운 도구

메모장++7.3.1
사용하기 쉬운 무료 코드 편집기

SublimeText3 중국어 버전
중국어 버전, 사용하기 매우 쉽습니다.

스튜디오 13.0.1 보내기
강력한 PHP 통합 개발 환경

드림위버 CS6
시각적 웹 개발 도구

SublimeText3 Mac 버전
신 수준의 코드 편집 소프트웨어(SublimeText3)

뜨거운 주제
 7360
7360
 15
15
 1628
1628
 14
14
 1353
1353
 52
52
 1265
1265
 25
25
 1214
1214
 29
29
![Illustrator에서 플러그인 로드 중 오류 발생 [수정됨]](https://img.php.cn/upload/article/000/465/014/170831522770626.jpg?x-oss-process=image/resize,m_fill,h_207,w_330) Illustrator에서 플러그인 로드 중 오류 발생 [수정됨]
Feb 19, 2024 pm 12:00 PM
Illustrator에서 플러그인 로드 중 오류 발생 [수정됨]
Feb 19, 2024 pm 12:00 PM
Adobe Illustrator를 시작할 때 플러그인 로딩 오류에 대한 메시지가 팝업됩니까? 일부 Illustrator 사용자는 응용 프로그램을 열 때 이 오류가 발생했습니다. 메시지 뒤에는 문제가 있는 플러그인 목록이 표시됩니다. 이 오류 메시지는 설치된 플러그인에 문제가 있음을 나타내지만 손상된 Visual C++ DLL 파일이나 손상된 기본 설정 파일과 같은 다른 이유로 인해 발생할 수도 있습니다. 이 오류가 발생하면 이 문서에서 문제 해결 방법을 안내하므로 아래 내용을 계속 읽어보세요. Illustrator에서 플러그인 로드 오류 Adobe Illustrator를 시작하려고 할 때 "플러그인 로드 오류" 오류 메시지가 표시되면 다음을 사용할 수 있습니다. 관리자로
 Ubuntu 24.04에 Angular를 설치하는 방법
Mar 23, 2024 pm 12:20 PM
Angular.js는 동적 애플리케이션을 만들기 위해 자유롭게 액세스할 수 있는 JavaScript 플랫폼입니다. HTML 구문을 템플릿 언어로 확장하여 애플리케이션의 다양한 측면을 빠르고 명확하게 표현할 수 있습니다. Angular.js는 코드를 작성, 업데이트 및 테스트하는 데 도움이 되는 다양한 도구를 제공합니다. 또한 라우팅 및 양식 관리와 같은 많은 기능을 제공합니다. 이 가이드에서는 Ubuntu24에 Angular를 설치하는 방법에 대해 설명합니다. 먼저 Node.js를 설치해야 합니다. Node.js는 서버 측에서 JavaScript 코드를 실행할 수 있게 해주는 ChromeV8 엔진 기반의 JavaScript 실행 환경입니다. Ub에 있으려면
 각도 학습 상태 관리자 NgRx에 대한 자세한 설명
May 25, 2022 am 11:01 AM
이 글은 Angular의 상태 관리자 NgRx에 대한 심층적인 이해를 제공하고 NgRx 사용 방법을 소개하는 글이 될 것입니다.
 Stremio 자막이 작동하지 않습니다. 자막을 로드하는 중 오류가 발생했습니다.
Feb 24, 2024 am 09:50 AM
Windows PC의 Stremio에서 자막이 작동하지 않습니까? 일부 Stremio 사용자는 동영상에 자막이 표시되지 않는다고 보고했습니다. 많은 사용자들이 "자막을 로드하는 중 오류가 발생했습니다."라는 오류 메시지가 나타났다고 보고했습니다. 이 오류와 함께 나타나는 전체 오류 메시지는 다음과 같습니다. 자막을 로드하는 동안 오류가 발생했습니다. 자막을 로드하지 못했습니다. 이는 사용 중인 플러그인이나 네트워크에 문제가 있을 수 있습니다. 오류 메시지에서 알 수 있듯이 인터넷 연결로 인해 오류가 발생할 수 있습니다. 따라서 네트워크 연결을 확인하고 인터넷이 제대로 작동하는지 확인하십시오. 이 외에도 충돌하는 자막 추가 기능, 특정 비디오 콘텐츠에 대해 지원되지 않는 자막, 오래된 Stremio 앱 등 이 오류의 다른 이유가 있을 수 있습니다. 좋다
 각도에서 monaco-editor를 사용하는 방법에 대한 간략한 분석
Oct 17, 2022 pm 08:04 PM
각도에서 모나코 편집기를 사용하는 방법은 무엇입니까? 다음 글은 최근 비즈니스에서 사용되는 Monaco-Editor의 활용 사례를 기록한 글입니다.
 Angular의 서버 측 렌더링(SSR)을 탐색하는 기사
Dec 27, 2022 pm 07:24 PM
앵귤러 유니버셜(Angular Universal)을 아시나요? 웹사이트가 더 나은 SEO 지원을 제공하는 데 도움이 될 수 있습니다!
 프로젝트가 너무 크면 어떻게 해야 하나요? Angular 프로젝트를 합리적으로 분할하는 방법은 무엇입니까?
Jul 26, 2022 pm 07:18 PM
Angular 프로젝트가 너무 큽니다. 합리적으로 분할하는 방법은 무엇입니까? 다음 글에서는 Angular 프로젝트를 합리적으로 분할하는 방법을 소개하겠습니다. 도움이 되셨으면 좋겠습니다!
 PHP는 무한 스크롤 로딩을 구현합니다.
Jun 22, 2023 am 08:30 AM
인터넷이 발전하면서 점점 더 많은 웹페이지에서 스크롤 로딩을 지원해야 하는데, 무한 스크롤 로딩이 그 중 하나입니다. 이를 통해 페이지에 새로운 콘텐츠가 지속적으로 로드되어 사용자가 웹을 보다 원활하게 탐색할 수 있습니다. 이번 글에서는 PHP를 이용하여 무한 스크롤 로딩을 구현하는 방법을 소개하겠습니다. 1. 무한 스크롤 로딩이란 무엇인가요? 무한 스크롤 로딩은 스크롤 막대를 기반으로 웹 콘텐츠를 로딩하는 방법입니다. 그 원리는 사용자가 페이지 하단으로 스크롤할 때 AJAX를 통해 배경 데이터를 비동기적으로 검색하여 지속적으로 새 콘텐츠를 로드하는 것입니다. 이런 종류의 로딩 방법


