캔버스에서는 Clip() 함수를 사용하여 영역을 자를 수 있습니다. 자르기 영역을 설정하면 해당 영역 내의 이미지만 표시되고 나머지는 차단됩니다. 이번 글에서는 캔버스 클리핑() 기능의 구체적인 사용법에 대한 관련 정보를 주로 소개하고 있으니 많은 도움이 되셨으면 좋겠습니다.
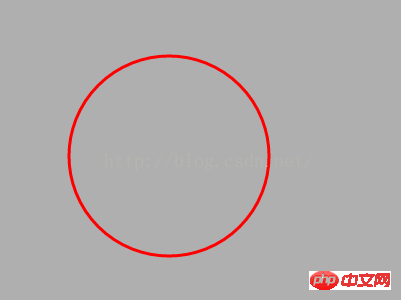
잘리지 않고 원 그리기
<!DOCTYPE html>
<html lang="en">
<head>
<meta charset="UTF-8">
<title></title>
<style>
*{margin:0; padding:0;}
html, body{width:100%; height:100%; overflow:hidden; background-color:#AFAFAF;}
</style>
</head>
<body>
<canvas id="canvas"></canvas>
<script>
var canvas = document.getElementById('canvas'),
context = canvas.getContext('2d');
canvas.width = document.body.clientWidth;
canvas.height = document.body.clientHeight;
context.lineWidth = 3;
context.strokeStyle = 'red';
context.beginPath();
context.arc(200, 200, 100, (Math.PI / 180) * 0, (Math.PI / 180) * 360, false);
context.stroke();
context.closePath();
</script>
</body>
</html>Effect

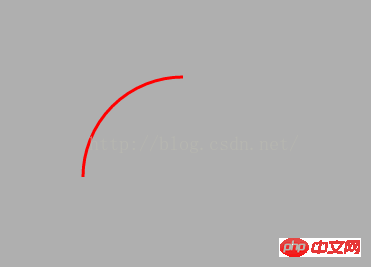
clip()을 사용하여 영역 자르기
<!DOCTYPE html>
<html lang="en">
<head>
<meta charset="UTF-8">
<title></title>
<style>
*{margin:0; padding:0;}
html, body{width:100%; height:100%; overflow:hidden; background-color:#AFAFAF;}
</style>
</head>
<body>
<canvas id="canvas"></canvas>
<script>
var canvas = document.getElementById('canvas'),
context = canvas.getContext('2d');
canvas.width = document.body.clientWidth;
canvas.height = document.body.clientHeight;
context.lineWidth = 3;
context.strokeStyle = 'red';
context.rect(0, 0, 200, 200);
context.clip();
context.beginPath();
context.arc(200, 200, 100, (Math.PI / 180) * 0, (Math.PI / 180) * 360, false);
context.stroke();
context.closePath();
</script>
</body>
</html>Effect

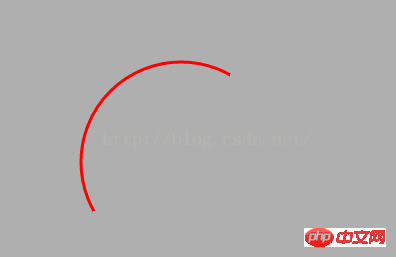
호를 사용하여 다음을 수행할 수도 있습니다. 원 그리기 클리핑 영역
<!DOCTYPE html>
<html lang="en">
<head>
<meta charset="UTF-8">
<title></title>
<style>
*{margin:0; padding:0;}
html, body{width:100%; height:100%; overflow:hidden; background-color:#AFAFAF;}
</style>
</head>
<body>
<canvas id="canvas"></canvas>
<script>
var canvas = document.getElementById('canvas'),
context = canvas.getContext('2d');
canvas.width = document.body.clientWidth;
canvas.height = document.body.clientHeight;
context.lineWidth = 3;
context.strokeStyle = 'red';
context.arc(100, 100, 150, (Math.PI / 180) * 0, (Math.PI / 180) * 360, false);
context.clip();
context.beginPath();
context.arc(200, 200, 100, (Math.PI / 180) * 0, (Math.PI / 180) * 360, false);
context.stroke();
context.closePath();
</script>
</body>
</html>효과

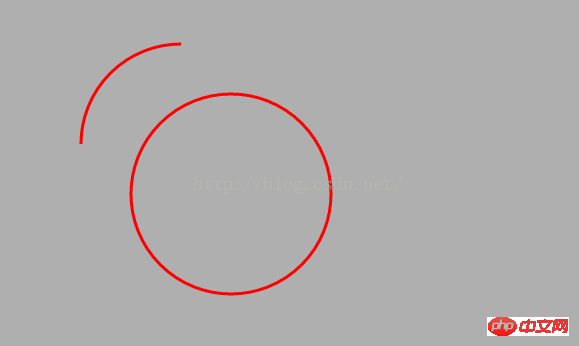
단일 경로만 클리핑하려면 저장 및 복원을 사용하세요
<!DOCTYPE html>
<html lang="en">
<head>
<meta charset="UTF-8">
<title></title>
<style>
*{margin:0; padding:0;}
html, body{width:100%; height:100%; overflow:hidden; background-color:#AFAFAF;}
</style>
</head>
<body>
<canvas id="canvas"></canvas>
<script>
var canvas = document.getElementById('canvas'),
context = canvas.getContext('2d');
canvas.width = document.body.clientWidth;
canvas.height = document.body.clientHeight;
context.lineWidth = 3;
context.strokeStyle = 'red';
context.save();
context.rect(0, 0, 200, 200);
context.clip();
context.beginPath();
context.arc(200, 200, 100, (Math.PI / 180) * 0, (Math.PI / 180) * 360, false);
context.stroke();
context.closePath();
context.restore();
context.beginPath();
context.arc(250, 250, 100, (Math.PI / 180) * 0, (Math.PI / 180) * 360, false);
context.stroke();
context.closePath();
</script>
</body>
</html>효과

관련 권장 사항:
사용 HTML5 Canvas API 클립() 메서드를 사용한 자르기 영역 이미지의 코드 예
위 내용은 캔버스에서 자르기 위해 clips() 함수 사용의 상세 내용입니다. 자세한 내용은 PHP 중국어 웹사이트의 기타 관련 기사를 참조하세요!