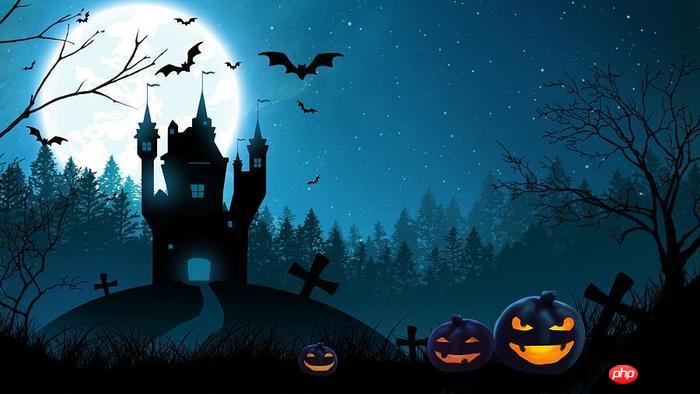
H5 캔버스를 사용하여 공포 애니메이션 만들기
이번에는 H5 캔버스를 사용하여 공포 애니메이션을 만드는 방법을 소개하겠습니다. H5 캔버스를 사용하여 공포 애니메이션을 만들 때 주의 사항은 무엇입니까?
캔버스는 흥미로운 효과와 애니메이션을 얻을 수 있습니다. 간단한 페이지 구현을 통해 기본적인 그리기 방법을 알아보세요.
Effect
Happy Halloween
기본 지식
let canvas = document.getElementById('canvas');let context = canvas.getContext('2d');
Start path
context.beginPath();
beginPath() 메서드는 캔버스에서 그리기 경로를 시작하거나 현재 경로를 재설정합니다.
Move path
context.moveTo();
moveTo() 메서드는 선을 만들지 않고 캔버스의 지정된 지점으로 경로를 이동합니다.
Add line
context.lineTo();
lineTo() 메서드는 새 점을 추가하고 해당 점에서 캔버스의 지정된 점까지 선을 만듭니다.
drawImage
context.drawImage(image,x,y);
drawImage() 메서드는 캔버스에 이미지, 캔버스 또는 비디오를 그리거나 이미지의 일부를 그리고 이미지 크기를 늘리거나 줄일 수 있습니다.
픽셀 데이터 가져오기
context.getImageData(x,y,width,height);
getImageData() 메서드는 직사각형의 픽셀 데이터를 지정하는 캔버스 imageData 개체를 가져올 수 있습니다.
imageData 개체의 각 픽셀에는 rgba 값이 있으며, 이는 배열 형식으로 data 속성에 저장됩니다.
픽셀 데이터 다시 넣기
context.putImageData(imageData,x,y);
putImageData() 메서드는 획득한 이미지 데이터를 캔버스에 다시 넣습니다.
Implementation
html
<canvas id="canvas"></canvas><button id="click" class="switch">Click</button>
css
html,body,canvas {    width: 100%;    height: 100%;    margin: 0;
}.switch {    position: absolute;    top: 70%;    right: 10%;    width: 50px;    height: 50px;    border-radius: 50px;    outline: none;    cursor: pointer;    animation: switch-animate alternate infinite ease 1s 0s;
}
@keyframes switch-animate {    from {        box-shadow: 0 0 30px #ece9c5;
    }    to {        box-shadow: 0 0 100px #eae5a7;
    }
}js
(function () { class Halloween { constructor(id) { this.canvas = document.getElementById(id); this.ctx = this.canvas.getContext('2d'); this.w = this.canvas.width; this.h = this.canvas.height; this.data = [];
} //初始画布
initDraw(img) { this.w = this.canvas.width = img.width; this.h = this.canvas.height = img.height; this.ctx.drawImage(img, 0, 0); this.data = this.ctx.getImageData(0, 0, this.w, this.h);
} //显示文字
drawText() { this.ctx.font = '60px Verdana'; this.ctx.fillStyle = '#ffffff'; this.ctx.fillText('万圣节快乐', 350, 280);
} //闪电
lightning() { let ctx = this.ctx;
ctx.strokeStyle = '#fff';
ctx.lineWidth = 2;
ctx.beginPath();
ctx.moveTo(800, 10);
ctx.lineTo(600, 100);
ctx.lineTo(500, 200);
ctx.stroke();
ctx.beginPath();
ctx.moveTo(600, 100);
ctx.lineTo(650, 170);
ctx.stroke()
} //打雷
thunder() { let timer = Math.floor(800 * Math.random()); this.reverse(); this.lightning(); this.drawText();
setTimeout(() => { this.reset();
}, timer);
} //反转画布
reverse() { let imgData = this.ctx.getImageData(0, 0, this.w, this.h); for (var i = 0, len = imgData.data.length; i < len; i += 4) {
imgData.data[i] = 255 - imgData.data[i];
imgData.data[i + 1] = 255 - imgData.data[i + 1];
imgData.data[i + 2] = 255 - imgData.data[i + 2];
imgData.data[i + 3] = 255;
} this.ctx.putImageData(imgData, 0, 0);
} //重置画布
reset() { this.ctx.putImageData(this.data, 0, 0);
}
} let halloween = new Halloween('canvas'); let canvas = document.getElementById('canvas'); let ctx = canvas.getContext('2d'); let img = new Image();
img.src = '/images/halloween.png';
img.onload = () => {
halloween.initDraw(img);
} document.getElementById('click').onclick = () => {
halloween.thunder();
}
})();
이 기사의 사례를 읽은 후 방법을 마스터했다고 믿습니다. 더 흥미로운 내용을 보려면 PHP 중국어에 주목하세요. 홈페이지other관련 기사!
추천 자료:
캔버스를 사용하여 검은 배경과 특수 효과로 파편 불꽃놀이를 만드는 방법
위 내용은 H5 캔버스를 사용하여 공포 애니메이션 만들기의 상세 내용입니다. 자세한 내용은 PHP 중국어 웹사이트의 기타 관련 기사를 참조하세요!

핫 AI 도구

Undresser.AI Undress
사실적인 누드 사진을 만들기 위한 AI 기반 앱

AI Clothes Remover
사진에서 옷을 제거하는 온라인 AI 도구입니다.

Undress AI Tool
무료로 이미지를 벗다

Clothoff.io
AI 옷 제거제

AI Hentai Generator
AI Hentai를 무료로 생성하십시오.

인기 기사

뜨거운 도구

메모장++7.3.1
사용하기 쉬운 무료 코드 편집기

SublimeText3 중국어 버전
중국어 버전, 사용하기 매우 쉽습니다.

스튜디오 13.0.1 보내기
강력한 PHP 통합 개발 환경

드림위버 CS6
시각적 웹 개발 도구

SublimeText3 Mac 버전
신 수준의 코드 편집 소프트웨어(SublimeText3)

뜨거운 주제
 7476
7476
 15
15
 1377
1377
 52
52
 77
77
 11
11
 49
49
 19
19
 19
19
 31
31
 HTML의 테이블 테두리
Sep 04, 2024 pm 04:49 PM
HTML의 테이블 테두리 안내. 여기에서는 HTML의 테이블 테두리 예제를 사용하여 테이블 테두리를 정의하는 여러 가지 방법을 논의합니다.
 HTML 여백-왼쪽
Sep 04, 2024 pm 04:48 PM
HTML 여백-왼쪽 안내. 여기에서는 HTML margin-left에 대한 간략한 개요와 코드 구현과 함께 예제를 논의합니다.
 HTML의 중첩 테이블
Sep 04, 2024 pm 04:49 PM
HTML의 Nested Table에 대한 안내입니다. 여기에서는 각 예와 함께 테이블 내에 테이블을 만드는 방법을 설명합니다.
 HTML 테이블 레이아웃
Sep 04, 2024 pm 04:54 PM
HTML 테이블 레이아웃 안내. 여기에서는 HTML 테이블 레이아웃의 값에 대해 예제 및 출력 n 세부 사항과 함께 논의합니다.
 HTML 입력 자리 표시자
Sep 04, 2024 pm 04:54 PM
HTML 입력 자리 표시자 안내. 여기서는 코드 및 출력과 함께 HTML 입력 자리 표시자의 예를 논의합니다.
 HTML 정렬 목록
Sep 04, 2024 pm 04:43 PM
HTML 순서 목록에 대한 안내입니다. 여기서는 HTML Ordered 목록 및 유형에 대한 소개와 각각의 예에 대해서도 설명합니다.
 HTML에서 텍스트 이동
Sep 04, 2024 pm 04:45 PM
HTML에서 텍스트 이동 안내. 여기서는 Marquee 태그가 구문과 함께 작동하는 방식과 구현할 예제에 대해 소개합니다.
 HTML 온클릭 버튼
Sep 04, 2024 pm 04:49 PM
HTML onclick 버튼에 대한 안내입니다. 여기에서는 각각의 소개, 작업, 예제 및 다양한 이벤트의 onclick 이벤트에 대해 설명합니다.


