

WordPress로 개인 블로그 구축

이 기사는 주로 사진, 텍스트 및 코드 형식으로 WordPress에서 개인 블로그를 구축하는 방법을 공유합니다.
1 그리고 세 가지 가상호스트LNMP 바이너리 설치 mysql-5.5.54
LNMP 소스코드 컴파일 및 설치 php-5.5.32# 修改/application/nginx/conf/extra/blog.conf[root@web01 extra]# cat blog.conf
server { listen 80;
server_name blog.rsq.com;
location / {
root html/blog; index index.html index.htm;
}
location ~ .*\.(php|php5)?$ {
root html/blog;
fastcgi_pass 127.0.0.1:9000;
fastcgi_index index.php;
include fastcgi.conf;
}
}# 重启nginx服务[root@web01 extra]# ../../sbin/nginx -tnginx: the configuration file /application/nginx-1.6.3//conf/nginx.conf syntax is ok
nginx: configuration file /application/nginx-1.6.3//conf/nginx.conf test is successful
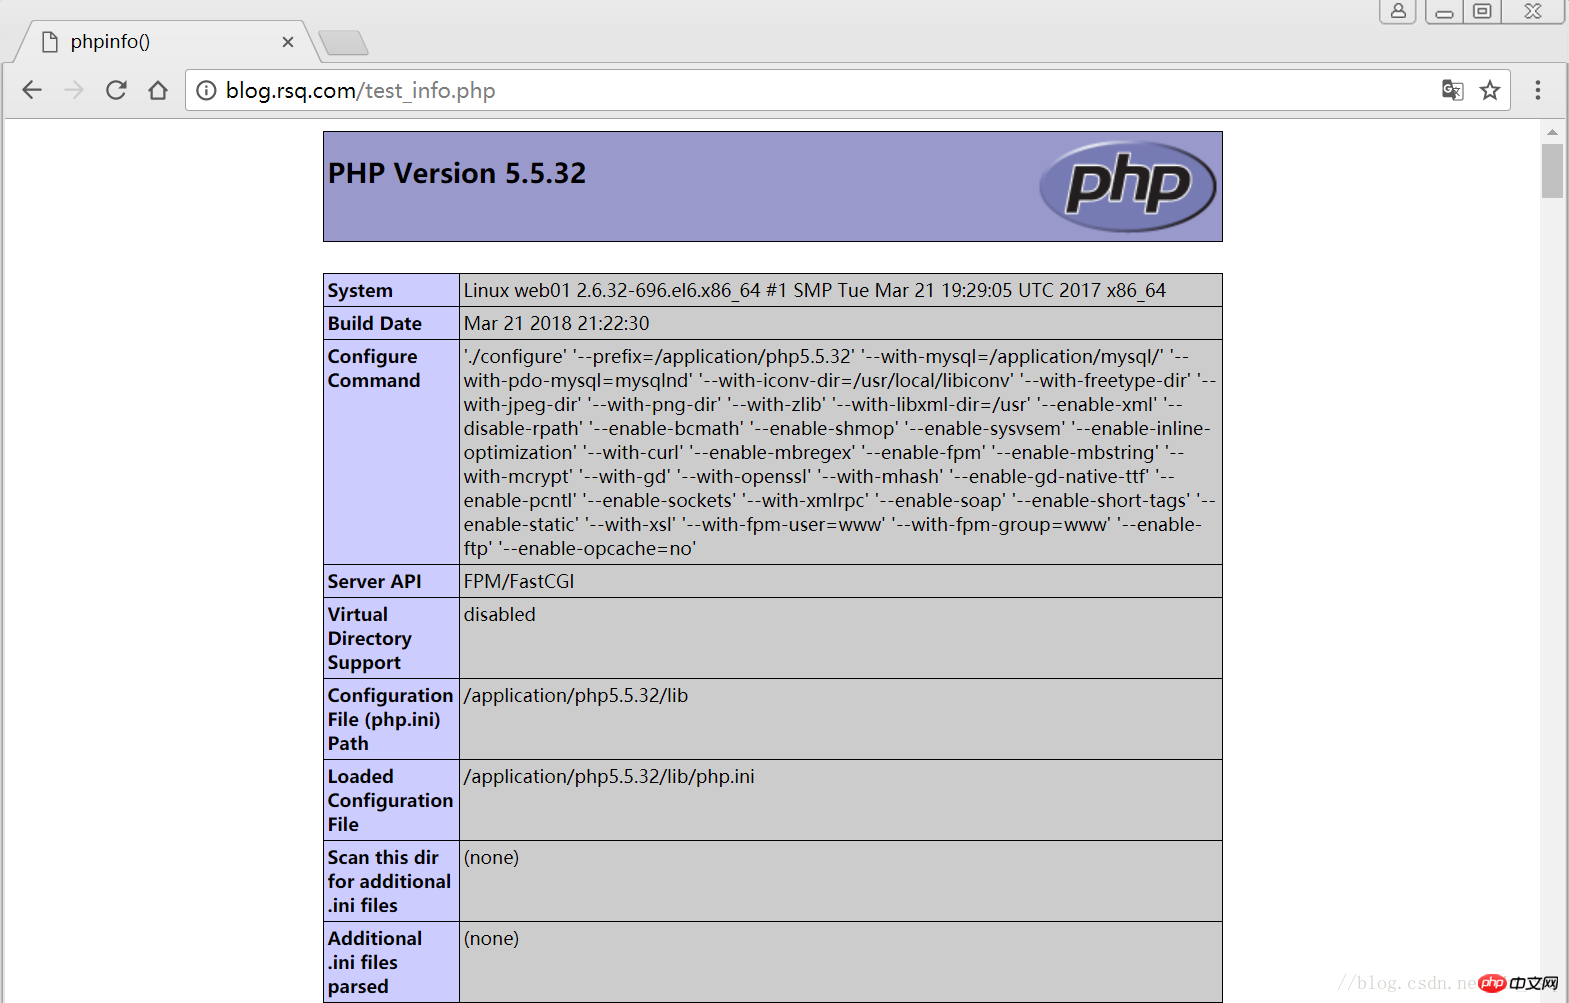
[root@web01 extra]# ../../sbin/nginx -s reload# 在/application/nginx/html/blog/目录中写一个WordPress로 개인 블로그 구축文件,测试连通性[root@web01 extra]# cd /application/nginx/html/blog/[root@web01 blog]# echo "<?php WordPress로 개인 블로그 구축(); ?>" >test_info.php[root@web01 blog]# cat test_info.php<?php WordPress로 개인 블로그 구축(); ?># 윈도우 브라우저에서 접속 테스트를 하시면 아래와 같은 페이지가 나옵니다. 테스트가 성공했습니다
# 브라우저 측 테스트
1.2 php에서 mysql로의 연결 확인# 写一个简单的数据库连接脚本[root@web01 blog]# cat test_mysql.php<?php $link_id=mysql_connect('localhost','root','oldboy123') or mysql_error(); if($link_id){ echo "Mysql successful by RSQ !"; }else{ echo mysql_error(); }?>로그인 후 복사로그인 후 복사
 2 LNMP WordPress 개인 블로그 설정
2.1 WordPress 데이터베이스 만들기
# 先登录mysql,创建WordPress所需要的数据库
[root@web01 ~]# mysql -uroot -poldboy123mysql> show databases;
+--------------------+| Database           |
+--------------------+| information_schema |
| mysql              |
| performance_schema || test               |
+--------------------+4 rows in set (0.01 sec)

mysql> drop database test;          # 删除多余的test数据库
Query OK, 0 rows affected (0.02 sec)mysql> show databases;          #显示数据库
+--------------------+| Database           |
+--------------------+| information_schema |
| mysql              |
| performance_schema |+--------------------+3 rows in set (0.00 sec)

mysql> create database wordpress;           # 创建wordpress用户
Query OK, 1 row affected (0.00 sec)mysql> show databases;
+--------------------+| Database           |
+--------------------+| information_schema |
| mysql              |
| performance_schema || wordpress          |
+--------------------+4 rows in set (0.00 sec)mysql> select user();
+----------------+| user()         |
+----------------+| root@localhost |
+----------------+1 row in set (0.00 sec)mysql> select user,host from mysql.user;        #查看当前数据库用户
+------+-----------+| user | host      |
+------+-----------+| root | 127.0.0.1 |
| root | ::1       |
|      | localhost || root | localhost |
+------+-----------+4 rows in set (0.00 sec)

# 为wordpress数据库创建专门管理的wordpress用户并授予所有权限
mysql> grant all on wordpress.* to wordpress@'localhost' identified by '123456';
Query OK, 0 rows affected (0.00 sec)mysql> select user,host from mysql.user;    # 查看wordpress数据库用户是否创建
+-----------+-----------+| user      | host      |
+-----------+-----------+| root      | 127.0.0.1 |
| root      | ::1       |
|           | localhost |
| root      | localhost || wordpress | localhost |
+-----------+-----------+5 rows in set (0.00 sec)
mysql> show grants for wordpress@'localhost';   # 查看指定用户所具有的权限
mysql> flush privileges;        # 刷新一下,使用户权限生效
Query OK, 0 rows affected (0.00 sec)
2.2 blog.conf 수정 구성 파일rrre 2.3 워드프레스 소프트웨어 패키지 다운로드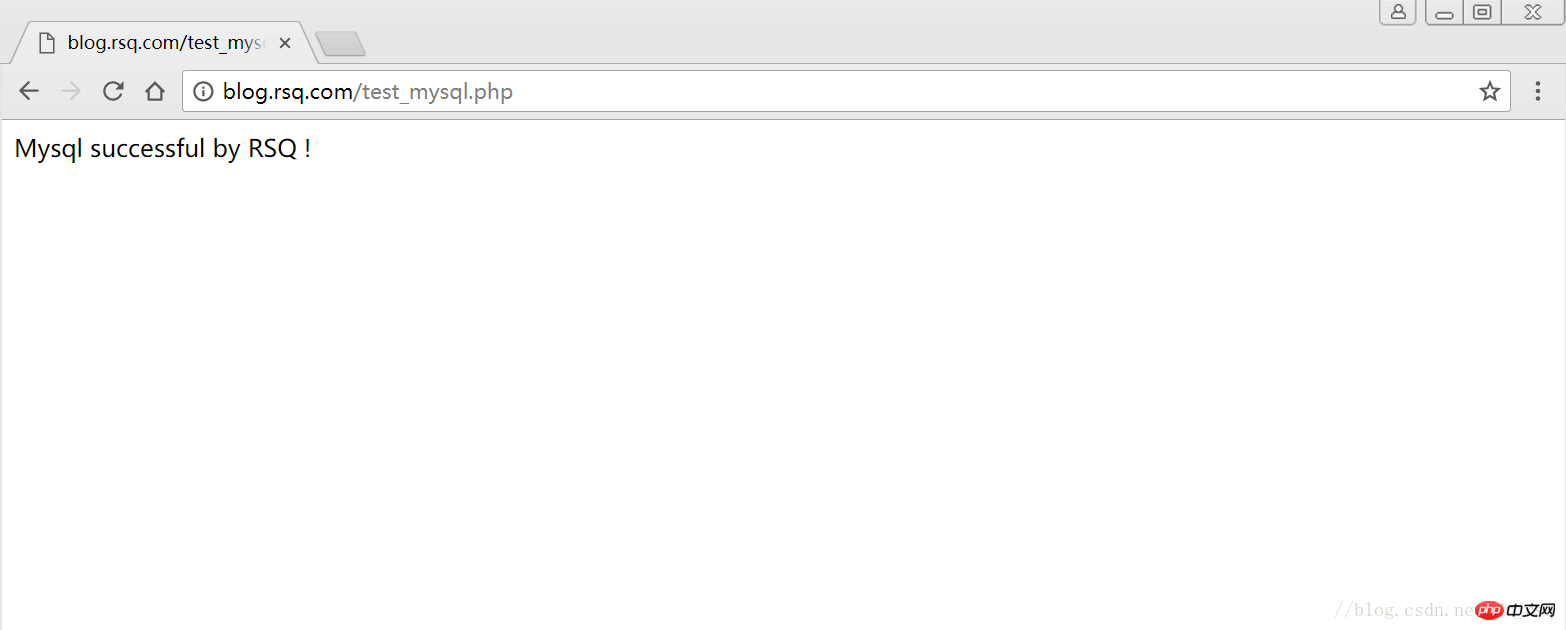
# blog.conf配置文件中index新增index.html[root@web01 extra]# cat blog.conf
server {
listen 80;
server_name blog.rsq.com;
location / {
root html/blog;
index index.php index.html index.htm;
}
location ~ .*\.(php|php5)?$ {
root html/blog;
fastcgi_pass 127.0.0.1:9000;
fastcgi_index index.php;
include fastcgi.conf;
}
}
[root@web01 tools]# /application/nginx/sbin/nginx -t nginx: the configuration file /application/nginx-1.6.3//conf/nginx.conf syntax is oknginx: configuration file /application/nginx-1.6.3//conf/nginx.conf test is successful
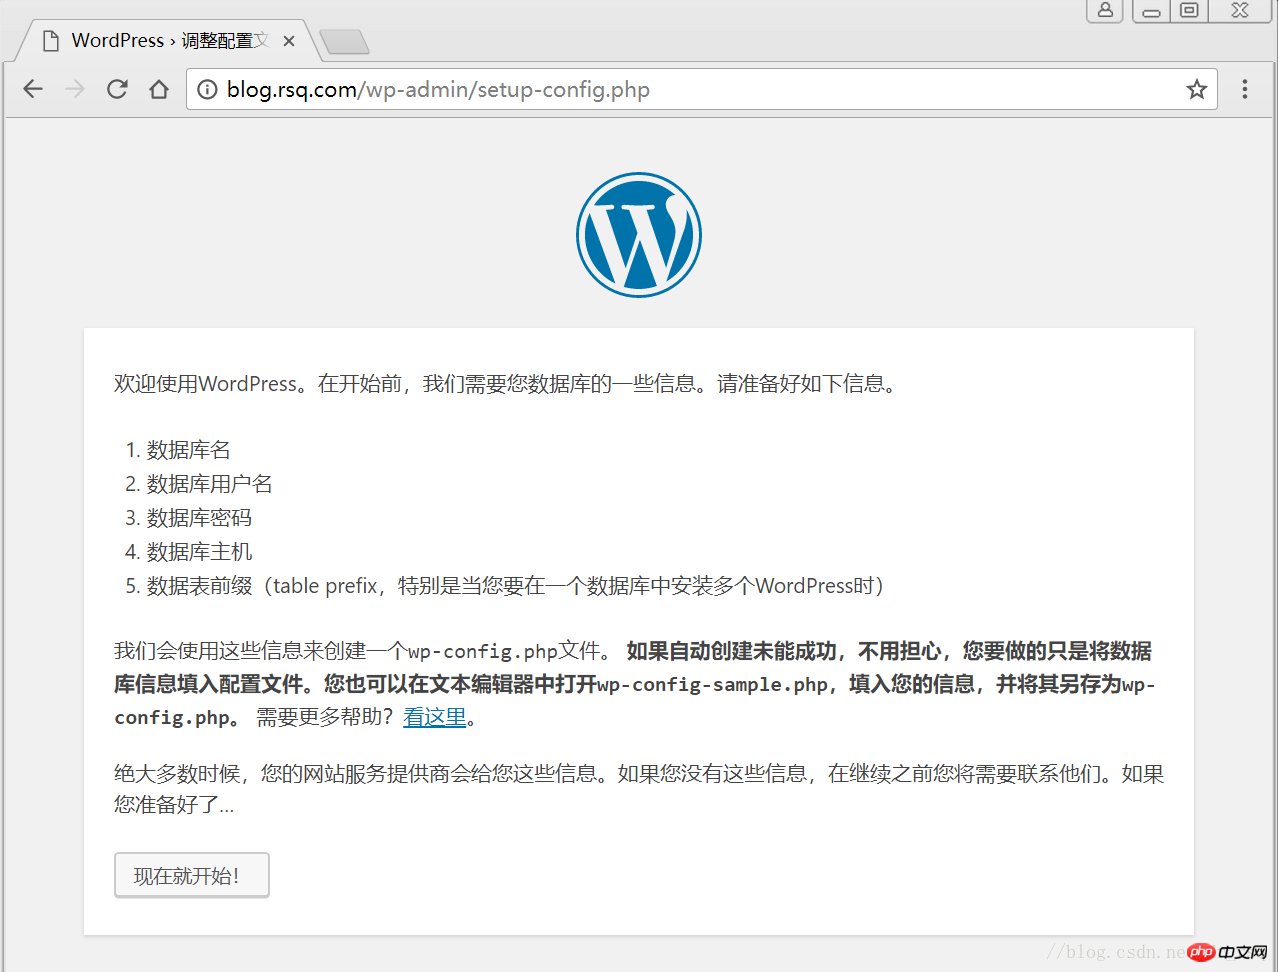
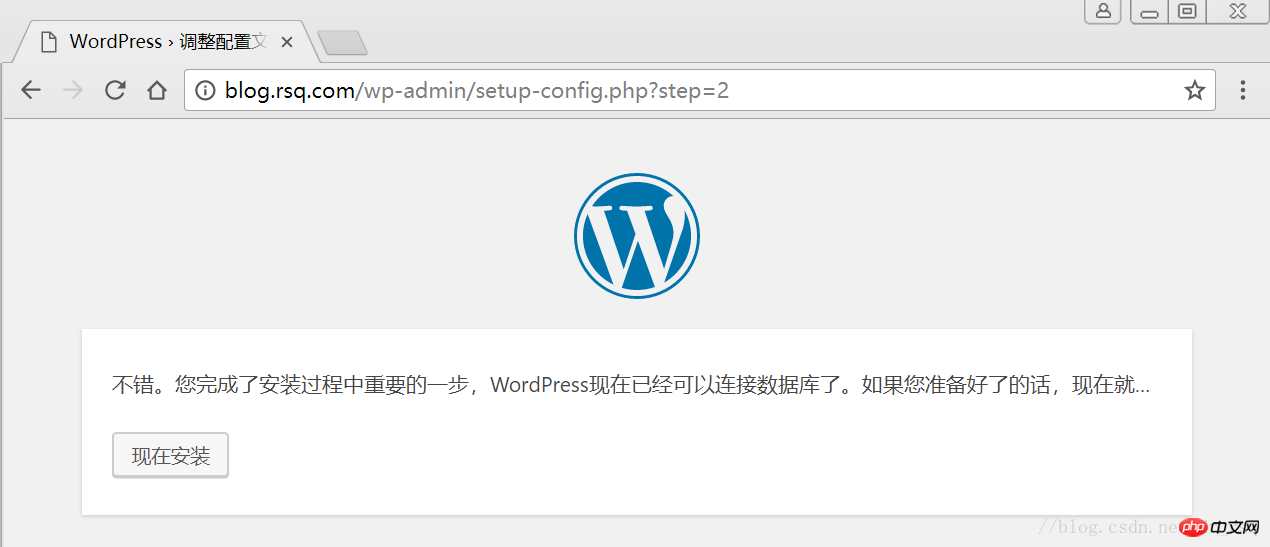
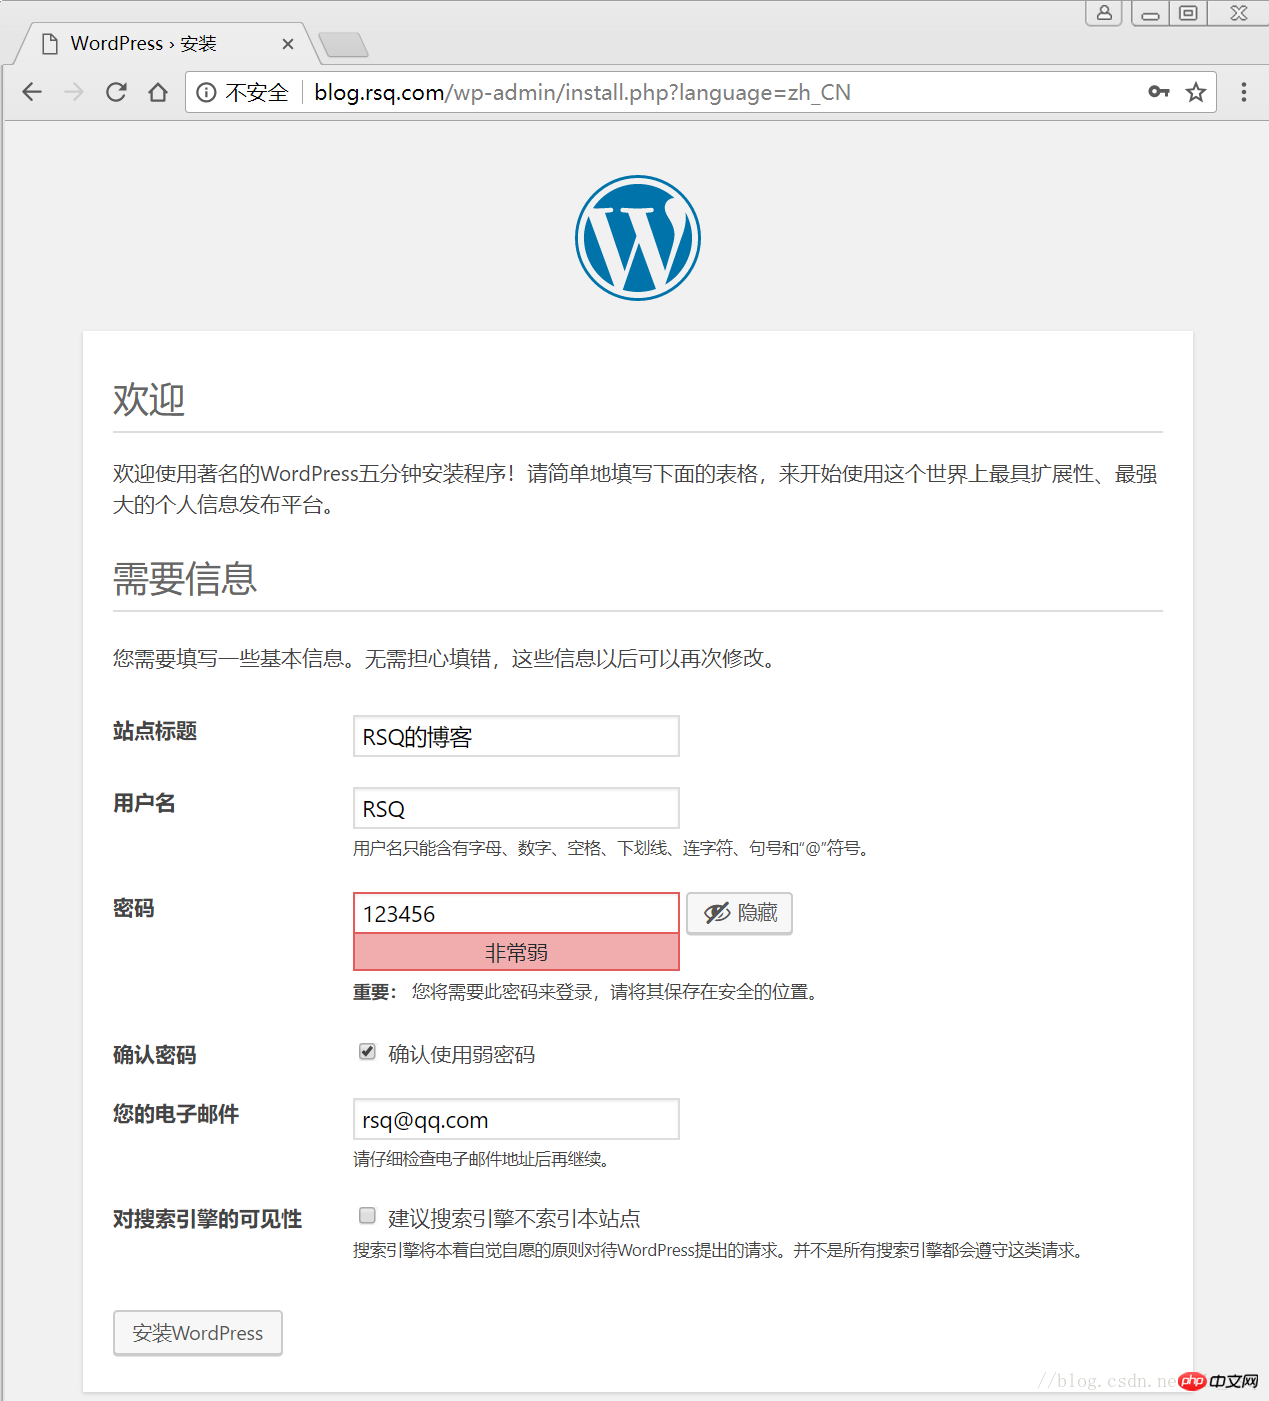
[root@web01 tools]# /application/nginx/sbin/nginx -s reload2.4 웹페이지에서 워드프레스를 설치하세요
# 클라이언트 호스트 파일을 구문 분석해야 합니다


1 LNMP 조합
1.1 Nginx에서 PHP로의 연결 확인
- 1.2 PHP에서 mysql로의 연결을 확인하세요
- 2 LNMP WordPress 개인 블로그 설정
2.1 wordpress 데이터베이스 만들기
- 2.2 blog.conf 구성 파일 수정
- 2.4 WordPress 설치 웹페이지
- 1 LNMP 조합 1.1 Nginx에서 PHP로의 연결 확인
-
처음 몇 개에서는 이 블로그 게시물의 모든 환경이 구성되었습니다. Nginx와 PHP 간의 연결을 테스트해 보겠습니다.
- 2.3 wordpress 패키지 다운로드
LNMP 바이너리 설치 mysql-5.5.54
LNMP 소스코드 컴파일 php-5.5.32 설치# 去官网下载最新的wordpress软件包[root@web01 extra]# cd /home/oldboy/tools/[root@web01 tools]# wget https://cn.wordpress.org/wordpress-4.9.4-zh_CN.tar.gz# 解压缩[root@web01 tools]# tar -xf wordpress-4.9.4-zh_CN.tar.gz# 拷贝wordpress目录下的所有内容到/application/nginx/html/blog/目录下[root@web01 tools]# cp -a wordpress/* /application/nginx/html/blog/[root@web01 tools]# ls /application/nginx/html/blog/index.php wp-blog-header.php wp-includes wp-settings.phplicense.txt wp-comments-post.php wp-links-opml.php wp-signup.phpreadme.html wp-config-sample.php wp-load.php wp-trackback.phpwp-activate.php wp-content wp-login.php xmlrpc.phpwp-admin wp-cron.php wp-mail.php# 授予权限,先暂时授予所有文件,以后再调整权限[root@web01 tools]# chown -R www.www /application/nginx/html/blog/
# Windows 브라우저에서 접속 테스트를 하시면 아래와 같은 페이지가 나타나면 테스트를 해보세요. 성공
# 브라우저 측 테스트
1.2 php에서 mysql로의 연결 확인# 修改/application/nginx/conf/extra/blog.conf[root@web01 extra]# cat blog.conf server { listen 80; server_name blog.rsq.com; location / { root html/blog; index index.html index.htm; } location ~ .*\.(php|php5)?$ { root html/blog; fastcgi_pass 127.0.0.1:9000; fastcgi_index index.php; include fastcgi.conf; } }# 重启nginx服务[root@web01 extra]# ../../sbin/nginx -tnginx: the configuration file /application/nginx-1.6.3//conf/nginx.conf syntax is ok nginx: configuration file /application/nginx-1.6.3//conf/nginx.conf test is successful [root@web01 extra]# ../../sbin/nginx -s reload# 在/application/nginx/html/blog/目录中写一个WordPress로 개인 블로그 구축文件,测试连通性[root@web01 extra]# cd /application/nginx/html/blog/[root@web01 blog]# echo "<?php WordPress로 개인 블로그 구축(); ?>" >test_info.php[root@web01 blog]# cat test_info.php<?php WordPress로 개인 블로그 구축(); ?>로그인 후 복사로그인 후 복사
2 LNMP wordpress 개인 블로그 구축
2.1 wordpress 데이터베이스 생성
# 写一个简单的数据库连接脚本[root@web01 blog]# cat test_mysql.php<?php
$link_id=mysql_connect('localhost','root','oldboy123') or mysql_error(); if($link_id){ echo "Mysql successful by RSQ !";
}else{ echo mysql_error();
}?>2.2 blog.conf 구성 수정 file # 先登录mysql,创建WordPress所需要的数据库
[root@web01 ~]# mysql -uroot -poldboy123mysql> show databases;
+--------------------+| Database |
+--------------------+| information_schema |
| mysql |
| performance_schema || test |
+--------------------+4 rows in set (0.01 sec)
mysql> drop database test; # 删除多余的test数据库
Query OK, 0 rows affected (0.02 sec)mysql> show databases; #显示数据库
+--------------------+| Database |
+--------------------+| information_schema |
| mysql |
| performance_schema |+--------------------+3 rows in set (0.00 sec)
mysql> create database wordpress; # 创建wordpress用户
Query OK, 1 row affected (0.00 sec)mysql> show databases;
+--------------------+| Database |
+--------------------+| information_schema |
| mysql |
| performance_schema || wordpress |
+--------------------+4 rows in set (0.00 sec)mysql> select user();
+----------------+| user() |
+----------------+| root@localhost |
+----------------+1 row in set (0.00 sec)mysql> select user,host from mysql.user; #查看当前数据库用户
+------+-----------+| user | host |
+------+-----------+| root | 127.0.0.1 |
| root | ::1 |
| | localhost || root | localhost |
+------+-----------+4 rows in set (0.00 sec)
# 为wordpress数据库创建专门管理的wordpress用户并授予所有权限
mysql> grant all on wordpress.* to wordpress@'localhost' identified by '123456';
Query OK, 0 rows affected (0.00 sec)mysql> select user,host from mysql.user; # 查看wordpress数据库用户是否创建
+-----------+-----------+| user | host |
+-----------+-----------+| root | 127.0.0.1 |
| root | ::1 |
| | localhost |
| root | localhost || wordpress | localhost |
+-----------+-----------+5 rows in set (0.00 sec)
mysql> show grants for wordpress@'localhost'; # 查看指定用户所具有的权限
mysql> flush privileges; # 刷新一下,使用户权限生效
Query OK, 0 rows affected (0.00 sec)
# blog.conf配置文件中index新增index.html[root@web01 extra]# cat blog.conf
    server {
        listen       80;
        server_name  blog.rsq.com;
        location / {
            root   html/blog;
            index  index.php index.html index.htm;
        }
        location ~ .*\.(php|php5)?$ {
            root html/blog;
        fastcgi_pass 127.0.0.1:9000;
        fastcgi_index index.php;
        include fastcgi.conf;
        }
    }
[root@web01 tools]# /application/nginx/sbin/nginx -t nginx: the configuration file /application/nginx-1.6.3//conf/nginx.conf syntax is oknginx: configuration file /application/nginx-1.6.3//conf/nginx.conf test is successful
[root@web01 tools]# /application/nginx/sbin/nginx -s reload2.4 웹 페이지 설치 wordpress
# 클라이언트 호스트 파일에 필요한 사항 파싱되세요
LAMP PHP 모듈을 기반으로 개인 블로그를 구축하는 방법에 대한 자세한 그래픽 및 텍스트 설명
php 개인 블로그 PHP 상속에 대한 이야기, 개인적인 의견
위 내용은 WordPress로 개인 블로그 구축의 상세 내용입니다. 자세한 내용은 PHP 중국어 웹사이트의 기타 관련 기사를 참조하세요!

핫 AI 도구

Undresser.AI Undress
사실적인 누드 사진을 만들기 위한 AI 기반 앱

AI Clothes Remover
사진에서 옷을 제거하는 온라인 AI 도구입니다.

Undress AI Tool
무료로 이미지를 벗다

Clothoff.io
AI 옷 제거제

Video Face Swap
완전히 무료인 AI 얼굴 교환 도구를 사용하여 모든 비디오의 얼굴을 쉽게 바꾸세요!

인기 기사
뜨거운 도구

메모장++7.3.1
사용하기 쉬운 무료 코드 편집기

SublimeText3 중국어 버전
중국어 버전, 사용하기 매우 쉽습니다.

스튜디오 13.0.1 보내기
강력한 PHP 통합 개발 환경

드림위버 CS6
시각적 웹 개발 도구

SublimeText3 Mac 버전
신 수준의 코드 편집 소프트웨어(SublimeText3)
뜨거운 주제
 7739
7739
 15
1643
14
1397
52
1290
25
1233
29
15
1643
14
1397
52
1290
25
1233
29

 WordPress 기사 목록을 조정하는 방법
Apr 20, 2025 am 10:48 AM
WordPress 기사 목록을 조정하는 방법
Apr 20, 2025 am 10:48 AM
WordPress 기사 목록을 조정하는 4 가지 방법이 있습니다. 테마 옵션 사용, 플러그인 사용 (예 : Post Type Order, WP Post List, Boxy Sitture), 코드 사용 (Functions.php 파일의 설정 추가) 또는 WordPress 데이터베이스를 직접 수정하십시오.
 WordPress 차단 IP 용 플러그인은 무엇입니까?
Apr 20, 2025 am 08:27 AM
WordPress 차단 IP 용 플러그인은 무엇입니까?
Apr 20, 2025 am 08:27 AM
WordPress IP 차단 플러그인 선택이 중요합니다. 다음 유형을 고려할 수 있습니다. .htaccess : 효율적이지만 복잡한 작동; 데이터베이스 작동 : 유연하지만 효율성이 낮습니다. 방화벽 : 높은 보안 성능이지만 복잡한 구성; 자체 작성 : 가장 높은 제어력이 있지만 더 많은 기술적 수준이 필요합니다.
 WordPress의 헤더를 작성하는 방법
Apr 20, 2025 pm 12:09 PM
WordPress의 헤더를 작성하는 방법
Apr 20, 2025 pm 12:09 PM
WordPress에서 사용자 정의 헤더를 만드는 단계는 다음과 같습니다. 테마 파일 "header.php"편집. 웹 사이트 이름과 설명을 추가하십시오. 탐색 메뉴를 만듭니다. 검색 표시 줄을 추가하십시오. 변경 사항을 저장하고 사용자 정의 헤더를보십시오.
 WordPress의 편집 날짜를 취소하는 방법
Apr 20, 2025 am 10:54 AM
WordPress의 편집 날짜를 취소하는 방법
Apr 20, 2025 am 10:54 AM
WordPress 편집 날짜는 세 가지 방법으로 취소 할 수 있습니다. 1. Post Date Disable 플러그인 설치; 2. functions.php 파일에 코드를 추가합니다. 3. WP_Posts 테이블에서 Post_Modified 열을 수동으로 편집합니다.
 WordPress에 오류가 있으면해야 할 일
Apr 20, 2025 am 11:57 AM
WordPress에 오류가 있으면해야 할 일
Apr 20, 2025 am 11:57 AM
WordPress 오류 해상도 안내서 : 500 내부 서버 오류 : 플러그인을 비활성화하거나 서버 오류 로그를 확인하십시오. 404 페이지를 찾을 수 없습니다 : Permalink를 점검하고 페이지 링크가 올바른지 확인하십시오. 흰색 사망 화면 : 서버 PHP 메모리 제한을 늘리십시오. 데이터베이스 연결 오류 : 데이터베이스 서버 상태 및 WordPress 구성을 확인하십시오. 기타 팁 : 디버그 모드 활성화, 오류 로그 검사 및 지원을 찾으십시오. 오류 방지 : 정기적으로 WordPress를 업데이트하고 필요한 플러그인 만 설치하고 웹 사이트를 정기적으로 백업하고 웹 사이트 성능을 최적화하십시오.
 WordPress 테마의 헤드 이미지를 변경하는 방법
Apr 20, 2025 am 10:00 AM
WordPress 테마의 헤드 이미지를 변경하는 방법
Apr 20, 2025 am 10:00 AM
WordPress의 헤더 이미지를 교체하기위한 단계별 안내서 : WordPress 대시 보드에 로그인하고 모양 & gt; 테마로 이동하십시오. 편집 할 주제를 선택하고 사용자 정의를 클릭하십시오. 테마 옵션 패널을 열고 사이트 헤더 또는 헤더 이미지 옵션을 찾으십시오. 이미지 선택 버튼을 클릭하고 새 헤드 이미지를 업로드하십시오. 이미지를 자르고 저장 및 자르기를 클릭하십시오. 저장 및 게시 버튼을 클릭하여 변경 사항을 업데이트하십시오.
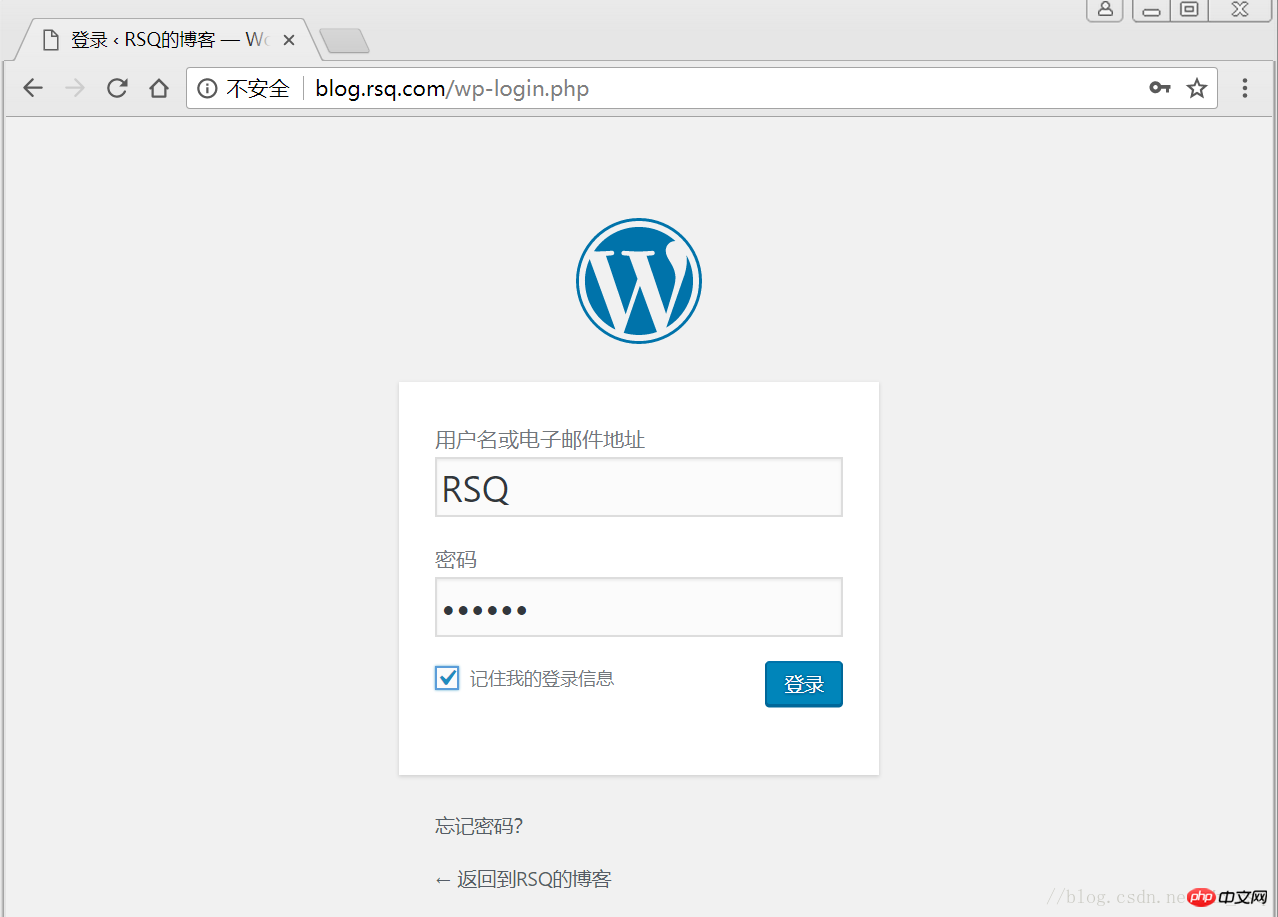
 WordPress 웹 사이트 계정 로그인
Apr 20, 2025 am 09:06 AM
WordPress 웹 사이트 계정 로그인
Apr 20, 2025 am 09:06 AM
WordPress 웹 사이트 계정에 로그인하려면 : 로그인 페이지를 방문하십시오 : 웹 사이트 URL Plus "/wp-login.php"를 입력하십시오. 사용자 이름과 비밀번호를 입력하십시오. "로그인"을 클릭하십시오. 검증 2 단계 확인 (선택 사항). 성공적으로 로그인하면 웹 사이트 대시 보드가 표시됩니다.
 WordPress 의견을 표시하는 방법
Apr 20, 2025 pm 12:06 PM
WordPress 의견을 표시하는 방법
Apr 20, 2025 pm 12:06 PM
WordPress 웹 사이트에서 댓글 활성화 : 1. 관리자 패널에 로그인하고 "설정" - "토론"으로 이동하여 "주석 허용"을 확인하십시오. 2. 주석을 표시 할 위치를 선택하십시오. 3. 주석을 사용자 정의합니다. 4. 의견을 관리하고 승인, 거부 또는 삭제합니다. 5. 사용 & lt;? php comment_template (); ? & gt; 주석을 표시하는 태그; 6. 중첩 된 주석 활성화; 7. 주석 모양 조정; 8. 스팸 주석을 방지하기 위해 플러그인 및 검증 코드를 사용하십시오. 9. 사용자가 그라바타 아바타를 사용하도록 권장합니다. 10. 참조 할 주석을 만듭니다
