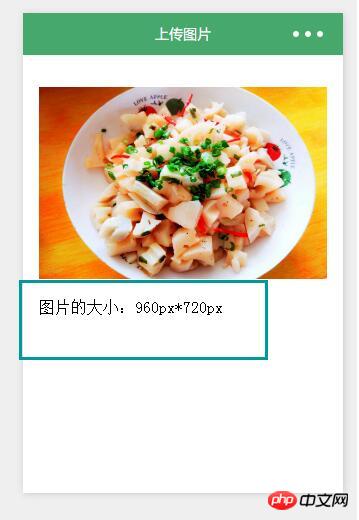
이번에는 사진정보를 얻기 위해 미니 프로그램에서 .getImageInfo()를 사용할 때 몇 가지 주의사항을 알려드리겠습니다.
이 기사의 예는 참고용으로 AndroidNine-Gongge 사진 표시에 대한 특정 코드를 공유합니다. 구체적인 내용은 다음과 같습니다
 2.
2.
(1). 로딩 시 <view class="zn-uploadimg">
<image src="{{tempFilePaths}}" mode="aspecFill" style="width: 100%; height: 450rpx" />
<text>图片的大小:{{imgwidth}}px*{{imgheight}}px</text>
</view>var app = getApp()
Page({
data: {
tempFilePaths: '../uploads/foods.jpg',
imgwidth:0,
imgheight:0,
},
onReady:function(){
// 页面渲染完成
var _this = this;
wx.getImageInfo({
src: _this.data.tempFilePaths,
success: function (res) {
_this.setData({
imgwidth:res.width,
imgheight:res.height,
})
}
})
}
})
<view class="zn-uploadimg">
  <button type="primary"bindtap="chooseimage">获取图片</button>
  <image src="{{tempFilePaths}}" mode="aspecFill" style="width: 100%; height: 450rpx"/>
  <text>图片的大小:{{imgwidth}}px*{{imgheight}}px</text>
</view>.zn-uploadimg{
padding:1rem;
}
.zn-uploadimg image{
margin:1rem 0;
}var app = getApp()
Page({
data: {
tempFilePaths: '',
imgwidth:0,
imgheight:0,
},
/**
* 上传图片
*/
chooseimage: function () {
var _this = this;
wx.chooseImage({
count: 1, // 默认9
sizeType: ['original', 'compressed'], // 可以指定是原图还是压缩图,默认二者都有
sourceType: ['album', 'camera'], // 可以指定来源是相册还是相机,默认二者都有
success: function (res) {
// 返回选定照片的本地文件路径列表,tempFilePath可以作为img标签的src属性显示图片
_this.setData({
tempFilePaths:res.tempFilePaths
})
wx.getImageInfo({
src: res.tempFilePaths[0],
success: function (res) {
_this.setData({
imgwidth:res.width,
imgheight:res.height,
})
}
})
}
})
}
}) 이 글의 사례를 읽으신 후 방법을 익히셨을 거라 믿습니다. PHP 중국어 웹사이트의 다른 관련 기사를 확인해보세요!
  추천 자료:
Vue2.5 및 Element UI의 구성 요소 페이징 기능 구현
jquery를 사용하여 동적으로 옵션을 추가하고 탐색하는 방법
위 내용은 애플릿은 .getImageInfo()를 사용하여 이미지 정보를 얻습니다.의 상세 내용입니다. 자세한 내용은 PHP 중국어 웹사이트의 기타 관련 기사를 참조하세요!