Python은 3D 그래픽을 그립니다.
이 글에서는 3D 그래픽을 그리는 데 주로 Python을 소개하는데, 이는 어느 정도 참고할만한 가치가 있습니다. 이제는 모든 사람과 공유합니다. 도움이 필요한 친구들이 참고할 수 있습니다.
3D 그래픽은 데이터 분석, 데이터 모델링, 그래픽 및 이미지 분야에서 사용됩니다. 여기에서는 3D 분산점, 3D 표면, 3D 윤곽선, 3D 직선(곡선) 그리기를 포함하여 Python을 사용하여 3D 그래픽을 그리는 방법을 소개합니다. 3D 텍스트.
준비 작업:
파이썬에서 3D 그래픽을 그리려면 흔히 사용되는 그리기 모듈인 matplotlib를 사용하지만, mpl_toolkits 툴킷을 설치해야 합니다. 설치 방법은 다음과 같습니다. Python 설치 디렉터리의 Scripts 폴더로 이동합니다. Windows 명령줄을 사용하여 다음을 실행합니다. pip Linux 환경에서 직접 --upgrade matplotlib를 설치하세요.
이 모듈을 설치한 후 mpl_tookits에서 mplot3d 클래스를 호출하여 3D 그래픽을 그릴 수 있습니다.
다음은 예시입니다.
1 나선형 3D 곡선의 결과는 다음과 같습니다. 3. 3D 윤곽선을 그립니다.from mpl_toolkits.mplot3d import Axes3D import matplotlib.pyplot as plt import numpy as np fig = plt.figure() ax = fig.add_subplot(111, projection='3d') # Make data u = np.linspace(0, 2 * np.pi, 100) v = np.linspace(0, np.pi, 100) x = 10 * np.outer(np.cos(u), np.sin(v)) y = 10 * np.outer(np.sin(u), np.sin(v)) z = 10 * np.outer(np.ones(np.size(u)), np.cos(v)) # Plot the surface ax.plot_surface(x, y, z, color='b') plt.show()
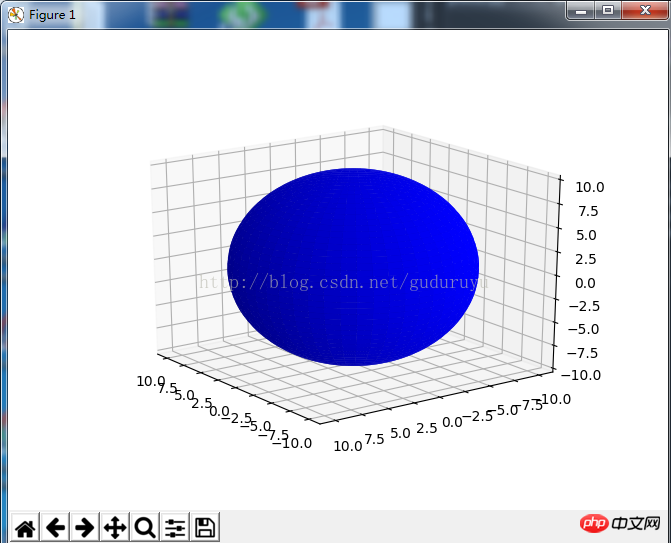
그리기 결과는 다음과 같습니다. 4. histogram
import matplotlib as mpl
from mpl_toolkits.mplot3d import Axes3D
import numpy as np
import matplotlib.pyplot as plt

mpl.rcParams['legend.fontsize'] = 10

fig = plt.figure()
ax = fig.gca(projection='3d')
theta = np.linspace(-4 * np.pi, 4 * np.pi, 100)
z = np.linspace(-2, 2, 100)
r = z**2 + 1
x = r * np.sin(theta)
y = r * np.cos(theta)
ax.plot(x, y, z, label='parametric curve')
ax.legend()

plt.show()
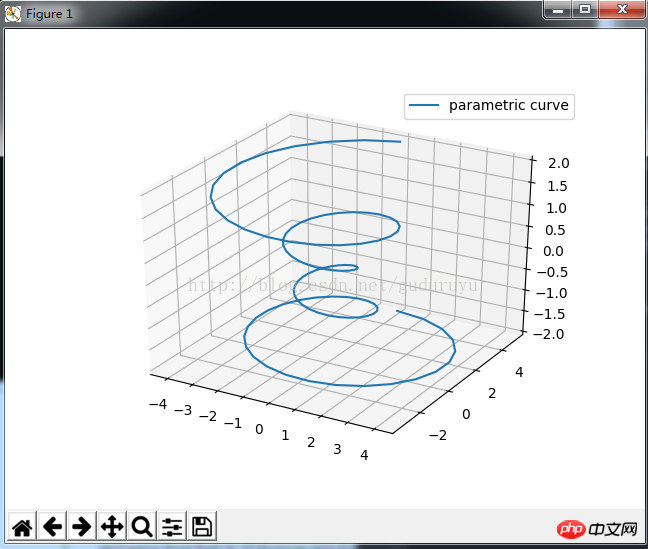
그리기 결과는 다음과 같습니다. 5. 3D 메쉬 선을 그립니다.
from mpl_toolkits.mplot3d import axes3d
import matplotlib.pyplot as plt
from matplotlib import cm

fig = plt.figure()
ax = fig.gca(projection='3d')
X, Y, Z = axes3d.get_test_data(0.05)
cset = ax.contour(X, Y, Z, zdir='z', offset=-100, cmap=cm.coolwarm)
cset = ax.contour(X, Y, Z, zdir='x', offset=-40, cmap=cm.coolwarm)
cset = ax.contour(X, Y, Z, zdir='y', offset=40, cmap=cm.coolwarm)

ax.set_xlabel('X')
ax.set_xlim(-40, 40)
ax.set_ylabel('Y')
ax.set_ylim(-40, 40)
ax.set_zlabel('Z')
ax.set_zlim(-100, 100)

plt.show()
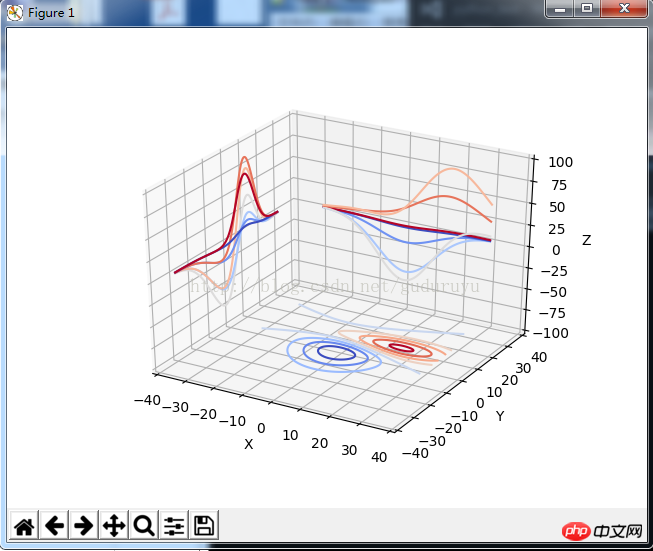
그리기 결과는 다음과 같습니다. 6. 그리기 3D 삼각형 패치 다이어그램
from mpl_toolkits.mplot3d import Axes3D
import matplotlib.pyplot as plt
import numpy as np

fig = plt.figure()
ax = fig.add_subplot(111, projection='3d')
x, y = np.random.rand(2, 100) * 4
hist, xedges, yedges = np.histogram2d(x, y, bins=4, range=[[0, 4], [0, 4]])

# Construct arrays for the anchor positions of the 16 bars.
# Note: np.meshgrid gives arrays in (ny, nx) so we use 'F' to flatten xpos,
# ypos in column-major order. For numpy >= 1.7, we could instead call meshgrid
# with indexing='ij'.
xpos, ypos = np.meshgrid(xedges[:-1] + 0.25, yedges[:-1] + 0.25)
xpos = xpos.flatten('F')
ypos = ypos.flatten('F')
zpos = np.zeros_like(xpos)

# Construct arrays with the dimensions for the 16 bars.
dx = 0.5 * np.ones_like(zpos)
dy = dx.copy()
dz = hist.flatten()

ax.bar3d(xpos, ypos, zpos, dx, dy, dz, color='b', zsort='average')

plt.show()
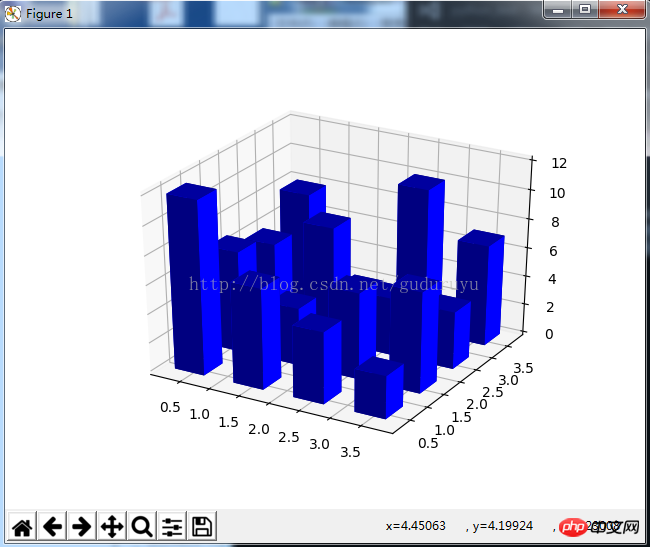
Draw 결과는 다음과 같습니다. 7. 3D 산점도 그리기
from mpl_toolkits.mplot3d import axes3d
import matplotlib.pyplot as plt


fig = plt.figure()
ax = fig.add_subplot(111, projection='3d')

# Grab some test data.
X, Y, Z = axes3d.get_test_data(0.05)

# Plot a basic wireframe.
ax.plot_wireframe(X, Y, Z, rstride=10, cstride=10)

plt.show()
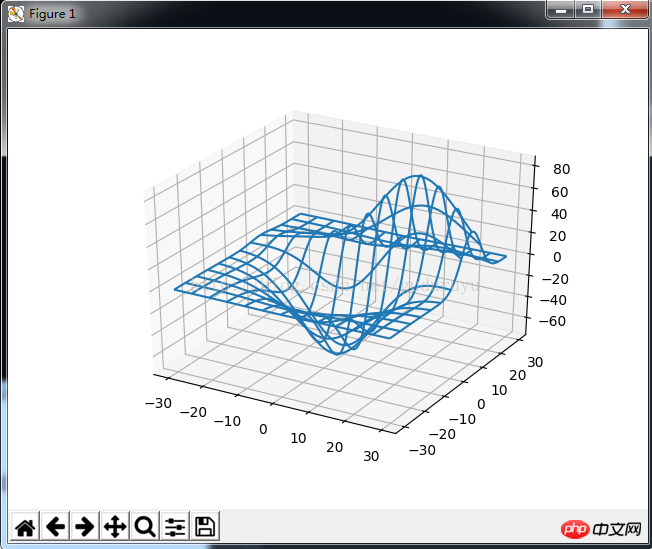
결과는 다음과 같습니다.
8 . 3D 텍스트 그리기
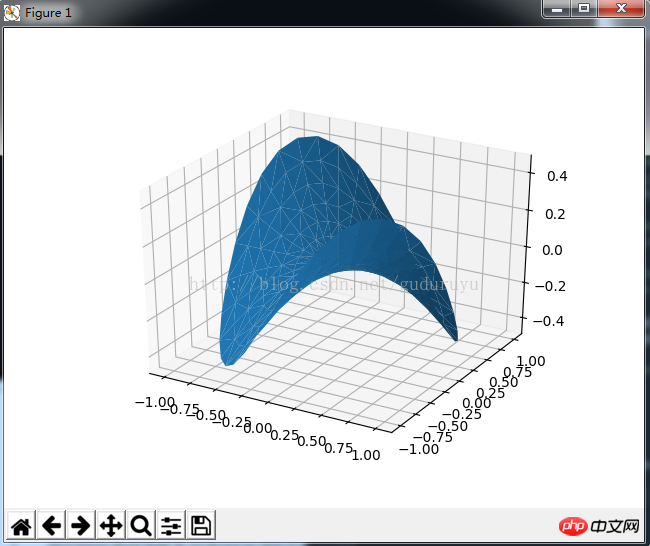
from mpl_toolkits.mplot3d import Axes3D
import matplotlib.pyplot as plt
import numpy as np


n_radii = 8
n_angles = 36

# Make radii and angles spaces (radius r=0 omitted to eliminate duplication).
radii = np.linspace(0.125, 1.0, n_radii)
angles = np.linspace(0, 2*np.pi, n_angles, endpoint=False)

# Repeat all angles for each radius.
angles = np.repeat(angles[..., np.newaxis], n_radii, axis=1)

# Convert polar (radii, angles) coords to cartesian (x, y) coords.
# (0, 0) is manually added at this stage, so there will be no duplicate
# points in the (x, y) plane.
x = np.append(0, (radii*np.cos(angles)).flatten())
y = np.append(0, (radii*np.sin(angles)).flatten())

# Compute z to make the pringle surface.
z = np.sin(-x*y)

fig = plt.figure()
ax = fig.gca(projection='3d')

ax.plot_trisurf(x, y, z, linewidth=0.2, antialiased=True)

plt.show(
그리기 결과는 다음과 같습니다.
9.3D 막대 차트
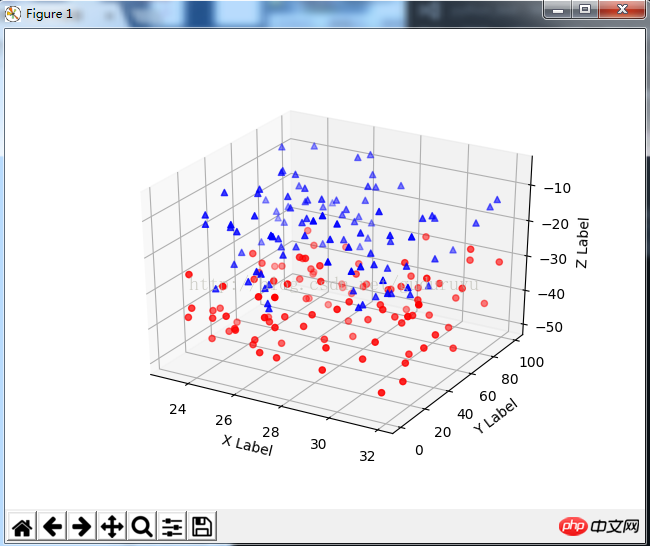
from mpl_toolkits.mplot3d import Axes3D
import matplotlib.pyplot as plt
import numpy as np


def randrange(n, vmin, vmax):
 '''''
 Helper function to make an array of random numbers having shape (n, )
 with each number distributed Uniform(vmin, vmax).
 '''
 return (vmax - vmin)*np.random.rand(n) + vmin

fig = plt.figure()
ax = fig.add_subplot(111, projection='3d')

n = 100

# For each set of style and range settings, plot n random points in the box
# defined by x in [23, 32], y in [0, 100], z in [zlow, zhigh].
for c, m, zlow, zhigh in [('r', 'o', -50, -25), ('b', '^', -30, -5)]:
 xs = randrange(n, 23, 32)
 ys = randrange(n, 0, 100)
 zs = randrange(n, zlow, zhigh)
 ax.scatter(xs, ys, zs, c=c, marker=m)

ax.set_xlabel('X Label')
ax.set_ylabel('Y Label')
ax.set_zlabel('Z Label')

plt.show()
그리기 결과는 다음과 같습니다.
관련 권장 사항:
파이썬을 사용하여 일반적으로 사용되는 차트 그리기
파이썬으로 그래픽 그리기 예제에 대한 자세한 설명
위 내용은 Python은 3D 그래픽을 그립니다.의 상세 내용입니다. 자세한 내용은 PHP 중국어 웹사이트의 기타 관련 기사를 참조하세요!

핫 AI 도구

Undresser.AI Undress
사실적인 누드 사진을 만들기 위한 AI 기반 앱

AI Clothes Remover
사진에서 옷을 제거하는 온라인 AI 도구입니다.

Undress AI Tool
무료로 이미지를 벗다

Clothoff.io
AI 옷 제거제

Video Face Swap
완전히 무료인 AI 얼굴 교환 도구를 사용하여 모든 비디오의 얼굴을 쉽게 바꾸세요!

인기 기사

뜨거운 도구

메모장++7.3.1
사용하기 쉬운 무료 코드 편집기

SublimeText3 중국어 버전
중국어 버전, 사용하기 매우 쉽습니다.

스튜디오 13.0.1 보내기
강력한 PHP 통합 개발 환경

드림위버 CS6
시각적 웹 개발 도구

SublimeText3 Mac 버전
신 수준의 코드 편집 소프트웨어(SublimeText3)
 PHP와 Python : 다른 패러다임이 설명되었습니다
Apr 18, 2025 am 12:26 AM
PHP는 주로 절차 적 프로그래밍이지만 객체 지향 프로그래밍 (OOP)도 지원합니다. Python은 OOP, 기능 및 절차 프로그래밍을 포함한 다양한 패러다임을 지원합니다. PHP는 웹 개발에 적합하며 Python은 데이터 분석 및 기계 학습과 같은 다양한 응용 프로그램에 적합합니다.
 PHP와 Python 중에서 선택 : 가이드
Apr 18, 2025 am 12:24 AM
PHP는 웹 개발 및 빠른 프로토 타이핑에 적합하며 Python은 데이터 과학 및 기계 학습에 적합합니다. 1.PHP는 간단한 구문과 함께 동적 웹 개발에 사용되며 빠른 개발에 적합합니다. 2. Python은 간결한 구문을 가지고 있으며 여러 분야에 적합하며 강력한 라이브러리 생태계가 있습니다.
 PHP와 Python : 그들의 역사에 깊은 다이빙
Apr 18, 2025 am 12:25 AM
PHP는 1994 년에 시작되었으며 Rasmuslerdorf에 의해 개발되었습니다. 원래 웹 사이트 방문자를 추적하는 데 사용되었으며 점차 서버 측 스크립팅 언어로 진화했으며 웹 개발에 널리 사용되었습니다. Python은 1980 년대 후반 Guidovan Rossum에 의해 개발되었으며 1991 년에 처음 출시되었습니다. 코드 가독성과 단순성을 강조하며 과학 컴퓨팅, 데이터 분석 및 기타 분야에 적합합니다.
 Python vs. JavaScript : 학습 곡선 및 사용 편의성
Apr 16, 2025 am 12:12 AM
Python은 부드러운 학습 곡선과 간결한 구문으로 초보자에게 더 적합합니다. JavaScript는 가파른 학습 곡선과 유연한 구문으로 프론트 엔드 개발에 적합합니다. 1. Python Syntax는 직관적이며 데이터 과학 및 백엔드 개발에 적합합니다. 2. JavaScript는 유연하며 프론트 엔드 및 서버 측 프로그래밍에서 널리 사용됩니다.
 숭고한 코드 파이썬을 실행하는 방법
Apr 16, 2025 am 08:48 AM
Sublime 텍스트로 Python 코드를 실행하려면 먼저 Python 플러그인을 설치 한 다음 .py 파일을 작성하고 코드를 작성한 다음 CTRL B를 눌러 코드를 실행하면 콘솔에 출력이 표시됩니다.
 Windows 8에서 코드를 실행할 수 있습니다
Apr 15, 2025 pm 07:24 PM
VS 코드는 Windows 8에서 실행될 수 있지만 경험은 크지 않을 수 있습니다. 먼저 시스템이 최신 패치로 업데이트되었는지 확인한 다음 시스템 아키텍처와 일치하는 VS 코드 설치 패키지를 다운로드하여 프롬프트대로 설치하십시오. 설치 후 일부 확장은 Windows 8과 호환되지 않을 수 있으며 대체 확장을 찾거나 가상 시스템에서 새로운 Windows 시스템을 사용해야합니다. 필요한 연장을 설치하여 제대로 작동하는지 확인하십시오. Windows 8에서는 VS 코드가 가능하지만 더 나은 개발 경험과 보안을 위해 새로운 Windows 시스템으로 업그레이드하는 것이 좋습니다.
 vscode에서 코드를 작성하는 위치
Apr 15, 2025 pm 09:54 PM
Visual Studio Code (VSCODE)에서 코드를 작성하는 것은 간단하고 사용하기 쉽습니다. vscode를 설치하고, 프로젝트를 만들고, 언어를 선택하고, 파일을 만들고, 코드를 작성하고, 저장하고 실행합니다. VSCODE의 장점에는 크로스 플랫폼, 무료 및 오픈 소스, 강력한 기능, 풍부한 확장 및 경량 및 빠른가 포함됩니다.
 메모장으로 파이썬을 실행하는 방법
Apr 16, 2025 pm 07:33 PM
메모장에서 Python 코드를 실행하려면 Python 실행 파일 및 NPPEXEC 플러그인을 설치해야합니다. Python을 설치하고 경로를 추가 한 후 nppexec 플러그인의 명령 "Python"및 매개 변수 "{current_directory} {file_name}"을 구성하여 Notepad의 단축키 "F6"을 통해 Python 코드를 실행하십시오.


