이 글은 주로 PHP에서의 페이징과 SqlHelper 클래스의 사용법을 소개하고, PHP 데이터베이스 쿼리 클래스와 페이징 클래스의 정의와 구체적인 사용 기법을 예제 형식으로 분석해 놓았으니 필요한 친구들이 참고할 수 있습니다
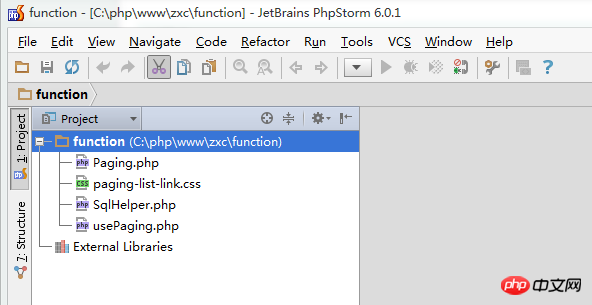
자세한 내용은 다음과 같습니다. 다음과 같이 다음과 같이 다음과 같이 문서 디렉토리 구조 :
 SQLHELPER.PHP 코드는 다음과 같습니다. .css 코드는 다음과 같습니다.
<?php
/**
 * Created by JetBrains PhpStorm.
 * User: lee
 * Date: 13-7-26
 * Time: 下午8:30
 * To change this template use File | Settings | File Templates.
 */
class SqlHelper{
  private $mysqli;
  private static $host="localhost";
  private static $user="root";
  private static $pwd="";
  private static $db="world";
  private $sql=false;
  private $result=false;
  function __construct(){
    $this->mysqli=new MySQLi(self::$host,self::$user,self::$pwd,self::$db);
    if($this->mysqli->connect_error){
      die("连接数据库失败! ".$this->mysql->connect_error);
    }
    $this->mysqli->query("set names utf8");
  }
  function execute_dql_all($sql){
    //执行查询语句
    $arr=array();
    $this->result=$this->mysqli->query($sql) or die ($this->mysql->connect_error);
    //将数据转存到$arr数组中
    while($row=mysqli_fetch_array($this->result,MYSQL_BOTH)){
      $arr[]=$row;
    }
    $this->result->free();
    return $arr;
  }
  function execute_dql_num($sql){
    //执行查询语句
    $arr=array();
    $this->result=$this->mysqli->query($sql) or die ($this->mysql->connect_error);
    //将数据转存到$arr数组中
    while($row=mysqli_fetch_array($this->result,MYSQLI_NUM)){
      $arr[]=$row;
    }
    $this->result->free();
    return $arr;
  }
  function execute_dql_assoc($sql){
    //执行查询语句
    $arr=array();
    $this->result=$this->mysqli->query($sql) or die ($this->mysql->connect_error);
    //将数据转存到$arr数组中
    while($row=mysqli_fetch_array($this->result,MYSQLI_ASSOC)){
      $arr[]=$row;
    }
    $this->result->free();
    return $arr;
  }
  //查询某表中的记录数
  function execute_dql_counts($table,$id="*"){
    $this->sql="select count($id) from $table";
    $this->result=$this->mysqli->query($this->sql);
    $row=mysqli_fetch_all($this->result);
    $this->result->free();
    return $row[0][0];
  }
  function execute_dml($sql){
    //执行正删改
    $this->result=$this->mysqli->query($sql);
    if(!$this->result){
      return -1;//执行正删改失败
    }else{
      if($this->mysqli->affected_rows>0){
        return 1;//执行正删改成功,影响行数
      }else{
        return 0;//执行正删改成功,但没有影响行数
      }
    }
  }
}usePaging.php 코드는 다음과 같습니다.
<?php
/**
* Created by JetBrains PhpStorm.
* User: lee
* Date: 13-7-27
* Time: 下午2:48
* To change this template use File | Settings | File Templates.
*/
header("Content-type:text/html;charset=utf-8;");
require_once("SqlHelper.php");
class Paging {
private $sqlHelper=false;
private $pageCount=false;//页数
private $counts=false;//总记录数
private $returnArr=false;//分页超链接的分页
function __construct(){
$this->sqlHelper=new SqlHelper();
$this->returnArr=array();
}
/*
* 参数说明
*
* $table 分页时对那个表的数据分页
* $id 辅助查询当前分页的数据表的总记录数
* $pageSize 每页显示多少条信息记录数
* $pagingSize 分页栏每次循环显示出来的个数
* $nowPage 当前是第几页,默认第一页
* $href 分页栏的超链接将要往哪里连接
*/
function paging_prev_next($table,$id="*",$pageSize,$pagingSize,$nowPage=1,$href){
$this->counts=$this->sqlHelper->execute_dql_counts($table,$id);
$this->pageCount=ceil($this->counts/$pageSize);
$this->returnArr["count"]=$this->counts;
$this->returnArr["start"]=($nowPage-1)*$pageSize;
$this->returnArr["limit"]=$pageSize;
if($nowPage>$this->pageCount || $nowPage<=0){
return false;
}
$t=(ceil($nowPage/$pagingSize)-1)*$pagingSize+1;
$pre=$nowPage-$pagingSize;
$nex=$nowPage+$pagingSize;
echo "
<span class='paging-list-a paging-list-a-withBg'>{$nowPage}/{$this->pageCount}</span>
<a href='{$href}?nowPage={$pre}' class='paging-list-a'><</a>";
for($i=$t;$i<$t+$pagingSize;$i++){
if($i*$pageSize>$this->pageCount*$pageSize){
break;
}else{
if($nowPage==$i){
echo "
<a href='{$href}?nowPage={$i}' class='paging-list-a paging-list-a-withBg'>{$i}</a>";
}else{
echo "
<a href='{$href}?nowPage={$i}' class='paging-list-a'>{$i}</a>";
}
}
}
echo "
<a href='{$href}?nowPage={$nex}' class='paging-list-a'>></a>";
return $this->returnArr;
}
}사용된 데이터베이스는 MySQL5.6에 포함된 월드 데이터베이스입니다.
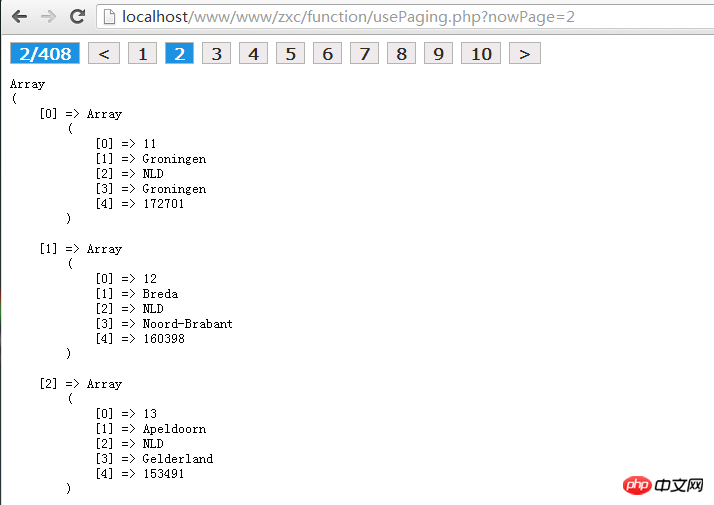
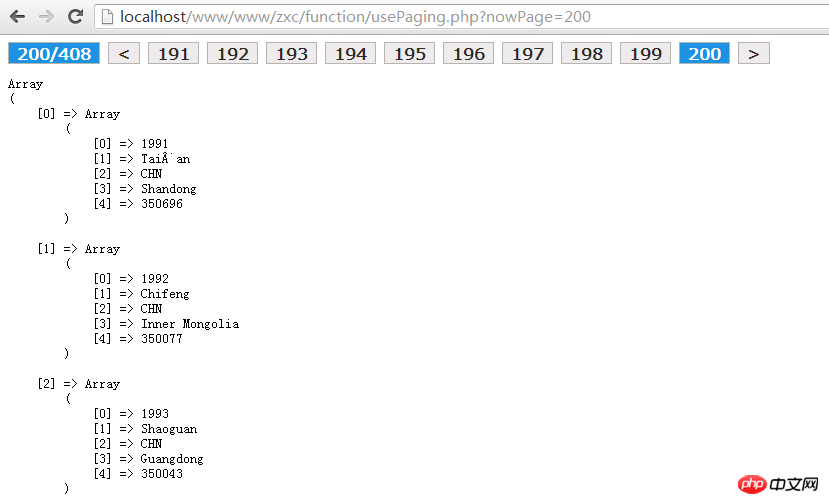
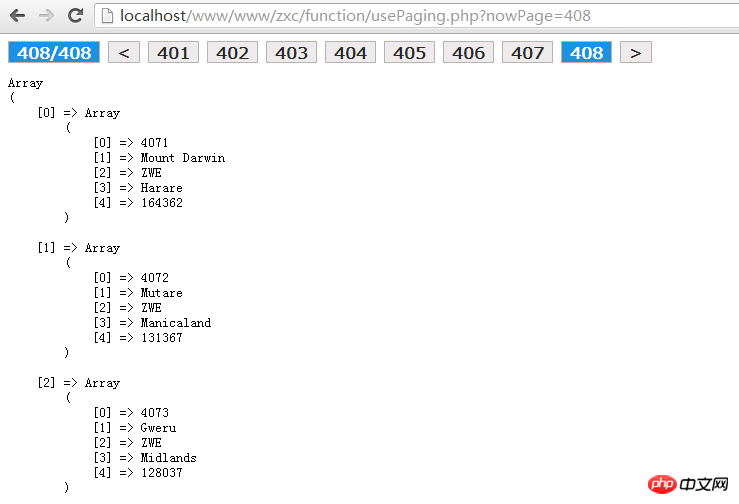
다음은 스크린샷입니다. 실행 효과:
하지만 코드에 버그가 있습니다. 단지 페이지를 끝까지 넘겼을 때 표시되지 않는 이유는 Paging.php 파일의 41~43번째 줄 부분에 판단에 문제가 있기 때문입니다.
오류 코드는 다음과 같습니다.
/**
 * Created by JetBrains PhpStorm.
 * User: lee
 * Date: 13-7-27
 * Time: 下午5:56
 * To change this template use File | Settings | File Templates.
 */
.paging-list-a{
  border:1px solid #b5b5af;
  background-color:#efebed;
  font-family: 'Meiryo UI';
  font-size: 16px;
  font-weight: 600;
  padding: 0px 8px 0px 8px;
  /*cursor: pointer;*/
  text-decoration: none;
  color: #292927;
}
.paging-list-a-withBg{
  background-color: #1D92E2;
  color: white;
}

페이징  처리를 구현하는 방법
페이징
, 로그인, 팔로우 및 기타 기능을 구현하는 방법
위 내용은 PHP의 페이징 및 SqlHelper 클래스 사용 예에 대한 자세한 설명의 상세 내용입니다. 자세한 내용은 PHP 중국어 웹사이트의 기타 관련 기사를 참조하세요!