PHP에서 인증 코드 애플릿을 구현하는 방법
이 글에서는 주로 PHP 기반 인증코드 애플릿의 구체적인 구현 방법을 소개하고, 자세한 설명을 해주셔서 이해와 학습에 도움이 됩니다. 필요한 친구들은 함께 살펴보시면 됩니다.
인증코드 기능(개인의 이해) ):
서버에 대한 부담을 줄입니다(예: 12306의 인증 코드 기능)
폭력적인 등록 방지
개인 아이디어: a-z, A-Z, 1-의 n자리 난수 생성 9 새로운 인증 코드를 생성하세요.
인증 코드 생성을 위한 몇 가지 작은 함수
range() //배열을 출력할 범위를 지정하세요
a) 예: range(1,9)
array_merge()//병합 arrays
a) Array_merge(array 1, array 2….)
array_rand(array, amount)
a) 배열에서 무작위로 여러 첨자를 꺼내어 배열을 반환합니다
shuffle(array) //will 다시 완료 배열의 요소를 섞습니다
mt_rand(범위 지정) //더 나은 난수 생성
-
예: mt_rand(1,5) //1-5 사이의 임의의 숫자 생성
인증 코드 코드 생성
<?php
$arr1=range('a', 'z');//指定范围输出一个数组
$arr2=range('A', 'Z');
$arr3=range(1,9);
$arr=array_merge($arr1,$arr2,$arr3); //合并数组
$index = array_rand($arr,5); //在$arr中随机取5个数,返回值是$arr的下标
Shuffle($index);
$code = '';//定义一个空的字符串来存储生成的验证码用'点'来进行拼接
foreach ($index as $key => $value) {//遍历数组
$code.= $arr[$value];//根据下标取数组中的值
}
var_dump($code);
?>실행 결과 스크린샷
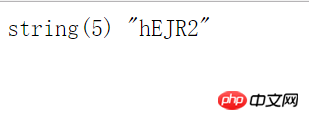
완벽: 인증 코드가 현실적으로 보이도록 이미지에 인증 코드를 추가해야 합니다
개선하기 전에 먼저 이미지 생성 소개 이미지 생성을 위한 일반적인 단계
방법 1: 트루 컬러 이미지 생성(빈 캔버스)
imagecreatetruecolor(width, height) //트루 컬러 이미지 생성</ code></span> </p>Description:<p><code>imagecreatetruecolor(width, height) //创建一个真彩色图像
说明:
width : 画布的宽度(像素)
height: 画布的高度(像素)
返回值为图像资源
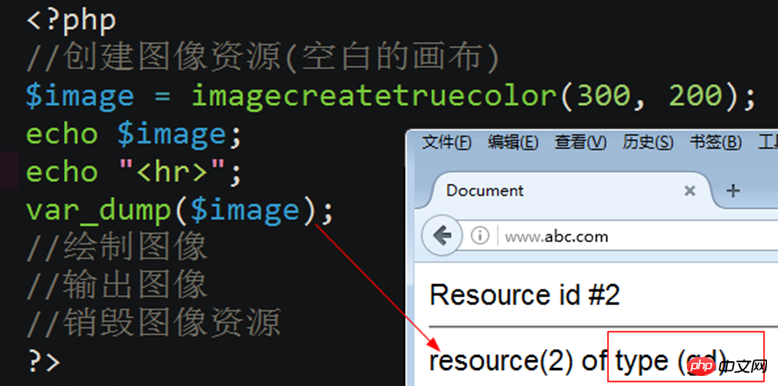
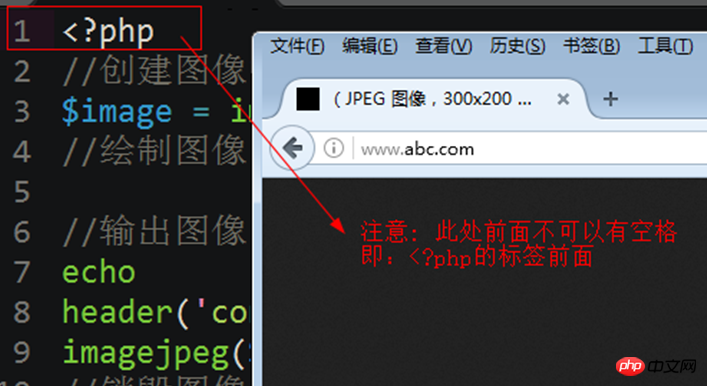
注意:
为真彩色图像: 填充颜色
imagefill(image, x, y, color) //为图像资源填充颜色
说明:
image //图像资源
x,y,填充的坐标点(注意:填充的与此点最接近的颜色)
color; //用什么颜色来填充
为真彩色图像: 分配颜色
imagecolorallocate(image, red, green, blue)
说明:
image //图像资源
red: //红颜色(0-255) 或 0x(00-ff) //即十六进制来表示 (0xff就是255)
green//绿颜色(0-255)
blue //蓝颜色(0-255)
imagefill和imagecolorallocate的代码演示
在没有给画布填充颜色时的效果

给画布填充颜色时的效果和代码
<?php //创建图像资源(空白画布)默认显示为黑色 $image = imagecreatetruecolor(300, 400); //1.image //图像资源 //2.red: //红颜色(0-255) 或 0x(00-ff) //即十六进制来表示 (0xff就是255) //3.green//绿颜色(0-255) //4.blue //蓝颜色(0-255) $color = imagecolorallocate($image, 255, 0, 0); //1.image //图像资源 //2.x,y,填充的坐标点(注意:填充的与此点最接近的颜色) //3.color; //用什么颜色来填充 imagefill($image, 0, 0, $color); //输出图像 header('content-type:image/jpeg'); imagejpeg($image); //销毁图像资源 imagedestroy($image); ?>
结果截图;
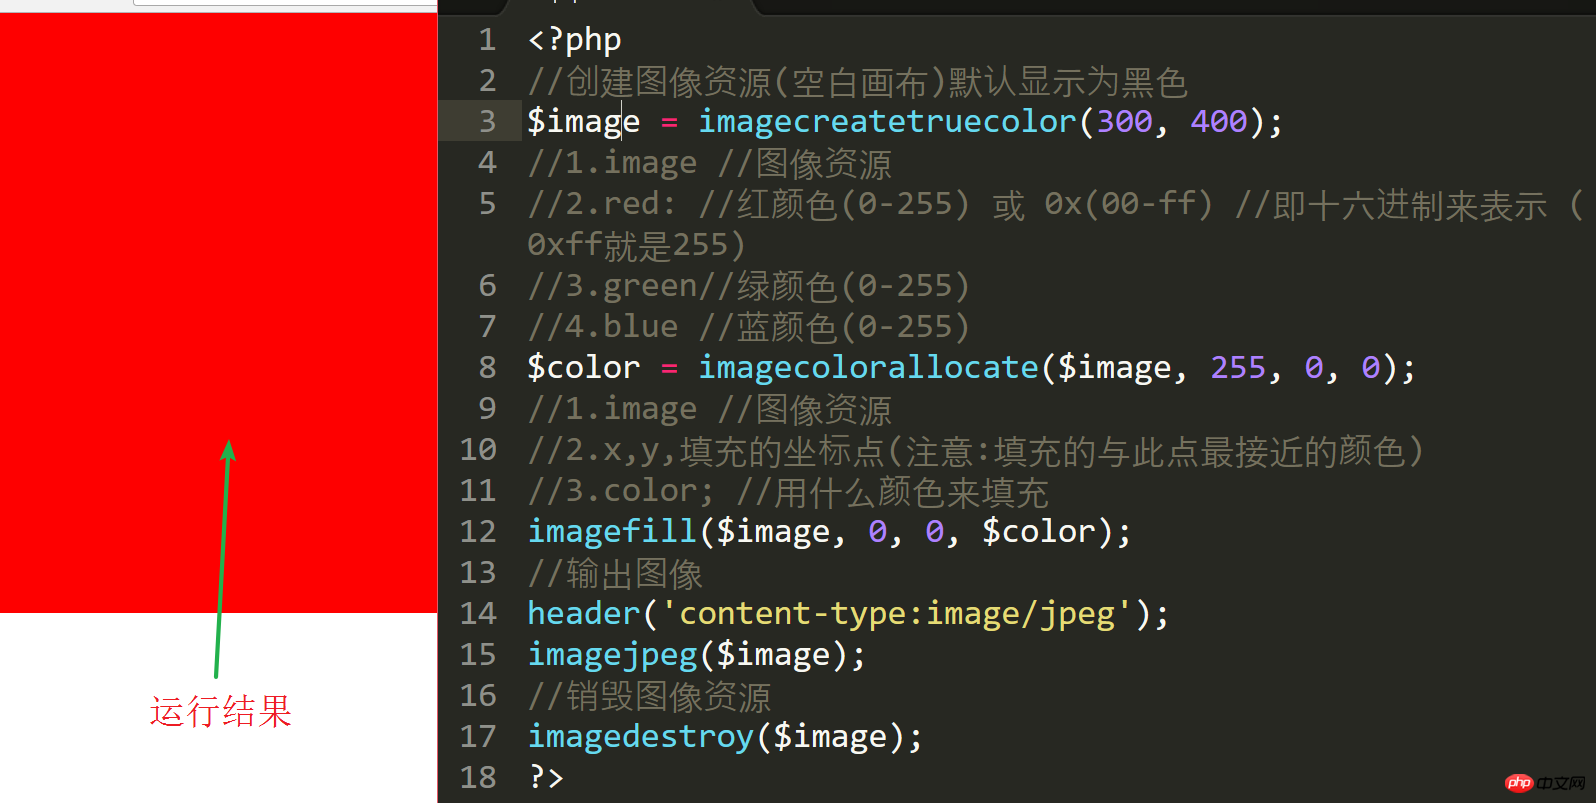
输出图像(以jpeg为例)
输出图像到浏览器
a) header('content-type:image/jpeg'); //设置将图像通过浏览来查看
b) imagejpeg(图像资源)
按文件进行输出图像
a) imagejpeg(图像资源,'图像路径',图像的质量) //质量取值0-100
b) 注意:

注意:只能jpeg格式才有质量这个参数.
销毁图像
imagedestroy($image); //销毁图像,释放内存资源.
注意: 当前生成几个图像资源,就销毁几个.
验证码的整个代码:
<?php
//实例:让文本居于图像的正中
//创建图像资源(空白的画布)
$image = imagecreatetruecolor(100, 50);
$color = imagecolorallocate($image, mt_rand(20,200), mt_rand(20,200), mt_rand(20,200));
//为图像资源填充颜色
imagefill($image, 0, 0, $color);
//绘制图像
$font = 5;
//验证码的开始
$arr1 = range('a','z');
$arr3 = range('A','Z');
$arr2 = range(1,9);
//array_merge — 合并一个或多个数组
$arr = array_merge($arr1,$arr2,$arr3);
$index = array_rand($arr,5); //随机从原数组中找出5个下标
$string = '';
foreach ($index as $value) { //$value 两个功能,即是$index中的值,又是$arr中的下标
$string .= $arr[$value]; //将得到字符进行连接
}
//验证码的结束
//mt_rand — 生成更好的随机数
//echo mt_rand(1,5);die;
//加入点干扰
$pointcolor = imagecolorallocate($image, mt_rand(20,200), mt_rand(20,200), mt_rand(20,200));
//循环创建1000个干扰点
for ($i=0; $i <1000 ; $i++) {
imagesetpixel($image, mt_rand(0,imagesx($image)), mt_rand(0,imagesy($image)), $pointcolor);
}
//加入线的干扰
$lintecolor = imagecolorallocate($image, mt_rand(20,200), mt_rand(20,200), mt_rand(20,200));
// 循环创建50个线干扰
for ($i=0; $i <50 ; $i++) {
imageline($image, mt_rand(0,imagesx($image)), mt_rand(0,imagesy($image)), mt_rand(0,imagesx($image)), mt_rand(0,imagesy($image)) ,$lintecolor);
}
//一个字符的宽度 imagefontwidth($font)
//字符串的个数: strlen(字符串)
//一个字符的宽度*字符串的个数
//所有字符串宽度和= 一个字符的宽度*字符串的个数
//$x = (画布的宽度-所有字符串宽度和)/2
$x = (imagesx($image)-imagefontwidth($font)*strlen($string))/2;
//$y = (画布的高度-字符的高度)/2;
//字符的高度: imagefontheight($font)
$y = (imagesy($image)-imagefontheight($font))/2;
$stringcolor = imagecolorallocate($image, mt_rand(20,200), mt_rand(20,200), mt_rand(20,200));
imagestring($image, $font, $x, $y, $string, $stringcolor);
//输出图像
header('content-type:image/jpeg'); //设置将图像通过浏览来查看
imagejpeg($image,'',100); //将图像资源输出
//销毁图像资源
imagedestroy($image); //销毁图像理解代码中的一些函数
加入干扰的点
imagesetpixel(image, x, y, color)
width: 캔버스 너비(픽셀)

반환 값은 이미지 리소스입니다
🎜🎜 🎜🎜참고: 🎜🎜
 🎜🎜🎜🎜는 트루 컬러 이미지입니다: 색상 채우기🎜🎜🎜🎜
imagefill(image, x, y, color) // 이미지 리소스의 색상 채우기🎜🎜지침: 🎜🎜🎜🎜image //이미지 리소스 🎜🎜🎜🎜x,y, 채워진 좌표점(참고: 가장 가까운 색상으로 채워짐) 이 점)🎜🎜🎜 🎜color; //트루 컬러 이미지를 채우는 데 사용할 색상 🎜🎜🎜🎜🎜🎜: 색상 지정 🎜🎜🎜🎜imagecolorallocate(image, red, green, blue)</ code>🎜🎜설명: 🎜🎜 🎜🎜image //이미지 리소스🎜🎜🎜🎜red: //빨간색(0-255) 또는 0x(00-ff) //즉, 16진수 표현(0xff는 255)🎜 🎜🎜🎜green// 녹색(0-255)🎜🎜🎜🎜blue //파란색(0-255)🎜🎜🎜🎜이미지 채우기 및 이미지 색상 할당 코드 데모🎜🎜캔버스가 색상으로 채워지지 않을 때의 효과🎜 🎜<img src="/static/imghw/default1.png" data-src="https://img.php.cn/upload/article/000/000/007/4999a7361246a05711a6f43947a9356a-3.png" class="lazy" alt=""/>🎜🎜캔버스에 색을 채울 때의 효과 및 코드 🎜🎜🎜🎜R<div class="code" style="position:relative; padding:0px; margin:0px;"><div class="code" style="position:relative; padding:0px; margin:0px;"><pre class='brush:php;toolbar:false;'>imagefontheight(font)获取字体的高度:
imagefontwidth(font)获取字体的宽度:
strlen(字符串)//获取字符串的长度
imagesx(image) //获取画布的宽度
imagesy(image) //获取画布的高度</pre><div class="contentsignin">로그인 후 복사</div></div><div class="contentsignin">로그인 후 복사</div></div>re 🎜SCREENSHOT의 결과; />🎜🎜이미지 출력 (예: jpeg)🎜🎜🎜이미지를 브라우저로 출력🎜🎜🎜a) header('content-type:image/jpeg') //브라우징을 통해 이미지를 볼 수 있도록 설정🎜 🎜b) imagejpeg(이미지 리소스)🎜🎜🎜 파일별로 이미지 출력🎜🎜🎜a) imagejpeg(이미지 리소스, '이미지 경로', 이미지 품질) //품질 값 0~100🎜🎜b) 참고:🎜🎜<img src="/static/imghw/default1.png" data-src="https://img.php.cn/upload/article/000/000/007/a581d419f3d107a4dd46392ffd05d85d-7.png" class="lazy" alt=""/>🎜🎜참고: jpeg 형식에만 품질 매개변수가 있습니다.🎜🎜🎜 이미지를 삭제합니다🎜🎜🎜< code>imagedestroy($image); //이미지를 삭제하고 메모리 리소스를 해제합니다.🎜🎜🎜🎜참고: 현재 생성된 이미지 리소스 중 일부를 삭제합니다.🎜🎜🎜🎜The 인증 코드 전체 코드:🎜 🎜🎜🎜<!DOCTYPE html> <html lang="en"> <head> <meta charset="UTF-8"> <title>Document</title> </head> <body> <form name='frm' method='post' action=''> <table width="30%" border="2" align="center" rules="all" cellpadding="10"> <tr> <th colspan="2">请输入信息</th> </tr> <tr> <th>姓名:</th> <th><input type="text" name="username"></input></th> </tr> <tr> <th>密码:</th> <th><input type="password" name="userpwd"></input></th> </tr> <tr> 555556 <th>验证码</th> <th><input type = 'text' name = 'checkcode'></input><img src="21.php" style="cursor:pointer" onclick="this.src='21.php'?+Math.random()"></th> </tr> <tr> <th colspan="2"><input type="submit" name="submit" value="提交"></input></th> </tr> </table> </form> </body> </html>
imagesetpixel(image, x, y, color)</ code>🎜🎜지침: x , y는 점의 좌표입니다🎜🎜🎜🎜🎜🎜🎜간섭선을 추가하세요🎜🎜🎜<p><code>imageline(image, x1, y1, x2, y2, color)说明: x1,y1是线的一个端点坐标; x2,y2是线的另一个端口的坐标; 由两点画一条线

让验证码居于图像的正中
imagefontheight(font)获取字体的高度:
imagefontwidth(font)获取字体的宽度:
strlen(字符串)//获取字符串的长度
imagesx(image) //获取画布的宽度
imagesy(image) //获取画布的高度
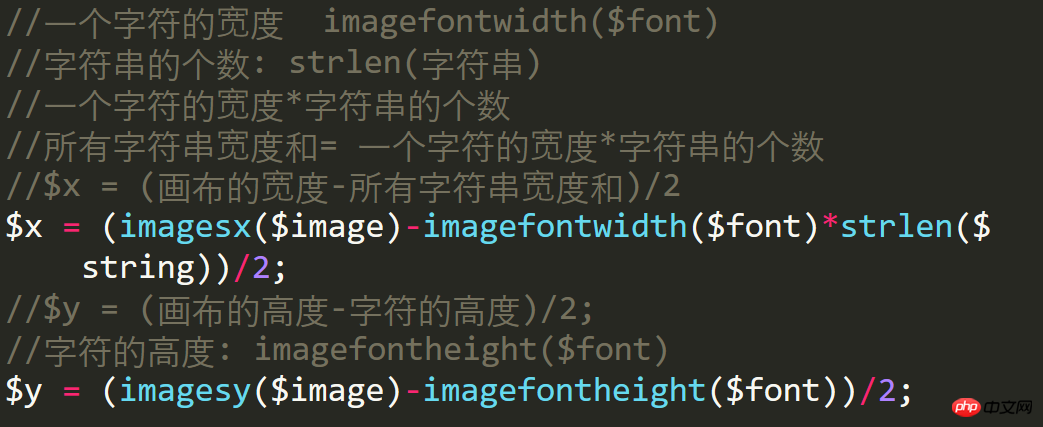
最后运行结果
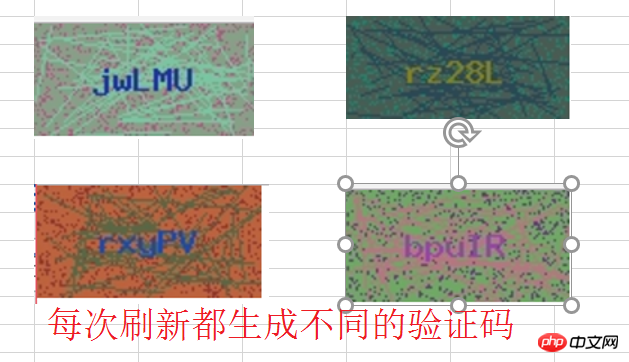
再次完善(和html代码结合起来)
Html代码
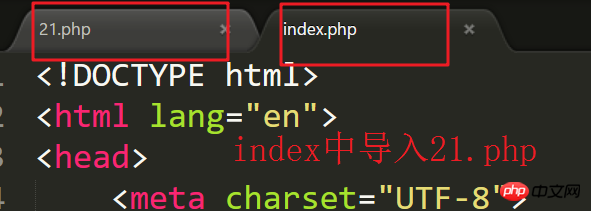
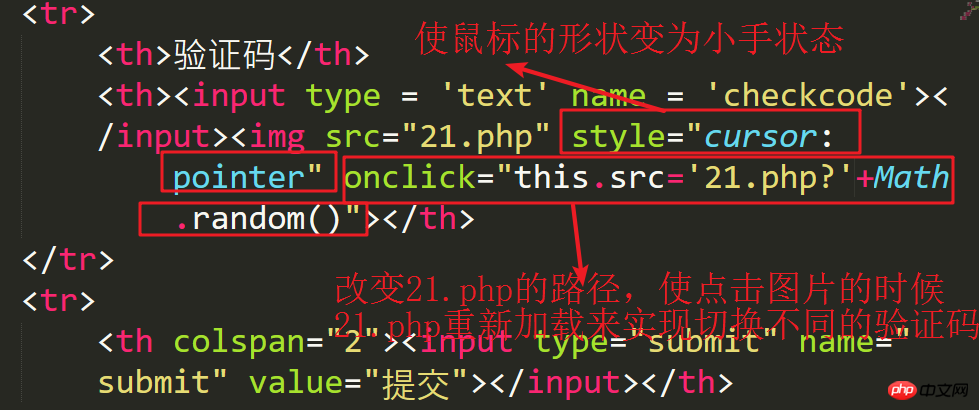
<!DOCTYPE html> <html lang="en"> <head> <meta charset="UTF-8"> <title>Document</title> </head> <body> <form name='frm' method='post' action=''> <table width="30%" border="2" align="center" rules="all" cellpadding="10"> <tr> <th colspan="2">请输入信息</th> </tr> <tr> <th>姓名:</th> <th><input type="text" name="username"></input></th> </tr> <tr> <th>密码:</th> <th><input type="password" name="userpwd"></input></th> </tr> <tr> 555556 <th>验证码</th> <th><input type = 'text' name = 'checkcode'></input><img src="21.php" style="cursor:pointer" onclick="this.src='21.php'?+Math.random()"></th> </tr> <tr> <th colspan="2"><input type="submit" name="submit" value="提交"></input></th> </tr> </table> </form> </body> </html>
理解;
最后结果截图
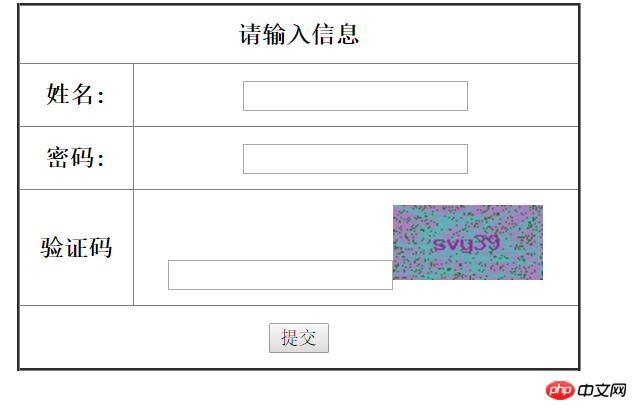
以上就是本文的全部内容,希望对大家的学习有所帮助。
相关推荐:
위 내용은 PHP에서 인증 코드 애플릿을 구현하는 방법의 상세 내용입니다. 자세한 내용은 PHP 중국어 웹사이트의 기타 관련 기사를 참조하세요!

핫 AI 도구

Undresser.AI Undress
사실적인 누드 사진을 만들기 위한 AI 기반 앱

AI Clothes Remover
사진에서 옷을 제거하는 온라인 AI 도구입니다.

Undress AI Tool
무료로 이미지를 벗다

Clothoff.io
AI 옷 제거제

AI Hentai Generator
AI Hentai를 무료로 생성하십시오.

인기 기사

뜨거운 도구

메모장++7.3.1
사용하기 쉬운 무료 코드 편집기

SublimeText3 중국어 버전
중국어 버전, 사용하기 매우 쉽습니다.

스튜디오 13.0.1 보내기
강력한 PHP 통합 개발 환경

드림위버 CS6
시각적 웹 개발 도구

SublimeText3 Mac 버전
신 수준의 코드 편집 소프트웨어(SublimeText3)

뜨거운 주제
 7415
7415
 15
15
 1359
1359
 52
52
 76
76
 11
11
 23
23
 19
19
 CakePHP 프로젝트 구성
Sep 10, 2024 pm 05:25 PM
이번 장에서는 CakePHP의 환경 변수, 일반 구성, 데이터베이스 구성, 이메일 구성에 대해 알아봅니다.
 Ubuntu 및 Debian용 PHP 8.4 설치 및 업그레이드 가이드
Dec 24, 2024 pm 04:42 PM
PHP 8.4는 상당한 양의 기능 중단 및 제거를 통해 몇 가지 새로운 기능, 보안 개선 및 성능 개선을 제공합니다. 이 가이드에서는 Ubuntu, Debian 또는 해당 파생 제품에서 PHP 8.4를 설치하거나 PHP 8.4로 업그레이드하는 방법을 설명합니다.
 CakePHP 데이터베이스 작업
Sep 10, 2024 pm 05:25 PM
CakePHP에서 데이터베이스 작업은 매우 쉽습니다. 이번 장에서는 CRUD(생성, 읽기, 업데이트, 삭제) 작업을 이해하겠습니다.
 CakePHP 토론
Sep 10, 2024 pm 05:28 PM
CakePHP는 PHP용 오픈 소스 프레임워크입니다. 이는 애플리케이션을 훨씬 쉽게 개발, 배포 및 유지 관리할 수 있도록 하기 위한 것입니다. CakePHP는 강력하고 이해하기 쉬운 MVC와 유사한 아키텍처를 기반으로 합니다. 모델, 뷰 및 컨트롤러 gu


