vue에서 Cropperjs를 사용하는 방법(자세한 튜토리얼)
이 글은 .vue 파일에 Cropperjs의 사용법과 배운 내용을 정리한 것입니다. 관심 있는 친구들이 함께 배울 수 있습니다.
vue를 사용하는 프로젝트에서는 이미지를 잘라야 하기 때문에, 저는 cropperjs를 사용하는 과정에서 몇 가지 함정에 빠지기도 했습니다. 다음은 .vue 파일의 Cropperjs에 대해 배운 사용법과 교훈을 요약한 것입니다.
사용하기 전에 소개하세요:

프로젝트에서 다음을 실행하세요:
npm install cropperjs -save
템플릿에서:
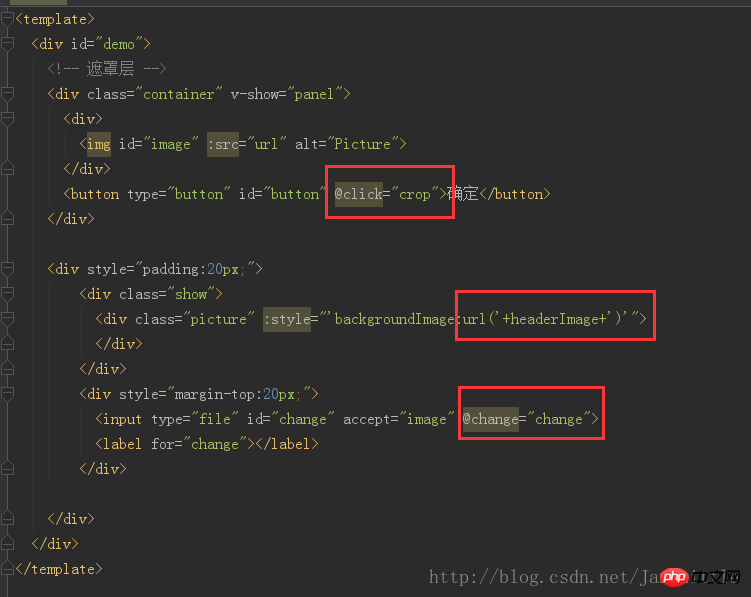
<p id="demo">
<!-- 遮罩层 -->
<p class="container" v-show="panel">
<p>
<img src="/static/imghw/default1.png" data-src="url" class="lazy" id="image" : alt="Picture">
</p>
<button type="button" id="button" @click="crop">确定</button>
</p>
<p style="padding:20px;">
<p class="show">
<p class="picture" :style="'backgroundImage:url('+headerImage+')'">
</p>
</p>
<p style="margin-top:20px;">
<input type="file" id="change" accept="image" @change="change">
<label for="change"></label>
</p>
</p>
</p>
js 코드:
import Cropper from 'cropperjs'
export default {
 components: {
 },
 data () {
  return {
   headerImage:'',
   picValue:'',
   cropper:'',
   croppable:false,
   panel:false,
   url:''
  }
 },
 mounted () {
  //初始化这个裁剪框
  var self = this;
  var image = document.getElementById('image');
  this.cropper = new Cropper(image, {
   aspectRatio: 1,
   viewMode: 1,
   background:false,
   zoomable:false,
   ready: function () {
    self.croppable = true;
   }
  });
 },
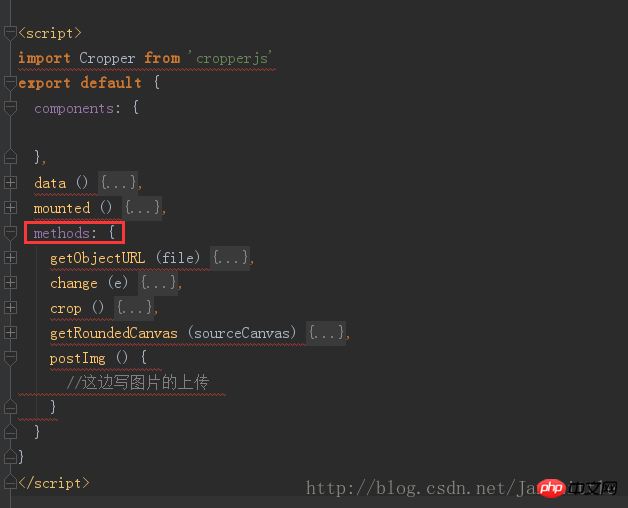
 methods: {
  getObjectURL (file) {
   var url = null ;
   if (window.createObjectURL!=undefined) { // basic
    url = window.createObjectURL(file) ;
   } else if (window.URL!=undefined) { // mozilla(firefox)
    url = window.URL.createObjectURL(file) ;
   } else if (window.webkitURL!=undefined) { // webkit or chrome
    url = window.webkitURL.createObjectURL(file) ;
   }
   return url ;
  },
  change (e) {
   let files = e.target.files || e.dataTransfer.files;
   if (!files.length) return;
   this.panel = true;
   this.picValue = files[0];
   this.url = this.getObjectURL(this.picValue);
   //每次替换图片要重新得到新的url
   if(this.cropper){
    this.cropper.replace(this.url);
   }
   this.panel = true;
  },
  crop () {
    this.panel = false;
    var croppedCanvas;
    var roundedCanvas;
    if (!this.croppable) {
     return;
    }
    // Crop
    croppedCanvas = this.cropper.getCroppedCanvas();
    console.log(this.cropper)
    // Round
    roundedCanvas = this.getRoundedCanvas(croppedCanvas);
    this.headerImage = roundedCanvas.toDataURL();
    this.postImg()
  },
  getRoundedCanvas (sourceCanvas) {
   var canvas = document.createElement('canvas');
   var context = canvas.getContext('2d');
   var width = sourceCanvas.width;
   var height = sourceCanvas.height;
   canvas.width = width;
   canvas.height = height;
   context.imageSmoothingEnabled = true;
   context.drawImage(sourceCanvas, 0, 0, width, height);
   context.globalCompositeOperation = 'destination-in';
   context.beginPath();
   context.arc(width / 2, height / 2, Math.min(width, height) / 2, 0, 2 * Math.PI, true);
   context.fill();
   return canvas;
  },
  postImg () {
   //这边写图片的上传
  }
 }
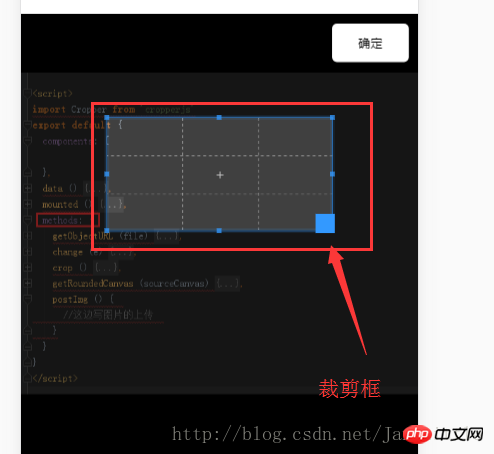
}전체 효과:

css 코드(비교적 길어서 원래는 올리고 싶지 않았지만, 어린이 신발을 위해서 달릴 수 있어요) 데모 직접 또는 게시됨, 길이가 길어서 죄송합니다):
*{
margin: 0;
padding: 0;
}
#demo #button {
position: absolute;
right: 10px;
top: 10px;
width: 80px;
height: 40px;
border:none;
border-radius: 5px;
background:white;
}
#demo .show {
width: 100px;
height: 100px;
overflow: hidden;
position: relative;
border-radius: 50%;
border: 1px solid #d5d5d5;
}
#demo .picture {
width: 100%;
height: 100%;
overflow: hidden;
background-position: center center;
background-repeat: no-repeat;
background-size: cover;
}
#demo .container {
z-index: 99;
position: fixed;
padding-top: 60px;
left: 0;
top: 0;
right: 0;
bottom: 0;
background:rgba(0,0,0,1);
}
#demo #image {
max-width: 100%;
}
.cropper-view-box,.cropper-face {
border-radius: 50%;
}
/*!
* Cropper.js v1.0.0-rc
* https://github.com/fengyuanchen/cropperjs
*
* Copyright (c) 2017 Fengyuan Chen
* Released under the MIT license
*
* Date: 2017-03-25T12:02:21.062Z
*/
.cropper-container {
font-size: 0;
line-height: 0;
position: relative;
-webkit-user-select: none;
-moz-user-select: none;
-ms-user-select: none;
user-select: none;
direction: ltr;
-ms-touch-action: none;
touch-action: none
}
.cropper-container img {
/* Avoid margin top issue (Occur only when margin-top <= -height) */
display: block;
min-width: 0 !important;
max-width: none !important;
min-height: 0 !important;
max-height: none !important;
width: 100%;
height: 100%;
image-orientation: 0deg
}
.cropper-wrap-box,
.cropper-canvas,
.cropper-drag-box,
.cropper-crop-box,
.cropper-modal {
position: absolute;
top: 0;
right: 0;
bottom: 0;
left: 0;
}
.cropper-wrap-box {
overflow: hidden;
}
.cropper-drag-box {
opacity: 0;
background-color: #fff;
}
.cropper-modal {
opacity: .5;
background-color: #000;
}
.cropper-view-box {
display: block;
overflow: hidden;
width: 100%;
height: 100%;
outline: 1px solid #39f;
outline-color: rgba(51, 153, 255, 0.75);
}
.cropper-dashed {
position: absolute;
display: block;
opacity: .5;
border: 0 dashed #eee
}
.cropper-dashed.dashed-h {
top: 33.33333%;
left: 0;
width: 100%;
height: 33.33333%;
border-top-width: 1px;
border-bottom-width: 1px
}
.cropper-dashed.dashed-v {
top: 0;
left: 33.33333%;
width: 33.33333%;
height: 100%;
border-right-width: 1px;
border-left-width: 1px
}
.cropper-center {
position: absolute;
top: 50%;
left: 50%;
display: block;
width: 0;
height: 0;
opacity: .75
}
.cropper-center:before,
.cropper-center:after {
position: absolute;
display: block;
content: ' ';
background-color: #eee
}
.cropper-center:before {
top: 0;
left: -3px;
width: 7px;
height: 1px
}
.cropper-center:after {
top: -3px;
left: 0;
width: 1px;
height: 7px
}
.cropper-face,
.cropper-line,
.cropper-point {
position: absolute;
display: block;
width: 100%;
height: 100%;
opacity: .1;
}
.cropper-face {
top: 0;
left: 0;
background-color: #fff;
}
.cropper-line {
background-color: #39f
}
.cropper-line.line-e {
top: 0;
right: -3px;
width: 5px;
cursor: e-resize
}
.cropper-line.line-n {
top: -3px;
left: 0;
height: 5px;
cursor: n-resize
}
.cropper-line.line-w {
top: 0;
left: -3px;
width: 5px;
cursor: w-resize
}
.cropper-line.line-s {
bottom: -3px;
left: 0;
height: 5px;
cursor: s-resize
}
.cropper-point {
width: 5px;
height: 5px;
opacity: .75;
background-color: #39f
}
.cropper-point.point-e {
top: 50%;
right: -3px;
margin-top: -3px;
cursor: e-resize
}
.cropper-point.point-n {
top: -3px;
left: 50%;
margin-left: -3px;
cursor: n-resize
}
.cropper-point.point-w {
top: 50%;
left: -3px;
margin-top: -3px;
cursor: w-resize
}
.cropper-point.point-s {
bottom: -3px;
left: 50%;
margin-left: -3px;
cursor: s-resize
}
.cropper-point.point-ne {
top: -3px;
right: -3px;
cursor: ne-resize
}
.cropper-point.point-nw {
top: -3px;
left: -3px;
cursor: nw-resize
}
.cropper-point.point-sw {
bottom: -3px;
left: -3px;
cursor: sw-resize
}
.cropper-point.point-se {
right: -3px;
bottom: -3px;
width: 20px;
height: 20px;
cursor: se-resize;
opacity: 1
}
@media (min-width: 768px) {
.cropper-point.point-se {
width: 15px;
height: 15px
}
}
@media (min-width: 992px) {
.cropper-point.point-se {
width: 10px;
height: 10px
}
}
@media (min-width: 1200px) {
.cropper-point.point-se {
width: 5px;
height: 5px;
opacity: .75
}
}
.cropper-point.point-se:before {
position: absolute;
right: -50%;
bottom: -50%;
display: block;
width: 200%;
height: 200%;
content: ' ';
opacity: 0;
background-color: #39f
}
.cropper-invisible {
opacity: 0;
}
.cropper-bg {
background-image: url('data:image/png;base64,iVBORw0KGgoAAAANSUhEUgAAABAAAAAQAQMAAAAlPW0iAAAAA3NCSVQICAjb4U/gAAAABlBMVEXMzMz////TjRV2AAAACXBIWXMAAArrAAAK6wGCiw1aAAAAHHRFWHRTb2Z0d2FyZQBBZG9iZSBGaXJld29ya3MgQ1M26LyyjAAAABFJREFUCJlj+M/AgBVhF/0PAH6/D/HkDxOGAAAAAElFTkSuQmCC');
}
.cropper-hide {
position: absolute;
display: block;
width: 0;
height: 0;
}
.cropper-hidden {
display: none !important;
}
.cropper-move {
cursor: move;
}
.cropper-crop {
cursor: crosshair;
}
.cropper-disabled .cropper-drag-box,
.cropper-disabled .cropper-face,
.cropper-disabled .cropper-line,
.cropper-disabled .cropper-point {
cursor: not-allowed;
}전체 그림:

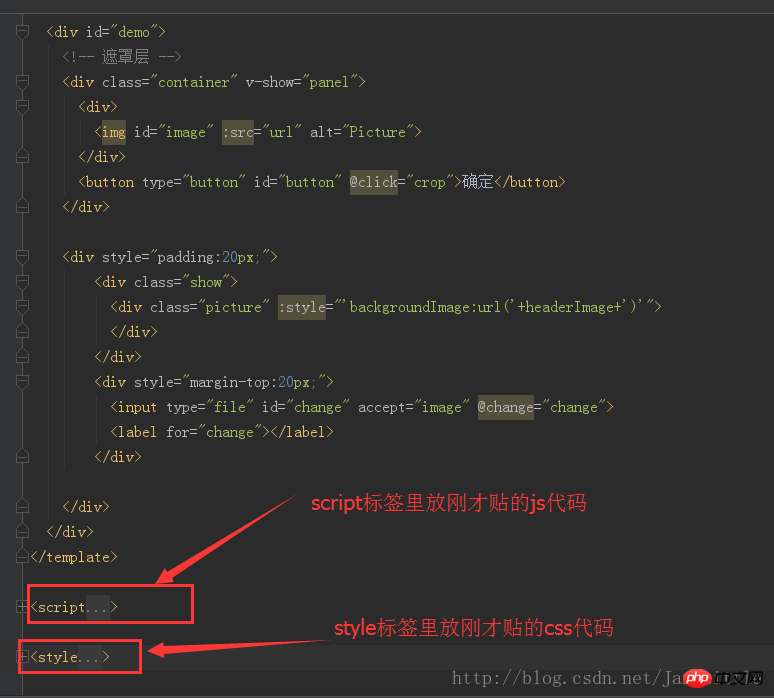
위 코드를 프로젝트에 넣거나 별도의 .vue를 만들어 프로젝트에 넣어 이 효과를 얻으세요.

위 내용은 모두를 위해 제가 정리한 내용입니다. 앞으로 모든 사람에게 도움이 되기를 바랍니다.
관련 기사:
Vue.js 사용자 정의 이벤트 양식 입력 구성 요소 방법
사용을 사용하여 Vue 전역 구성 요소 및 전역 지시문을 등록하는 방법
위 내용은 vue에서 Cropperjs를 사용하는 방법(자세한 튜토리얼)의 상세 내용입니다. 자세한 내용은 PHP 중국어 웹사이트의 기타 관련 기사를 참조하세요!

핫 AI 도구

Undresser.AI Undress
사실적인 누드 사진을 만들기 위한 AI 기반 앱

AI Clothes Remover
사진에서 옷을 제거하는 온라인 AI 도구입니다.

Undress AI Tool
무료로 이미지를 벗다

Clothoff.io
AI 옷 제거제

AI Hentai Generator
AI Hentai를 무료로 생성하십시오.

인기 기사

뜨거운 도구

메모장++7.3.1
사용하기 쉬운 무료 코드 편집기

SublimeText3 중국어 버전
중국어 버전, 사용하기 매우 쉽습니다.

스튜디오 13.0.1 보내기
강력한 PHP 통합 개발 환경

드림위버 CS6
시각적 웹 개발 도구

SublimeText3 Mac 버전
신 수준의 코드 편집 소프트웨어(SublimeText3)

뜨거운 주제
 7517
7517
 15
15
 1378
1378
 52
52
 79
79
 11
11
 53
53
 19
19
 21
21
 66
66
 마그넷 링크 사용 방법
Feb 18, 2024 am 10:02 AM
마그넷 링크는 리소스를 다운로드하기 위한 링크 방식으로, 기존 다운로드 방식보다 더 편리하고 효율적입니다. 마그넷 링크를 사용하면 중간 서버에 의존하지 않고 P2P 방식으로 리소스를 다운로드할 수 있습니다. 이번 글에서는 마그넷 링크의 사용법과 주의할 점을 소개하겠습니다. 1. 마그넷 링크란 무엇인가요? 마그넷 링크는 P2P(Peer-to-Peer) 프로토콜을 기반으로 한 다운로드 방식입니다. 마그넷 링크를 통해 사용자는 리소스 게시자에 직접 연결하여 리소스 공유 및 다운로드를 완료할 수 있습니다. 전통적인 다운로드 방법과 비교하여 자기
 mdf 및 mds 파일을 사용하는 방법
Feb 19, 2024 pm 05:36 PM
mdf 파일, mds 파일 사용법 컴퓨터 기술의 지속적인 발전으로 우리는 다양한 방법으로 데이터를 저장하고 공유할 수 있게 되었습니다. 디지털 미디어 분야에서는 특별한 파일 형식을 자주 접하게 됩니다. 이 기사에서는 일반적인 파일 형식인 mdf 및 mds 파일에 대해 설명하고 사용 방법을 소개합니다. 먼저 mdf 파일과 mds 파일의 의미를 이해해야 합니다. mdf는 CD/DVD 이미지 파일의 확장자이고, mds 파일은 mdf 파일의 메타데이터 파일입니다.
 크리스탈디스크마크란 어떤 소프트웨어인가요? -크리스탈디스크마크는 어떻게 사용하나요?
Mar 18, 2024 pm 02:58 PM
CrystalDiskMark는 순차 및 무작위 읽기/쓰기 속도를 빠르게 측정하는 하드 드라이브용 소형 HDD 벤치마크 도구입니다. 다음으로 편집자님에게 CrystalDiskMark 소개와 crystaldiskmark 사용법을 소개하겠습니다~ 1. CrystalDiskMark 소개 CrystalDiskMark는 기계식 하드 드라이브와 솔리드 스테이트 드라이브(SSD)의 읽기 및 쓰기 속도와 성능을 평가하는 데 널리 사용되는 디스크 성능 테스트 도구입니다. ). 무작위 I/O 성능. 무료 Windows 응용 프로그램이며 사용자 친화적인 인터페이스와 다양한 테스트 모드를 제공하여 하드 드라이브 성능의 다양한 측면을 평가하고 하드웨어 검토에 널리 사용됩니다.
 foobar2000을 어떻게 다운로드하나요? - foobar2000 사용법
Mar 18, 2024 am 10:58 AM
foobar2000은 언제든지 음악 리소스를 들을 수 있는 소프트웨어입니다. 모든 종류의 음악을 무손실 음질로 제공합니다. 음악 플레이어의 향상된 버전을 사용하면 더욱 포괄적이고 편안한 음악 경험을 얻을 수 있습니다. 컴퓨터에서 고급 오디오를 재생합니다. 이 장치는 보다 편리하고 효율적인 음악 재생 경험을 제공합니다. 인터페이스 디자인은 단순하고 명확하며 사용하기 쉽습니다. 또한 다양한 스킨과 테마를 지원하고, 자신의 선호도에 따라 설정을 개인화하며, 다양한 오디오 형식의 재생을 지원하는 전용 음악 플레이어를 생성합니다. 또한 볼륨을 조정하는 오디오 게인 기능도 지원합니다. 과도한 볼륨으로 인한 청력 손상을 방지하려면 자신의 청력 상태에 따라 조정하십시오. 다음엔 내가 도와줄게
 NetEase 메일박스 마스터를 사용하는 방법
Mar 27, 2024 pm 05:32 PM
NetEase Mailbox는 중국 네티즌들이 널리 사용하는 이메일 주소로, 안정적이고 효율적인 서비스로 항상 사용자들의 신뢰를 얻어 왔습니다. NetEase Mailbox Master는 휴대폰 사용자를 위해 특별히 제작된 이메일 소프트웨어로 이메일 보내기 및 받기 프로세스를 크게 단순화하고 이메일 처리를 더욱 편리하게 만듭니다. 따라서 NetEase Mailbox Master를 사용하는 방법과 그 기능이 무엇인지 아래에서 이 사이트의 편집자가 자세한 소개를 제공하여 도움을 드릴 것입니다! 먼저, 모바일 앱스토어에서 NetEase Mailbox Master 앱을 검색하여 다운로드하실 수 있습니다. App Store 또는 Baidu Mobile Assistant에서 "NetEase Mailbox Master"를 검색한 후 안내에 따라 설치하세요. 다운로드 및 설치가 완료되면 NetEase 이메일 계정을 열고 로그인합니다. 로그인 인터페이스는 아래와 같습니다.
 Baidu Netdisk 앱 사용 방법
Mar 27, 2024 pm 06:46 PM
오늘날 클라우드 스토리지는 우리의 일상 생활과 업무에 없어서는 안 될 부분이 되었습니다. 중국 최고의 클라우드 스토리지 서비스 중 하나인 Baidu Netdisk는 강력한 스토리지 기능, 효율적인 전송 속도 및 편리한 운영 경험으로 많은 사용자의 호감을 얻었습니다. 중요한 파일을 백업하고, 정보를 공유하고, 온라인으로 비디오를 시청하고, 음악을 듣고 싶은 경우 Baidu Cloud Disk는 귀하의 요구를 충족할 수 있습니다. 그러나 많은 사용자가 Baidu Netdisk 앱의 구체적인 사용 방법을 이해하지 못할 수 있으므로 이 튜토리얼에서는 Baidu Netdisk 앱 사용 방법을 자세히 소개합니다. Baidu 클라우드 네트워크 디스크 사용 방법: 1. 설치 먼저 Baidu Cloud 소프트웨어를 다운로드하고 설치할 때 사용자 정의 설치 옵션을 선택하십시오.
 BTCC 튜토리얼: BTCC 교환에서 MetaMask 지갑을 바인딩하고 사용하는 방법은 무엇입니까?
Apr 26, 2024 am 09:40 AM
MetaMask(중국어로 Little Fox Wallet이라고도 함)는 무료이며 호평을 받는 암호화 지갑 소프트웨어입니다. 현재 BTCC는 MetaMask 지갑에 대한 바인딩을 지원합니다. 바인딩 후 MetaMask 지갑을 사용하여 빠르게 로그인하고 가치를 저장하고 코인을 구매할 수 있으며 첫 바인딩에는 20 USDT 평가판 보너스도 받을 수 있습니다. BTCCMetaMask 지갑 튜토리얼에서는 MetaMask 등록 및 사용 방법, BTCC에서 Little Fox 지갑을 바인딩하고 사용하는 방법을 자세히 소개합니다. MetaMask 지갑이란 무엇입니까? 3천만 명 이상의 사용자를 보유한 MetaMask Little Fox Wallet은 오늘날 가장 인기 있는 암호화폐 지갑 중 하나입니다. 무료로 사용할 수 있으며 확장으로 네트워크에 설치할 수 있습니다.
 Xiaoai 스피커 사용 방법 Xiaoai 스피커를 휴대폰에 연결하는 방법
Feb 22, 2024 pm 05:19 PM
스피커의 재생 버튼을 길게 누른 후 소프트웨어에서 Wi-Fi에 연결하면 사용 가능합니다. 튜토리얼 적용 모델: Xiaomi 12 시스템: EMUI11.0 버전: Xiaoai Classmate 2.4.21 분석 1 먼저 스피커의 재생 버튼을 찾아 길게 눌러 네트워크 배포 모드로 들어갑니다. 2 휴대폰의 Xiaoai 스피커 소프트웨어에서 Xiaomi 계정에 로그인하고 클릭하여 새 Xiaoai 스피커를 추가하세요. 3. Wi-Fi의 이름과 비밀번호를 입력한 후 Xiao Ai에게 전화를 걸어 사용할 수 있습니다. 보충: Xiaoai 스피커에는 어떤 기능이 있습니까? 1 Xiaoai 스피커에는 시스템 기능, 소셜 기능, 엔터테인먼트 기능, 지식 기능, 생활 기능, 스마트 홈 및 교육 계획이 있습니다. 요약/주의사항: 간편한 연결 및 사용을 위해서는 Xiao Ai 앱을 휴대폰에 미리 설치해야 합니다.


