

VS Code 편집기를 사용하여 AngularJS 2 애플리케이션을 개발하는 방법
이 글에서는 VS Code를 사용하여 첫 번째 AngularJS 2 애플리케이션을 개발하는 방법에 대한 관련 정보를 주로 소개합니다. 이 글은 모든 사람의 공부나 업무에 대한 특정 참조 학습 가치가 있는 샘플 코드를 통해 자세히 소개합니다. 와서 아래를 살펴보세요.
머리말
이전에 Angular2 개발 환경을 구축하는 방법에 대한 튜토리얼인 VS Code를 소개했습니다. 이 기사에서는 VS Code를 사용하여 AngularJS2 애플리케이션을 개발하는 방법을 자세히 소개하고 이를 공유합니다. 아래에서는 더 이상 언급하지 않겠습니다. 자세한 소개를 살펴보겠습니다.
실행 환경:
1, Windows 10
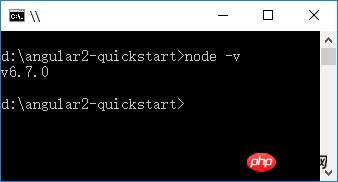
2, Node 6.7.0
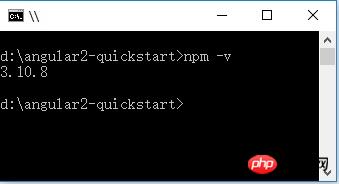
3, npm 3.10.8
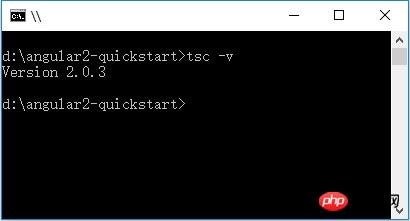
4, TypeScript 2.0.3
프로젝트 생성
1. 폴더 생성: angle2-quickstart, VS Code 시작, 새로 생성된 폴더: angle2-quickstart.
2. 루트 폴더(angular2-quickstart)에서 package.json 파일을 생성합니다:
{
 "name": "angular-quickstart",
 "version": "1.0.0",
 "scripts": {
 "start": "tsc && concurrently \"tsc -w\" \"lite-server\" ",
 "lite": "lite-server",
 "postinstall": "typings install",
 "tsc": "tsc",
 "tsc:w": "tsc -w",
 "typings": "typings"
 },
 "license": "ISC",
 "dependencies": {
 "@angular/common": "~2.0.2",
 "@angular/compiler": "~2.0.2",
 "@angular/core": "~2.0.2",
 "@angular/forms": "~2.0.2",
 "@angular/http": "~2.0.2",
 "@angular/platform-browser": "~2.0.2",
 "@angular/platform-browser-dynamic": "~2.0.2",
 "@angular/router": "~3.0.2",
 "@angular/upgrade": "~2.0.2",
 "angular-in-memory-web-api": "~0.1.5",
 "bootstrap": "^3.3.7",
 "core-js": "^2.4.1",
 "reflect-metadata": "^0.1.8",
 "rxjs": "5.0.0-beta.12",
 "systemjs": "0.19.39",
 "zone.js": "^0.6.25"
 },
 "devDependencies": {
 "concurrently": "^3.1.0",
 "lite-server": "^2.2.2",
 "typescript": "^2.0.3",
 "typings": "^1.4.0"
 }
}3. 루트 폴더(angular2-quickstart)에서 tsconfig.json 파일을 생성합니다:
{
 "compilerOptions": {
 "target": "es5",
 "module": "commonjs",
 "moduleResolution": "node",
 "sourceMap": true,
 "emitDecoratorMetadata": true,
 "experimentalDecorators": true,
 "removeComments": false,
 "noImplicitAny": false
 }
}4. 루트 폴더 폴더(angular2-quickstart) 아래에 lookings.json 파일을 생성합니다:
{
 "globalDependencies": {
 "core-js": "registry:dt/core-js#0.0.0+20160725163759",
 "jasmine": "registry:dt/jasmine#2.2.0+20160621224255",
 "node": "registry:dt/node#6.0.0+20160909174046"
 }
}5. 루트 폴더(angular2-quickstart) 아래에 systemjs.config.js(JavaScript 스크립트) 파일을 생성합니다:
/**
 * System configuration for Angular samples
 * Adjust as necessary for your application needs.
 */
(function(global) {
 System.config({
 paths: {
  // paths serve as alias
  'npm:': 'node_modules/'
 },
 // map tells the System loader where to look for things
 map: {
  // our app is within the app folder
  app: 'app',
  // angular bundles
  '@angular/core': 'npm:@angular/core/bundles/core.umd.js',
  '@angular/common': 'npm:@angular/common/bundles/common.umd.js',
  '@angular/compiler': 'npm:@angular/compiler/bundles/compiler.umd.js',
  '@angular/platform-browser': 'npm:@angular/platform-browser/bundles/platform-browser.umd.js',
  '@angular/platform-browser-dynamic': 'npm:@angular/platform-browser-dynamic/bundles/platform-browser-dynamic.umd.js',
  '@angular/http': 'npm:@angular/http/bundles/http.umd.js',
  '@angular/router': 'npm:@angular/router/bundles/router.umd.js',
  '@angular/forms': 'npm:@angular/forms/bundles/forms.umd.js',
  // other libraries
  'rxjs': 'npm:rxjs',
  'angular-in-memory-web-api': 'npm:angular-in-memory-web-api',
 },
 // packages tells the System loader how to load when no filename and/or no extension
 packages: {
  app: {
  main: './main.js',
  defaultExtension: 'js'
  },
  rxjs: {
  defaultExtension: 'js'
  },
  'angular-in-memory-web-api': {
  main: './index.js',
  defaultExtension: 'js'
  }
 }
 });
})(this);파일 구조:
|_ angular2-quickstart
|_ app
| |_ app.component.ts
| |_ main.ts
|_ node_modules ...
|_ typings ...
|_ index.html
|_ package.json
|_ tsconfig.json
|_ typings.json
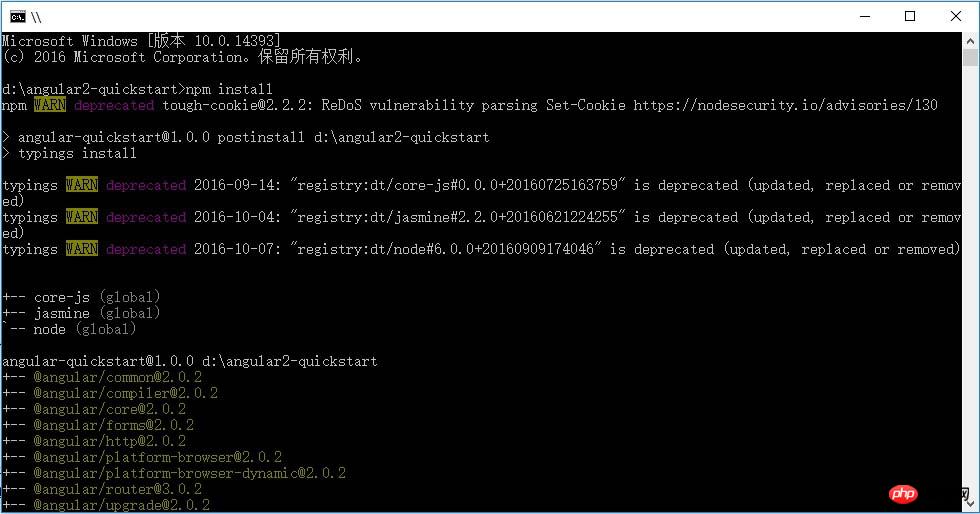
종속성 패키지 설치(가장 중요한 단계)
npm 명령을 사용하여 package.json에 나열된 종속성 패키지를 설치합니다. 명령줄 cmd 창에 다음을 입력합니다. cd angle2-quickstart, angle2-quickstar 폴더를 입력하고 다음 명령을 입력합니다.
npm install
TypeScript 애플리케이션 만들기
1. root 폴더(angular2-quickstart) 아래에 앱 하위 폴더를 만듭니다.
2. 하위 앱 폴더에 app.module.ts:
import { NgModule } from '@angular/core';
import { BrowserModule } from '@angular/platform-browser';
import { AppComponent } from './app.component';
@NgModule({
 imports: [ BrowserModule ],
 declarations: [ AppComponent ],
 bootstrap: [ AppComponent ]
})
export class AppModule { }3를 만듭니다. 하위 앱 폴더에 app.comComponent.ts:
import { Component } from '@angular/core';
@Component({
selector: 'my-app',
template: '<h1>我的第一个 AngularJS 2 应用程序</h1>'
})
export class AppComponent { }4를 만듭니다. 하위 앱 파일 폴더에서 TypeScript 파일 main.ts:
import { platformBrowserDynamic } from '@angular/platform-browser-dynamic';
import { AppModule } from './app.module';
const platform = platformBrowserDynamic();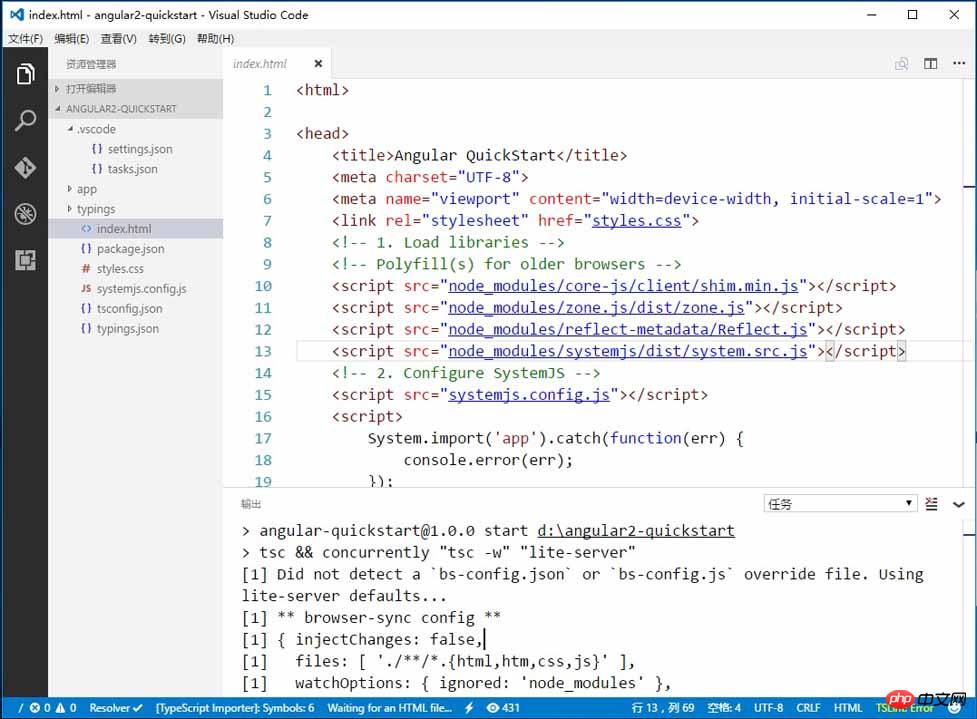
platform.bootstrapModule(AppModule);5를 만듭니다. 루트 폴더(angular2-quickstart) 아래에 html 파일 index.html:
<html>
<head>
<title>Angular QuickStart</title>
<meta charset="UTF-8">
<meta name="viewport" content="width=device-width, initial-scale=1">
<link rel="stylesheet" href="styles.css">
<!-- 1. Load libraries -->
<!-- Polyfill(s) for older browsers -->
<script src="node_modules/core-js/client/shim.min.js"></script>
<script src="node_modules/zone.js/dist/zone.js"></script>
<script src="node_modules/reflect-metadata/Reflect.js"></script>
<script src="node_modules/systemjs/dist/system.src.js"></script>
<!-- 2. Configure SystemJS -->
<script src="systemjs.config.js"></script>
<script>
System.import('app').catch(function(err) {
console.error(err);
});
</script>
</head>
<!-- 3. Display the application -->
<body>
<my-app>Loading...</my-app>
</body>
</html>6을 만듭니다. ), CSS 파일 styles.css를 만듭니다.
/* Master Styles */
h1 {
 color: #369;
 font-family: Arial, Helvetica, sans-serif;
 font-size: 250%;
}
h2,
h3 {
 color: #444;
 font-family: Arial, Helvetica, sans-serif;
 font-weight: lighter;
}
body {
 margin: 2em;
}Configuration application
1 VS Code에서 루트 폴더(angular2-quickstart) 아래에 .vscode 하위 폴더를 만듭니다.
2. .vscode 하위 폴더에서 settings.json 파일을 생성합니다:
// 将设置放入此文件中以覆盖默认值和用户设置。
{
 "typescript.tsdk": "node_modules/typescript/lib",
 // ts 项目, 隐藏 .js 和 .js.map 文件
 "files.exclude": {
  "node_modules": true,
  "**/*.js": { "when": "$(basename).ts" },
  "**/*.js.map": true
 }
}3. .vscode 하위 폴더에서 task.json 파일을 생성합니다:
{
 // See https://go.microsoft.com/fwlink/?LinkId=733558
 // for the documentation about the tasks.json format
 "version": "0.1.0",
 "command": "cmd",
 "isShellCommand": true,
 "showOutput": "always",
 "args": ["/C npm start"]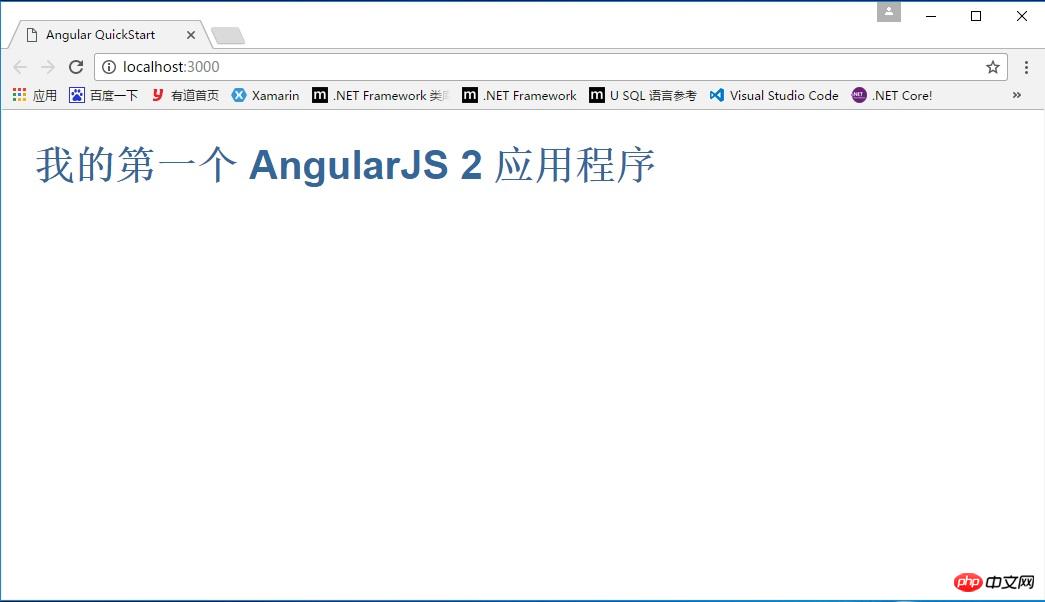
}구성이 완료되면 애플리케이션을 실행합니다. , Ctrl + Shift + B 컴파일을 누르면 프로그램이 Typescript를 Javascript로 컴파일하고 동시에 라이트 서버를 시작하며 우리가 작성한 index.html을 로드합니다. 디스플레이: 내 첫 번째 Angular 2 애플리케이션
위 내용은 모두를 위해 편집한 내용입니다. 앞으로 모든 사람에게 도움이 되기를 바랍니다.
관련 기사:
React 프로젝트에서 Redux를 사용하는 방법(자세한 튜토리얼)
JavaScript에서 자동 숫자 증가를 구현하는 방법
위 내용은 VS Code 편집기를 사용하여 AngularJS 2 애플리케이션을 개발하는 방법의 상세 내용입니다. 자세한 내용은 PHP 중국어 웹사이트의 기타 관련 기사를 참조하세요!

핫 AI 도구

Undresser.AI Undress
사실적인 누드 사진을 만들기 위한 AI 기반 앱

AI Clothes Remover
사진에서 옷을 제거하는 온라인 AI 도구입니다.

Undress AI Tool
무료로 이미지를 벗다

Clothoff.io
AI 옷 제거제

AI Hentai Generator
AI Hentai를 무료로 생성하십시오.

인기 기사
뜨거운 도구

메모장++7.3.1
사용하기 쉬운 무료 코드 편집기

SublimeText3 중국어 버전
중국어 버전, 사용하기 매우 쉽습니다.

스튜디오 13.0.1 보내기
강력한 PHP 통합 개발 환경

드림위버 CS6
시각적 웹 개발 도구

SublimeText3 Mac 버전
신 수준의 코드 편집 소프트웨어(SublimeText3)
뜨거운 주제
 7569
7569
 15
1386
52
87
11
62
19
28
108
15
1386
52
87
11
62
19
28
108

 VSCODE에 필요한 컴퓨터 구성
Apr 15, 2025 pm 09:48 PM
VSCODE에 필요한 컴퓨터 구성
Apr 15, 2025 pm 09:48 PM
대 코드 시스템 요구 사항 : 운영 체제 : Windows 10 이상, MacOS 10.12 이상, Linux 배포 프로세서 : 최소 1.6GHz, 권장 2.0GHz 이상의 메모리 : 최소 512MB, 권장 4GB 이상의 저장 공간 : 최소 250MB, 권장 1GB 및 기타 요구 사항 : 안정 네트워크 연결, Xorg/Wayland (LINUX)
 VSCODE 용 헤더 파일을 정의하는 방법
Apr 15, 2025 pm 09:09 PM
VSCODE 용 헤더 파일을 정의하는 방법
Apr 15, 2025 pm 09:09 PM
Visual Studio 코드를 사용하여 헤더 파일을 정의하는 방법은 무엇입니까? .h 또는 .hpp 접미사 이름 (예 : 클래스, 함수, 변수)을 사용하여 헤더 파일을 만들고 기호를 선언합니다. 소스 파일에 헤더 파일을 포함시키기 위해 #include 지시문을 사용하여 프로그램을 컴파일합니다. 헤더 파일이 포함되어 있고 선언 된 기호를 사용할 수 있습니다.

 VSCODE 터미널의 공통 명령
Apr 15, 2025 pm 10:06 PM
VSCODE 터미널의 공통 명령
Apr 15, 2025 pm 10:06 PM
VS 코드 터미널에 대한 공통 명령은 다음과 같습니다. 터미널 화면 (Clear) 지우기 (CLEAR), 현재 디렉토리 파일 (LS)을 나열하고 현재 작업 디렉토리 (CD) 변경, 현재 작업 디렉토리 경로 (MKDIR) 작성, 빈 디렉토리 (RMDIR) 삭제, 새 파일 (터치), 파일 삭제 또는 디렉토리 또는 디렉토리 (CP) (MV) 파일 콘텐츠 표시 (CAT) 파일 콘텐츠보기 및 스크롤 (적음) 파일 컨텐츠보기 아래로 스크롤 (more) 파일의 처음 몇 줄 (헤드)을 표시합니다.
 vScode 이전 다음 바로 가기 키
Apr 15, 2025 pm 10:51 PM
vScode 이전 다음 바로 가기 키
Apr 15, 2025 pm 10:51 PM
vs 코드 1 단계/다음 단계 바로 가기 키 사용 : 1 단계 (뒤로) : Windows/Linux : Ctrl ←; MACOS : CMD ← 다음 단계 (앞으로) : Windows/Linux : Ctrl →; MACOS : CMD →
 vscode를 사용하는 방법
Apr 15, 2025 pm 11:21 PM
vscode를 사용하는 방법
Apr 15, 2025 pm 11:21 PM
Visual Studio Code (VSCODE)는 Microsoft가 개발 한 크로스 플랫폼, 오픈 소스 및 무료 코드 편집기입니다. 광범위한 프로그래밍 언어에 대한 가볍고 확장 성 및 지원으로 유명합니다. VSCODE를 설치하려면 공식 웹 사이트를 방문하여 설치 프로그램을 다운로드하고 실행하십시오. VScode를 사용하는 경우 새 프로젝트를 만들고 코드 편집, 디버그 코드, 프로젝트 탐색, VSCODE 확장 및 설정을 관리 할 수 있습니다. VSCODE는 Windows, MacOS 및 Linux에서 사용할 수 있으며 여러 프로그래밍 언어를 지원하며 Marketplace를 통해 다양한 확장을 제공합니다. 이점은 경량, 확장 성, 광범위한 언어 지원, 풍부한 기능 및 버전이 포함됩니다.
 VScode와 Pycharm의 차이점은 무엇입니까?
Apr 15, 2025 pm 11:54 PM
VScode와 Pycharm의 차이점은 무엇입니까?
Apr 15, 2025 pm 11:54 PM
VS Code와 Pycharm의 주요 차이점은 다음과 같습니다. 1. 확장 성 : VS 코드는 확장 가능하며 플러그인 시장이 풍부하고 Pycharm은 기본적으로 더 넓은 기능을 가지고 있습니다. 2. 가격 : vs 코드는 무료이며 오픈 소스이며 Pycharm은 전문 버전에 대해 지불됩니다. 3. 사용자 인터페이스 : VS 코드는 현대적이고 친근하며 Pycharm은 더 복잡합니다. 4. 코드 내비게이션 : 대 코드는 소규모 프로젝트에 적합하며 Pycharm은 대규모 프로젝트에 더 적합합니다. 5. 디버깅 : vs 코드는 기본적이며 Pycharm은 더 강력합니다. 6. 코드 리팩토링 : vs 코드는 기본적이며 Pycharm은 더 풍부합니다. 7. 코드
 중국어로 vscode를 설정하는 방법
Apr 15, 2025 pm 09:27 PM
중국어로 vscode를 설정하는 방법
Apr 15, 2025 pm 09:27 PM
Visual Studio Code에서 중국어를 설정하는 두 가지 방법이 있습니다. 1. 중국어 패키지 설치; 2. 구성 파일에서 "로케일"설정을 수정하십시오. Visual Studio Code 버전이 1.17 이상인지 확인하십시오.
