
이 글은 주로 WeChat 미니 프로그램 개발에 관한 정보를 소개합니다. LOL 영웅 소개가 필요한 친구들은 참고하시면 됩니다
WeChat 미니 프로그램이 최근 청두의 집값처럼 인기가 많아서 저도 시도해 봤습니다. 어제 그리고 나만의 영웅 목록을 만들었습니다. 오늘은 여기에 제작 과정을 기록하겠습니다.
1. WeChat 개발자 도구 다운로드
공식 웹사이트 링크: https://mp.weixin.qq.com/debug/ wxadoc/dev/devtools /download.html?t=1475052055364, 다운로드가 완료된 후 기본적으로 설치할 수 있습니다
2. 새 프로젝트 만들기
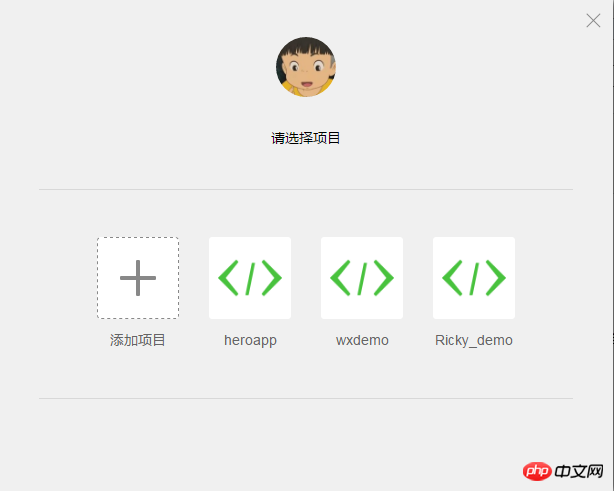
WeChat 개발자 도구를 엽니다(WeChat QR 코드를 스캔해야 함) 처음 로그인하려면) 아래 그림과 같이 프로젝트 추가를 클릭한 후 APPID, 프로젝트 이름을 입력하고 프로젝트가 있는 디렉터리(로컬 디렉터리)를 선택합니다. AppID, APPID 없음 선택(일부 기능은 제한됨)
> 은 미니 프로그램의 항목 구성 파일이며 일부 전역 설정은 이 파일에 모두 포함되어 있습니다.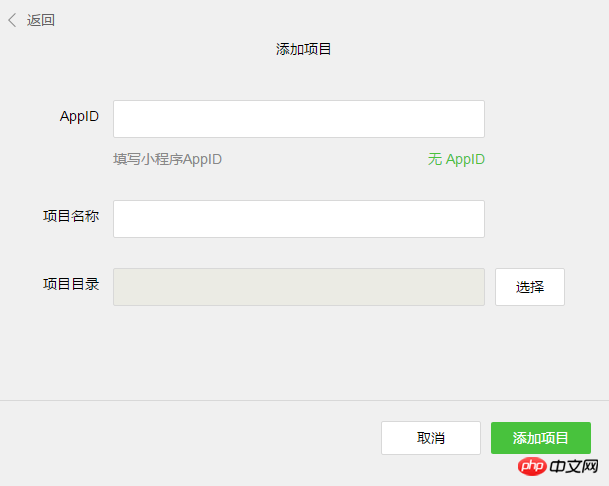
 (1) Detail.js는 관련된 js 처리 파일입니다. Detail.wxml 페이지
(2)detail.json은 Detail.wxml의 구성 파일입니다. 예를 들어 탐색 표시줄의 제목을 설정할 수 있습니다.
(3)detail.wxml은 표시되는 페이지입니다. 미니 프로그램, UI의 선반입니다.
(4)detail.wxss는 Detail.wxml의 내용입니다. CSS 파일과 유사한 스타일 파일입니다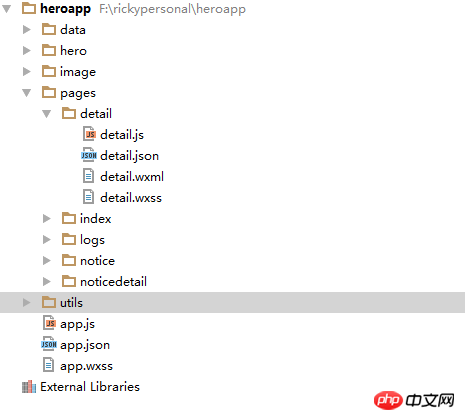
3.1 다음으로 app.json 파일을 살펴보겠습니다.
{
 "pages":[
  "pages/index/index",
  "pages/logs/logs",
  "pages/detail/detail",
  "pages/notice/notice",
  "pages/noticedetail/noticedetail"
 ],
 "window":{
  "backgroundTextStyle":"light",
  "navigationBarBackgroundColor": "#fff",
  "navigationBarTitleText": "英雄角色",
  "navigationBarTextStyle":"black",
  "backgroundColor": "#fbf9fe"
 },
 "tabBar": {
  "color": "#333",
  "selectedColor": "#3cc51f",
  "borderStyle": "#cccccc",
  "backgroundColor": "#ffffff",
  "list": [{
   "pagePath": "pages/index/index",
   "text": "英雄列表",
   "iconPath": "image/list_normal.png",
   "selectedIconPath": "image/list.png"
  }, {
   "pagePath": "pages/notice/notice",
   "text": "版本公告",
   "iconPath": "image/hot_normal.png",
   "selectedIconPath": "image/hot.png"
  }]
 }
}3.2 app.js 파일
app.js에는 일부 전역 함수, 전역 변수 등이 포함되어 있습니다.//app.js
App({
onLaunch: function () {
//调用API从本地缓存中获取数据
var logs = wx.getStorageSync('logs') || []
logs.unshift(Date.now())
wx.setStorageSync('logs', logs)
},
getUserInfo:function(cb){
var that = this
if(this.globalData.userInfo){
typeof cb == "function" && cb(this.globalData.userInfo)
}else{
//调用登录接口
wx.login({
success: function () {
wx.getUserInfo({
success: function (res) {
that.globalData.userInfo = res.userInfo
typeof cb == "function" && cb(that.globalData.userInfo)
}
})
}
})
}
},
globalData:{
userInfo:null,
userId:null
}
})var app=getApp();
app.globalData. userId="12"이런 식으로 전역 변수인 Variables를 조작할 수 있습니다.3.3 데이터 바인딩
애플릿의 데이터 바인딩은 이중 중괄호 방식을 사용한다는 점에서 각도 및 vue와 유사합니다. 중괄호 안의 내용은 {{detail.wxml 파일의 이름 }} 형식이므로 변수 이름의 값 설정은 해당 Detail.js 파일에서 설정해야 합니다.Page({
data: {
hero:heros.getInfoById(app.globalData.userId),<br> name:'Ricky',<br> items:[{"id":1,"name":"name1"},{"id":2,"name":"name2"}]
},
onLoad:function () {
this.setData({
hero:heros.getInfoById(app.globalData.userId)
})
},<br> tapName:function(event){<br> console.log(event)<br> }
})3.4 바인딩 wxml의 이벤트 바인딩은 바인드+메서드 이름
3.5 목록 렌더링
애플릿의 목록 렌더링은 wx:for= "{{items}}" 메서드를 사용하며 항목 변수가 반복될 때마다 항목 개체가 생성되고 각 항목에 이름 속성이 포함됩니다. 루프는 item.name
애플릿에서 페이지 점프를 사용할 수 있습니다:
wx.navigateTo({
     url: '../detail/detail'
   })
미니 프로그램에 대한 자세한 API 정보는 공식 웹사이트를 참조하세요. : https://mp.weixin.qq.com/debug/wxadoc/dev/framework/MINA.html?t= 1475052046827
마지막으로 제 미니프로그램 스크린샷을 보여드릴게요~
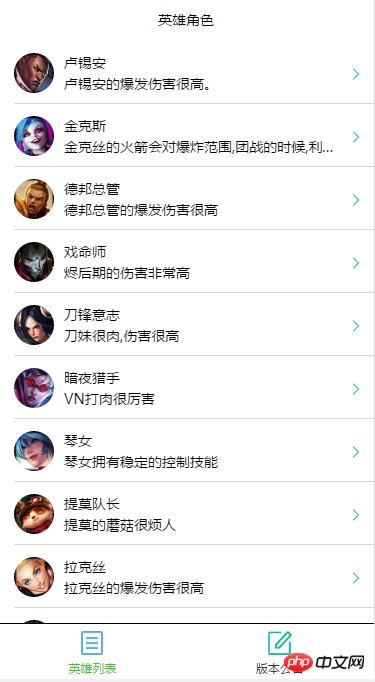
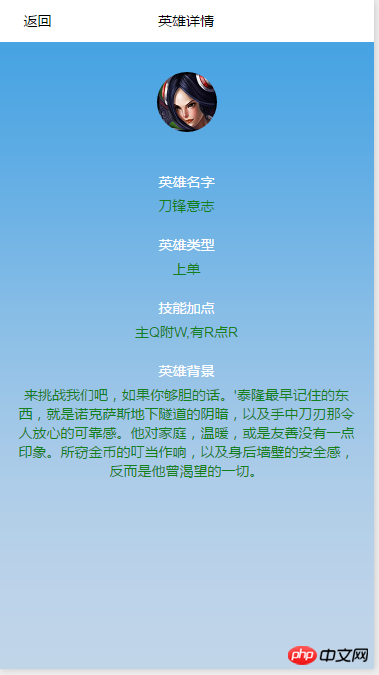
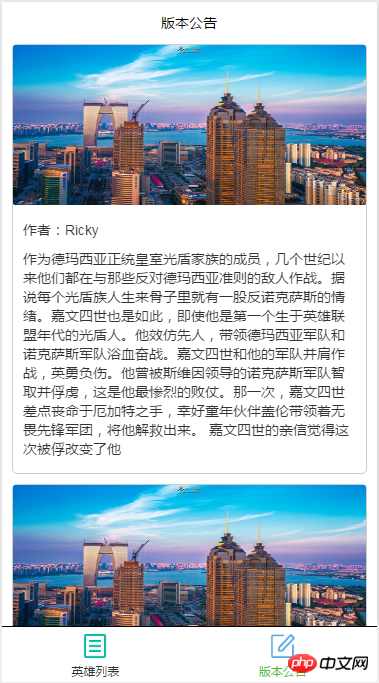
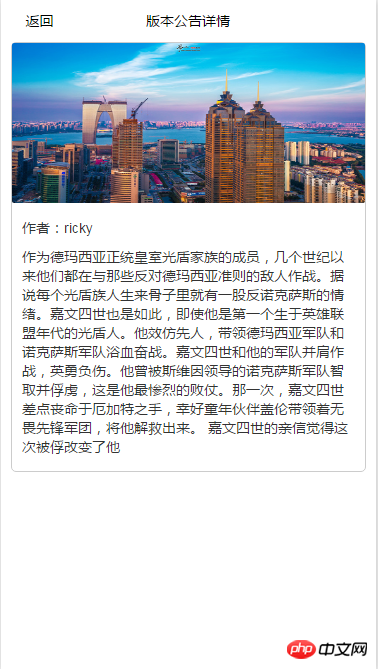
위 내용은 모두의 학습에 도움이 되기를 바랍니다.
관련 추천:
WeChat 애플릿(ecshop)의 쇼핑몰 개발에 대해
위 내용은 위챗 미니 프로그램 개발 소개 LOL 히어로즈의 상세 내용입니다. 자세한 내용은 PHP 중국어 웹사이트의 기타 관련 기사를 참조하세요!