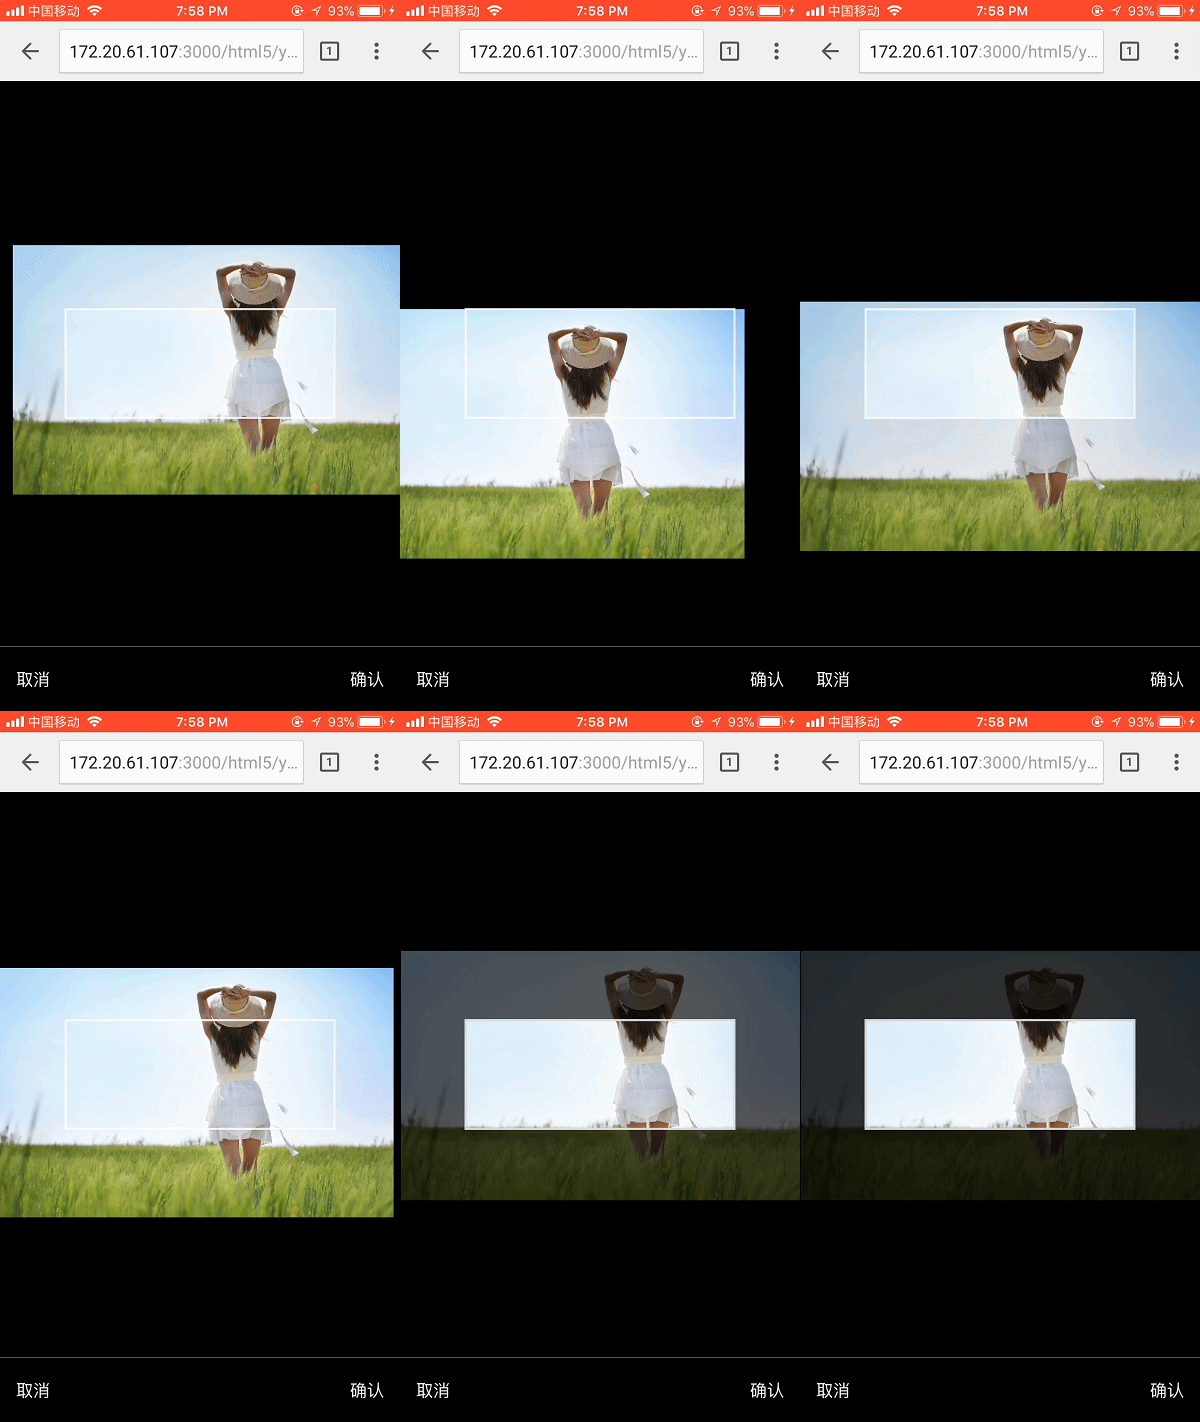
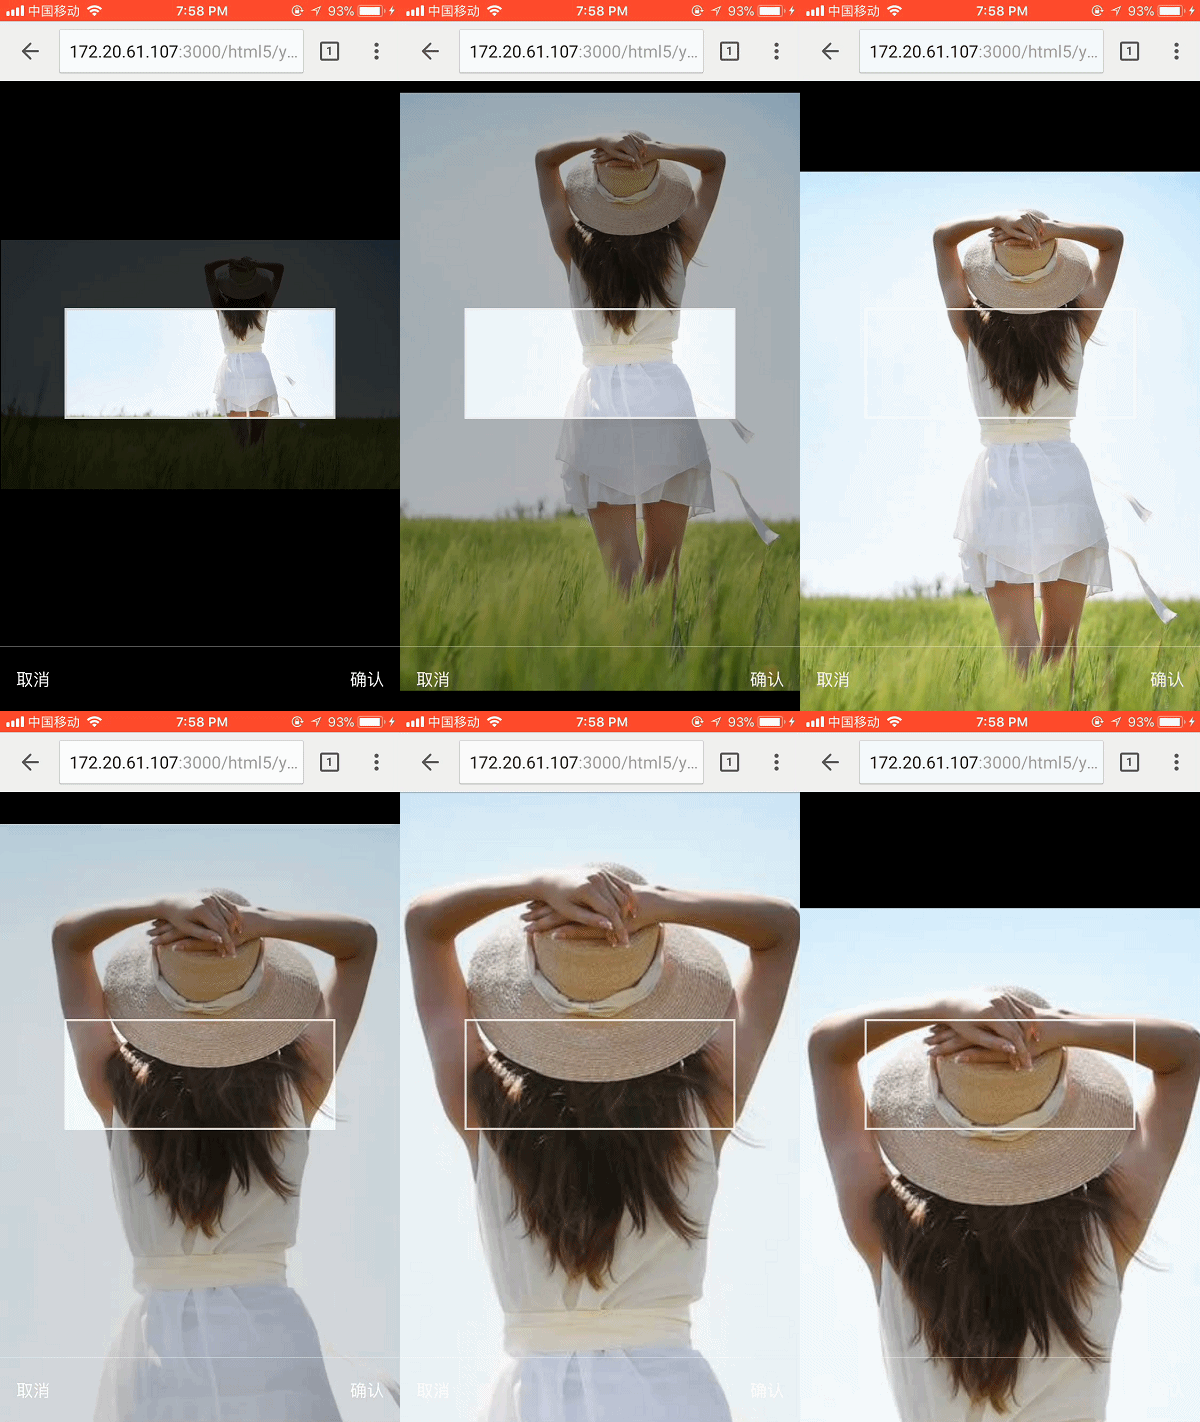
이 글에서는 Vue를 기반으로 한 모바일 단말기 이미지 자르기 컴포넌트의 기능을 소개합니다. 모바일 단말기는 Vue 컴포넌트로 작성되었기 때문에 제가 구현한 아이디어 중 일부를 참고할 수 있습니다. it
최근 프로젝트에서 번호판 인식 기능을 구축하고 싶습니다. 원래는 이미지를 배경으로 던지기만 하면 되는 아주 간단한 줄 알았는데, 테스트해보니 인식률이 20~40%에 불과했습니다. 따라서 제품에서는 사진 촬영 후 사진을 끌어서 확대한 뒤, 번호판 부분을 잘라서 배경에 업로드하면 인식률을 높일 수 있도록 권장하고 있다. 처음에는 기성품이 있는지 알아보기 위해 바이두를 뒤졌으나 적당한 것을 찾을 수 없었습니다. 다행히 이 기능은 크게 불안하지 않아서 주말에 집에서 공부했습니다.
데모 주소 : https://vivialex.github.io/demo/imageClipper/index.html
다운로드 주소 : https://github.com/vivialex/vue-imageClipper
모바일 단말기는 vue를 사용하기 때문에 이는 vue 구성 요소로 작성되었습니다. 아래에서 내 구현 아이디어 중 일부에 대해 이야기해 보겠습니다(기술이 제한되어 있으므로 이해해 주시기 바랍니다. 또한 표시된 코드는 특정 기능의 전체 코드가 아닐 수 있습니다). 효과 먼저:


1. 구성 요소의 초기화 매개변수
1. 이미지 img(url 또는 base64 data-url)
2. 스크린샷의 너비clipperImgWidth
3 .스크린샷의 높이 클리퍼ImgHeight
props: {
  img: String, //url或dataUrl
  clipperImgWidth: {
    type: Number,
    default: 500
  },
  clipperImgHeight: {
    type: Number,
    default: 200
  }
}2. 레이아웃
Z축 방향으로 보면 크게 4개의 레이어로 구성되어 있습니다. 첫 번째 레이어는 전체 컨테이너를 차지하는 캔버스(cCanvas라고 함)입니다. 두 번째 레이어는 투명한 마스크 레이어입니다. 세 번째 레이어는 동일한 영역 크기의 캔버스를 포함하는 잘린 영역(예제 그림의 흰색 상자)입니다. (pCanvas라고 함) 네 번째 레이어는 touchstart, touchmove, touchend 이벤트를 바인딩하는 데 사용되는 투명 레이어 제스처 마스크입니다. 두 캔버스 모두 동일한 그림을 로드하지만 시작 좌표는 다릅니다. 왜 두 개의 캔버스가 필요한가요? 왜냐하면 손가락이 화면을 떠날 때 자르기 영역 외부 표면의 일부에 마스크 레이어 효과가 있어 자르기 영역의 내용을 강조할 수 있는 효과를 만들고 싶기 때문입니다.
<p class="cut-container" ref="cut">
  <canvas ref="canvas"></canvas>
  <!-- 裁剪部分 -->
  <p class="cut-part">
    <p class="pCanvas-container">
      <canvas ref="pCanvas"></canvas>
    </p>
  </p>
  <!-- 底部操作栏 -->
  <p class="action-bar">
    <button class="btn-cancel" @click="_cancel">取消</button>
    <button class="btn-ok" @click="_cut">确认</button>
  </p>
  <!-- 背景遮罩 -->
  <p class="mask" :class="{opacity: maskShow}"></p>
  <!-- 手势操作层 -->
  <p class="gesture-mask" ref="gesture"></p>
</p>3. 캔버스 초기화
캔버스로 그린 그림이 HDPI 디스플레이에서 흐릿하게 표시됩니다. 여기서는 구체적인 이유를 분석하지 않습니다. 여기서 하는 일은 캔버스의 너비와 높이에 CSS 너비/높이의 devicePixelRatio를 곱하고, 캔버스 API를 호출할 때 전달된 매개 변수에 window.devicePixelRatio를 곱하는 것입니다. 마지막으로 두 캔버스 좌표 원점(originXDiff 및 OriginYDiff) 간의 x, y 차이를 기록합니다. 다음과 같습니다
_ratio(size) {
return parseInt(window.devicePixelRatio * size);
},
_initCanvas() {
let $canvas = this.$refs.canvas,
$pCanvas = this.$refs.pCanvas,
clipperClientRect = this.$refs.clipper.getBoundingClientRect(),
clipperWidth = parseInt(this.clipperImgWidth / window.devicePixelRatio),
clipperHeight = parseInt(this.clipperImgHeight / window.devicePixelRatio);
this.ctx = $canvas.getContext('2d');
this.pCtx = $pCanvas.getContext('2d');
//判断clipperWidth与clipperHeight有没有超过容器值
if (clipperWidth < 0 || clipperWidth > clipperClientRect.width) {
clipperWidth = 250
}
if (clipperHeight < 0 || clipperHeight > clipperClientRect.height) {
clipperHeight = 100
}
//因为canvas在手机上会被放大,因此里面的内容会模糊,这里根据手机的devicePixelRatio来放大canvas,然后再通过设置css来收缩,因此关于canvas的所有值或坐标都要乘以devicePixelRatio
$canvas.style.width = clipperClientRect.width + 'px';
$canvas.style.height = clipperClientRect.height + 'px';
$canvas.width = this._ratio(clipperClientRect.width);
$canvas.height = this._ratio(clipperClientRect.height);
$pCanvas.style.width = clipperWidth + 'px';
$pCanvas.style.height = clipperHeight + 'px';
$pCanvas.width = this._ratio(clipperWidth);
$pCanvas.height = this._ratio(clipperHeight);
//计算两个canvas原点的x y差值
let cClientRect = $canvas.getBoundingClientRect(),
pClientRect = $pCanvas.getBoundingClientRect();
this.originXDiff = pClientRect.left - cClientRect.left;
this.originYDiff = pClientRect.top - cClientRect.top;
this.cWidth = cClientRect.width;
this.cHeight = cClientRect.height;
}IV. 이미지 로드
먼저 Image 객체를 생성하고 onload 이벤트를 수신합니다(로드된 이미지가 크로스 도메인일 수 있으므로 crossOrigin 속성을 다음으로 설정합니다. Anonymous를 선택한 다음 서버에서 Access-Control-Allow-Origin 응답 헤더를 설정합니다. 로드된 이미지의 너비와 높이가 컨테이너의 너비와 높이보다 큰 경우 이를 줄여야 합니다. 마지막으로 수직 및 수평 중심 표시()(여기서는 그림을 그리기 전에 너비와 높이 값을 저장하는 것입니다. 그림의 향후 배율은 이 값을 기반으로 한 다음 확대/축소 비율을 곱하기 때문입니다. imgStartWidth, imgStartHeight)
_loadImg() {
  if (this.imgLoading || this.loadImgQueue.length === 0) {
    return;
  }
  let img = this.loadImgQueue.shift();
  if (!img) {
    return;
  }
  let $img = new Image(),
    onLoad = e => {
      $img.removeEventListener('load', onLoad, false);
      this.$img = $img;
      this.imgLoaded = true;
      this.imgLoading = false;
      this._initImg($img.width, $img.height);
      this.$emit('loadSuccess', e);
      this.$emit('loadComplete', e);
      this._loadImg();
    },
    onError = e => {
      $img.removeEventListener('error', onError, false);
      this.$img = $img = null;
      this.imgLoading = false;
      this.$emit('loadError', e);
      this.$emit('loadComplete', e);
      this._loadImg();
    };
  this.$emit('beforeLoad');
  this.imgLoading = true;
  this.imgLoaded = false;
  $img.src = this.img;
  $img.crossOrigin = 'Anonymous'; //因为canvas toDataUrl不能操作未经允许的跨域图片,这需要服务器设置Access-Control-Allow-Origin头
  $img.addEventListener('load', onLoad, false);
  $img.addEventListener('error', onError, false);
}
_initImg(w, h) {
  let eW = null,
    eH = null,
    maxW = this.cWidth,
    maxH = this.cHeight - this.actionBarHeight;
  //如果图片的宽高都少于容器的宽高,则不做处理
  if (w <= maxW && h <= maxH) {
    eW = w;
    eH = h;
  } else if (w > maxW && h <= maxH) {
    eW = maxW;
    eH = parseInt(h / w * maxW);
  } else if (w <= maxW && h > maxH) {
    eW = parseInt(w / h * maxH);
    eH = maxH;
  } else {
    //判断是横图还是竖图
    if (h > w) {
      eW = parseInt(w / h * maxH);
      eH = maxH;
    } else {
      eW = maxW;
      eH = parseInt(h / w * maxW);
    }
  }
  if (eW <= maxW && eH <= maxH) {
    //记录其初始化的宽高,日后的缩放功能以此值为基础
    this.imgStartWidth = eW;
    this.imgStartHeight = eH;
    this._drawImage((maxW - eW) / 2, (maxH - eH) / 2, eW, eH);
  } else {
    this._initImg(eW, eH);
  }
}5. 이미지 그리기
다음 _drawImage에는 4개의 매개변수가 있는데, 이는 cCanvas에 해당하는 이미지의 x, y 좌표와 cCanvas의 현재 너비 및 높이 w, h입니다. 이미지. 이 함수는 먼저 캔버스의 너비와 높이를 재설정하여 두 캔버스의 내용을 지웁니다. 그런 다음 구성 요소 인스턴스에서 해당 값을 업데이트하고 마지막으로 두 캔버스의 drawImage를 호출하여 그림을 그립니다. pCanvas의 경우 그려진 그림의 좌표 값은 x와 y에서 해당 OriginXDiff와 OriginYDiff를 뺀 값입니다(실제로는 좌표계 표시를 전환하는 것과 동일하므로 원점 간의 x와 y 차이만 빼면 됩니다). 두 개의 좌표계) ). 코드를 살펴보세요
_drawImage(x, y, w, h) {
  this._clearCanvas();
  this.imgX = parseInt(x);
  this.imgY = parseInt(y);
  this.imgCurrentWidth = parseInt(w);
  this.imgCurrentHeight = parseInt(h);
  //更新canvas
  this.ctx.drawImage(this.$img, this._ratio(x), this._ratio(y), this._ratio(w), this._ratio(h));
  //更新pCanvas,只需要减去两个canvas坐标原点对应的差值即可
  this.pCtx.drawImage(this.$img, this._ratio(x - this.originXDiff), this._ratio(y - this.originYDiff), this._ratio(w), this._ratio(h));
},
_clearCanvas() {
  let $canvas = this.$refs.canvas,
    $pCanvas = this.$refs.pCanvas;
  $canvas.width = $canvas.width;
  $canvas.height = $canvas.height;
  $pCanvas.width = $pCanvas.width;
  $pCanvas.height = $pCanvas.height;
}6. 움직이는 그림
움직이는 그림의 구현은 매우 간단합니다. 먼저 touchstart, touchmove 및 touchend 이벤트를 제스처 마스크에 바인딩합니다. 아래에 소개되어 있습니다
먼저 scx, scy(손가락의 시작 좌표), iX, iY(cCanvas를 기준으로 한 그림의 현재 좌표) 4개의 변수를 정의합니다.
1. touchstart
방법은 매우 간단합니다. 즉, 페이지를 가져오고 이동 후 x 좌표는 iX + f1x - scx와 같고 y 좌표는 동일하며 마지막으로 _drawImage를 호출하여 이미지를 업데이트합니다.
코드를 살펴보겠습니다
_initEvent() {
  let $gesture = this.$refs.gesture,
    scx = 0,
    scy = 0;
  let iX = this.imgX,
    iY = this.imgY;
  $gesture.addEventListener('touchstart', e => {
    if (!this.imgLoaded) {
      return;
    }
    let finger = e.touches[0];
      scx = finger.pageX;
      scy = finger.pageY;
      iX = this.imgX;
      iY = this.imgY;
  }, false);
  $gesture.addEventListener('touchmove', e => {
    e.preventDefault();
    if (!this.imgLoaded) {
      return;
    }
    let f1x = e.touches[0].pageX,
      f1y = e.touches[0].pageY;
      this._drawImage(iX + f1x - scx, iY + f1y - scy, this.imgCurrentWidth, this.imgCurrentHeight);
  }, false);
}七、缩放图片(这里不作特别说明的坐标都是相对于cCanvas坐标系)
绘制缩放后的图片无非需要4个参数,缩放后图片左上角的坐标以及宽高。求宽高相对好办,宽高等于imgStartWidth * 缩放比率与imgstartHeight * 缩放倍率(imgStartWidth ,imgstartHeight 上文第四节有提到)。接下来就是求缩放倍率的问题了,首先在touchstart事件上求取两手指间的距离d1;然后在touchmove事件上继续求取两手指间的距离d2,当前缩放倍率= 初始缩放倍率 + (d2-d1) / 步长(例如每60px算0.1),touchend事件上让初始缩放倍率=当前缩放倍率。
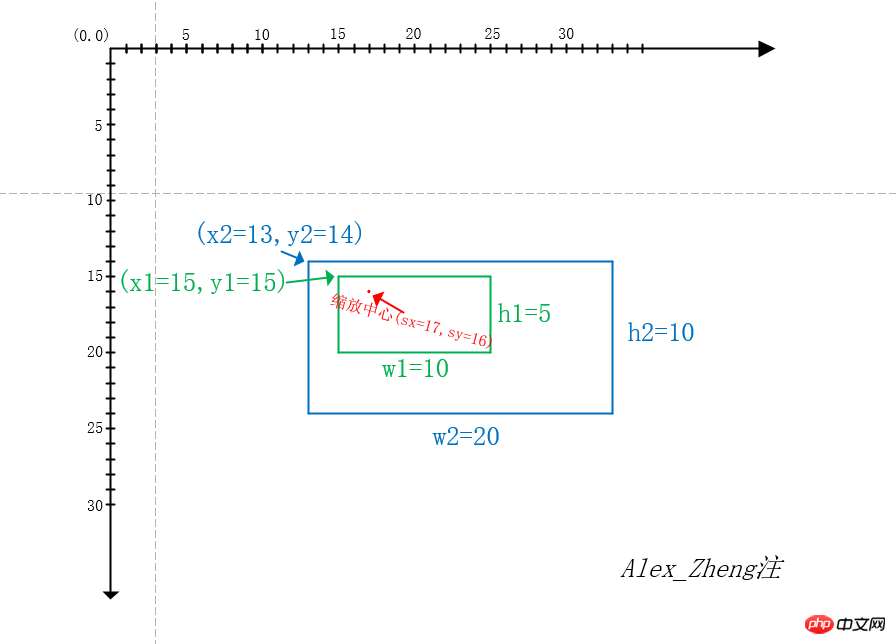
至于如何求取缩放后图片左上角的坐标值,在草稿纸上画来画去,画了很久......终于有点眉目。首先要找到一个缩放中心(这里做法是取双指的中点坐标,但是这个坐标必须要位于图片上,如果不在图片上,则取图片上离该中点坐标最近的点),然后存在下面这个等式
(缩放中心x坐标 - 缩放后图片左上角x坐标)/ 缩放后图片的宽度 = (缩放中心x坐标 - 缩放前图片左上角x坐标)/ 缩放前图片的宽度;(y坐标同理)
接下来看看下面这个例子(在visio找了很久都没有画坐标系的功能,所以只能手工画了)

绿色框是一张10*5的图片,蓝色框是宽高放大两倍后的图片20*10,根据上面的公式推算的x2 = sx - w2(sx - x1) / w1,y2 = sy - h2(sy - y1) / h1。
坚持...继续看看代码吧
_initEvent() {
let $gesture = this.$refs.gesture,
cClientRect = this.$refs.canvas.getBoundingClientRect(),
scx = 0, //对于单手操作是移动的起点坐标,对于缩放是图片距离两手指的中点最近的图标。
scy = 0,
fingers = {}; //记录当前有多少只手指在触控屏幕
//one finger
let iX = this.imgX,
iY = this.imgY;
//two finger
let figureDistance = 0,
pinchScale = this.imgScale;
$gesture.addEventListener('touchstart', e => {
if (!this.imgLoaded) {
return;
}
if (e.touches.length === 1) {
let finger = e.touches[0];
scx = finger.pageX;
scy = finger.pageY;
iX = this.imgX;
iY = this.imgY;
fingers[finger.identifier] = finger;
} else if (e.touches.length === 2) {
let finger1 = e.touches[0],
finger2 = e.touches[1],
f1x = finger1.pageX - cClientRect.left,
f1y = finger1.pageY - cClientRect.top,
f2x = finger2.pageX - cClientRect.left,
f2y = finger2.pageY - cClientRect.top;
scx = parseInt((f1x + f2x) / 2);
scy = parseInt((f1y + f2y) / 2);
figureDistance = this._pointDistance(f1x, f1y, f2x, f2y);
fingers[finger1.identifier] = finger1;
fingers[finger2.identifier] = finger2;
//判断变换中点是否在图片中,如果不是则去离图片最近的点
if (scx < this.imgX) {
scx = this.imgX;
}
if (scx > this.imgX + this.imgCurrentWidth) {
scx = this.imgX + this.imgCurrentHeight;
}
if (scy < this.imgY) {
scy = this.imgY;
}
if (scy > this.imgY + this.imgCurrentHeight) {
scy = this.imgY + this.imgCurrentHeight;
}
}
}, false);
$gesture.addEventListener('touchmove', e => {
e.preventDefault();
if (!this.imgLoaded) {
return;
}
this.maskShowTimer && clearTimeout(this.maskShowTimer);
this.maskShow = false;
if (e.touches.length === 1) {
let f1x = e.touches[0].pageX,
f1y = e.touches[0].pageY;
this._drawImage(iX + f1x - scx, iY + f1y - scy, this.imgCurrentWidth, this.imgCurrentHeight);
} else if (e.touches.length === 2) {
let finger1 = e.touches[0],
finger2 = e.touches[1],
f1x = finger1.pageX - cClientRect.left,
f1y = finger1.pageY - cClientRect.top,
f2x = finger2.pageX - cClientRect.left,
f2y = finger2.pageY - cClientRect.top,
newFigureDistance = this._pointDistance(f1x, f1y, f2x, f2y),
scale = this.imgScale + parseFloat(((newFigureDistance - figureDistance) / this.imgScaleStep).toFixed(1));
fingers[finger1.identifier] = finger1;
fingers[finger2.identifier] = finger2;
if (scale !== pinchScale) {
//目前缩放的最小比例是1,最大是5
if (scale < this.imgMinScale) {
scale = this.imgMinScale;
} else if (scale > this.imgMaxScale) {
scale = this.imgMaxScale;
}
pinchScale = scale;
this._scale(scx, scy, scale);
}
}
}, false);
$gesture.addEventListener('touchend', e => {
if (!this.imgLoaded) {
return;
}
this.imgScale = pinchScale;
//从finger删除已经离开的手指
let touches = Array.prototype.slice.call(e.changedTouches, 0);
touches.forEach(item => {
delete fingers[item.identifier];
});
//迭代fingers,如果存在finger则更新scx,scy,iX,iY,因为可能缩放后立即单指拖动
let i,
fingerArr = [];
for(i in fingers) {
if (fingers.hasOwnProperty(i)) {
fingerArr.push(fingers[i]);
}
}
if (fingerArr.length > 0) {
scx = fingerArr[0].pageX;
scy = fingerArr[0].pageY;
iX = this.imgX;
iY = this.imgY;
} else {
this.maskShowTimer = setTimeout(() => {
this.maskShow = true;
}, 300);
}
//做边界值检测
let x = this.imgX,
y = this.imgY,
pClientRect = this.$refs.pCanvas.getBoundingClientRect();
if (x > pClientRect.left + pClientRect.width) {
x = pClientRect.left
} else if (x + this.imgCurrentWidth < pClientRect.left) {
x = pClientRect.left + pClientRect.width - this.imgCurrentWidth;
}
if (y > pClientRect.top + pClientRect.height) {
y = pClientRect.top;
} else if (y + this.imgCurrentHeight < pClientRect.top) {
y = pClientRect.top + pClientRect.height - this.imgCurrentHeight;
}
if (this.imgX !== x || this.imgY !== y) {
this._drawImage(x, y, this.imgCurrentWidth, this.imgCurrentHeight);
}
});
},
_scale(x, y, scale) {
let newPicWidth = parseInt(this.imgStartWidth * scale),
newPicHeight = parseInt(this.imgStartHeight * scale),
newIX = parseInt(x - newPicWidth * (x - this.imgX) / this.imgCurrentWidth),
newIY = parseInt(y - newPicHeight * (y - this.imgY) / this.imgCurrentHeight);
this._drawImage(newIX, newIY, newPicWidth, newPicHeight);
},
_pointDistance(x1, y1, x2, y2) {
return parseInt(Math.sqrt((x1 - x2) * (x1 - x2) + (y1 - y2) * (y1 - y2)));
}说明一下fingers是干嘛的,是用来记录当前有多少只手指在屏幕上触摸。可能会出现这种情况,双指缩放后,其中一只手指移出显示屏,而另外一个手指在显示屏上移动。针对这种情况,要在touchend事件上根据e.changedTouches来移除fingers里已经离开显示屏的finger,如果此时fingers里只剩下一个finger,则更新scx,scy,iX,iY为移动图片做初始化准备。
八、裁剪图片
这里很简单,就调用pCanvas的toDataURL方法就可以了
_clipper() {
  let imgData = null;
  try {
    imgData = this.$refs.pCanvas.toDataURL();
  } catch (e) {
    console.error('请在response header加上Access-Control-Allow-Origin,否则canvas无法裁剪未经许可的跨域图片');
  }
  this.$emit('sure', imgData);
}上面是我整理给大家的,希望今后会对大家有帮助。
相关文章:
在Bootstrap框架里使用treeview如何实现动态加载数据
위 내용은 Vue 모바일 터미널을 사용하여 이미지 자르기 컴포넌트를 구현하는 방법의 상세 내용입니다. 자세한 내용은 PHP 중국어 웹사이트의 기타 관련 기사를 참조하세요!