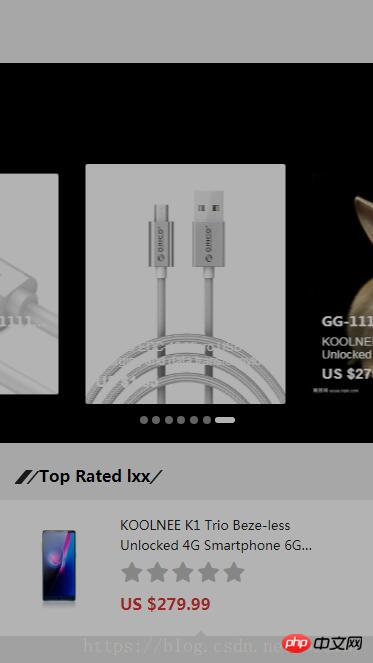
이 글은 주로 VUE 3D 캐러셀 차트 캡슐화의 구현 방법을 소개합니다. 관심 있는 친구들은 이를 참고할 수 있습니다.
이 글은 참고를 위해 VUE 3D 캐러셀 차트 캡슐화의 구체적인 코드를 공유합니다. 구체적인 내용은 다음과 같습니다
1. 체험주소
VUE 3D 캐러셀 지도

2. 기능 포인트 구현
(1), 심리스 캐러셀
(2) , 입력하시면 확대, 축소 놔두기 (3D와 같은 전환 효과)
3. js code
<!--轮播图插件模板-->
<template>
</template>
<script type="text/ecmascript-6">
import {swiper, swiperSlide} from 'vue-awesome-swiper'
require('swiper/dist/css/swiper.css');//注意这里
import Pageination from "./pageination"
import { mapActions, mapMutations, mapGetters, mapState} from "vuex"
import {getPriceSymbolValue} from '../../util/tool/index'
export default {
//props: ['bannerList'],
data() {
let _self=this;
return {
pageinationIndex:0,
data: {
"bannerList":[]
},
swiperOption: {
loop: true, // 循环
speed:500, //切换速度
mousewheelControl: false,// 禁止鼠标滚轮切换
lazy: {
loadPrevNext: true,
},
pagination: {
el: '.swiper-pagination',
},
autoplay: {
delay:2000,
stopOnLastSlide: false, // 切换到最后一个时不停止
disableOnInteraction: false, //用户操作swiper之后 不停止autoplay
},
watchSlidesProgress:true,
centeredSlides: true, //设定为true时,活动块会居中,而不是默认状态下的居左。
spaceBetween:10,
slidesPerView: 1.7,
loopedSlides :2,
observer: true,
observeParents: true
}
}
},
methods: {
},
mounted() {
// 这边就可以使用swiper这个对象去使用swiper官网中的那些方法
// this.$nextTick(function() {
// this.swiper.slideTo(3, 10, false);
// });
},
computed: {
swiper() {
return this.$refs.mySwiper.swiper
}
},
components: {
swiper,
swiperSlide,
Pageination
}
}
</script>
<style lang="scss" type="text/scss">
</style>위 내용은 이 글의 전체 내용입니다. 모두의 학습에 도움이 되었으면 좋겠습니다. 더 많은 관심 부탁드립니다. 관련 내용 PHP 중국어 웹사이트!
관련 권장사항:
vue를 사용하여 버튼을 클릭하여 패널 밖으로 슬라이드하기 실현
위 내용은 VUE 3D 캐러셀 다이어그램 캡슐화 구현 방법의 상세 내용입니다. 자세한 내용은 PHP 중국어 웹사이트의 기타 관련 기사를 참조하세요!