yii2 404 오류 처리

yii2 404 오류 처리
프론트엔드와 백엔드 구성 방법은 동일합니다. 여기서는 프론트엔드를 보여줍니다
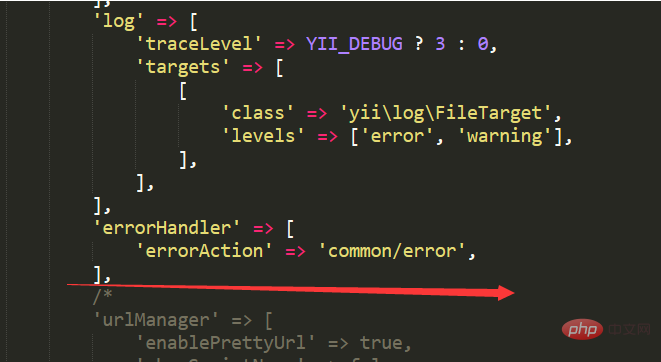
1 먼저 yii 프레임워크의 frontendconfig 폴더로 이동합니다. 파일을 열고 편집기를 열고 컨트롤러 이름과 메서드 이름을 수정합니다.
'errorHandler' => [
'errorAction' => 'common/error',
],
권장 학습: yii Framework
표시된 대로:

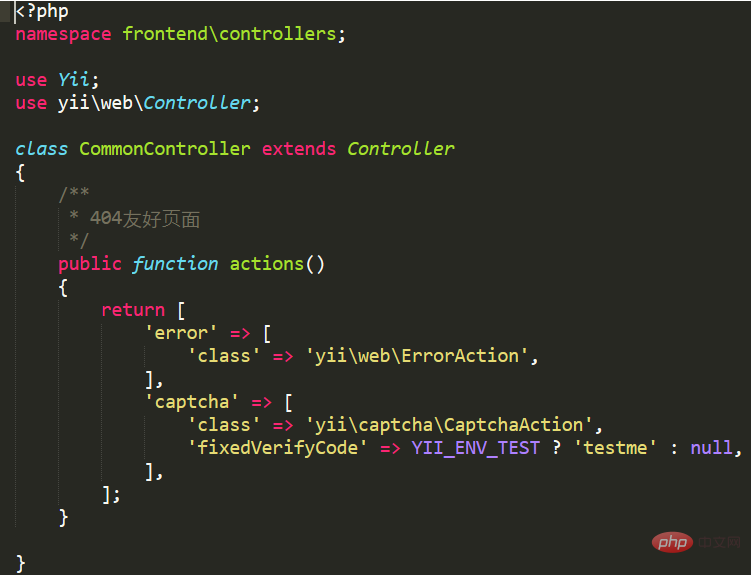
2. 그런 다음 컨트롤러로 이동하여 컨트롤러를 만들고 다음을 작성합니다. 코드:
/**
 * 404友好页面
 */
public function actions(){
return [
'error' => [
        'class' => 'yii\web\ErrorAction',
        ],
        'captcha' => [
        'class' => 'yii\captcha\CaptchaAction',
            'fixedVerifyCode' => YII_ENV_TEST ? 'testme' : null,
        ,
];
}그림에 표시된 대로:

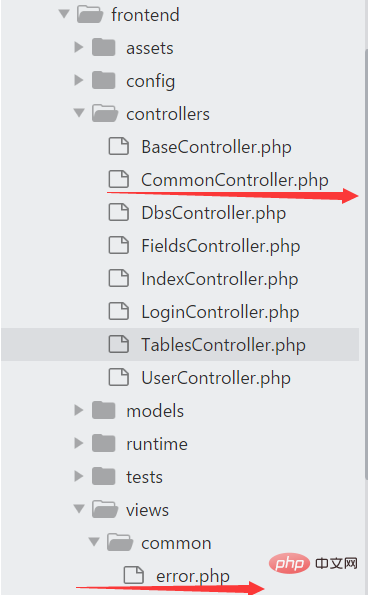
3. 마지막으로 V 레이어에서 뷰를 만듭니다(여기는 error.php입니다):
<?php
    $this->context->layout = false; //不加载公共样式
?>
<!DOCTYPE html>
<html>
<head>
<title>404错误,您所访问的页面不存在!</title>
<meta charset="utf-8">
<link rel="stylesheet" href="css/style.css"/>
<link rel="stylesheet" href="css/base.css"/>
</head>
<body>
<div id="errorpage">
    <div class="tfans_error">
        <div class="logo"></div>
        <div class="errortans clearfix">
            <div class="e404"></div>
            <p><b>出错啦!</b></p>
            <p>您访问的页面不存在</p>
            <div class="bt" ><a href="?r=index/index">返回首页</a></div>
        </div>
    </div>
</div>
</body>
</html>그림에 표시된 대로:

위 내용은 yii2 404 오류 처리의 상세 내용입니다. 자세한 내용은 PHP 중국어 웹사이트의 기타 관련 기사를 참조하세요!

핫 AI 도구

Undresser.AI Undress
사실적인 누드 사진을 만들기 위한 AI 기반 앱

AI Clothes Remover
사진에서 옷을 제거하는 온라인 AI 도구입니다.

Undress AI Tool
무료로 이미지를 벗다

Clothoff.io
AI 옷 제거제

AI Hentai Generator
AI Hentai를 무료로 생성하십시오.

인기 기사

뜨거운 도구

메모장++7.3.1
사용하기 쉬운 무료 코드 편집기

SublimeText3 중국어 버전
중국어 버전, 사용하기 매우 쉽습니다.

스튜디오 13.0.1 보내기
강력한 PHP 통합 개발 환경

드림위버 CS6
시각적 웹 개발 도구

SublimeText3 Mac 버전
신 수준의 코드 편집 소프트웨어(SublimeText3)

뜨거운 주제
 7517
7517
 15
15
 1378
1378
 52
52
 79
79
 11
11
 53
53
 19
19
 21
21
 66
66
 클라우드 네이티브 환경에서 YII를 사용하기위한 모범 사례는 무엇입니까?
Mar 18, 2025 pm 04:39 PM
이 기사는 컨테이너화, 오케스트레이션 및 보안 조치를 통한 확장 성, 신뢰성 및 효율성에 중점을 둔 클라우드 네이티브 환경에 YII 애플리케이션을 배포하기위한 모범 사례에 대해 설명합니다.
 서버리스 아키텍처에서 YII를 사용하기위한 주요 고려 사항은 무엇입니까?
Mar 18, 2025 pm 04:33 PM
이 기사는 Serverless Architectures에서 YII를 사용하기위한 주요 고려 사항에 대해 논의하고, 무국적, 콜드 스타트, 기능 크기, 데이터베이스 상호 작용, 보안 및 모니터링에 중점을 둡니다. 또한 최적화 전략과 잠재적 인적 통합을 다룹니다
 YII의 내장 테스트 프레임 워크의 주요 기능은 무엇입니까?
Mar 18, 2025 pm 04:41 PM
YII의 내장 테스트 프레임 워크는 PHPUnit 통합, 고정 장치 관리 및 다양한 테스트 유형 지원과 같은 기능으로 응용 프로그램 테스트를 향상시켜 코드 품질 및 개발 관행을 향상시킵니다.
 YII 애플리케이션 성능을 모니터링하고 프로파일 링하는 데 가장 적합한 도구는 무엇입니까?
Mar 17, 2025 pm 01:52 PM
이 기사는 YII 디버그 도구 모음, Blackfire, New Relic, Xdebug 및 Datadog 및 Dynatrace와 같은 APM 솔루션을 포함하여 YII Debug 도구 모음을 모니터링하고 프로파일 링하는 도구에 대해 설명합니다.
 CodeCeption으로 YII 애플리케이션을 테스트하기위한 가장 좋은 전략은 무엇입니까?
Mar 18, 2025 pm 04:27 PM
이 기사는 CodeCeption을 사용하여 YII 응용 프로그램을 테스트하기위한 전략, 내장 모듈, BDD, 다양한 테스트 유형, 조롱, CI 통합 및 코드 범위에 중점을 둔 전략에 대해 설명합니다.
 YII 및 WebSockets와 실시간 데이터 동기화를 구현하는 방법은 무엇입니까?
Mar 18, 2025 pm 04:34 PM
이 기사는 YII 및 WebSockets를 사용하여 실시간 데이터 동기화 구현, 성능 및 보안을위한 설정, 통합 및 모범 사례를 다루는 것에 대해 설명합니다.
 생산에 YII 애플리케이션을 배포 할 때 주요 고려 사항은 무엇입니까?
Mar 17, 2025 pm 01:58 PM
이 기사는 생산에 YII 애플리케이션을 배포하고 환경 설정, 구성 관리, 성능 최적화, 보안, 로깅, 모니터링, 배포 전략 및 백업/복구 계획에 중점을 둔 주요 고려 사항에 대해 설명합니다.
 SaaS 애플리케이션 구축에 YII를 사용하면 주요 이점은 무엇입니까?
Mar 18, 2025 pm 04:25 PM
이 기사는 SaaS 개발에 대한 YII의 이점, 성능, 보안 및 신속한 개발 기능에 중점을 두어 확장 성을 향상시키고 시장 마켓을 줄입니다.


