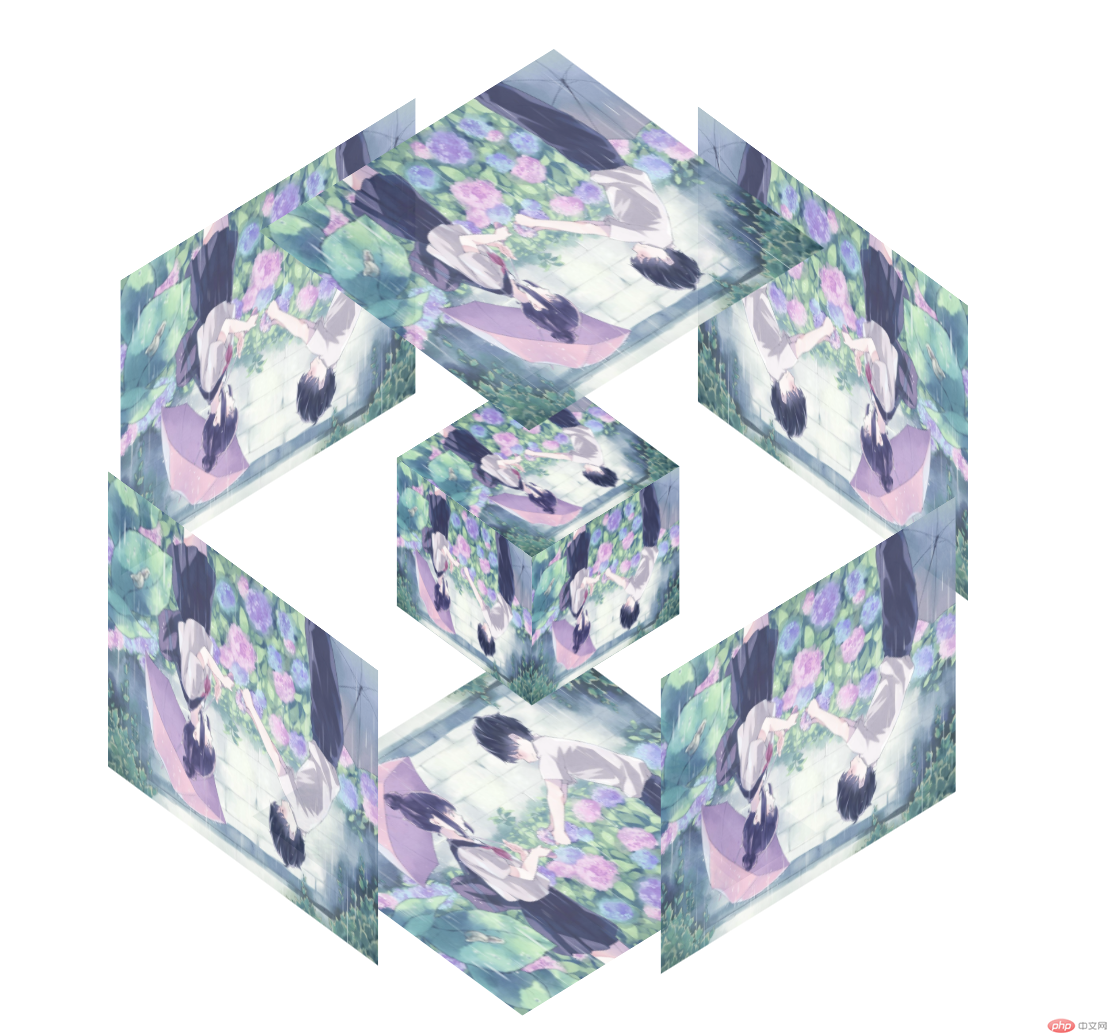
520이 곧 출시될 예정인데, 화이트 매직 도구 사용법을 가르쳐 드리겠습니다. 싱글 프로그래머라면 배우기가 매우 쉽다고 생각합니다.
제작 단계:
1. 새 코드 디렉터리를 만들고 index.html이라는 새 파일을 만들고 다음 코드를 파일에 복사합니다.
2. 새 폴더 이미지를 만들고 12개의 사진을 찾아 넣습니다. 그리고 imgae 태그 속성에 해당하는 src를 수정하면 멋진 사진 회전이 완료됩니다.
3 코드 효과는 다음과 같습니다. index.html을 두 번 클릭하거나 브라우저로 직접 드래그하여 엽니다.
<!doctype html>
<html>
<head>
    <meta charset="utf-8">
    <title>520表白神器-照片特效</title>
    <style>
        *{
            padding:0;
            margin:0;
        }
        #react{
            width: 200px;
            height:200px;
            margin: 200px auto;
            transform-style:preserve-3d;
            animation:rotate 20s infinite;
            animation-timing-function: linear;
        }
        #react div{
            position:absolute;
            transition: all .4s;
        }
        div .out_pic{
            width:200px;
            height:200px;
            opacity:0.9;
        }
        div .in_pic{
            width:100px;
            height:100px;
        }
        #react span{
            display:block;
            position:absolute;
            width:100px;
            height:100px;
            top:50px;
            left:50px;
        }
        @keyframes rotate{
            from{transform: rotateX(0deg) rotateY(0deg);}
            to{transform: rotateX(360deg) rotateY(360deg);}
        }
        .out_frount{
            transform:translateZ(100px);
        }
        .out_back{
            transform:translateZ(-100px);
        }
        .out_left{
            transform:rotateY(90deg) translateZ(100px);
        }
        .out_right{
            transform: rotateY(-90deg) translateZ(100px);
        }
        .out_top{
            transform:rotateX(90deg) translateZ(100px);
        }
        .out_bottom{
            transform: rotateX(-90deg) translateZ(100px);
        }
        .in_frount{
            transform:translateZ(50px);
        }
        .in_back{
            transform:translateZ(-50px);
        }
        .in_left{
            transform:rotateY(90deg) translateZ(50px);
        }
        .in_right{
            transform: rotateY(-90deg) translateZ(50px);
        }
        .in_top{
            transform:rotateX(90deg) translateZ(50px);
        }
        .in_bottom{
            transform: rotateX(-90deg) translateZ(50px);
        }
        #react:hover .out_frount{
            transform:translateZ(200px);
        }
        #react:hover .out_back{
            transform:translateZ(-200px);
        }
        #react:hover .out_left{
            transform:rotateY(90deg) translateZ(200px);
        }
        #react:hover .out_right{
            transform: rotateY(-90deg) translateZ(200px);
        }
        #react:hover .out_top{
            transform:rotateX(90deg) translateZ(200px);
        }
        #react:hover .out_bottom{
            transform: rotateX(-90deg) translateZ(200px);
        }
        @charset "utf-8";
        /* CSS Document */
    </style>
</head>

<body>
<div id="react">
    <div class="out_frount">
        <image src="image/1.jpg" class="out_pic">
    </div>
    <div class="out_back">
        <image src="image/1.jpg" class="out_pic">
    </div>
    <div class="out_left">
        <image src="image/1.jpg" class="out_pic">
    </div>
    <div class="out_right">
        <image src="image/1.jpg" class="out_pic">
    </div>
    <div class="out_top">
        <image src="image/1.jpg" class="out_pic">
    </div>
    <div class="out_bottom">
        <image src="image/1.jpg" class="out_pic">
    </div>
    <span class="in_frount">
        <image src="image/1.jpg" class="in_pic">
    </span>
    <span class="in_back">
        <image src="image/1.jpg" class="in_pic">
    </span>
    <span class="in_left">
        <image src="image/1.jpg" class="in_pic">
    </span>
    <span class="in_right">
        <image src="image/1.jpg" class="in_pic">
    </span>
    <span class="in_top">
        <image src="image/1.jpg" class="in_pic">
    </span>
    <span class="in_bottom">
        <image src="image/1.jpg" class="in_pic">
    </span>
</div>
</body>
</html>
이것은 싱글을 없애고 빠르게 학습할 수 있는 유일한 단계입니다. 돌아와서 팔로우하는 것을 잊지 마세요!
위 내용은 프론트엔드 특수효과 520 고백 유물 회전 포토월의 상세 내용입니다. 자세한 내용은 PHP 중국어 웹사이트의 기타 관련 기사를 참조하세요!