
SMS 서비스 활성화
먼저 이 웹사이트로 이동하여 Alibaba Cloud의 SMS 문자 메시지 서비스를 활성화하십시오: https://www.aliyun.com/product/sms?spm=5176.8142029.388261.295 .vU5 T5g
관련 학습 권장사항: php 프로그래밍(동영상)
서명 및 템플릿 생성
SMS 서버를 사용하려면 먼저 서명과 템플릿을 생성하고 다음에 제출해야 합니다. SMS 서비스를 정상적으로 사용하기 전에 Alibaba Cloud를 검토하세요.
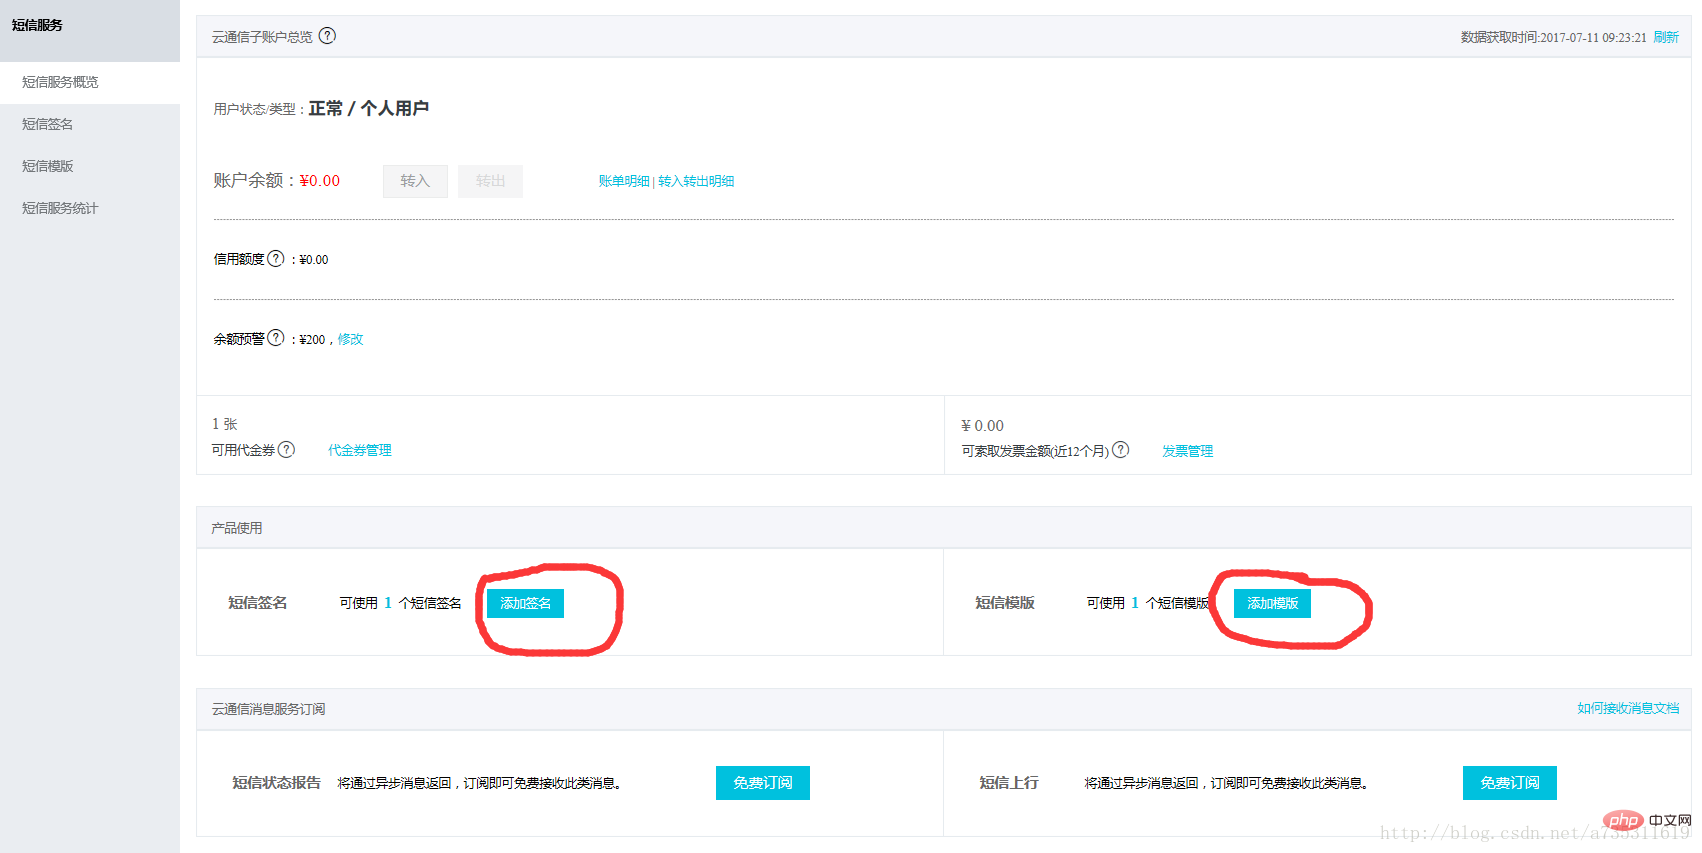
서명 만들기
서명을 만들 때 서명 이름에 주의하면 나머지는 번거롭지 않습니다.
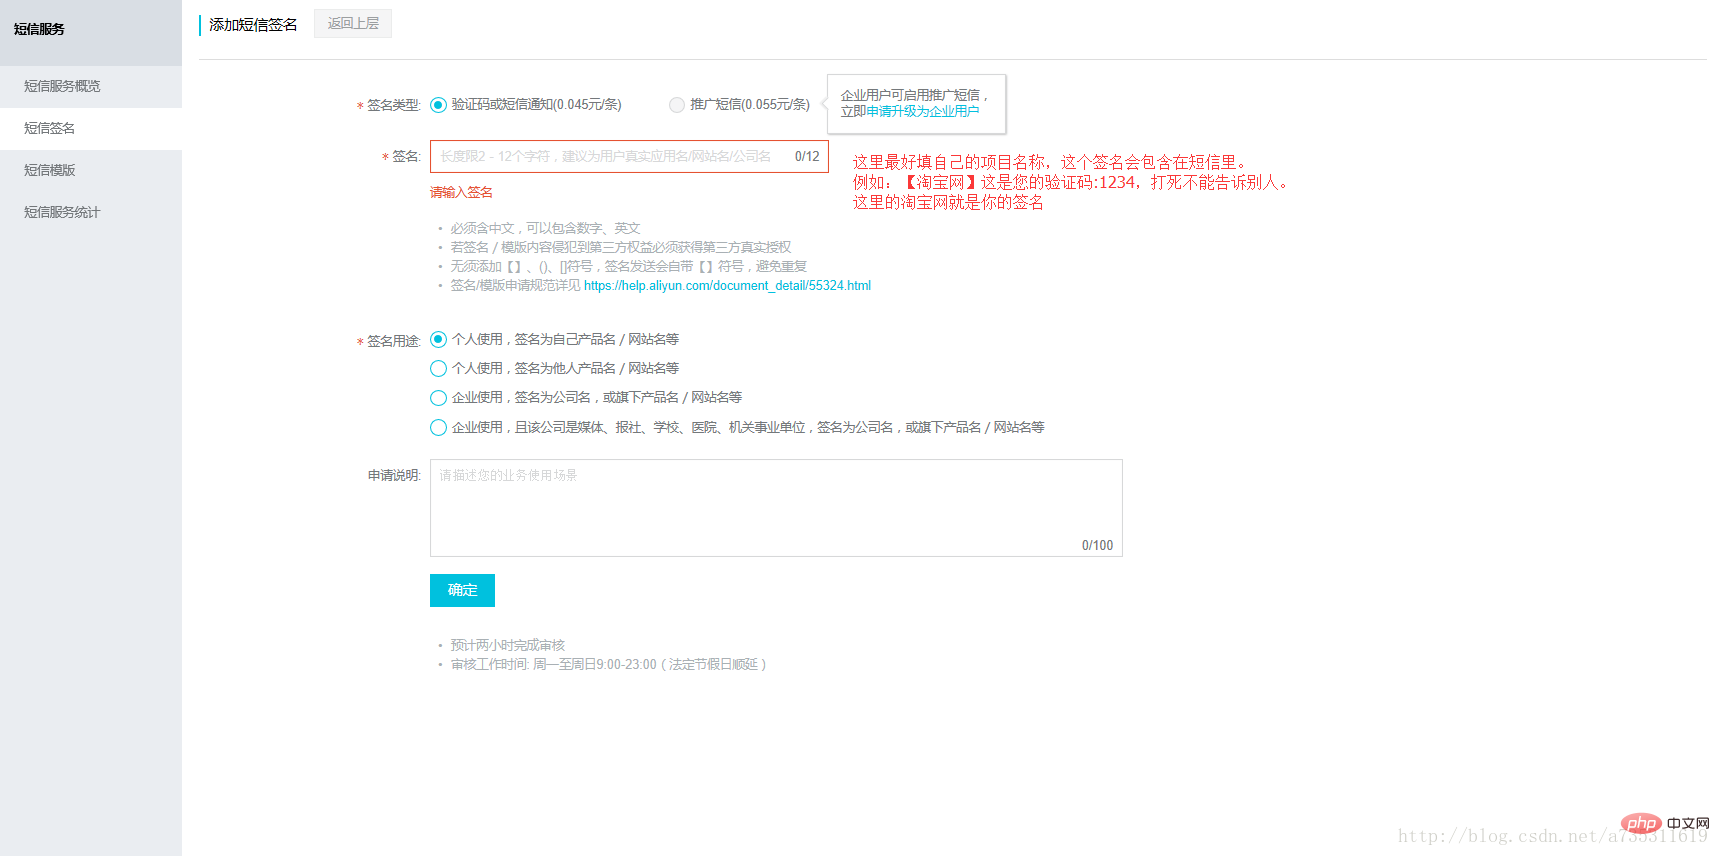
서명 이름 기억하기
이제 생성한 서명 이름을 기억하세요. 나중에 코드에서 필요합니다.
템플릿 만들기
템플릿을 만드는 방법도 매우 간단하며, Alibaba Cloud에서 작성 방법을 명확하게 작성했습니다.
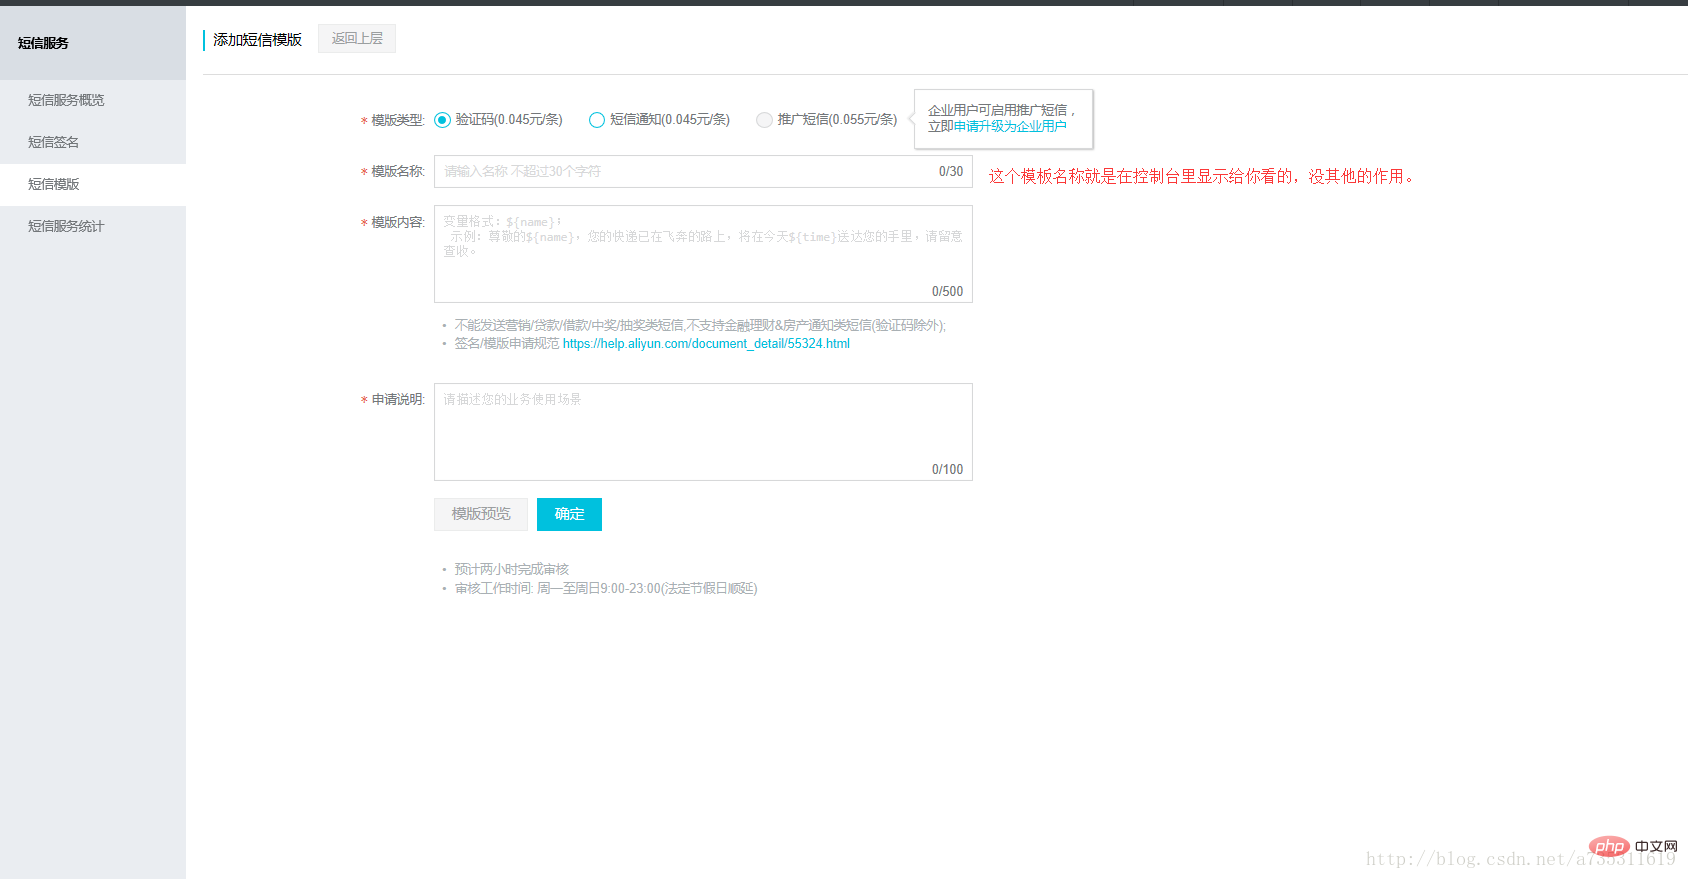
템플릿 CODE
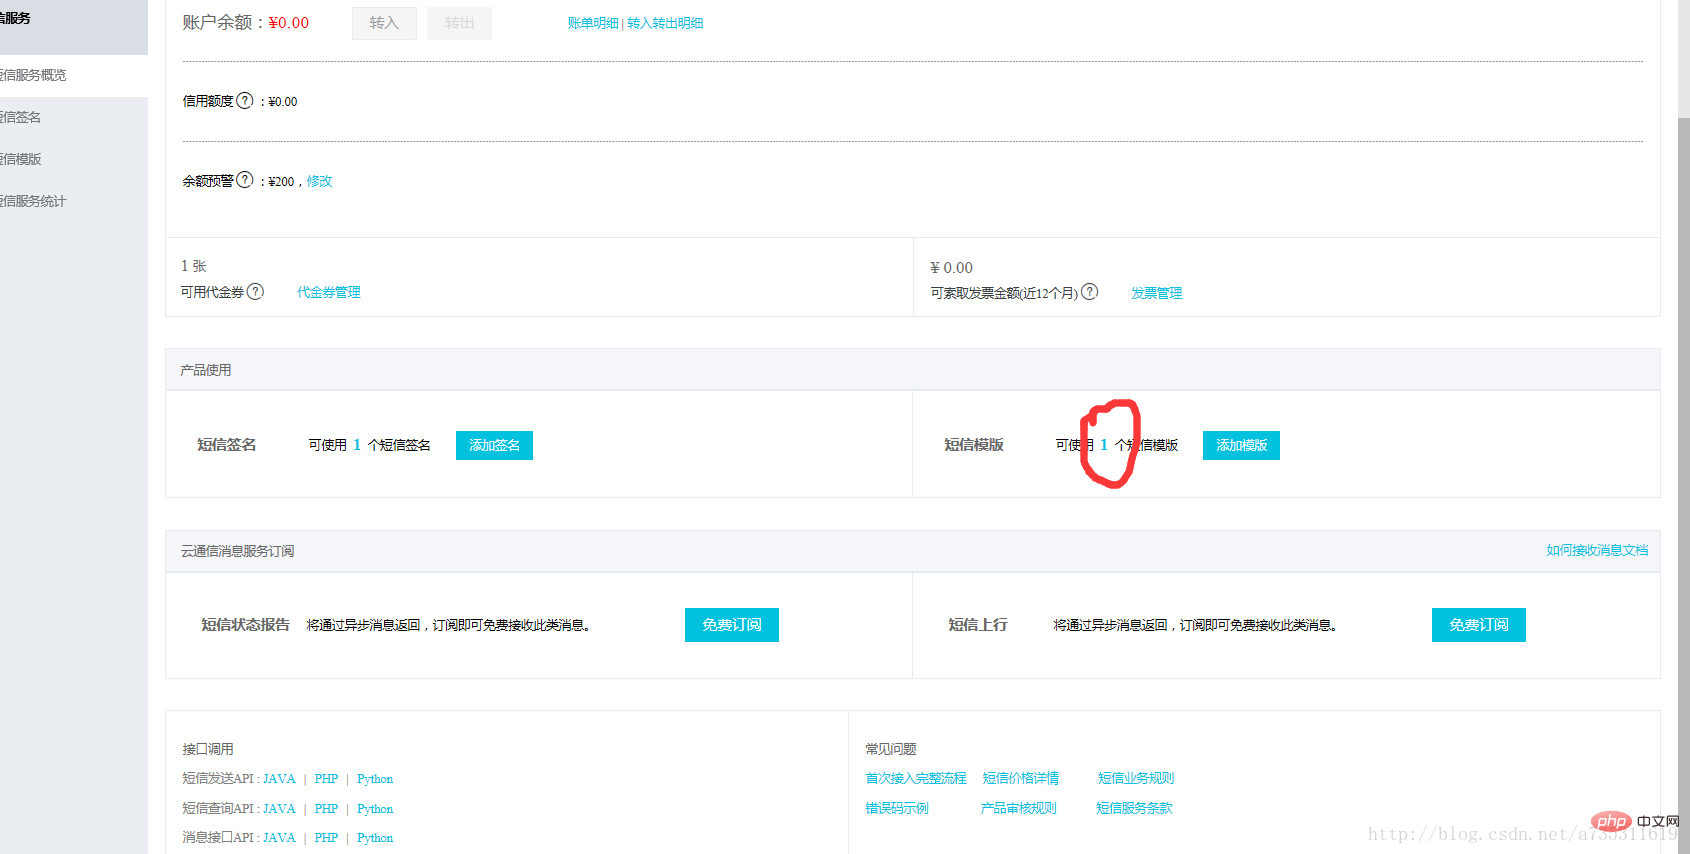
를 보고 기억하세요. 콘솔로 돌아가면 템플릿이 승인되면 0보다 큰 숫자가 나타납니다.
이 번호를 클릭하시면 템플릿 관리 패널로 들어가며 템플릿 코드를 확인하실 수 있습니다.

KeyId 및 KeySecret 생성 및 기억
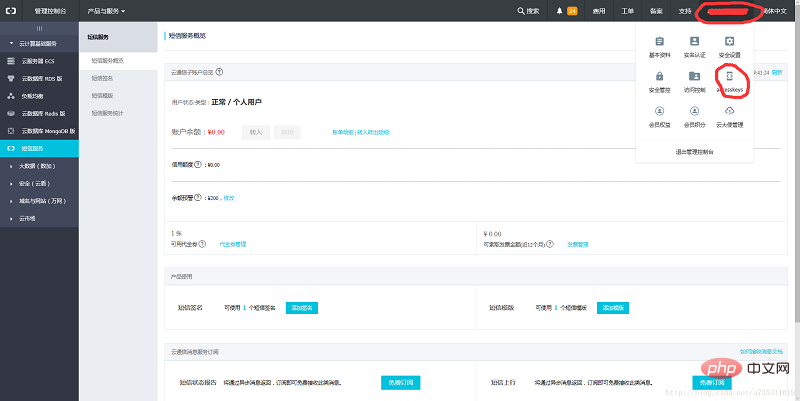
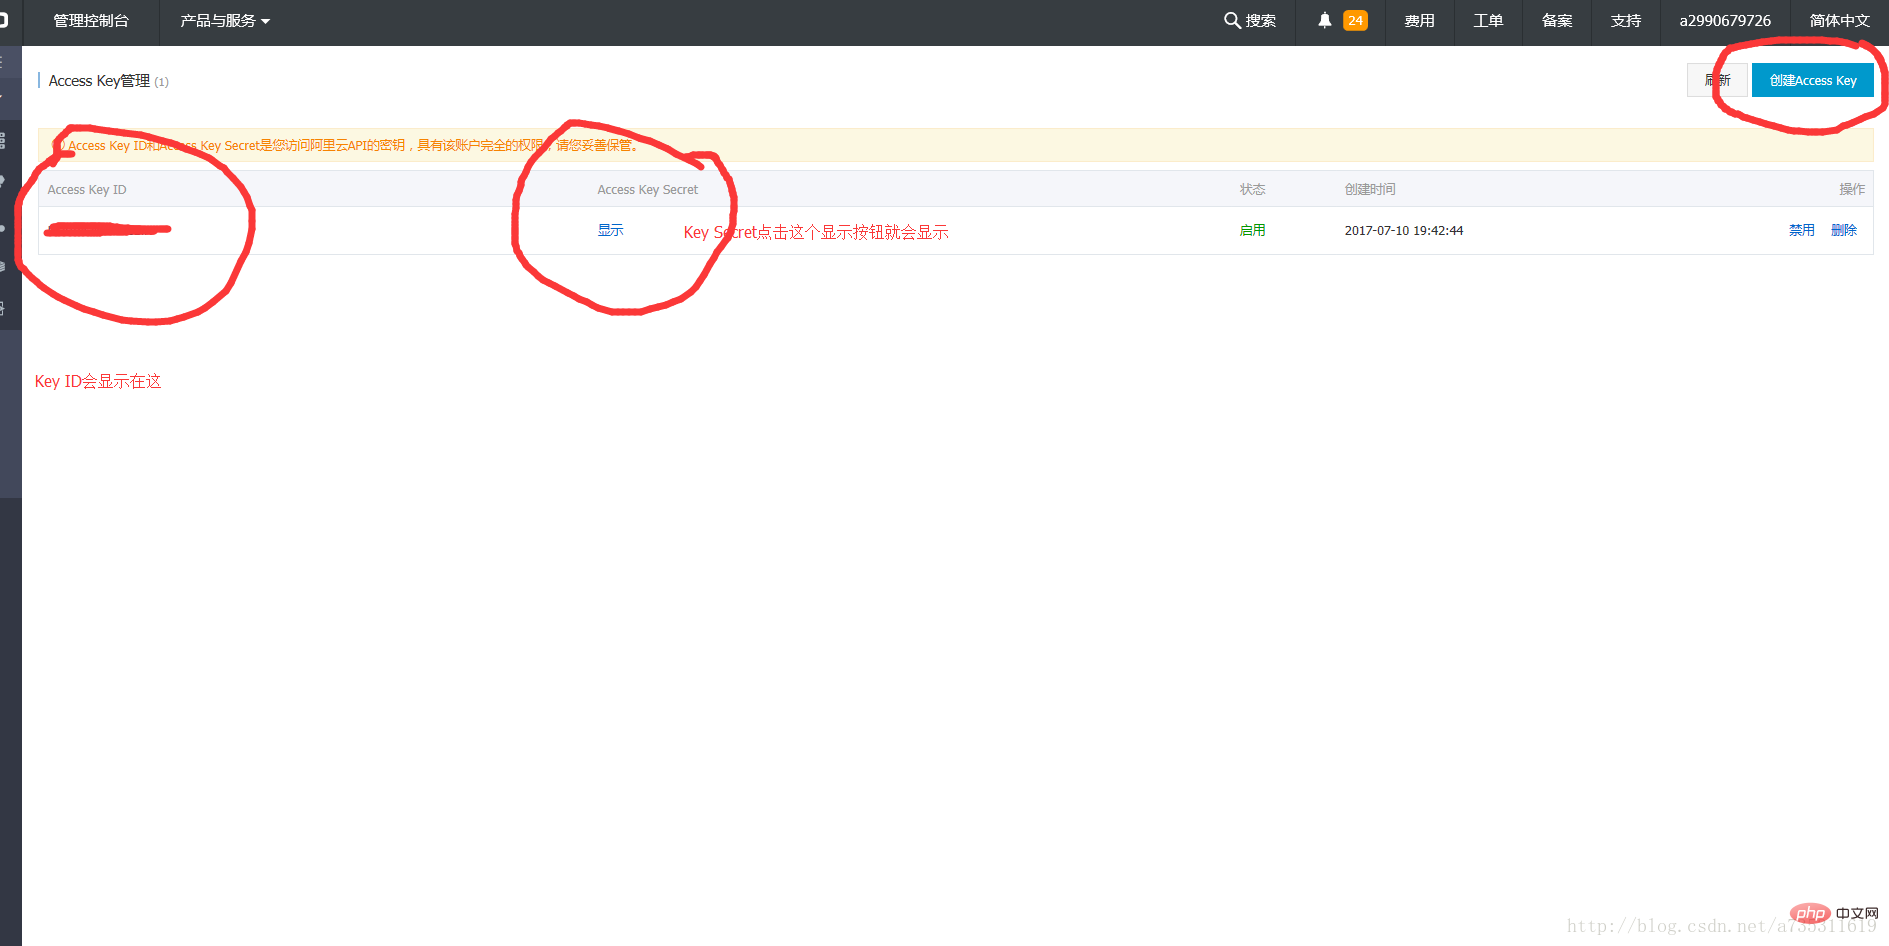
콘솔로 이동하여 사용자 이름이 있는 오른쪽 상단에 마우스를 놓으면 accessKeySecret이 나타납니다. KeyId 및 KeySecret을 생성하려면 보안 등을 위해 RAM을 사용하라는 메시지가 표시되면 직원에게 권한을 할당할지 확인하고, 그렇지 않으면 클릭하여 계속 사용하세요.
Alibaba Cloud SMS 서버 PHP-SDK 다운로드
공식 다운로드 주소: https://help.aliyun.com/document_detail/55359.html?spm=5176.8195934.507901.12.b1ngGK
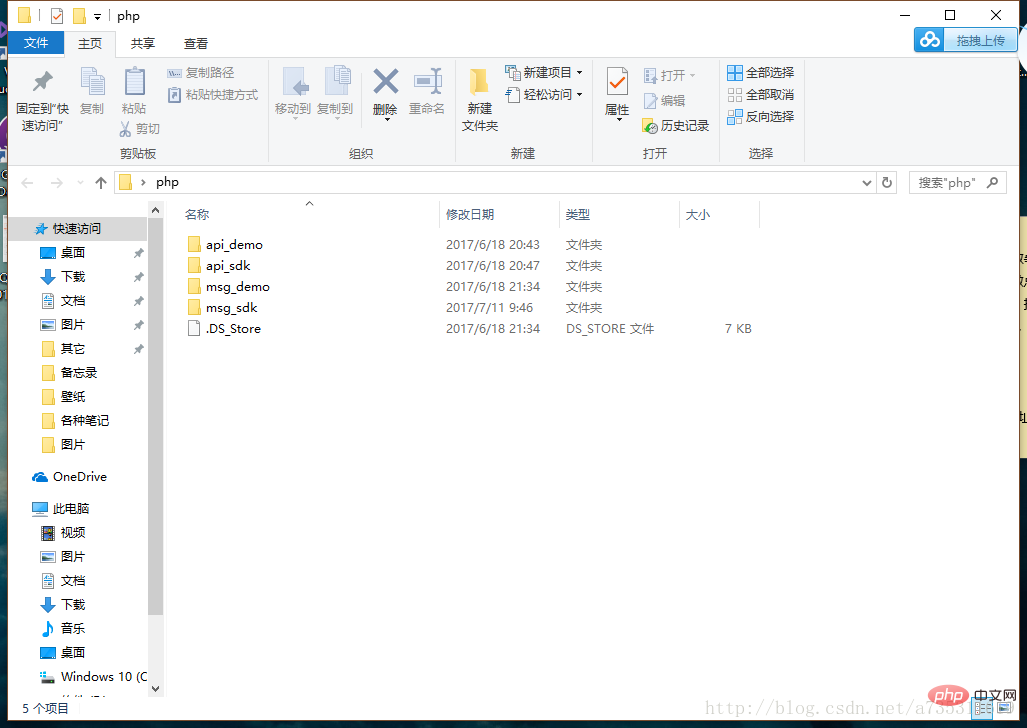
이 튜토리얼에서는 SDK를 사용합니다. 다운로드 주소: http://pan.baidu.com/s/1bpF5B8z
키: pult
PHP-SMS 프로젝트 만들기
코드 파일 만들기
코드 파일을 만들고 여기에 넣어주세요 방금 다운로드한 SDK 폴더의 api_sdk aliyun-php-sdk-core 디렉터리에 파일을 만들고, 코드 파일에 다음 코드를 작성합니다.
aliyun-php-sdk-core 디렉토리에는 SMS 문자 메시지 서비스의 다양한 모듈이 포함되어 있으므로 서비스를 사용하려면 여기에 배치해야 합니다
<?php
include 'Config.php';
include_once 'Request/V20170525/SendSmsRequest.php';
include_once 'Request/V20170525/QuerySendDetailsRequest.php';
$accessKeyId = "LTAIvAaNs61JeBiN";
//阿里云KeyId
$accessKeySecret = "Y3H7durYJ6GIqmJJrsdbJwPi6E8O8M";
//阿里云KeySecret
//短信API产品名
$product = "Dysmsapi";
//照写就行了
//短信API产品域名
$domain = "dysmsapi.aliyuncs.com";
//照着写就行了
//暂时不支持多Region
$region = "cn-hangzhou";
//照着写就行了
//初始化访问的acsCleint
$profile = DefaultProfile::getProfile($region, $accessKeyId, $accessKeySecret);
DefaultProfile::addEndpoint("cn-hangzhou", "cn-hangzhou", $product, $domain);
$acsClient= new DefaultAcsClient($profile);
$request = new SendSmsRequest;
//必填-短信接收号码。支持以逗号分隔的形式进行批量调用,批量上限为20个手机号码,批量调用相对于单条调用及时性稍有延迟,验证码类型的短信推荐使用单条调用的方式
$request->setPhoneNumbers("123456789");
//这里填你要发送的电话号码
//必填-短信签名
$request->setSignName("xx项目");
//这里就是刚才让你记住的项目签名
//必填-短信模板Code
$request->setTemplateCode("SMS_123456");
//这里就是模板CODE
//选填-假如模板中存在变量需要替换则为必填(JSON格式)
$request->setTemplateParam("{\"name\":\"郭涛\",\"number\":\"316\"}");
//选填-发送短信流水号
$request->setOutId("1234");//照填就行了
//发起访问请求
$acsResponse = $acsClient->getAcsResponse($request);
var_dump($acsResponse);//返回结果Requset으로 이동
아직 다운로드한 SDK 폴더에 있습니다. api_sdk 디렉터리에는 Dysmsapi용 폴더가 있습니다. 이 폴더를 열면 Put this Requests라는 폴더가 표시됩니다. 폴더를 복사하여 aliyun-php-sdk-core에 붙여넣습니다. 솔직히 알리바바 클라우드가 이렇게 SDK를 따로 설치하는 이유는 잘 모르겠습니다. 아마도 제가 잘못 사용하고 있어서 그럴지도 모르겠습니다. 혹시 아시는 고수님 계시다면 조언 부탁드립니다. 선량한 사람들이 안전한 삶을 살 수 있기를 바랍니다.
옮긴 후 RequestV20170525 디렉터리에 있는 소스 파일 SendSmsRequest.php를 엽니다. 첫 번째 줄의 스페이스 이름 지정을 비활성화하십시오. 즉, 이 라인 네임스페이스 DysmsapiReqestV20170525의 최종 효과는 다음과 같습니다
<?php
/*
 * Licensed to the Apache Software Foundation (ASF) under one
 * or more contributor license agreements. See the NOTICE file
 * distributed with this work for additional information
 * regarding copyright ownership. The ASF licenses this file
 * to you under the Apache License, Version 2.0 (the
 * "License"); you may not use this file except in compliance
 * with the License. You may obtain a copy of the License at
 *
 *   http://www.apache.org/licenses/LICENSE-2.0
 *
 * Unless required by applicable law or agreed to in writing,
 * software distributed under the License is distributed on an
 * "AS IS" BASIS, WITHOUT WARRANTIES OR CONDITIONS OF ANY
 * KIND, either express or implied. See the License for the
 * specific language governing permissions and limitations
 * under the License.
 */
//namespace Dysmsapi\Request\V20170525;//就是屏蔽这一行代码!!!!
class SendSmsRequest extends \RpcAcsRequest
{
  function __construct()
  {
    parent::__construct("Dysmsapi", "2017-05-25", "SendSms");
  }
  private $outId;
  private $signName;
  private $ownerId;
  private $resourceOwnerId;
  private $templateCode;
  private $phoneNumbers;
  private $resourceOwnerAccount;
  private $templateParam;
  public function getOutId() {
    return $this->outId;
  }
  public function setOutId($outId) {
    $this->outId = $outId;
    $this->queryParameters["OutId"]=$outId;
  }
  public function getSignName() {
    return $this->signName;
  }
  public function setSignName($signName) {
    $this->signName = $signName;
    $this->queryParameters["SignName"]=$signName;
  }
  public function getOwnerId() {
    return $this->ownerId;
  }
  public function setOwnerId($ownerId) {
    $this->ownerId = $ownerId;
    $this->queryParameters["OwnerId"]=$ownerId;
  }
  public function getResourceOwnerId() {
    return $this->resourceOwnerId;
  }
  public function setResourceOwnerId($resourceOwnerId) {
    $this->resourceOwnerId = $resourceOwnerId;
    $this->queryParameters["ResourceOwnerId"]=$resourceOwnerId;
  }
  public function getTemplateCode() {
    return $this->templateCode;
  }
  public function setTemplateCode($templateCode) {
    $this->templateCode = $templateCode;
    $this->queryParameters["TemplateCode"]=$templateCode;
  }
  public function getPhoneNumbers() {
    return $this->phoneNumbers;
  }
  public function setPhoneNumbers($phoneNumbers) {
    $this->phoneNumbers = $phoneNumbers;
    $this->queryParameters["PhoneNumbers"]=$phoneNumbers;
  }
  public function getResourceOwnerAccount() {
    return $this->resourceOwnerAccount;
  }
  public function setResourceOwnerAccount($resourceOwnerAccount) {
    $this->resourceOwnerAccount = $resourceOwnerAccount;
    $this->queryParameters["ResourceOwnerAccount"]=$resourceOwnerAccount;
  }
  public function getTemplateParam() {
    return $this->templateParam;
  }
  public function setTemplateParam($templateParam) {
    $this->templateParam = $templateParam;
    $this->queryParameters["TemplateParam"]=$templateParam;
  }
}Complete
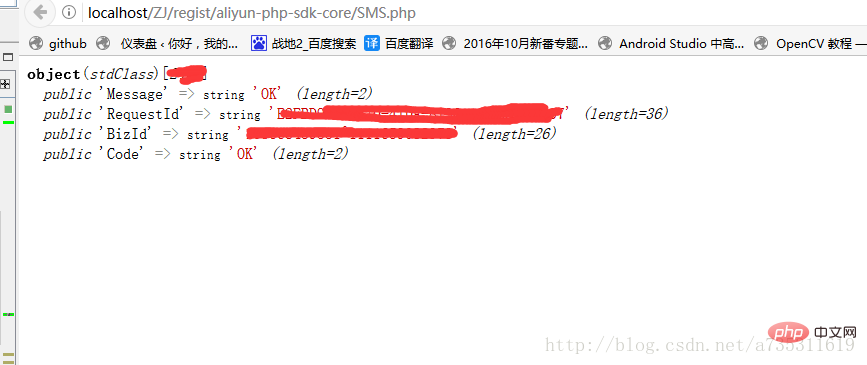
실행하고 사용해 보세요
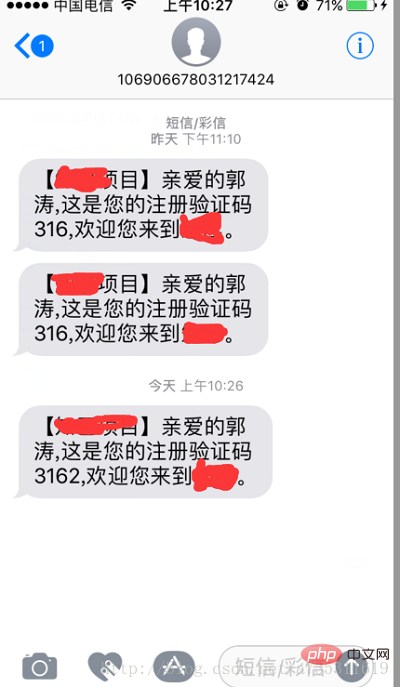
관련 학습 권장 사항: 프로그래밍 동영상
위 내용은 Alibaba Cloud PHP SMS SMS 서비스에 대한 인증 코드를 보내는 방법에 대한 자세한 설명의 상세 내용입니다. 자세한 내용은 PHP 중국어 웹사이트의 기타 관련 기사를 참조하세요!