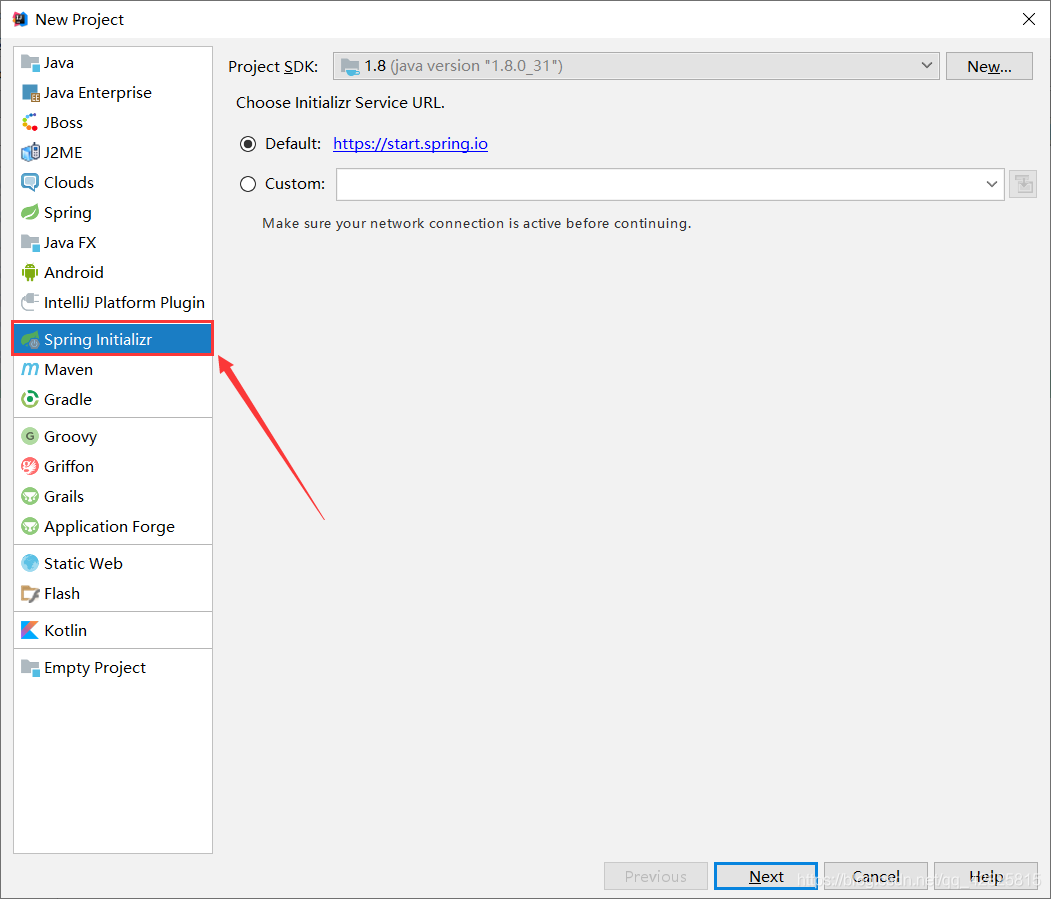
1. Spring Initializr를 사용하여 프로젝트 웹 프로젝트 생성
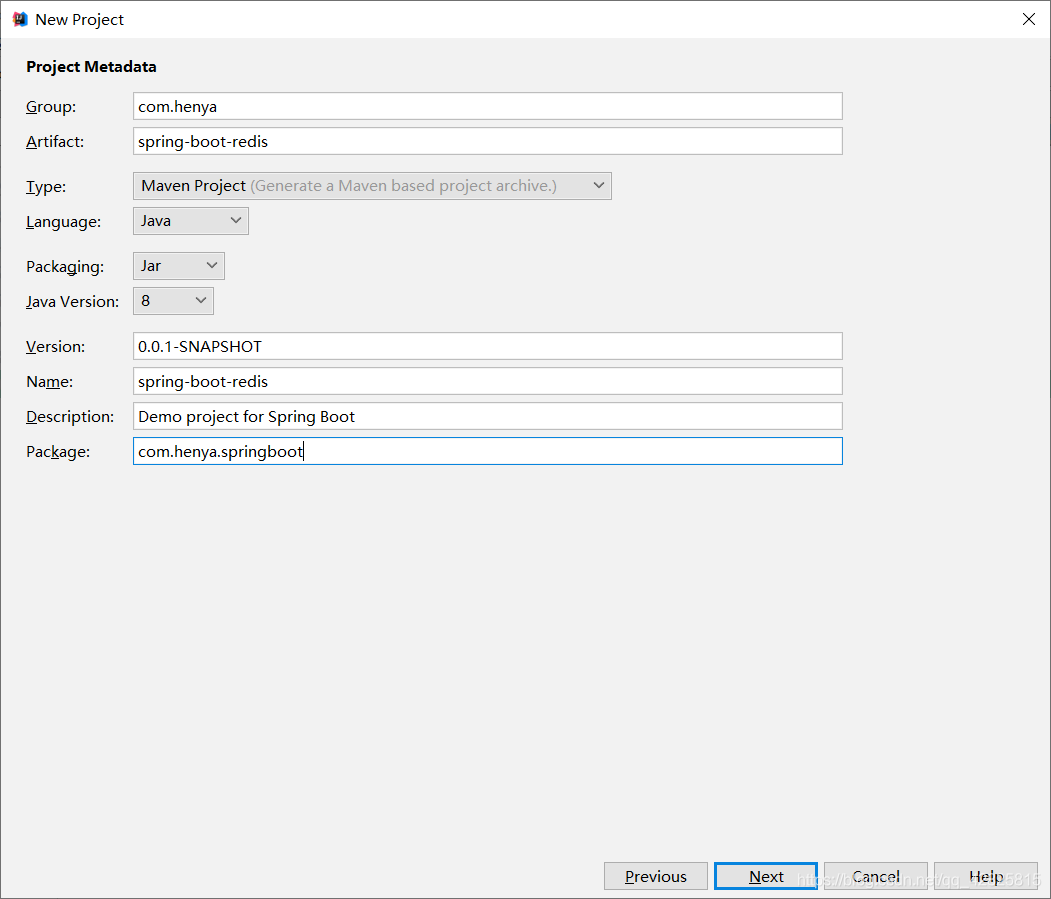
2. 그림과 같이 다음을 클릭하고 그룹 이름을 지정합니다. 그리고 Artifact
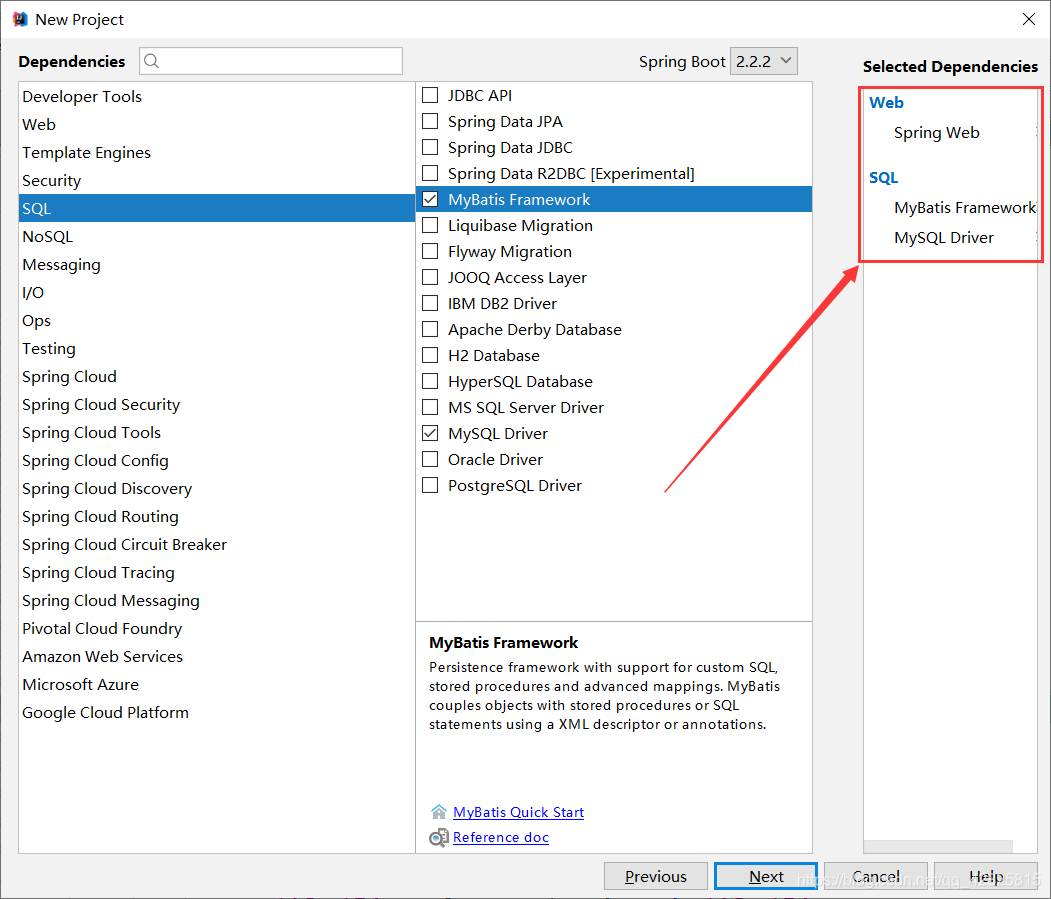
3 다음으로 그림과 같이 필수 종속성을 확인하면 Spring 초기화가 자동으로 필수 스타터<?xml version="1.0" encoding="UTF-8"?> <project xmlns="http://maven.apache.org/POM/4.0.0" xmlns:xsi="http://www.w3.org/2001/XMLSchema-instance" xsi:schemaLocation="http://maven.apache.org/POM/4.0.0 https://maven.apache.org/xsd/maven-4.0.0.xsd"> <modelVersion>4.0.0</modelVersion> <parent> <groupId>org.springframework.boot</groupId> <artifactId>spring-boot-starter-parent</artifactId> <version>2.2.2.RELEASE</version> <relativePath/> <!-- lookup parent from repository --> </parent> <groupId>com.heny</groupId> <artifactId>spring-boot-redis</artifactId> <version>0.0.1-SNAPSHOT</version> <name>spring-boot-redis</name> <description>Demo project for Spring Boot</description> <properties> <java.version>1.8</java.version> </properties> <dependencies> <dependency> <groupId>org.springframework.boot</groupId> <artifactId>spring-boot-starter-web</artifactId> </dependency> <dependency> <groupId>org.mybatis.spring.boot</groupId> <artifactId>mybatis-spring-boot-starter</artifactId> <version>2.1.1</version> </dependency> <dependency> <groupId>mysql</groupId> <artifactId>mysql-connector-java</artifactId> <scope>runtime</scope> </dependency> <dependency> <groupId>org.springframework.boot</groupId> <artifactId>spring-boot-starter-test</artifactId> <scope>test</scope> <exclusions> <exclusion> <groupId>org.junit.vintage</groupId> <artifactId>junit-vintage-engine</artifactId> </exclusion> </exclusions> </dependency> </dependencies> <build> <plugins> <plugin> <groupId>org.springframework.boot</groupId> <artifactId>spring-boot-maven-plugin</artifactId> </plugin> </plugins> </build> </project>
 5. pom.xml 파일 스타터에 redis를 추가하세요
<dependency>
		<groupId>org.springframework.boot</groupId>
		<artifactId>spring-boot-starter-data-redis</artifactId>
	</dependency>
 6. 참고: JavaBean 객체를 작성할 때 직렬화 가능 인터페이스를 구현해야 합니다. 그렇지 않으면 다음 오류가 보고됩니다:
 Cannot deserialize; 중첩된 예외는 org.springframework.core.serializer.support.SerializationFailedException
7입니다.
package com.henya.springboot.bean;

import java.io.Serializable;

public class Employee implements Serializable{

	private Integer id;
	private String lastName;
	private String email;
	private Integer gender; //性别 1男 0女
	private Integer dId;


	public Employee() {
		super();
	}


	public Employee(Integer id, String lastName, String email, Integer gender, Integer dId) {
		super();
		this.id = id;
		this.lastName = lastName;
		this.email = email;
		this.gender = gender;
		this.dId = dId;
	}

	public Integer getId() {
		return id;
	}
	public void setId(Integer id) {
		this.id = id;
	}
	public String getLastName() {
		return lastName;
	}
	public void setLastName(String lastName) {
		this.lastName = lastName;
	}
	public String getEmail() {
		return email;
	}
	public void setEmail(String email) {
		this.email = email;
	}
	public Integer getGender() {
		return gender;
	}
	public void setGender(Integer gender) {
		this.gender = gender;
	}
	public Integer getdId() {
		return dId;
	}
	public void setdId(Integer dId) {
		this.dId = dId;
	}
	@Override
	public String toString() {
		return "Employee [id=" + id + ", lastName=" + lastName + ", email=" + email + ", gender=" + gender + ", dId="
				+ dId + "]";
	}
}8. 주석이 달린 Mybatis 버전을 사용하여 Mapper
#serverTimezone用于指定时区,不然会报错
spring.datasource.url=jdbc:mysql://localhost:3306/cache?serverTimezone=UTC
spring.datasource.username=root
spring.datasource.password=123456

# 开启驼峰命名法规则
mybatis.configuration.map-underscore-to-camel-case=true
#日志级别
logging.level.com.henya.springboot.mapper=debug
참고:
스캔하려면 @MapperScan 주석을 사용해야 합니다. 매퍼가 있는 인터페이스를 기본 프로그램 클래스에 추가하기만 하면 됩니다. 또한 캐싱을 활성화하려면 @EnableCaching을 사용하세요.package com.henya.springboot.mapper;
import com.henya.springboot.bean.Employee;
import org.apache.ibatis.annotations.*;
@Mapper
public interface EmployeeMapper {
@Select("SELECT * FROM employee WHERE id=#{id}")
public Employee getEmpById(Integer id);
@Update("UPDATE employee SET lastName=#{lastName},email=#{email},gender=#{gender},d_id=#{dId} WHERE id=#{id}")
public void updateEmp(Employee employee);
@Delete("DELETE FROM emlpoyee WHERE id=#{id}")
public void delEmpById(Integer id);
@Insert("INSERT INTO employee(lastName, email, gender, d_id) VALUES (#{lastName}, #{email}, #{gender}, #{dId})")
public Employee insertEmp(Employee employee);
@Select("SELECT * FROM employee WHERE lastName=#{lastName}")
public Employee getEmpByLastName(String lastName);
}10. 쓰기 컨트롤러 클래스@MapperScan("com.henya.springboot.mapper") @SpringBootApplication @EnableCaching //开启缓存 public class SpringBootRedisApplication { public static void main(String[] args) { SpringApplication.run(SpringBootRedisApplication.class, args); } }로그인 후 복사
package com.henya.springboot.service;
import com.henya.springboot.bean.Employee;
import com.henya.springboot.mapper.EmployeeMapper;
import org.springframework.beans.factory.annotation.Autowired;
import org.springframework.cache.annotation.*;
import org.springframework.stereotype.Service;

@CacheConfig(cacheNames = "emp") //抽取缓存的公共配置
@Service
public class EmployeeService {
 @Autowired
 EmployeeMapper employeeMapper;

 /**
 * @param id
 * @return
 */
 @Cacheable(cacheNames = {"emp"},keyGenerator = "myKeyGenerator")
 public Employee getEmpById(Integer id) {
 System.err.println("开始查询"+ id +"号员工");
 Employee employee = employeeMapper.getEmpById(id);
 return employee;
 }

 /**
 * @CachePut:既调用方法(这个方法必须要执行),又更新缓存数据
 * @param employee
 * @return
 */
 @CachePut(value = "emp",key = "#result.id")
 public Employee updateEmp(Employee employee){
 System.err.println("开始更新" + employee.getId() + "号员工");
 employeeMapper.updateEmp(employee);
 return employee;
 }

 /**
 * @CacheEvict:缓存清除
 * @param id
 */
 @CacheEvict(value = "emp",beforeInvocation = true)
 public void deleteEmp(Integer id){
 System.err.println("删除" + id + "员工");
 int i = 10/0;
 }
2. 다시 접속하면 그림과 같이 콘솔에 sql로그가 없습니다.
3 이때 Redis를 보기 위해 RedisDesktopManager 도구를 사용하면 그림과 같이 데이터가 있고, 캐시 이름은 emp입니다.
emp 개체만 직렬화됩니다. 소스 코드를 보면 Redis가 기본적으로 직렬화에 Jdk를 사용하는 것을 알 수 있습니다.
package com.henya.springboot.controller;


import com.henya.springboot.bean.Employee;
import com.henya.springboot.service.EmployeeService;
import org.springframework.beans.factory.annotation.Autowired;
import org.springframework.web.bind.annotation.GetMapping;
import org.springframework.web.bind.annotation.PathVariable;
import org.springframework.web.bind.annotation.RestController;

/**
 * @Description:
 * @Author:HenYa
 * @CreatTime:2019/12/1 12:44
 */
@RestController
public class EmployeeController {
 @Autowired
 EmployeeService employeeService;

 @GetMapping("/emp/{id}")
 public Employee getEmpById(@PathVariable("id") Integer id){
 Employee employee = employeeService.getEmpById(id);
 return employee;
 }

 @GetMapping("/emp")
 public Employee updateEmp(Employee employee){
 Employee emp = employeeService.updateEmp(employee);
 return emp;
 }
} 우리가 일반적으로 사용하는 것은 json 형식의 직렬화입니다. 하지만 RedisCacheManager를 사용자 정의해야 합니다.
3. RedisCacheManager 사용자 정의

static RedisSerializer<Object> java(@Nullable ClassLoader classLoader) {
 return new JdkSerializationRedisSerializer(classLoader);
}이때 Redis에 캐시된 데이터는 그림과 같이 Json 형식으로 직렬화됩니다.
위 내용은 Redis 프레임워크를 통합하여 SpringBoot2.X를 구축하는 방법에 대한 자세한 튜토리얼의 상세 내용입니다. 자세한 내용은 PHP 중국어 웹사이트의 기타 관련 기사를 참조하세요!