이 기사에서는 노드가 mysql 데이터베이스에 연결하는 방법에 대해 설명합니다. 도움이 필요한 친구들이 모두 참고할 수 있기를 바랍니다.

관련 권장 사항: "node js tutorial"
node는 기본 방법을 사용하여 mysql 데이터베이스에 연결합니다

(async () => {
    // 链接数据库
    const mysql = require('mysql2/promise');    // npm i mysql2
    const cfg = {
        host: 'localhost',
        user: 'root',
        password: ';he%0f_,ljyW',
        database: 'izengx',
    }
    const connection = await mysql.createConnection(cfg);

    // 创建一个新表tests
    let ret = await connection.execute(`CREATE TABLE IF NOT EXISTS tests (
        id INT NOT NULL AUTO_INCREMENT,
        message VARCHAR(45) NULL,
        PRIMARY KEY (id)
    )`)
    console.log('create', ret);

    // 新建数据
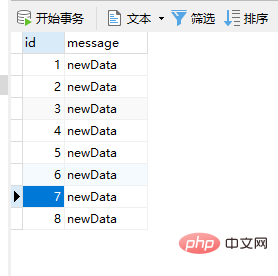
    ret = await connection.execute(`INSERT INTO tests(message) VALUE(?)`, ['newData'])
    console.log('新建数据', ret);

    const [rows, fields] = await connection.execute(`
        SELECT * FROM tests
    `)
    console.log('查询数据', rows);

})()Sequelize 연결 및 작동 데이터베이스
(async () => {
    // 使用数据库中间件(ORM):sequelize连接和操作数据库
    // 1. 使用Sequelize时,生成的表名会自动加成复数s,如fruit->fruits
    // 2. 自动生成主键id,自增(缺点是合并新旧数据时,id又从1开始,会有重合)
    const Sequelize = require('sequelize');
    const sequelize = new Sequelize('izengx', 'root', ';he%0f_,ljyW', {
        host: 'localhost',
        dialect: 'mysql',
        operatorsAliases: false,
    })

    const Fruit =sequelize.define('Fruit', {
        name: {type: Sequelize.STRING(20), allowNull: false,},
        price: {type: Sequelize.FLOAT, allowNull: false},
        stock: {type: Sequelize.INTEGER, defaultValue: 0}
    })

    // 同步数据库
    let ret = await Fruit.sync();

    // 增加一条数据
    ret = await Fruit.create({
        name: 'apple',
        price: 3.5
    })

    // 更新数据
    await Fruit.update({
        price: 4,
    }, {
        where: {
            name: 'banana',
        }
    })

    // 查询
    ret = await Fruit.findAll();
    // 查询指定范围的数据
    const Op = Sequelize.Op;
    opRet = await Fruit.findAll({
        where: {
            price: {
                [Op.gt]: 3,
                [Op.lt]: 5,
            }
        }
    })
    console.log('search: '+ JSON.stringify(opRet));
})()더 많은 프로그래밍 관련 지식을 보려면 프로그래밍 학습 웹사이트를 방문하세요! !
위 내용은 노드가 mysql 데이터베이스에 연결하는 방법에 대한 간략한 설명의 상세 내용입니다. 자세한 내용은 PHP 중국어 웹사이트의 기타 관련 기사를 참조하세요!