CSS의 위치 지정 및 레이아웃 세부 사항에 대한 심층 분석 및 이해
이 기사에서는 CSS 위치 지정 레이아웃에 대한 관련 지식을 제공하고, 상대 위치 지정, 절대 위치 지정, 고정 위치 지정이 무엇인지, 다양한 요소 속성과 용도, 기타 지식이 모든 사람에게 도움이 되기를 바랍니다.
1. 상대 위치 지정
1.1) 상대 위치 지정이란
상대 위치 지정: 상자의 위치를 원래 위치에 따라 지정할 수 있습니다(위치 설명자를 통해 구현됨).
위치 설명자:
왼쪽: 오른쪽으로 이동, 오른쪽은 왼쪽으로 이동, 위쪽은 아래로 이동, 아래쪽은 위로 이동
(내부 값이 음수인 경우 반대 방향으로 이동)
예:
원본:
<!DOCTYPE html><html lang="en"><head>
    <meta charset="UTF-8">
    <meta http-equiv="X-UA-Compatible" content="IE=edge">
    <meta name="viewport" content="width=device-width, initial-scale=1.0">
    <title>相对定位</title>
    <style>
        * {
            margin: 0;
            padding: 0;
        }

        p {
            width: 500px;
            height: 500px;
            border: 1px solid #000;
            margin: 50px auto;
        }

        p {
            width: 100px;
            height: 100px;
            background-color: lightblue;
            position: relative;
            top: 50px;
            left: 50px;
        }
    </style></head><body>
    <p>
    	<p></p>
</p></body></html>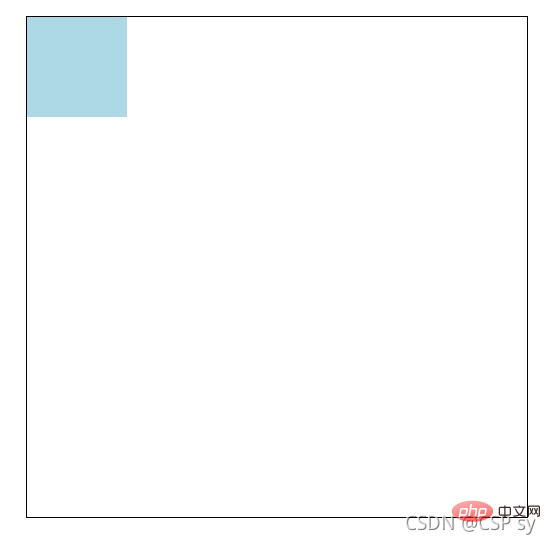 <br/> p를 상대 위치로 설정:
p {
    width: 100px;
    height: 100px;
    background-color: lightblue;
    position: relative;
    top: 50px;
    left: 50px;}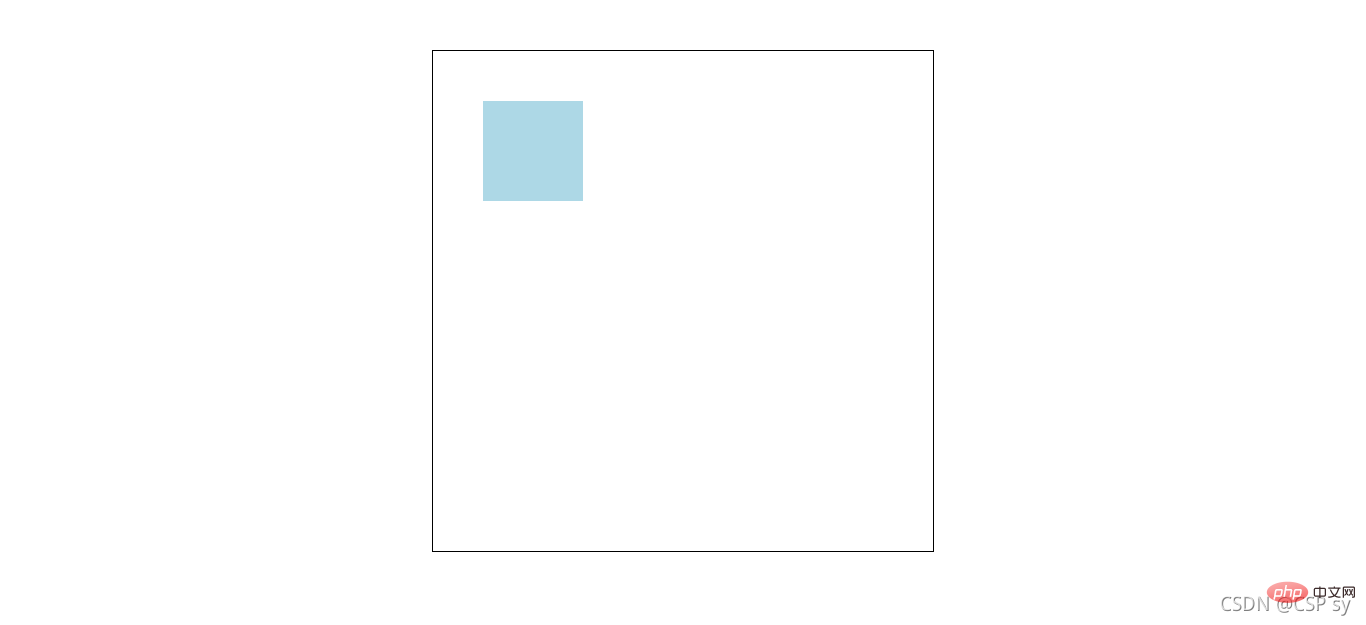
1.2) 상대 위치의 속성 및 사용
Properties
- 상대 위치에 있는 요소는 기본적으로 여전히 원래 위치에 있습니다. 그것 단지 새로운 위치에서 렌더링되며 페이지의 다른 요소에는 영향을 주지 않습니다.
사용
- 요소의 위치를 미세 조정하는 데 사용됩니다.
- 상대 위치 지정 상자는 절대 위치 지정을 위한 참조 상자로 사용할 수 있습니다.
예:
<!DOCTYPE html><html lang="en"><head>
    <meta charset="UTF-8">
    <meta http-equiv="X-UA-Compatible" content="IE=edge">
    <meta name="viewport" content="width=device-width, initial-scale=1.0">
    <title>相对定位</title>
    <style>
        * {
            margin: 0;
            padding: 0;
        }

        nav {
            width: 780px;
            height: 50px;
            margin: 40px auto;
        }

        nav ul {
            list-style: none;
        }

        nav ul li {
            float: left;
            width: 156px;
            height: 50px;
            line-height: 50px;
            text-align: center;
        }

        nav ul li a {
            display: block;
            width: 156px;
            height: 50px;
            background-color: lightcyan;
            color: #000;
            text-decoration: none;
        }

        nav ul li a:hover {
            border-top: 3px solid red;
        }
    </style></head><body>
    <nav>
        <ul>
            <li>
                <a href="#">导航一</a>
            </li>
            <li>
                <a href="#">导航二</a>
            </li>
            <li>
                <a href="#">导航三</a>
            </li>
            <li>
                <a href="#">导航四</a>
            </li>
            <li>
                <a href="#">导航五</a>
            </li>
        </ul>
</nav></body></html>이 때 효과는 다음과 같습니다. 이:<br/> <br/> 마우스를 위에 올리면 탐색 영역이 가라앉습니다 <br/> 상대 위치를 설정하고 미세 조정한 후:
nav ul li a:hover {
    border-top: 3px solid red;
    position: relative;
top: -3px;} <br/> 이제 문제가 해결될 것입니다
2. 절대 위치 지정
2.1) 절대 위치 지정이란
절대 위치 지정: 상자는 좌표로 위치를 설명하며 자체 절대 위치를 갖습니다.
절대 위치 참조 상자:<br/> 절대 위치 상자는 상위 요소 중 위치 속성이 있는 가장 가까운 상자를 참조 지점으로 사용합니다.
이 상자는 대개 상대적인 위치에 있어서 "아들 아버지의 모습"이라고도 불립니다.
위치 설명자: <br/> 왼쪽: 왼쪽까지의 거리, 오른쪽: 오른쪽까지의 거리, 위쪽: 위쪽까지의 거리, 아래쪽: 아래쪽까지의 거리
예:
<!DOCTYPE html><html lang="en"><head>
    <meta charset="UTF-8">
    <meta http-equiv="X-UA-Compatible" content="IE=edge">
    <meta name="viewport" content="width=device-width, initial-scale=1.0">
    <title>绝对定位</title>
    <style>
        * {
            margin: 0;
            padding: 0;
        }

        .box {
            position: absolute;
            width: 500px;
            height: 300px;
            left: 200px;
            top: 100px;
            background-color: antiquewhite;
        }
    </style></head><body>
    <p class="box">
</p></body></html>2.2) 절대 위치 지정
절대적으로 배치된 상자는 수직으로 중앙에 배치됩니다:
.box {
	position: absolute;
	top: 50%;
margin-top: -自己高度一半;}절대적으로 배치된 상자는 수평으로 중앙에 배치됩니다:
.box {
	position: absolute;
	left: 50%;
margin-left: -自己宽度一半;}- 스태킹 순서 z-index 속성
절대적으로 배치된 요소의 겹침 설정 순서 .<br/>는 단위가 없는 양의 정수입니다. 더 큰 값은 더 작은 값을 억제할 수 있습니다(즉, 더 큰 값이 상위 레이어에 표시됩니다)
예:
<!DOCTYPE html><html lang="en"><head>
    <meta charset="UTF-8">
    <meta http-equiv="X-UA-Compatible" content="IE=edge">
    <meta name="viewport" content="width=device-width, initial-scale=1.0">
    <title>绝对定位</title>
    <style>
        * {
            margin: 0;
            padding: 0;
        }

        .box1 {
            width: 300px;
            height: 300px;
            position: absolute;
            left: 100px;
            top: 100px;
            background-color: antiquewhite;
        }

        .box2 {
            width: 300px;
            height: 300px;
            position: absolute;
            left: 200px;
            top: 200px;
            background-color: lightblue;
        }
    </style></head><body>
    <p class="box1"></p>
<p class="box2"></p></body></html>이때 효과는 다음과 같습니다. <br/>
<br/>
이때 box1을 상위 레이어에 표시하려면 z-index 속성을 설정합니다. <br/>
.box1 {
    width: 300px;
    height: 300px;
    position: absolute;
    left: 100px;
    top: 100px;
    background-color: antiquewhite;
    z-index: 100;}.box2 {
    width: 300px;
    height: 300px;
    position: absolute;
    left: 200px;
    top: 200px;
    background-color: lightblue;
z-index: 1;}효과 살펴보기: <br/>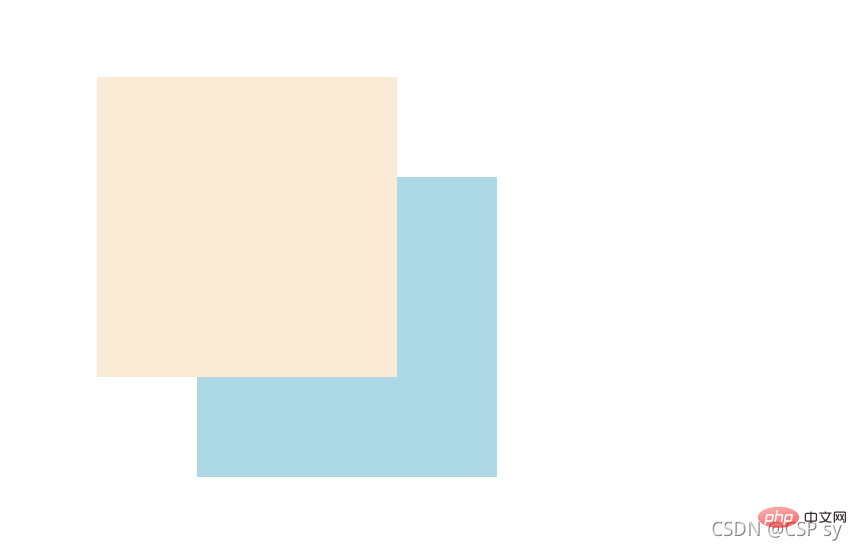
- Usage
절대 위치 지정은 효과를 "덮고" "마스크"하는 데 사용됩니다<br/> CSS 스프라이트와 함께 사용할 수 있습니다<br/> JS와 결합하여 다음을 수행할 수 있습니다. 애니메이션 달성
3. 고정 위치 지정
3.1) 고정 위치 지정이란 무엇입니까
고정 위치 지정: 페이지가 어떻게 스크롤되더라도 항상 페이지를 참조 지점으로 사용하여 고정됩니다.
위치 설명자: <br/> 왼쪽: 왼쪽까지의 거리, 오른쪽: 오른쪽까지의 거리, 위쪽: 위쪽까지의 거리, 아래쪽: 아래쪽까지의 거리
.box {
	position: fixed;
	top: 100px;
left: 100px;}3.2) 고정 위치 지정의 특성 및 사용
예 페이지를 탐색할 때 맨 위로 돌아가기 버튼과 같이 일부 요소는 항상 현재 페이지의 특정 위치에 나타나야 한다는 것을 인식하는 데 사용됩니다. 예:
<!DOCTYPE html><html lang="en"><head>
    <meta charset="UTF-8">
    <meta http-equiv="X-UA-Compatible" content="IE=edge">
    <meta name="viewport" content="width=device-width, initial-scale=1.0">
    <title>固定定位</title>
    <style>
        * {
            margin: 0;
            padding: 0;
        }

        .box {
            position: fixed;
            bottom: 20px;
            right: 20px;
            width: 40px;
            height: 40px;

            text-align: center;
            line-height: 40px;
            border-radius: 50%;
            background-color: rgba(78, 209, 226, 0.5);

            cursor: pointer;
            font-size: 24px;
        }
    </style></head><body>
    <a class="box">^</a>
    <p>
        <img src="/static/imghw/default1.png"  data-src="https://dummyimage.com/600x400/00bcd4/fff"  class="lazy"   alt="">
    </p>
    <p>
        <img src="/static/imghw/default1.png"  data-src="https://dummyimage.com/600x400/00bcd4/fff"  class="lazy"   alt="">
    </p>
    <p>
        <img src="/static/imghw/default1.png"  data-src="https://dummyimage.com/600x400/00bcd4/fff"  class="lazy"   alt="">
</p></body></html>효과는 다음과 같습니다.
페이지가 하단에 도달한 경우 , 오른쪽 하단에 있는 맨 위로 돌아가기 버튼의 위치는 변경되지 않습니다.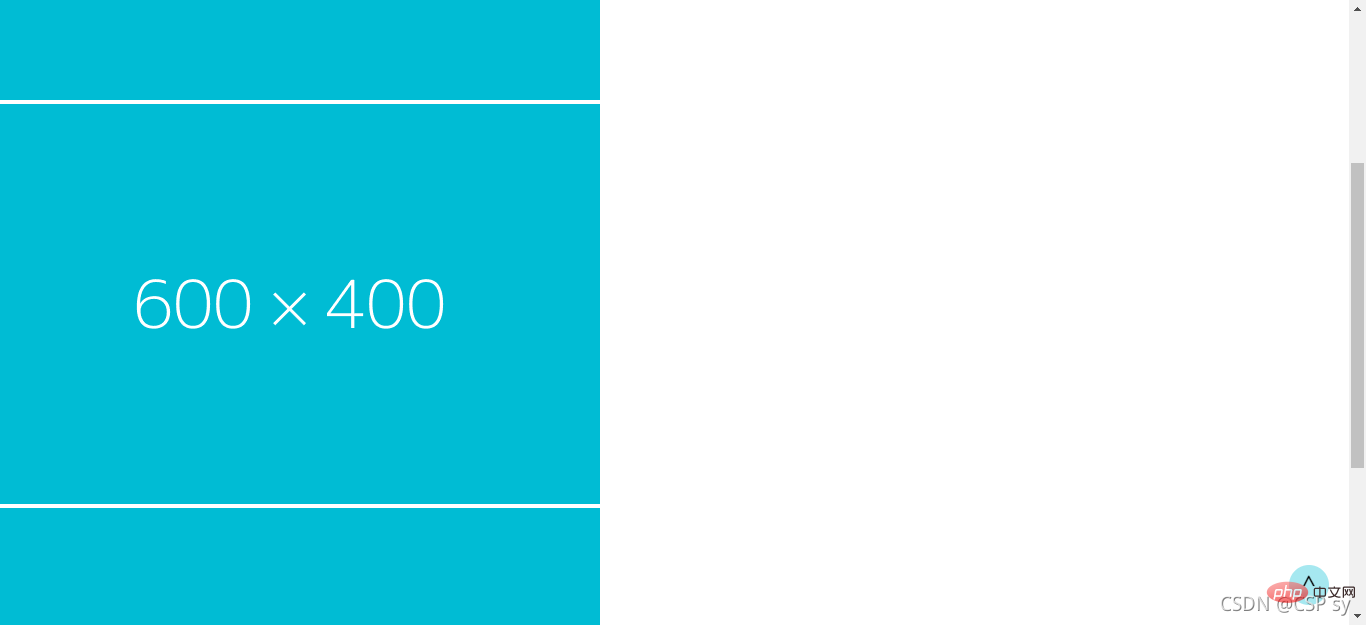 관심이 있으시면 계속해서
위 내용은 CSS의 위치 지정 및 레이아웃 세부 사항에 대한 심층 분석 및 이해의 상세 내용입니다. 자세한 내용은 PHP 중국어 웹사이트의 기타 관련 기사를 참조하세요!

핫 AI 도구

Undresser.AI Undress
사실적인 누드 사진을 만들기 위한 AI 기반 앱

AI Clothes Remover
사진에서 옷을 제거하는 온라인 AI 도구입니다.

Undress AI Tool
무료로 이미지를 벗다

Clothoff.io
AI 옷 제거제

Video Face Swap
완전히 무료인 AI 얼굴 교환 도구를 사용하여 모든 비디오의 얼굴을 쉽게 바꾸세요!

인기 기사

뜨거운 도구

메모장++7.3.1
사용하기 쉬운 무료 코드 편집기

SublimeText3 중국어 버전
중국어 버전, 사용하기 매우 쉽습니다.

스튜디오 13.0.1 보내기
강력한 PHP 통합 개발 환경

드림위버 CS6
시각적 웹 개발 도구

SublimeText3 Mac 버전
신 수준의 코드 편집 소프트웨어(SublimeText3)

뜨거운 주제
 7727
7727
 15
15
 1643
1643
 14
14
 1397
1397
 52
52
 1290
1290
 25
25
 1233
1233
 29
29
 Vue에서 부트 스트랩을 사용하는 방법
Apr 07, 2025 pm 11:33 PM
vue.js에서 bootstrap 사용은 5 단계로 나뉩니다 : Bootstrap 설치. main.js.의 부트 스트랩 가져 오기 부트 스트랩 구성 요소를 템플릿에서 직접 사용하십시오. 선택 사항 : 사용자 정의 스타일. 선택 사항 : 플러그인을 사용하십시오.
 HTML, CSS 및 JavaScript의 역할 : 핵심 책임
Apr 08, 2025 pm 07:05 PM
HTML은 웹 구조를 정의하고 CSS는 스타일과 레이아웃을 담당하며 JavaScript는 동적 상호 작용을 제공합니다. 세 사람은 웹 개발에서 의무를 수행하고 화려한 웹 사이트를 공동으로 구축합니다.
 부트 스트랩에 분할 라인을 작성하는 방법
Apr 07, 2025 pm 03:12 PM
부트 스트랩 분할 라인을 만드는 두 가지 방법이 있습니다 : 태그를 사용하여 수평 분할 라인이 생성됩니다. CSS 테두리 속성을 사용하여 사용자 정의 스타일 분할 라인을 만듭니다.
 HTML, CSS 및 JavaScript 이해 : 초보자 안내서
Apr 12, 2025 am 12:02 AM
WebDevelopmentReliesonHtml, CSS 및 JavaScript : 1) HtmlStructuresContent, 2) CSSSTYLESIT, 및 3) JAVASCRIPTADDSINGINTERACTIVITY, BASISOFMODERNWEBEXPERIENCES를 형성합니다.
 부트 스트랩을위한 프레임 워크를 설정하는 방법
Apr 07, 2025 pm 03:27 PM
부트 스트랩 프레임 워크를 설정하려면 다음 단계를 따라야합니다. 1. CDN을 통해 부트 스트랩 파일 참조; 2. 자신의 서버에서 파일을 다운로드하여 호스팅하십시오. 3. HTML에 부트 스트랩 파일을 포함; 4. 필요에 따라 Sass/Less를 컴파일하십시오. 5. 사용자 정의 파일을 가져옵니다 (선택 사항). 설정이 완료되면 Bootstrap의 그리드 시스템, 구성 요소 및 스타일을 사용하여 반응 형 웹 사이트 및 응용 프로그램을 만들 수 있습니다.
 부트 스트랩에 사진을 삽입하는 방법
Apr 07, 2025 pm 03:30 PM
Bootstrap에 이미지를 삽입하는 방법에는 여러 가지가 있습니다. HTML IMG 태그를 사용하여 이미지를 직접 삽입하십시오. 부트 스트랩 이미지 구성 요소를 사용하면 반응 형 이미지와 더 많은 스타일을 제공 할 수 있습니다. 이미지 크기를 설정하고 IMG-Fluid 클래스를 사용하여 이미지를 적응할 수 있도록하십시오. IMG 통과 클래스를 사용하여 테두리를 설정하십시오. 둥근 모서리를 설정하고 IMG 라운드 클래스를 사용하십시오. 그림자를 설정하고 그림자 클래스를 사용하십시오. CSS 스타일을 사용하여 이미지를 조정하고 배치하십시오. 배경 이미지를 사용하여 배경 이미지 CSS 속성을 사용하십시오.
 부트 스트랩 버튼을 사용하는 방법
Apr 07, 2025 pm 03:09 PM
부트 스트랩 버튼을 사용하는 방법? 부트 스트랩 CSS를 소개하여 버튼 요소를 만들고 부트 스트랩 버튼 클래스를 추가하여 버튼 텍스트를 추가하십시오.


